
Home>Outdoors & Camping>Hardscaping>DIY: How To Build A Garden Wall
Hardscaping
DIY: How To Build A Garden Wall
Published: March 6, 2024

Content Creator for Outdoors & Camping, Sophie turns any yard into a sustainable paradise. Her dedication to DIY outdoor projects and volunteer work in community gardens shares joy and knowledge.
Learn how to enhance your outdoor space with this comprehensive guide on hardscaping. Discover step-by-step instructions for building a garden wall in this engaging DIY tutorial.
(Many of the links in this article redirect to a specific reviewed product. Your purchase of these products through affiliate links helps to generate commission for Twigandthistle.com, at no extra cost. Learn more)
Introduction
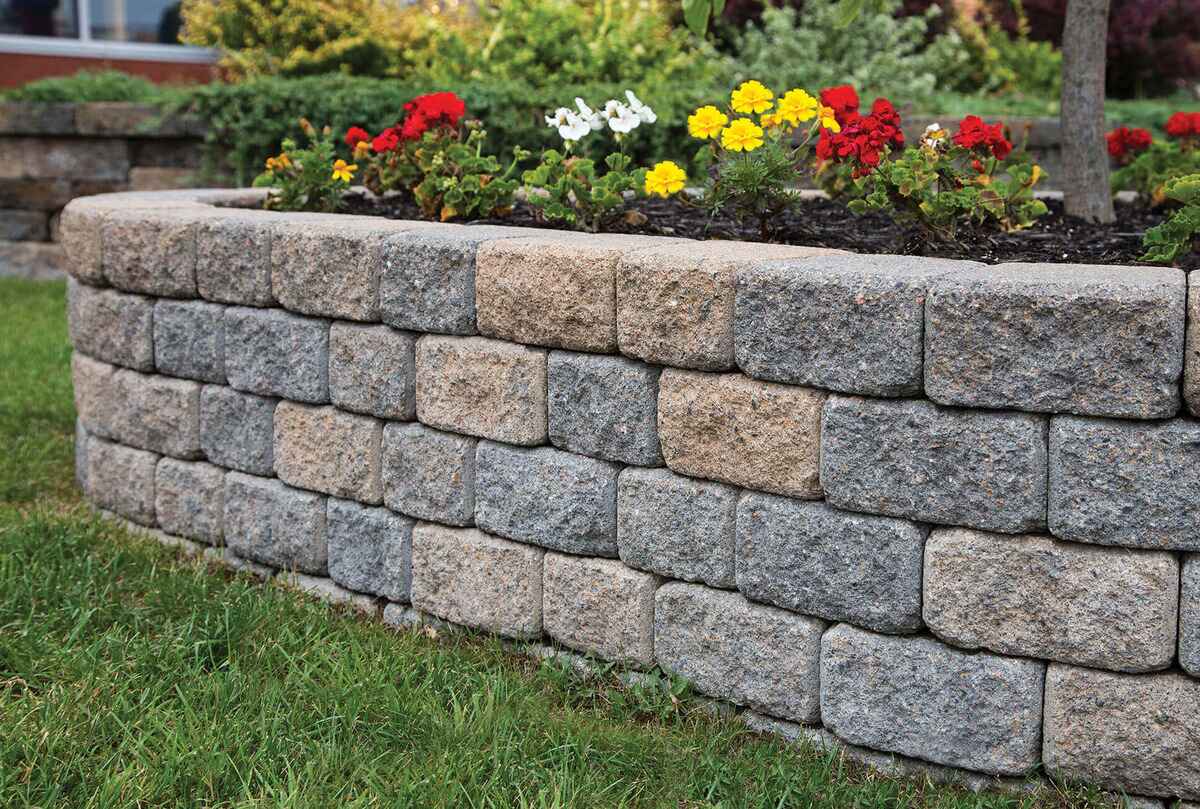
So, you've decided to take on the challenge of building a garden wall. Congratulations! A well-built garden wall can add structure, definition, and charm to your outdoor space. Whether you're looking to create a boundary, add a decorative element, or provide a retaining structure for a raised garden bed, building a garden wall can be a rewarding DIY project. In this article, we'll guide you through the process, from planning and designing to adding the finishing touches. Let's roll up our sleeves and get started!
Planning and Designing Your Garden Wall
When it comes to building a garden wall, the first step is to plan and design your project. Here are some key considerations to keep in mind:
-
Purpose: Determine the purpose of your garden wall. Are you looking to create a boundary, add seating, or provide a retaining structure for a raised garden bed? Understanding the purpose will help you make design decisions.
-
Materials: Choose the materials for your garden wall. Whether you opt for bricks, concrete blocks, or natural stone, selecting the right materials is crucial for achieving the desired look and functionality.
-
Style: Consider the style of your garden wall. Do you want a modern, sleek design or a more rustic, traditional look? The style should complement the overall aesthetic of your outdoor space.
-
Height and Length: Measure the height and length of the wall. This will help you determine the amount of materials needed and ensure that the wall fits seamlessly into your garden layout.
-
Permits and Regulations: Check local building codes and regulations. Depending on the height and location of your garden wall, you may need to obtain permits or adhere to specific guidelines.
By carefully planning and designing your garden wall, you can set the stage for a successful and visually appealing DIY project.
Gathering Materials and Tools
Gathering the right materials and tools is essential for the successful construction of your garden wall. Here's what you'll need:
Materials
- Bricks, Concrete Blocks, or Natural Stone: Depending on the design and style of your garden wall, choose the appropriate materials. Ensure that you have enough to cover the calculated area and height of the wall.
- Mortar: Select the right type of mortar for your chosen materials. Different mortars are suitable for various applications, such as bricklaying or stonework.
- Gravel and Sand: These are essential for creating a stable foundation and backfilling behind the wall.
- Rebar: If you're building a tall or retaining wall, reinforcing bars (rebar) may be necessary to add strength and stability.
- Capstones: If you want to add a polished finish to the top of your wall, capstones are a great addition.
Tools
- Trowel: A trowel is essential for applying mortar and leveling the surfaces of the wall materials.
- Spirit Level: This tool ensures that your wall is straight and level during construction.
- Masonry Saw or Hammer and Chisel: Depending on the materials used, you'll need a masonry saw for precise cuts or a hammer and chisel for shaping and resizing.
- Wheelbarrow: Use this to mix mortar and transport materials around the construction site.
- Shovel: Essential for moving and leveling gravel and sand during the foundation and backfilling stages.
- Safety Gear: Don't forget gloves, safety glasses, and a dust mask to protect yourself during construction.
By gathering the right materials and tools, you'll be well-prepared to tackle the construction of your garden wall with confidence and efficiency.
Preparing the Site
Before you start building your garden wall, it's crucial to prepare the site properly. Here's a detailed guide on how to get the site ready for construction:
-
Mark the Layout: Use stakes and string to mark the layout of the wall. This will give you a clear visual guide and help ensure that the wall is straight and properly aligned.
-
Excavate the Area: Dig a trench for the foundation of the wall. The depth of the trench will depend on the height and purpose of the wall. Typically, the trench should be at least one-third the height of the exposed wall, plus an additional 6 inches for the gravel base.
-
Level the Trench: Use a spirit level to ensure that the bottom of the trench is level. This is essential for creating a stable and even foundation for the wall.
-
Add Gravel and Sand: Once the trench is leveled, add a layer of gravel followed by a layer of sand. Tamp down each layer to create a solid base for the wall.
-
Compact the Base: Use a hand tamper or a mechanical compactor to compact the gravel and sand base. This will provide a stable foundation and prevent settling over time.
-
Install Drainage: If your wall will be retaining soil or water, consider adding drainage behind the wall. This can be achieved by placing perforated pipe or drainage gravel behind the wall to prevent water buildup.
-
Check for Level and Alignment: Before laying the first course of materials, double-check the level and alignment of the trench. Making adjustments at this stage will save you time and effort later in the construction process.
By thoroughly preparing the site, you'll create a solid foundation for your garden wall and set the stage for a successful and long-lasting structure.
Laying the Foundation
Once the site is properly prepared, it's time to lay the foundation for your garden wall. This step is crucial for providing stability and support to the structure. Here's a detailed guide on how to lay the foundation:
-
Mix the Mortar: Start by mixing the mortar according to the manufacturer's instructions. The consistency should be workable but not too wet.
-
Lay the First Course: Using a trowel, apply a bed of mortar along the trench where the first course of materials will be placed. Carefully position the first row of bricks, concrete blocks, or stones on the mortar bed. Use a spirit level to ensure that the materials are level and aligned.
-
Check for Level and Plumb: As you lay each unit, check for both level and plumb. Adjust the position of the materials as needed to maintain a straight and vertical alignment.
-
Backfill and Compact: Once the first course is in place, backfill behind the wall with gravel or drainage material. Compact the backfill to provide additional support and stability to the structure.
-
Add Additional Courses: Continue laying additional courses of materials, applying mortar between each unit. Stagger the joints between adjacent rows to create a stronger and more visually appealing wall.
-
Insert Reinforcement: If you're building a tall or retaining wall, consider inserting rebar into the channels of the materials and securing them with mortar. This will add strength and stability to the structure.
-
Check for Alignment: Periodically check for alignment and adjust the position of the materials as needed. Ensuring that the wall is straight and level during the construction process is essential for a professional-looking result.
By following these steps, you'll successfully lay the foundation for your garden wall, creating a sturdy and visually appealing structure that will enhance your outdoor space.
Building the Wall
With the foundation in place, it's time to build the body of your garden wall. Here's a step-by-step guide on how to construct the wall:
-
Apply Mortar: Begin by applying a layer of mortar on top of the first course of materials. Use a trowel to spread the mortar evenly, ensuring full coverage.
-
Lay the Next Course: Carefully position the next row of bricks, concrete blocks, or stones on top of the mortar layer. Use a spirit level to check for both level and alignment as you lay each unit.
-
Create Bonding: To create a strong and stable wall, stagger the joints between adjacent rows. This technique, known as bonding, enhances the structural integrity of the wall.
-
Smooth the Joints: As you lay each unit, use a jointing tool or the edge of the trowel to smooth the mortar joints. This not only improves the appearance of the wall but also helps seal the joints for added strength.
-
Repeat the Process: Continue applying mortar and laying courses of materials until you reach the desired height for your garden wall. Periodically check for level, plumb, and alignment to ensure a professional and visually appealing result.
-
Add Capstones: If you want to give your wall a polished finish, consider adding capstones to the top row. Apply mortar to the top course of materials and carefully position the capstones, ensuring that they are level and aligned.
-
Finishing Touches: Once the wall is built, use a brush to remove any excess mortar and clean the surfaces of the materials. This will give your garden wall a clean and polished appearance.
By following these steps, you'll successfully build the body of your garden wall, creating a sturdy and visually appealing structure that will enhance your outdoor space.
Adding Finishing Touches
After the construction of the garden wall, adding the finishing touches will elevate its overall appearance and ensure its longevity. Here are the essential steps to complete your garden wall project:
-
Clean the Surface: Use a brush and water to clean off any excess mortar or dirt from the surface of the wall. This will give your wall a polished and professional look.
-
Apply Sealant (Optional): Depending on the materials used for your garden wall, you may consider applying a sealant to protect the surface from weathering and staining. Sealants are particularly beneficial for natural stone walls, as they can enhance the color and texture while providing protection against the elements.
-
Landscaping: Enhance the visual appeal of your garden wall by incorporating landscaping elements around it. Planting flowers, shrubs, or vines near the wall can soften its appearance and integrate it seamlessly into your garden design.
-
Lighting: Consider adding outdoor lighting fixtures to illuminate your garden wall during the evening. This not only enhances the aesthetic appeal but also provides safety and security to your outdoor space.
-
Decorative Accents: Personalize your garden wall by adding decorative accents such as wall art, hanging planters, or ornamental features. These details can add character and charm to your outdoor area.
By adding these finishing touches, you'll transform your garden wall into a stunning focal point that enhances the beauty and functionality of your outdoor space.
Conclusion
Congratulations on successfully completing the construction of your garden wall! By following the steps outlined in this guide, you've not only added a visually appealing structure to your outdoor space but also enhanced its functionality. A well-built garden wall can serve as a boundary, a retaining structure, or a decorative element, adding character and charm to your garden.
Remember, the key to a successful DIY garden wall project lies in careful planning, proper preparation, and attention to detail during construction. By selecting the right materials, laying a solid foundation, and adding finishing touches, you've created a structure that will stand the test of time.
As you admire your newly constructed garden wall, take pride in the fact that you've tackled a challenging DIY project and transformed your outdoor space. Whether you're enjoying a quiet moment in your garden or entertaining guests, your garden wall will be a standout feature that reflects your creativity and craftsmanship.
Now, sit back, relax, and bask in the satisfaction of a job well done. Your garden wall not only adds beauty and structure to your outdoor oasis but also serves as a testament to your DIY skills and determination. Cheers to your successful garden wall project!