
Home>Outdoors & Camping>Hardscaping>How To Build Steps With Pavers
Hardscaping
How To Build Steps With Pavers
Published: March 6, 2024

Content Creator for Outdoors & Camping, Sophie turns any yard into a sustainable paradise. Her dedication to DIY outdoor projects and volunteer work in community gardens shares joy and knowledge.
Learn how to create beautiful and durable hardscaping with pavers by following our step-by-step guide. Enhance your outdoor space with our expert tips.
(Many of the links in this article redirect to a specific reviewed product. Your purchase of these products through affiliate links helps to generate commission for Twigandthistle.com, at no extra cost. Learn more)
Introduction
So, you've decided to spruce up your outdoor space by adding some paver steps. That's a fantastic idea! Paver steps not only enhance the aesthetic appeal of your home but also provide a functional pathway to navigate through your yard. Whether you're a seasoned DIY enthusiast or a novice looking to take on a new project, building steps with pavers is a rewarding and achievable task. In this guide, we'll walk you through the step-by-step process of creating beautiful and durable paver steps that will elevate the charm of your outdoor living area. Let's dive in and get those creative juices flowing!
Planning and Preparation
Before diving into the physical work of building steps with pavers, it's crucial to start with a solid plan and thorough preparation. Here's how to get started:
-
Assess Your Space: Take a good look at the area where you intend to install the paver steps. Consider the existing landscape, the slope of the ground, and any potential obstacles that may affect the installation process.
-
Determine the Size and Design: Decide on the dimensions and layout of your paver steps. Consider factors such as the number of steps needed, the width and depth of each step, and the overall design that complements your outdoor space.
-
Gather Tools and Materials: Make a list of all the tools and materials required for the project. This may include pavers, base materials, hand tools, safety gear, and any additional accessories needed for the installation.
-
Check Local Regulations: Before proceeding, check with your local authorities or homeowner's association to ensure compliance with any regulations or guidelines related to outdoor construction projects.
By taking the time to plan and prepare adequately, you'll set a strong foundation for the successful execution of your paver step project.
Choosing the Right Pavers
When it comes to selecting the perfect pavers for your steps, there are several factors to consider. The right choice of pavers can significantly impact the durability, aesthetics, and overall functionality of your steps. Here's what to keep in mind:
-
Material: Pavers come in various materials such as concrete, natural stone, and brick. Each material offers distinct characteristics in terms of color, texture, and durability. Consider the overall look you want to achieve and the level of maintenance you're willing to undertake.
-
Size and Shape: Pavers are available in a range of sizes and shapes. For steps, it's essential to choose pavers that provide enough surface area for secure footing. Additionally, consider the visual appeal and how the size and shape of the pavers will complement the surrounding landscape.
-
Traction and Safety: Safety should be a top priority when selecting pavers for steps. Look for pavers that offer good traction, especially in outdoor environments where they may be exposed to rain or snow. Textured or rough-surfaced pavers can provide better grip and reduce the risk of slipping.
-
Compatibility with Surrounding Elements: Consider how the chosen pavers will harmonize with the existing hardscape and landscape features. The color, style, and pattern of the pavers should complement the overall design of your outdoor space.
-
Budget and Longevity: Evaluate your budget for the project and weigh it against the longevity of the pavers. While natural stone pavers may have a higher upfront cost, they often offer exceptional durability and timeless appeal, potentially reducing long-term maintenance expenses.
By carefully considering these factors, you can choose pavers that not only enhance the visual appeal of your steps but also provide a safe and durable pathway for years to come.
Measuring and Marking the Area
Accurate measurements and precise markings are essential for laying out the foundation of your paver steps. Here's how to tackle this crucial step:
-
Gather Your Tools: Before you begin, ensure you have a measuring tape, stakes, string, marking paint, and a level at your disposal.
-
Measure the Space: Start by measuring the total rise (vertical height) and the total run (horizontal distance) of the area where the steps will be installed. This will help determine the number of steps needed and the depth of each tread.
-
Mark the Layout: Use stakes and string to outline the perimeter of the steps. Ensure that the layout is level and aligns with the intended design. You can use marking paint to make the layout more visible and easier to follow.
-
Consider Tread and Riser Dimensions: Based on the measurements, calculate the dimensions of each tread (the flat surface of the step) and riser (the vertical face of the step). Standard dimensions for comfortable steps are around 12 inches for the tread depth and 6-7 inches for the riser height.
-
Double-Check the Layout: Once the initial layout is marked, double-check the measurements and layout to ensure accuracy. Use a level to confirm that the ground is flat and that the steps will be even and stable.
By meticulously measuring and marking the area, you'll establish a solid foundation for the subsequent stages of the paver step installation process.
Excavating and Leveling the Ground
Once the area has been measured and marked, it's time to prepare the ground for the installation of the paver steps. This involves excavating the soil to create a stable foundation and ensuring that the ground is level and properly graded. Here's a detailed breakdown of the excavation and leveling process:
-
Gather Your Excavation Tools: Before starting the excavation, gather the necessary tools, including a shovel, a wheelbarrow, a rake, and a plate compactor. These tools will help you efficiently remove the soil and compact the ground.
-
Begin Excavation: Using a shovel, start digging out the soil within the marked area for the steps. The depth of the excavation will depend on the thickness of the base material and the pavers. Typically, you'll need to excavate to a depth that allows for 4-6 inches of base material and the thickness of the pavers.
-
Check for Proper Slope: As you excavate, ensure that the ground slopes away from any nearby structures to prevent water from pooling around the steps. A slight slope away from the house or other structures will help with drainage.
-
Compact the Soil: Once the soil is excavated, use a plate compactor to compact the ground thoroughly. This will create a stable base and minimize the risk of settling over time. Compact the soil in layers, adding and compacting the base material as needed.
-
Add Base Material: After the soil is compacted, add a layer of base material, such as crushed stone or gravel, to the excavated area. Spread the base material evenly and use a rake to level it out. The thickness of the base material will depend on the specific requirements for your project.
-
Compact the Base Material: Using the plate compactor, compact the base material to create a firm and level surface. This step is crucial for ensuring the stability and longevity of your paver steps.
By meticulously excavating and leveling the ground, you'll create a solid and reliable foundation for the installation of your paver steps. This groundwork is essential for ensuring the stability and durability of the steps for years to come.
Installing the Base Material
Once the ground has been excavated and properly leveled, the next crucial step in building steps with pavers is to install the base material. The base material serves as a foundational layer that provides stability, support, and proper drainage for the paver steps. Here's a detailed guide on how to install the base material effectively:
-
Select the Right Base Material: Choose a suitable base material such as crushed stone, gravel, or paver base. The specific type of base material will depend on the soil conditions and the recommendations for your paver project.
-
Calculate the Quantity: Determine the amount of base material needed based on the dimensions of the excavated area and the required thickness of the base layer. It's essential to ensure that you have enough material to cover the entire area at the specified depth.
-
Spread the Base Material: Begin by spreading a layer of the chosen base material evenly over the excavated area. Use a rake to distribute the material and create a uniform layer with the desired thickness. The thickness of the base material will depend on the specific requirements for your project, typically ranging from 4 to 6 inches.
-
Compact the Base Material: Using a plate compactor, compact the base material thoroughly. This step is crucial for achieving a stable and solid foundation for the paver steps. Compact the material in layers, adding more as needed and ensuring that the surface remains level and even.
-
Check for Proper Slope and Level: Throughout the process of adding and compacting the base material, it's important to check for proper slope and level. The surface should slope away from any nearby structures to facilitate proper drainage, and it should be uniformly level to support the pavers.
-
Verify the Stability: After compacting the base material, walk over the surface to ensure that it feels firm and stable. Any areas that feel soft or uneven may require additional compaction and leveling.
By following these steps, you'll establish a solid and reliable base for your paver steps, setting the stage for the successful installation of the pavers and the creation of a durable and visually appealing outdoor feature.
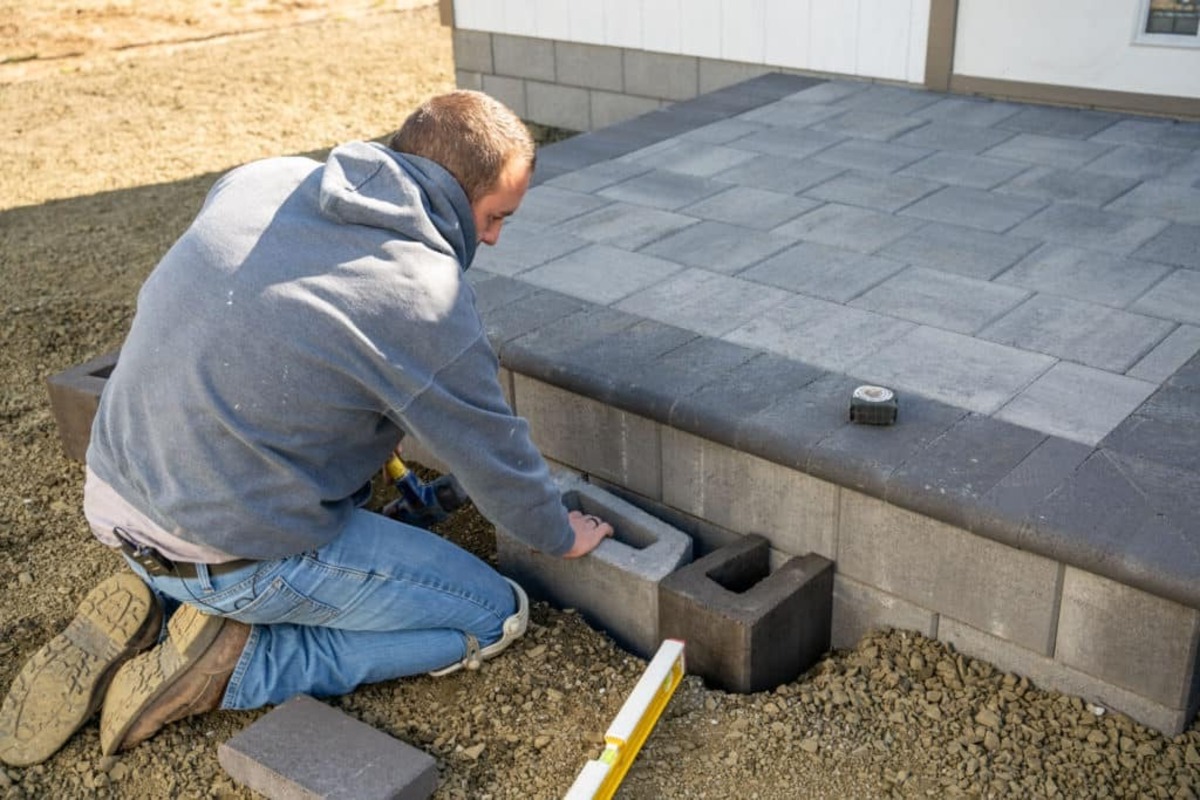
Placing the Pavers
With the groundwork laid and the base material in place, it's time to embark on the exciting phase of placing the pavers to bring your steps to life. This step requires precision and attention to detail to ensure that the pavers are laid evenly and securely. Here's a comprehensive guide on how to effectively place the pavers for your steps:
-
Start at the Bottom: Begin by placing the first row of pavers at the bottom of the steps. Ensure that the pavers are snug against each other, with minimal gaps between them. This will provide a solid foundation for the subsequent rows.
-
Use a Level: As you lay each paver, use a level to check for both side-to-side and front-to-back leveling. Adjust the position of the pavers as needed to maintain a consistent and level surface. This step is crucial for ensuring that the steps are safe and comfortable to use.
-
Consider Patterns and Alignment: If you're working with patterned pavers or a specific design, pay close attention to the alignment and orientation of the pavers. Ensure that the patterns align seamlessly and that the edges form clean, straight lines.
-
Cut Pavers as Needed: In some cases, you may need to cut pavers to fit the dimensions of the steps or to accommodate curves or angles. Use a paver saw or chisel to carefully cut the pavers to the required size and shape. Take precise measurements and exercise caution when cutting the pavers to achieve a seamless fit.
-
Maintain Consistent Joints: As you place the pavers, ensure that the joints between them are consistent and uniform. You can use spacers or small wooden blocks to maintain even spacing between the pavers, creating a professional and polished look.
-
Check for Stability and Alignment: Periodically step back and inspect the placement of the pavers. Verify that they are stable, level, and aligned with the intended design. Making adjustments as you progress will help ensure a flawless end result.
-
Secure the Pavers: Once the pavers are in place, use a rubber mallet to gently tap them into position, ensuring that they are firmly set in the base material. This will enhance the stability of the steps and create a secure walking surface.
By following these steps and taking the time to meticulously place the pavers, you'll create a stunning set of steps that not only enhance the visual appeal of your outdoor space but also provide a durable and functional pathway for years to come.
Finishing Touches and Maintenance
As you near the completion of your paver step project, it's essential to focus on the finishing touches that will elevate the overall appearance and functionality of the steps. Additionally, understanding the maintenance requirements will help ensure that your paver steps remain in top condition for the long term.
Adding Edge Restraints
To enhance the stability and longevity of your paver steps, consider adding edge restraints along the sides of the steps. Edge restraints help secure the pavers in place, preventing shifting or spreading over time. This is particularly important for steps that experience heavy foot traffic. Use plastic or metal edge restraints and secure them firmly in place along the edges of the steps.
Joint Sand and Sealant
Once the pavers are in position, filling the joints with polymeric sand will help lock the pavers together and prevent weed growth and erosion. After filling the joints, use a gentle mist of water to activate the sand and allow it to settle. Additionally, consider applying a sealant to the pavers to enhance their color, protect them from stains, and provide an extra layer of stability. Follow the manufacturer's instructions for the proper application of sealant.
Regular Maintenance
Maintaining your paver steps is essential for preserving their appearance and structural integrity. Regularly sweep the steps to remove debris, leaves, and dirt that can accumulate between the pavers. Periodically rinse the steps with a garden hose to remove surface stains and prevent the buildup of grime. If necessary, use a mild detergent and a scrub brush to clean stubborn stains. Additionally, inspect the steps for any signs of shifting, settling, or damage, and address any issues promptly to prevent further deterioration.
Seasonal Considerations
In regions with fluctuating weather conditions, it's important to consider the impact of seasonal changes on your paver steps. During the winter months, be mindful of using de-icing agents that can potentially damage the pavers. Opt for de-icing products that are safe for use on concrete and stone surfaces. In the fall, regularly remove fallen leaves and debris to prevent staining and deterioration of the steps. During the summer, consider applying a fresh coat of sealant to protect the pavers from prolonged exposure to sunlight and heat.
By attending to these finishing touches and implementing a proactive maintenance routine, you'll ensure that your paver steps remain a stunning and functional feature of your outdoor space for years to come. Regular care and attention will preserve the beauty and durability of the steps, allowing you to enjoy their benefits for many seasons ahead.