Home>Create & Decorate>DIY & Crafts>Slope Pavers: A DIY Guide For Crafting A Beautiful Landscape

DIY & Crafts
Slope Pavers: A DIY Guide For Crafting A Beautiful Landscape
Published: April 24, 2024

Content Creator specializing in woodworking and interior transformations. Caegan's guides motivate readers to undertake their own projects, while his custom furniture adds a personal touch.
Learn how to create a stunning landscape with our DIY guide to slope pavers. Discover expert tips and techniques for crafting your own outdoor oasis. Ideal for DIY & Crafts enthusiasts.
(Many of the links in this article redirect to a specific reviewed product. Your purchase of these products through affiliate links helps to generate commission for Twigandthistle.com, at no extra cost. Learn more)
Introduction
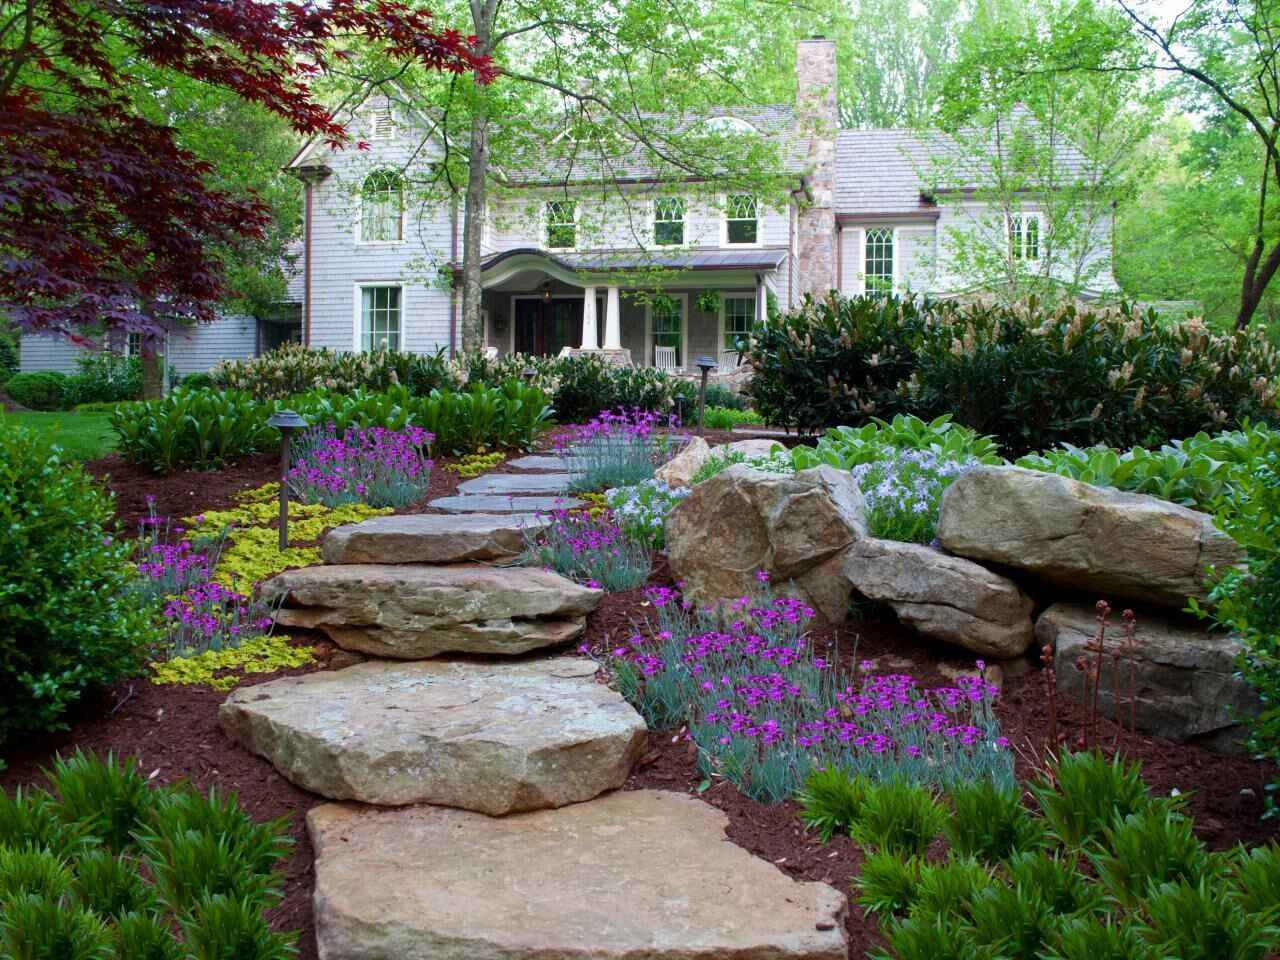
Are you looking to enhance the aesthetics of your outdoor space? Slope pavers are a fantastic way to add charm and functionality to your landscape. Whether you want to create a winding pathway or a terraced garden, crafting a beautiful landscape with slope pavers can transform your yard into a stunning oasis. In this DIY guide, we'll walk you through the steps to create a visually appealing and structurally sound slope using pavers. With the right materials, preparation, and techniques, you can achieve a professional-looking result while enjoying the satisfaction of completing the project yourself. Let's dive in and get started on this exciting journey to elevate your outdoor living space!
Read more: How to Install DIY Metal Roof Snow Guards
Choosing the Right Materials
When embarking on a slope paver project, selecting the right materials is crucial for a successful outcome. Here are the key materials you'll need:
1. Pavers
Choose durable, weather-resistant pavers that can withstand the elements and foot traffic. Opt for materials like concrete, natural stone, or brick that complement the style of your landscape.
2. Base Material
A sturdy base is essential for supporting the pavers and preventing shifting. Use a combination of gravel and sand to create a stable foundation. This will ensure proper drainage and minimize the risk of erosion.
3. Edge Restraints
To maintain the integrity of your slope paver design, edge restraints are essential. These can be in the form of plastic or metal paver restraints, concrete or brick edging, or even natural elements like boulders or logs.
4. Landscape Fabric
Landscape fabric helps to prevent weed growth and maintain the stability of the base material. It's a valuable addition to your slope paver project, especially in areas prone to weed infestation.
5. Tools
Gather the necessary tools such as a shovel, wheelbarrow, level, tamper, and a masonry saw for cutting pavers to fit the desired layout. Having the right tools on hand will streamline the installation process and ensure precision.
By carefully selecting high-quality materials and tools, you'll set the stage for a successful slope paver project that enhances the beauty and functionality of your outdoor space.
Preparing the Ground
Before laying the pavers, it's essential to prepare the ground properly to ensure a stable and long-lasting foundation for your slope. Follow these steps to get the ground ready for the paver installation:
-
Clear the Area: Begin by clearing the area of any vegetation, debris, or obstacles. Use a shovel or a sod cutter to remove grass, roots, and rocks. This step is crucial for creating a clean and even surface for the pavers.
-
Excavate the Soil: Use a shovel or a mini excavator to dig into the soil to the required depth. The depth will depend on the thickness of the base and pavers. Typically, you'll need to excavate several inches to accommodate the base material and the pavers themselves.
-
Create a Slope: If your landscape requires a sloped pathway or terrace, ensure that you create a gentle slope for proper drainage. Use a level and a string to establish the desired slope and ensure that water will flow away from structures and towards appropriate drainage areas.
-
Add Base Material: Once the excavation is complete, add a layer of base material such as gravel or crushed rock. Spread the material evenly and use a tamper to compact it. This will provide a stable and level surface for the pavers to rest on.
-
Install Edge Restraints: Install edge restraints along the perimeter of the slope to keep the pavers in place and prevent them from shifting. Secure the restraints firmly into the ground to create a boundary for the pavers.
-
Lay Landscape Fabric: To inhibit weed growth and maintain the integrity of the base, lay down landscape fabric over the compacted base material. Trim the fabric to fit the area and secure it in place.
By meticulously preparing the ground, you'll create a solid foundation for your slope paver project, ensuring that the pavers remain stable and visually appealing for years to come.
Laying the Pavers
With the ground meticulously prepared, it's time to lay the pavers and bring your slope to life. Follow these steps for a seamless paver installation process:
-
Start at the Bottom: Begin laying the pavers at the bottom of the slope and work your way upwards. This approach will prevent the need to step on the freshly laid pavers, ensuring that they remain undisturbed and properly aligned.
-
Create a Pattern: Depending on the design you envision, create a pattern with the pavers that complements the landscape. Whether it's a herringbone, running bond, or basket weave pattern, ensure that the pavers fit snugly together.
-
Cut Pavers as Needed: Use a masonry saw to cut pavers to fit the edges and curves of the slope. Precise cuts will result in a polished and professional-looking finish.
-
Maintain Consistent Gaps: Place spacers between the pavers to maintain consistent gaps for a uniform appearance. This will also facilitate proper drainage and prevent the pavers from shifting over time.
-
Check for Level: Use a level to ensure that the pavers are being laid evenly. Adjust the base material as needed to maintain a consistent level throughout the slope.
-
Compact the Pavers: Once the pavers are in place, use a tamper to gently compact them into the base material. This will ensure that they are securely set and provide a stable surface for walking and other activities.
-
Add Finishing Touches: As you progress, periodically step back and assess the layout to make any necessary adjustments. Pay attention to the overall alignment and aesthetics of the pavers.
By following these steps, you'll be well on your way to creating a visually stunning and structurally sound slope using pavers. The meticulous attention to detail during the installation process will result in a landscape feature that enhances the beauty and functionality of your outdoor space.
Read more: Create Your Own Virtual Window Display
Creating a Slope
Creating a slope with pavers requires careful planning and execution to ensure proper drainage and a visually appealing design. Here's how to create a slope using pavers:
-
Establish the Slope: Use a level and a string to establish the desired slope for your pathway or terrace. A gentle slope is ideal for efficient water drainage and a natural flow within the landscape.
-
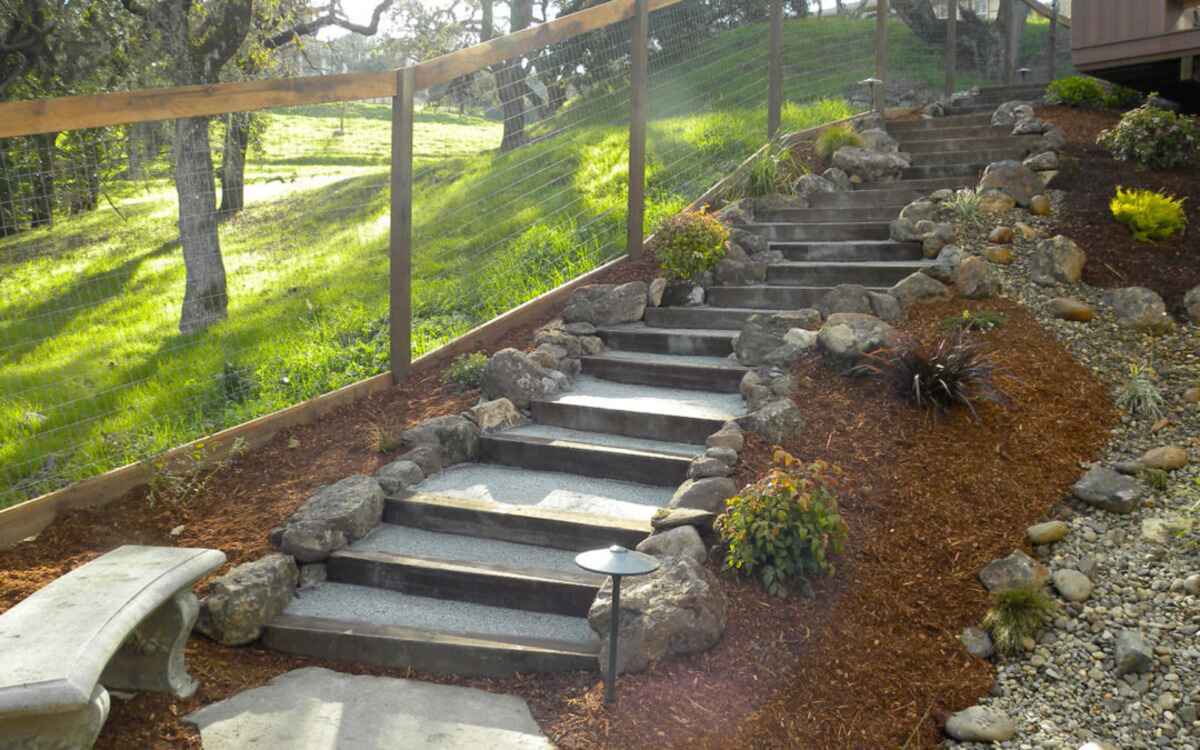
Consider Terracing: If you're working with a steep slope, consider creating terraces using retaining walls or steps. This not only adds visual interest but also provides functional spaces within the slope.
-
Use Retaining Walls: For steeper slopes, retaining walls can help hold back the soil and create level areas for laying the pavers. Ensure that the retaining walls are properly constructed and anchored for stability.
-
Plan for Drainage: Incorporate proper drainage techniques into the slope design to prevent water from pooling or causing erosion. This may involve adding drainage pipes, gravel beds, or creating swales to direct water away from the slope.
-
Select the Right Pavers: Choose pavers that are suitable for sloped installations. Textured pavers or those with non-slip surfaces are ideal for ensuring traction and safety, especially in areas prone to rain or snow.
-
Secure the Pavers: Use a sturdy adhesive or jointing sand to secure the pavers in place, especially on steeper slopes. This will prevent them from shifting and ensure a stable surface for walking and other activities.
By carefully considering the slope and implementing proper techniques, you can create a visually striking and functional landscape feature using pavers. The slope will not only add dimension to your outdoor space but also contribute to the overall beauty and usability of your landscape.
Finishing Touches
As you near the completion of your slope paver project, it's time to add the finishing touches that will elevate the overall look and functionality of the landscape. Here are the essential steps to consider for the final phase of your project:
-
Clean the Pavers: Before adding any final elements, ensure that the pavers are clean and free of any debris. Use a broom or a leaf blower to remove dirt, dust, and loose particles from the surface of the pavers.
-
Apply Jointing Sand: If you're working with interlocking pavers, applying jointing sand is crucial to fill the gaps between the pavers. This not only enhances the stability of the pavers but also prevents weed growth and maintains a polished appearance.
-
Add Plantings: Integrate plantings along the edges of the slope to soften the hardscape and introduce natural elements. Consider low-maintenance plants that thrive in your climate and complement the overall design of the landscape.
-
Install Lighting: Incorporating lighting along the slope can enhance safety and create a captivating ambiance during the evening hours. Solar-powered or low-voltage LED lights can be strategically placed to illuminate the pathway and highlight key features of the slope.
-
Consider Seating: If space allows, consider adding seating areas within the slope. This could be in the form of built-in stone benches, cozy nooks, or even a small patio area where one can relax and enjoy the surroundings.
-
Add Decorative Elements: Incorporate decorative elements such as ornamental boulders, sculptures, or water features to add visual interest and personality to the slope. These elements can serve as focal points and contribute to the overall charm of the landscape.
-
Evaluate the Overall Design: Step back and assess the completed slope from various vantage points. Ensure that the layout is visually appealing, the pavers are securely in place, and the finishing touches harmonize with the surrounding environment.
By attending to these finishing touches, you'll add depth, character, and functionality to your slope paver project, creating a captivating outdoor space that beckons for relaxation and enjoyment.
Maintenance Tips
Maintaining your slope pavers is essential to preserve their beauty and structural integrity over time. Here are some valuable maintenance tips to keep your slope looking pristine:
-
Regular Cleaning: Periodically sweep or use a leaf blower to remove debris, leaves, and dirt from the surface of the pavers. This will prevent the buildup of organic matter and maintain the aesthetic appeal of the slope.
-
Weed Control: Keep an eye out for any weeds that may emerge between the pavers. Use a suitable weed killer or manually remove the weeds to prevent them from taking root and causing damage to the paver joints.
-
Inspect for Damage: Routinely inspect the pavers for any signs of damage, such as cracks or shifting. Address any issues promptly to prevent further deterioration and maintain the stability of the slope.
-
Reapply Jointing Sand: Over time, the jointing sand between the pavers may wear away. Reapply jointing sand as needed to fill in any gaps and ensure the pavers remain securely in place.
-
Seal the Pavers: Consider applying a sealer to the pavers to enhance their longevity and protect them from stains, color fading, and the effects of weathering. Follow the manufacturer's recommendations for the appropriate sealing products and application methods.
-
Address Drainage Issues: Monitor the slope for any drainage issues that may arise. Ensure that water flows away from the slope and that there are no areas where water pools, as this can lead to erosion and damage.
-
Trim Plantings: If there are plantings integrated into the slope, regularly trim and maintain them to prevent overgrowth and ensure they complement the pavers without causing any obstruction.
-
Professional Maintenance: Consider scheduling periodic professional maintenance to assess the condition of the slope pavers and address any underlying issues that may require expert attention.
By implementing these maintenance tips, you can prolong the lifespan of your slope pavers and continue to enjoy a visually stunning and structurally sound landscape feature for years to come.

