
Home>Outdoors & Camping>Hardscaping>How To Build A Paver Patio
Hardscaping
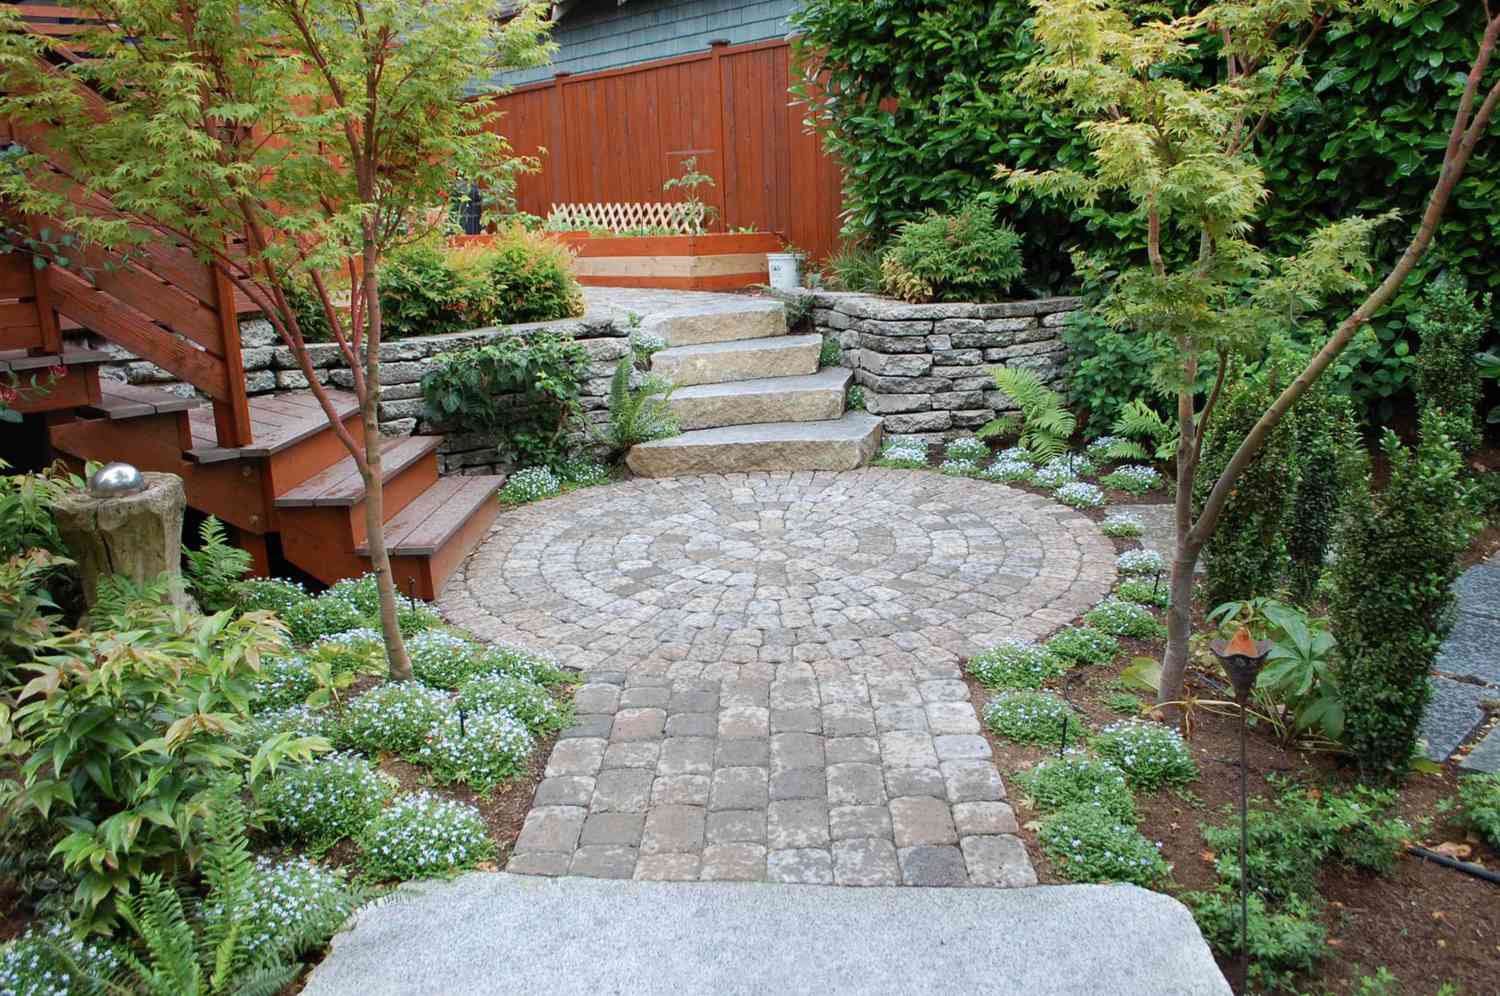
How To Build A Paver Patio
Published: February 20, 2024

Content Creator for Outdoors & Camping, Sophie turns any yard into a sustainable paradise. Her dedication to DIY outdoor projects and volunteer work in community gardens shares joy and knowledge.
Learn how to create a stunning hardscaping feature with our step-by-step guide on building a paver patio. Transform your outdoor space today!
(Many of the links in this article redirect to a specific reviewed product. Your purchase of these products through affiliate links helps to generate commission for Twigandthistle.com, at no extra cost. Learn more)
Introduction
Creating a beautiful and functional outdoor living space can significantly enhance the appeal and value of your property. One of the most popular and versatile hardscaping projects is the construction of a paver patio. Whether you envision a cozy nook for relaxation or a spacious entertainment area for gatherings, a well-designed paver patio can fulfill your aspirations.
In this comprehensive guide, we will walk you through the step-by-step process of building a paver patio. From initial planning to the finishing touches, you will gain valuable insights into the intricacies of this rewarding endeavor. By following these instructions, you can embark on a fulfilling journey to transform your outdoor space into a captivating oasis.
The allure of a paver patio lies in its adaptability to various architectural styles and landscaping preferences. Whether you prefer the timeless charm of traditional brick pavers or the contemporary elegance of concrete pavers, the design possibilities are virtually limitless. Additionally, the wide array of colors, textures, and patterns available in paver options allows for personalized customization, ensuring that your patio reflects your unique taste and complements the existing aesthetic of your property.
Moreover, a well-constructed paver patio offers durability and low maintenance, making it a practical and long-lasting investment. Unlike traditional concrete slabs, pavers are less prone to cracking and can withstand the rigors of changing weather conditions. Their interlocking nature provides flexibility, preventing unsightly surface damage and allowing for easy repairs if necessary. With proper installation and maintenance, a paver patio can retain its appeal for years to come.
Furthermore, the versatility of pavers extends beyond patios, as they can be used to create pathways, driveways, and other outdoor features. This adaptability underscores the value of pavers as a foundational element in hardscaping projects, allowing for cohesive and harmonious design throughout your outdoor space.
As we delve into the intricacies of building a paver patio, you will gain a deeper understanding of the craftsmanship and attention to detail required to bring your vision to life. With careful planning, precise execution, and a touch of creativity, you can embark on this fulfilling journey to craft a captivating outdoor sanctuary that reflects your unique style and enhances your lifestyle.
Step 1: Planning and Preparation
The initial phase of building a paver patio involves meticulous planning and thorough preparation. This pivotal step sets the foundation for a successful and enduring outdoor space that aligns with your vision and functional requirements.
1. Design Concept:
Begin by envisioning the layout and purpose of your paver patio. Consider factors such as the intended use of the space, the desired seating and entertainment areas, and any additional features such as fire pits or outdoor kitchens. Take into account the existing landscape and architectural elements to ensure a cohesive integration of the patio with its surroundings.
2. Site Selection and Measurement:
Carefully select the location for your patio, considering aspects such as sunlight exposure, drainage, and accessibility. Measure the chosen area accurately to determine the required quantity of pavers, base materials, and edging restraints. This step is crucial for estimating the project's scope and acquiring the necessary materials.
3. Material Selection:
Explore the diverse range of paver options available, taking into account factors such as color, texture, and pattern. Consider the overall aesthetic of your property and select pavers that complement the existing design elements. Additionally, choose suitable base materials and edging restraints that align with the anticipated traffic and load requirements of the patio.
4. Permit and Regulations:
Check local building codes and regulations to ensure compliance with any necessary permits or restrictions for constructing a paver patio. Understanding these requirements beforehand can prevent potential setbacks and ensure a smooth progression through the project.
5. Budgeting and Timeline:
Establish a realistic budget for the project, factoring in material costs, labor, and any additional features or landscaping elements. Create a timeline that accounts for the various stages of construction, allowing for flexibility and contingencies. Setting clear financial and temporal parameters will help manage expectations and facilitate a well-organized execution of the project.
6. Drainage Considerations:
Assess the existing drainage patterns in the selected area and incorporate appropriate measures to prevent water accumulation on the patio surface. Proper drainage planning is essential for preserving the integrity of the patio and ensuring a comfortable outdoor environment, especially during inclement weather.
7. Utility Line Identification:
Before excavation, identify and mark the locations of underground utility lines to avoid accidental damage during the construction process. This precautionary measure is crucial for safety and prevents potential disruptions to essential services.
By meticulously addressing these planning and preparation considerations, you can lay a solid groundwork for the subsequent stages of building your paver patio. Thoughtful deliberation and attention to detail in this phase will contribute to the successful realization of your outdoor oasis.
Step 2: Excavation and Grading
The second phase of constructing a paver patio involves the critical tasks of excavation and grading. This stage sets the groundwork for a stable and level surface, ensuring the structural integrity and longevity of the patio.
1. Excavation:
Commence the process by marking the perimeter of the patio area using stakes and string. With the aid of a shovel, excavator, or skid-steer loader, remove the top layer of soil and vegetation to achieve the desired depth. The depth of excavation should account for the thickness of the base materials and pavers, as well as any necessary slope for proper drainage. Carefully remove all organic matter and debris to create a clean and uniform excavation site.
2. Grading:
Following the excavation, focus on grading the exposed soil to establish a consistent slope away from structures and towards designated drainage areas. Utilize a grading rake, screed board, or plate compactor to achieve a gradual slope of approximately 1/8 inch per foot. This gentle slope facilitates efficient water runoff and prevents pooling on the patio surface, contributing to its long-term stability and usability.
3. Compaction:
Once the grading is complete, compact the soil using a plate compactor to enhance its density and load-bearing capacity. This crucial step minimizes soil settlement over time, ensuring that the patio foundation remains steadfast and resilient. Thorough compaction is essential for creating a solid base that can withstand the weight of the base materials and pavers without shifting or settling.
4. Edge Restraints:
Install sturdy edge restraints along the perimeter of the excavated area to contain the base materials and pavers, preventing lateral displacement and maintaining the structural integrity of the patio. Choose durable materials such as plastic, aluminum, or concrete edge restraints that securely anchor the pavers while accommodating the anticipated traffic and load requirements.
5. Inspection:
Conduct a comprehensive inspection of the excavated and graded site to verify the uniformity of the slope, the absence of debris, and the proper installation of edge restraints. Address any irregularities or deficiencies at this stage to ensure a solid foundation for the subsequent phases of the paver patio construction.
By meticulously executing the excavation and grading process, you establish a stable and well-prepared substrate for the installation of base materials and pavers. This meticulous groundwork lays the foundation for a visually appealing, durable, and functional paver patio that enriches your outdoor living experience.
Step 3: Base Material Installation
The installation of base materials is a pivotal phase in the construction of a paver patio, as it forms the underlying support system that ensures the stability, durability, and longevity of the paved surface. This crucial step involves the strategic placement and compaction of specific materials to create a solid and uniform substrate for the subsequent paver installation.
1. Base Material Selection:
Selecting the appropriate base materials is essential for establishing a robust foundation for the paver patio. Common options include crushed stone, gravel, or aggregate base materials, each offering distinct advantages in terms of load-bearing capacity, drainage properties, and compaction characteristics. The chosen base material should align with the anticipated traffic and load requirements of the patio, providing adequate support while facilitating efficient water drainage.
2. Layering and Compaction:
Commence the base material installation by layering the selected material evenly across the excavated and graded site. Gradually build up the layers to achieve the desired thickness, typically ranging from 4 to 6 inches, depending on the specific requirements of the project. Utilize a plate compactor to systematically compact each layer, ensuring uniform density and stability throughout the substrate. Thorough compaction is essential for minimizing settling and creating a solid base that can withstand the weight of the pavers and sustain long-term structural integrity.
3. Leveling and Sloping:
During the installation process, pay meticulous attention to leveling the base materials to create a uniformly flat surface. Utilize a screed board or leveling device to achieve a consistent plane, meticulously addressing any irregularities or variations in elevation. Additionally, incorporate a gentle slope into the base material layers to facilitate proper water runoff and prevent moisture accumulation on the patio surface. This slope, typically ranging from 1/8 inch to 1/4 inch per foot, contributes to effective drainage and enhances the overall functionality of the patio.
4. Edge Restraint Integration:
Integrate the base materials with the previously installed edge restraints, ensuring a seamless transition and secure containment of the substrate. The edge restraints play a crucial role in confining the base materials and pavers, preventing lateral displacement and maintaining the structural integrity of the patio. Securely anchor the edge restraints to the compacted base materials, creating a stable boundary that supports the perimeter of the patio.
5. Quality Assurance:
Conduct a comprehensive assessment of the installed base materials, verifying the uniformity of compaction, proper slope, and integration with edge restraints. Address any inconsistencies or deficiencies at this stage to ensure a solid and reliable foundation for the subsequent phase of paver installation. Thorough quality assurance measures contribute to the overall structural integrity and performance of the paver patio.
By meticulously executing the installation of base materials, you establish a resilient and well-prepared substrate that forms the cornerstone of a visually appealing, durable, and functional paver patio. This meticulous groundwork sets the stage for the seamless integration of pavers, culminating in the creation of an inviting outdoor sanctuary that enriches your lifestyle and enhances the aesthetic appeal of your property.
Step 4: Paver Installation
The installation of pavers marks a transformative phase in the construction of a captivating and functional patio. This step involves the meticulous placement of individual pavers to create a visually striking and structurally sound surface that enhances the outdoor living experience.
1. Pattern Selection:
Begin the paver installation process by selecting a suitable pattern that complements the overall design and aesthetic of the patio. Whether opting for classic herringbone, contemporary running bond, or intricate basket weave patterns, the choice of layout significantly influences the visual impact of the paved surface. Consider factors such as paver size, shape, and color variation to create a cohesive and visually engaging arrangement.
2. Placement and Alignment:
Carefully position each paver within the designated area, ensuring precise alignment and consistent spacing between individual units. Utilize string lines, straight edges, or layout guides to maintain straight edges and uniformity throughout the installation. Attention to detail during this phase contributes to the creation of a polished and visually appealing surface that reflects craftsmanship and precision.
3. Cutting and Trimming:
Incorporate custom cuts and trims as necessary to accommodate the specific dimensions and contours of the patio layout. Utilize a paver splitter, wet saw, or chisel to achieve precise cuts that seamlessly integrate with the overall pattern and design. Meticulous attention to detail during the cutting and trimming process ensures a seamless and visually cohesive presentation of the paver surface.
4. Interlocking and Stability:
Leverage the interlocking nature of the pavers to create a stable and resilient surface that withstands the demands of foot traffic and outdoor activities. Ensure that each paver securely engages with its neighboring units, forming a cohesive and durable structure. This interlocking mechanism enhances the overall stability and load-bearing capacity of the patio, contributing to its long-term performance and integrity.
5. Edge Detailing:
Pay special attention to the perimeter and edge detailing of the paver installation, ensuring a clean and polished transition to the surrounding landscape or structures. Incorporate edge restraints and border pavers to define the boundaries of the patio, creating a visually distinct and structurally reinforced perimeter. Thoughtful edge detailing enhances the overall visual appeal and cohesiveness of the paved surface.
6. Quality Assurance:
Conduct a comprehensive assessment of the installed pavers, verifying the uniformity of the pattern, precise alignment, and integration with edge restraints. Address any irregularities or discrepancies to ensure a visually stunning and structurally robust presentation. Thorough quality assurance measures contribute to the overall integrity and longevity of the paver patio, ensuring a captivating outdoor space that enriches your lifestyle.
By meticulously executing the installation of pavers, you bring your vision to life, creating a visually captivating and enduring patio that elevates the aesthetic appeal and functionality of your outdoor environment.
Step 5: Edging and Restraints
The incorporation of edging restraints is a pivotal step in the construction of a paver patio, contributing to the structural integrity, visual appeal, and long-term performance of the outdoor space. Edging restraints serve as a crucial boundary system, confining the base materials and pavers while preventing lateral displacement and ensuring a cohesive integration of the patio with its surroundings.
-
Material Selection: The selection of edging restraint materials plays a significant role in determining the durability and aesthetic impact of the patio. Common options include plastic, aluminum, and concrete edging restraints, each offering distinct advantages in terms of strength, flexibility, and visual appeal. The chosen material should align with the anticipated traffic and load requirements of the patio, providing robust containment while complementing the overall design aesthetic.
-
Installation Process: Commence the installation by positioning the edging restraints along the perimeter of the excavated and graded site, ensuring a secure and uniform placement. Utilize stakes or anchors to anchor the restraints firmly into the ground, creating a stable boundary that withstands external forces and maintains the structural integrity of the patio. Pay meticulous attention to the alignment and elevation of the edging restraints, ensuring a seamless transition between the patio surface and the surrounding landscape.
-
Integration with Base Materials: Integrate the edging restraints with the previously installed base materials, creating a cohesive and stable boundary that contains the substrate and pavers. Securely anchor the restraints to the compacted base materials, establishing a robust connection that prevents lateral shifting and maintains the uniformity of the patio surface. This integration contributes to the overall stability and longevity of the patio, ensuring a visually polished and structurally resilient presentation.
-
Visual Enhancement: Beyond their functional role, edging restraints contribute to the visual enhancement of the patio, defining its boundaries and creating a distinct transition between the paved surface and the surrounding landscape. Thoughtful selection and installation of edging restraints add a refined finishing touch to the patio, elevating its aesthetic appeal and creating a visually cohesive outdoor environment.
-
Long-Term Stability: The presence of edging restraints significantly contributes to the long-term stability and performance of the paver patio. By containing the base materials and pavers, the restraints prevent lateral displacement and maintain the structural integrity of the patio, ensuring enduring functionality and visual appeal. Additionally, the integration of edging restraints minimizes the risk of edge deterioration and enhances the overall resilience of the patio surface.
Incorporating edging restraints is a fundamental aspect of creating a visually captivating, durable, and functional paver patio. By meticulously selecting, installing, and integrating edging restraints, you establish a stable and visually polished boundary system that enhances the overall appeal and longevity of the outdoor space.
Step 6: Sand and Sealant Application
The application of sand and sealant represents the final phase in the construction of a paver patio, playing a pivotal role in enhancing the stability, longevity, and visual appeal of the paved surface. This crucial step involves the meticulous placement of jointing sand and the application of sealant, contributing to the overall integrity and performance of the patio.
Jointing Sand Application:
Commence the process by evenly distributing jointing sand over the installed pavers, ensuring complete coverage of the joints and interlocking spaces. The jointing sand serves as a stabilizing agent, filling the gaps between the pavers and creating a cohesive bond that minimizes movement and prevents weed growth. Utilize a broom or mechanical spreader to achieve uniform distribution, meticulously addressing any voids or irregularities within the joint spaces. The jointing sand enhances the overall stability and load-bearing capacity of the patio, contributing to its long-term performance and durability.
Compaction and Settling:
Following the application of jointing sand, utilize a plate compactor to gently vibrate the pavers, facilitating the settling of the sand into the joints. This compaction process ensures that the jointing sand effectively fills the interlocking spaces, creating a firm and stable bond between the pavers. Thorough compaction minimizes the risk of sand displacement and contributes to the overall structural integrity of the patio surface.
Sealant Application:
Once the jointing sand has settled, apply a high-quality sealant to the entire surface of the paver patio, utilizing a roller or sprayer for even coverage. The sealant serves as a protective barrier, safeguarding the pavers against moisture penetration, color fading, and surface deterioration. Additionally, the sealant enhances the vibrancy of the paver colors, creating a lustrous and visually appealing finish. Select a sealant that aligns with the specific characteristics of the pavers, such as porosity and texture, to ensure optimal protection and aesthetic enhancement.
Long-Term Protection:
The application of sealant provides long-term protection for the paver patio, preserving its visual appeal and structural integrity. By creating a shield against environmental elements and wear, the sealant prolongs the lifespan of the pavers, minimizing the need for frequent maintenance and repairs. Additionally, the sealant facilitates easy cleaning and stain resistance, contributing to the overall low-maintenance nature of the patio.
Visual Enhancement:
Beyond its protective function, the sealant application enhances the visual allure of the paver patio, accentuating the natural colors and textures of the pavers. The glossy finish created by the sealant imparts a sophisticated and polished appearance, elevating the aesthetic appeal of the outdoor space. The enhanced vibrancy and luster of the pavers create a visually captivating surface that complements the surrounding landscape and architectural elements.
By meticulously executing the sand and sealant application, you elevate the overall appeal and performance of the paver patio, creating a visually stunning and enduring outdoor sanctuary. This final phase culminates in the realization of a captivating and functional outdoor space that enriches your lifestyle and enhances the aesthetic charm of your property.
Conclusion
In conclusion, the construction of a paver patio represents a transformative journey that culminates in the creation of a captivating and enduring outdoor sanctuary. From the initial planning and meticulous preparation to the intricate installation of pavers and the final application of sand and sealant, every phase of the process contributes to the realization of a visually striking and functional patio.
The allure of a paver patio lies not only in its aesthetic appeal but also in its durability and adaptability to diverse outdoor environments. By carefully selecting materials, planning the layout, and executing precise installation techniques, homeowners can craft a personalized outdoor space that reflects their unique style and enhances their lifestyle.
The completion of a paver patio project signifies the transformation of an ordinary outdoor area into a captivating oasis that beckons for relaxation, entertainment, and connection with nature. The seamless integration of pavers, meticulous attention to detail, and thoughtful incorporation of edging restraints and sealant collectively contribute to the creation of a visually polished and enduring outdoor space.
Furthermore, the construction of a paver patio represents a rewarding investment that adds value to the property while offering a versatile and low-maintenance outdoor living area. The durability of pavers, coupled with the protective benefits of sealant, ensures that the patio retains its visual appeal and functionality for years to come, providing a space for cherished moments and gatherings.
Ultimately, the construction of a paver patio is a testament to the artistry and craftsmanship involved in hardscaping projects. It embodies the fusion of creativity, precision, and practicality, resulting in the transformation of outdoor spaces into inviting and captivating extensions of the home.
In embracing the journey of building a paver patio, homeowners embark on a fulfilling endeavor that enriches their lifestyle, enhances their property, and creates a timeless outdoor retreat. The completion of this project signifies not only the creation of a visually stunning and enduring patio but also the cultivation of cherished memories and experiences within a captivating outdoor environment.