
Home>Create & Decorate>DIY & Crafts>Stone Patios: A DIY Guide
DIY & Crafts
Stone Patios: A DIY Guide
Published: April 18, 2024

Senior Editor in Create & Decorate, Kathryn combines traditional craftsmanship with contemporary trends. Her background in textile design and commitment to sustainable crafts inspire both content and community.
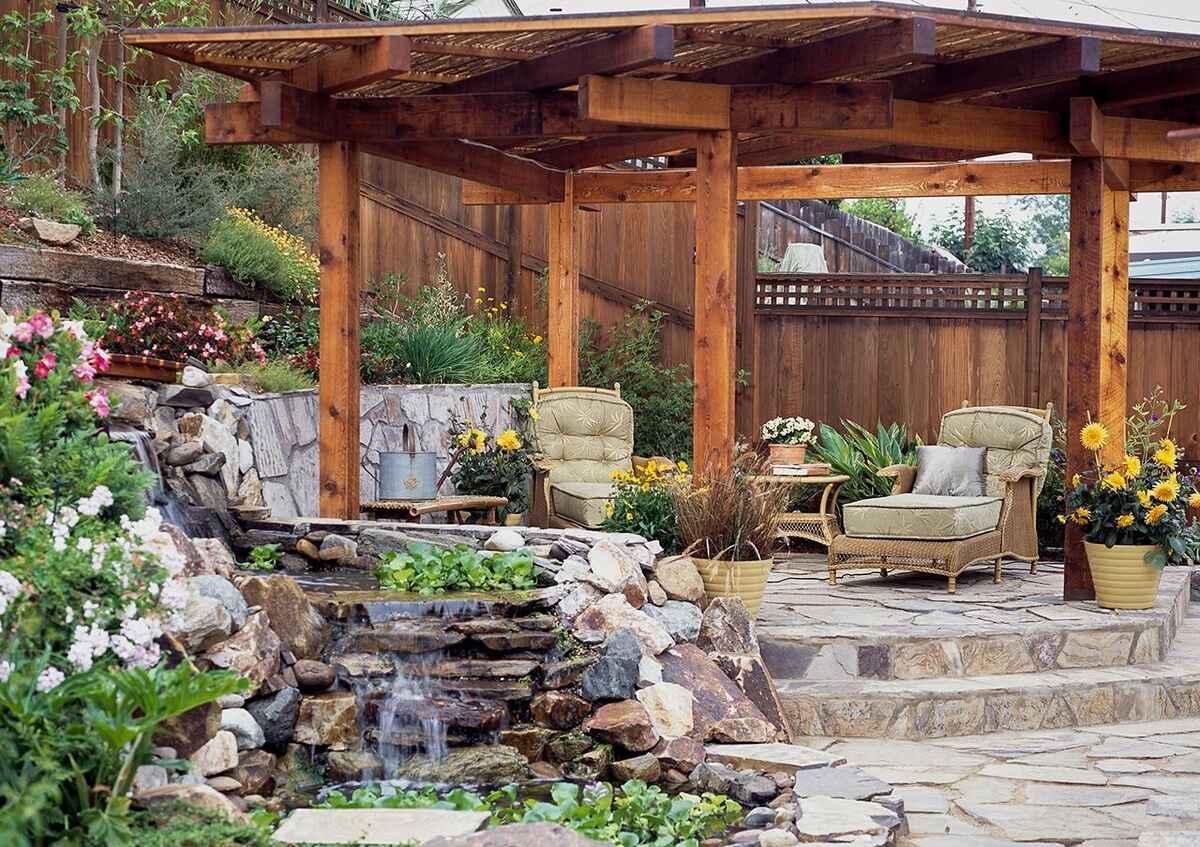
Learn how to create stunning stone patios with our comprehensive DIY guide. Get expert tips, ideas, and inspiration for your next DIY & Crafts project.
(Many of the links in this article redirect to a specific reviewed product. Your purchase of these products through affiliate links helps to generate commission for Twigandthistle.com, at no extra cost. Learn more)
Introduction
So, you've been dreaming of creating a beautiful outdoor space where you can relax, entertain, and enjoy the fresh air. A stone patio might just be the perfect addition to your home. But where do you start? How do you go about building a stone patio that will not only enhance the aesthetics of your outdoor area but also stand the test of time? In this DIY guide, we'll walk you through the step-by-step process of creating your own stunning stone patio. From planning and material selection to installation and maintenance, we've got you covered. Let's dive in and turn your patio dreams into reality!
Planning Your Stone Patio
When it comes to creating a beautiful and functional stone patio, planning is key. Here are the essential steps to consider when planning your stone patio:
-
Determine the Purpose: First and foremost, think about how you intend to use your patio. Will it be a space for outdoor dining, entertaining guests, or simply relaxing? Understanding the primary purpose of your patio will help you make design decisions that align with your needs.
-
Choose the Location: Consider the best location for your stone patio. Take into account factors such as sunlight exposure, proximity to the house, and the surrounding landscape. You'll want to select a spot that is both visually appealing and practical for its intended use.
-
Measure the Space: Take accurate measurements of the area where you plan to build your patio. This will help you determine the amount of materials you'll need and ensure that the final design fits seamlessly into the available space.
-
Design and Layout: Sketch out a rough design and layout for your patio. Consider the shape, size, and any additional features such as built-in seating or fire pits. Visualizing the layout will give you a clear idea of how the finished patio will look and function.
-
Check Local Regulations: Before you get started, check with your local authorities to ensure that you comply with any regulations or permits required for building a patio. This step is crucial to avoid any legal issues down the line.
By carefully planning your stone patio, you'll set the stage for a successful and enjoyable DIY project. Once you have a clear vision of your patio's purpose, location, size, design, and compliance with regulations, you'll be ready to move on to the next steps in the process.
Choosing the Right Materials
Selecting the right materials for your stone patio is crucial to ensure both durability and aesthetic appeal. Here are the key considerations when choosing the materials for your project:
-
Stone Type: The type of stone you choose will significantly impact the look and feel of your patio. Options include natural stone such as flagstone, slate, or limestone, each offering unique textures and colors. Alternatively, you can opt for concrete pavers that mimic the appearance of natural stone while providing a more uniform and consistent look.
-
Durability: Consider the durability of the materials, especially in relation to the climate in your area. If you experience harsh winters or extreme weather conditions, opt for materials that can withstand the elements without deteriorating over time.
-
Maintenance: Think about the level of maintenance you are willing to commit to. Natural stone often requires more maintenance, such as sealing and occasional re-leveling, while concrete pavers are generally lower maintenance and more resistant to staining.
-
Cost: Set a budget for your project and explore materials that align with your financial plan. Keep in mind that while natural stone may come with a higher initial cost, it can add significant value to your property.
-
Color and Texture: Consider the overall aesthetic you want to achieve. Natural stone offers a range of colors and textures, adding a unique and organic feel to your patio. Concrete pavers come in various colors and patterns, allowing for a more tailored design approach.
-
Compatibility with the Surrounding Landscape: Choose materials that complement the existing landscape and architecture of your home. The goal is to create a cohesive and harmonious outdoor space that seamlessly integrates with its surroundings.
By carefully considering these factors, you can choose the right materials that not only align with your design vision but also meet the practical requirements of your stone patio project. Whether you opt for the natural charm of stone or the versatility of concrete pavers, the materials you select will set the foundation for a stunning and long-lasting outdoor retreat.
Preparing the Site
Before you can start laying down the stones for your patio, it's crucial to prepare the site properly. This step sets the stage for a stable and long-lasting foundation. Here's how to prepare the site for your stone patio:
-
Clear the Area: Begin by clearing the designated area of any vegetation, debris, or obstacles. This may involve removing grass, plants, rocks, or old paving materials. Use a shovel, rake, and wheelbarrow to clear the space thoroughly.
-
Mark the Layout: Use stakes and string to mark the layout of your patio. This will provide a visual guide for the size and shape of the patio, ensuring that the final installation aligns with your initial design.
-
Excavation: Excavate the area to a depth that allows for the base and stone thickness. Typically, this involves digging down several inches to accommodate the base material and the stones themselves. Use a shovel, pickaxe, or a rented excavation machine for larger areas.
-
Grade the Soil: Once the area is excavated, use a rake to grade the soil, ensuring a slight slope away from your house to facilitate proper drainage. This slope will prevent water from pooling on the patio surface.
-
Add Base Material: After grading, add a base material such as crushed gravel or stone dust to the excavated area. This base layer provides stability, aids in drainage, and helps prevent the stones from shifting over time. Use a tamper to compact the base material thoroughly.
-
Install Edging: Consider installing edging materials such as plastic or metal paver restraints around the perimeter of the patio. This helps contain the stones, prevents spreading, and provides a clean, finished look to the patio's edges.
By meticulously preparing the site for your stone patio, you'll create a solid foundation that ensures the longevity and stability of your outdoor space. Taking the time to clear, mark, excavate, grade, add base material, and install edging will set the stage for the next phase of your DIY stone patio project.
Laying the Foundation
Once the site is properly prepared, it's time to lay the foundation for your stone patio. This foundational layer is essential for providing stability and support for the stones. Here's a detailed look at the steps involved in laying the foundation:
-
Add a Layer of Sand: After the base material has been compacted, spread a layer of coarse sand over the entire area. The sand provides a level surface for the stones and allows for minor adjustments during the installation process.
-
Screed the Sand: Use a long, straight board (a screed) to level the sand layer. Drag the screed across the surface, filling in any low spots and removing excess sand to create a smooth and even base for the stones.
-
Establish Proper Slope: Ensure that the sand layer maintains the same slight slope away from the house that was established during the soil grading. This slope is crucial for proper drainage and prevents water from pooling on the patio.
-
Compact the Sand: Use a plate compactor to compact the sand layer. This step is essential for creating a stable and solid base that minimizes the risk of settling and shifting over time.
-
Lay the Stones: With the sand layer prepared, it's time to start laying the stones according to your predetermined design and layout. Begin from one corner and work your way across, fitting the stones tightly together.
-
Maintain Consistent Joints: Use spacers or consistent hand spacing to maintain uniform joints between the stones. This ensures a professional and polished look for your patio surface.
-
Cut Stones as Needed: For edges and irregular areas, you may need to cut stones to fit. A chisel and hammer or a masonry saw can be used to achieve precise cuts that seamlessly integrate with the rest of the patio.
-
Check for Level and Alignment: Periodically use a level to ensure that the stones are being laid evenly and maintain the desired slope. Adjust the sand as needed to achieve a level surface.
By following these steps, you'll establish a solid foundation for your stone patio, setting the stage for the final phase of the installation process. The careful attention to detail during the foundation laying process will ensure a visually appealing, durable, and long-lasting outdoor space for your home.
Installing the Stones
With the foundation in place, it's time to dive into the exciting phase of actually installing the stones for your patio. This step requires precision, attention to detail, and a keen eye for creating a visually appealing layout. Here's a detailed look at the process of installing the stones for your stone patio:
-
Start from the Center: Begin laying the stones from the center of the patio and work your way outwards. This approach helps maintain symmetry and balance in the overall design.
-
Fit the Stones Tightly: As you place each stone, ensure a snug and tight fit with the surrounding stones. This minimizes gaps and creates a cohesive, seamless surface.
-
Maintain Consistent Joint Width: Use spacers or consistent hand spacing to ensure that the joints between the stones remain uniform in width. This attention to detail contributes to a professional and polished look for your patio.
-
Consider Patterns and Variations: If you're using multiple stone sizes or shapes, consider incorporating a pattern that adds visual interest to the patio surface. Alternating stone sizes or creating a mosaic-like layout can enhance the overall aesthetic.
-
Check for Level and Alignment: Periodically use a level to ensure that the stones are being laid evenly and maintain the desired slope. Adjust the sand as needed to achieve a level surface.
-
Fill in the Gaps: Once the stones are in place, fill the gaps between them with fine sand or stone dust. This material helps lock the stones in position and provides a finished look to the patio surface.
-
Compact the Stones: Use a plate compactor to gently compact the stones into the sand layer. This step ensures that the stones are firmly set and minimizes the risk of shifting over time.
-
Add Edge Stones: For the perimeter of the patio, consider using edge stones or a border material to provide a clean and defined edge. This finishing touch adds a polished look to the overall design.
By following these steps, you'll be well on your way to creating a stunning and professionally installed stone patio. The careful attention to detail during the stone installation process will result in a visually appealing, durable, and long-lasting outdoor space for your home.
Adding Finishing Touches
Once the stones are in place, it's time to add the finishing touches that will elevate the visual appeal and functionality of your stone patio. These final details will not only enhance the overall look of the patio but also contribute to its long-term durability and usability. Here's a detailed look at the essential finishing touches for your stone patio:
-
Seal the Surface: Depending on the type of stones you've used, consider applying a sealant to the surface of the patio. This step helps protect the stones from staining, enhances their natural colors, and provides an added layer of durability against the elements.
-
Add Outdoor Furniture: Introduce outdoor furniture such as tables, chairs, and loungers to transform your patio into a comfortable and inviting space. Choose furniture that complements the style of your home and the overall design of the patio.
-
Incorporate Lighting: Enhance the ambiance of your patio by incorporating outdoor lighting. Options include string lights, lanterns, or built-in fixtures. Proper lighting not only extends the functionality of the patio into the evening but also adds a warm and inviting atmosphere.
-
Create Greenery: Introduce potted plants, flower beds, or a vertical garden to bring a touch of nature to your patio. Greenery adds color, texture, and a sense of tranquility to the outdoor space, creating a more inviting and relaxing environment.
-
Consider a Fire Feature: If space and local regulations allow, consider adding a fire pit or an outdoor fireplace to your patio. A fire feature creates a focal point, provides warmth on cooler evenings, and encourages gatherings and socializing.
-
Install Outdoor Accessories: Enhance the functionality and style of your patio with outdoor accessories such as an umbrella for shade, a grill for outdoor cooking, or decorative elements like sculptures or water features.
-
Add Comfortable Elements: Incorporate elements that enhance comfort, such as outdoor rugs, cushions, and throw pillows. These additions make the patio a cozy and inviting space for relaxation and entertainment.
By adding these finishing touches, you'll transform your stone patio into a fully realized outdoor living area that reflects your personal style and enhances the enjoyment of your home. These details not only contribute to the visual appeal of the patio but also create a welcoming and functional space for you, your family, and your guests to enjoy.
Maintenance and Care Tips
Maintaining your stone patio is essential to preserve its beauty and structural integrity over time. By following these maintenance and care tips, you can ensure that your patio remains a stunning outdoor space for years to come:
-
Regular Cleaning: Keep your stone patio clean by regularly sweeping away debris, leaves, and dirt. Use a garden hose or pressure washer to remove built-up grime and stains. For stubborn stains, consider using a mild detergent or specialized stone cleaner.
-
Sealing the Stones: Depending on the type of stone used, consider resealing the surface of your patio every 1-3 years. Sealing helps protect the stones from moisture, staining, and the effects of weathering, prolonging their lifespan and maintaining their appearance.
-
Inspect for Damage: Periodically inspect the patio for any signs of damage, such as cracked or loose stones. Address any issues promptly to prevent further deterioration and ensure the stability of the patio surface.
-
Weed Control: Keep an eye out for weeds or grass growing between the stones. Regularly remove any vegetation to prevent it from taking root and causing damage to the patio.
-
Avoid Harsh Chemicals: When cleaning your stone patio, avoid using harsh chemicals or acidic cleaners that can damage the stones. Opt for gentle, pH-neutral cleaners that are specifically formulated for use on natural stone surfaces.
-
Preventative Measures: Take preventative measures to protect your patio, such as using furniture pads to prevent scratches, placing mats under grills to avoid grease stains, and using coasters under planters to prevent water damage.
-
Repairing Damage: If you notice any damaged or loose stones, address the issue promptly. Replace or reposition the stones as needed, and fill in any gaps with fresh sand or stone dust to maintain the integrity of the patio surface.
-
Winter Care: In colder climates, take precautions to protect your patio during the winter months. Use plastic or fabric covers to shield the patio furniture, and avoid using de-icing salts that can damage the stones.
By implementing these maintenance and care tips, you can ensure that your stone patio remains a beautiful and functional outdoor space for years to come. Regular upkeep and proactive measures will preserve the longevity and appeal of your patio, allowing you to continue enjoying its benefits for seasons to come.
Conclusion
In conclusion, creating a stunning stone patio is a rewarding DIY project that can significantly enhance the beauty and functionality of your outdoor living space. By carefully planning the layout, selecting the right materials, preparing the site, laying a solid foundation, and meticulously installing the stones, you can bring your patio dreams to life. Adding the finishing touches, such as outdoor furniture, lighting, and greenery, transforms the patio into a welcoming retreat for relaxation and entertainment.
Furthermore, maintaining and caring for your stone patio ensures its long-term durability and visual appeal. Regular cleaning, sealing, weed control, and proactive repairs are essential for preserving the beauty and structural integrity of the patio. With proper maintenance, your stone patio will continue to be a source of enjoyment and pride for years to come.
Whether you're hosting outdoor gatherings, enjoying a quiet moment in nature, or simply basking in the beauty of your home, a well-crafted stone patio provides the perfect setting. Embrace the process, enjoy the journey, and revel in the transformation of your outdoor space into a captivating oasis.