Home>Knowledge & Skills>Masonry & Tilework>How To Build Stone Steps


Masonry & Tilework
How To Build Stone Steps
Published: March 6, 2024

Our Editor-in-Chief brings a fresh perspective with his expertise in modern home technologies and eco-friendly solutions. Philip bridges tradition with innovation across a wide range of DIY topics.
Learn how to build stone steps with our comprehensive guide on masonry and tilework. Get expert tips and step-by-step instructions for a stunning outdoor feature.
(Many of the links in this article redirect to a specific reviewed product. Your purchase of these products through affiliate links helps to generate commission for Twigandthistle.com, at no extra cost. Learn more)
Introduction
So, you've decided to spruce up your outdoor space and add some charm and functionality with stone steps. Building stone steps can be a rewarding and visually appealing project that adds character to your home. Whether you're looking to create a grand entrance to your garden or simply need a way to navigate a sloping yard, stone steps can be a beautiful and durable solution. In this guide, we'll walk you through the process of building your own stone steps, from choosing the right stone to putting the finishing touches on your project. Let's get started!
Read more: How To Build A Stone Pillar
Choosing the Right Stone
When it comes to building stone steps, selecting the right type of stone is crucial for both the aesthetic and structural integrity of your project. Here are some popular options to consider:
1. Flagstone
Flagstone is a popular choice for its natural, flat surface, making it ideal for creating a rustic and organic look. It comes in various colors and can be easily shaped to fit the design of your steps.
2. Limestone
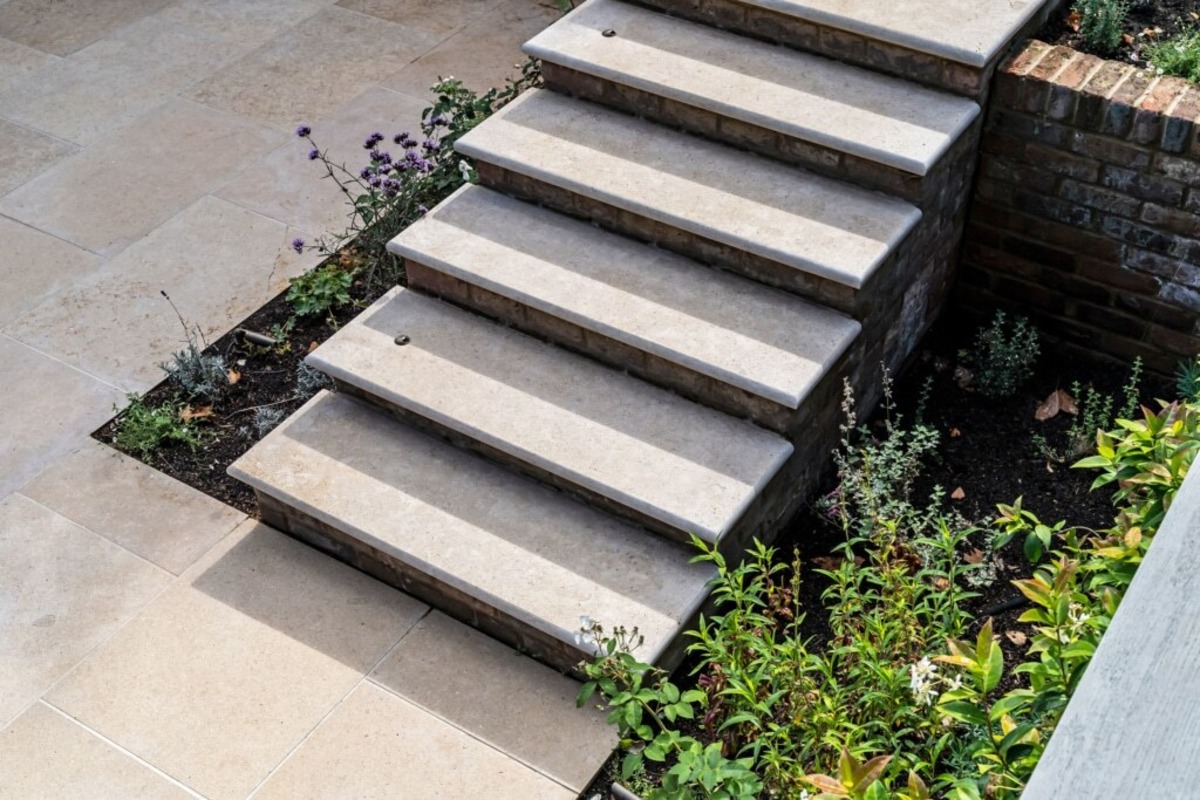
Limestone is a durable and versatile option that offers a timeless appeal. It is available in a range of earthy tones and can be easily cut and shaped to create a custom look for your steps.
3. Granite
Granite is known for its strength and durability, making it an excellent choice for high-traffic areas. It comes in a variety of colors and can add a touch of elegance to your outdoor space.
Read more: How To Build A Stone Wall
4. Sandstone
Sandstone is prized for its natural beauty and unique texture. It is available in a range of warm hues and can add a touch of warmth and character to your stone steps.
When choosing the right stone for your project, consider factors such as the overall aesthetic you want to achieve, the durability of the stone, and how it complements the surrounding landscape. Keep in mind that the size and shape of the stones will also play a role in the overall look of your steps. Once you've selected the perfect stone, you'll be one step closer to creating stunning stone steps that enhance the beauty and functionality of your outdoor space.
Planning and Designing Your Stone Steps
Planning and designing your stone steps is a crucial step in the process of creating a visually appealing and functional addition to your outdoor space. Here are the key considerations to keep in mind as you plan and design your stone steps:
-
Measure and Assess the Site: Begin by measuring the area where you plan to install the stone steps. Take note of the slope and any existing landscaping features. This will help you determine the number of steps needed and the overall design of the project.
-
Consider the Style: Think about the overall style and aesthetic you want to achieve with your stone steps. Do you prefer a formal, symmetrical look, or are you aiming for a more natural and organic feel? The style of your home and existing landscaping can also influence the design of your stone steps.
-
Sketch the Design: Create a rough sketch or use design software to visualize the layout of your stone steps. Consider the size and shape of the stones, the width and height of each step, and any additional features such as landings or curves.
-
Factor in Safety and Functionality: Safety should be a top priority when designing your stone steps. Ensure that the rise and run of each step adhere to local building codes and provide a comfortable and safe transition between levels. Additionally, consider the flow of traffic and how people will move through the space.
-
Choose the Right Materials: In addition to selecting the type of stone, consider other materials needed for the project, such as gravel, sand, and landscaping fabric. These materials will play a crucial role in the construction and longevity of your stone steps.
-
Seek Inspiration: Look for inspiration in landscaping magazines, online resources, and even in your local area. Pay attention to the design elements that appeal to you and consider how you can incorporate them into your own stone step project.
By carefully planning and designing your stone steps, you can ensure that the end result not only enhances the beauty of your outdoor space but also provides a safe and functional pathway for years to come.
Preparing the Site
Preparing the site for your stone steps is a crucial step that sets the foundation for a successful and long-lasting project. Here's a detailed look at the essential tasks involved in preparing the site:
-
Clear the Area: Begin by clearing the area where the stone steps will be installed. Remove any existing vegetation, rocks, or debris to create a clean and level surface. This will provide a solid base for the construction of your steps.
-
Mark the Layout: Use stakes and string to mark the layout of your stone steps. This will help you visualize the placement of each step and ensure that the design aligns with your initial plans.
-
Excavate the Trenches: Excavate the trenches for the steps, making sure to follow the design and layout you've established. The depth of the trenches will depend on the height of your steps and the type of stone you're using. Typically, a depth of 6-8 inches is sufficient.
-
Add a Base Layer: Once the trenches are excavated, add a base layer of gravel to provide stability and drainage for your stone steps. Tamp down the gravel to create a firm foundation for the steps.
-
Install Landscaping Fabric: To prevent weed growth and promote drainage, consider laying landscaping fabric over the gravel base. This will help maintain the integrity of your stone steps over time.
-
Create a Level Surface: Use a level to ensure that the base of each trench is flat and even. This will help prevent any shifting or unevenness in your stone steps once they are installed.
-
Consider Drainage: If your site is prone to water accumulation, it's essential to incorporate proper drainage into the design of your stone steps. This may involve adding a perforated pipe or ensuring that the steps are sloped to direct water away from your home.
By thoroughly preparing the site for your stone steps, you can lay the groundwork for a sturdy and visually appealing addition to your outdoor space. Taking the time to complete these preparatory steps will contribute to the overall success and longevity of your stone step project.
Laying the Foundation
Laying the foundation for your stone steps is a critical phase that directly impacts the stability and durability of the entire structure. Here's a detailed breakdown of the essential steps involved in laying a solid foundation for your stone steps:
-
Add a Layer of Sand: Once the trenches are prepared, adding a layer of sand on top of the gravel base can help create a level surface for laying the stones. The sand layer also allows for minor adjustments to be made to the positioning of the stones as you set them in place.
-
Compact the Sand: Use a hand tamper or a mechanical compactor to firmly compact the layer of sand. This will ensure that it provides a stable and level base for the stones and helps prevent shifting over time.
-
Lay the First Step: Start by placing the first stone at the base of the steps. Use a level to ensure that it sits evenly on the compacted sand and is in line with the design and layout you've established.
-
Check for Level and Stability: As you lay each stone, use a level to check for both side-to-side and front-to-back levelness. Additionally, ensure that each stone is stable and does not rock or wobble when pressure is applied.
-
Maintain Consistent Rise and Run: Pay close attention to the rise and run of each step to ensure a consistent and comfortable transition between levels. This is crucial for the safety and usability of your stone steps.
-
Fill in the Gaps: As you set the stones, fill in the gaps between them with additional sand. This will help lock the stones in place and provide a cohesive and secure foundation for your steps.
-
Consider the Overhang: If you're using overhanging stones, make sure that they are properly supported and do not pose a tripping hazard. Use a chisel or saw to carefully shape the overhanging edges as needed.
-
Double-Check Alignment: Periodically step back and assess the alignment and overall appearance of the steps. Making adjustments as you go will help ensure that the finished result meets your design and safety standards.
By meticulously laying the foundation for your stone steps, you can establish a solid base that not only supports the weight of the structure but also contributes to the overall visual appeal and functionality of your outdoor space. Taking the time to execute this phase with precision will set the stage for a successful and enduring stone step project.
Read more: How To Make A Stone Walkway
Setting the Stones
Setting the stones is a pivotal stage in the construction of your stone steps, as it determines the overall appearance and structural integrity of the finished project. Here's a comprehensive guide to effectively setting the stones for your stone steps:
-
Arrange the Stones: Begin by arranging the stones in the desired sequence and orientation at the bottom of the steps. This allows you to visualize the layout and make any necessary adjustments before permanently setting the stones in place.
-
Apply Adhesive: Depending on the type of stone and the design of your steps, you may need to apply a construction adhesive to the back of each stone before setting it in position. This adhesive helps secure the stones and prevents shifting over time.
-
Set the First Stone: Starting from the bottom step, carefully set the first stone in place, ensuring that it sits securely on the foundation and aligns with the predetermined layout. Use a level to confirm that the stone is both horizontally and vertically level.
-
Check for Stability: Once the first stone is set, apply pressure to ensure that it is stable and does not rock or shift. This step is crucial for verifying the solidity of the foundation and the effectiveness of the adhesive.
-
Continue Setting Stones: Proceed to set the remaining stones, working your way up the steps. As you set each stone, take the time to check for stability, alignment, and levelness, making any necessary adjustments along the way.
-
Fill in Gaps: As you set the stones, fill in the gaps between them with additional sand or gravel. This not only enhances the visual appeal of the steps but also provides support and stability to the stones.
-
Consider the Overhang: If your design includes overhanging stones, ensure that they are properly supported and do not pose a tripping hazard. Carefully shape the overhanging edges as needed to achieve a seamless and safe transition between steps.
-
Maintain Consistency: Pay attention to maintaining a consistent rise and run for each step, ensuring that the transition between levels is comfortable and safe for users.
-
Step Back and Assess: Periodically step back and assess the overall appearance and alignment of the stones. This allows you to make any final adjustments to ensure that the finished result meets your design and safety standards.
By meticulously following these steps, you can effectively set the stones for your stone steps, creating a visually stunning and structurally sound addition to your outdoor space. This phase is essential for achieving a professional and enduring finish that enhances the beauty and functionality of your home.
Finishing Touches and Maintenance
Once the stones are set and the structure of your stone steps is in place, it's time to add the finishing touches that will elevate the overall appearance and ensure the longevity of your project. Here's a detailed look at the essential steps for adding those final touches and maintaining your stone steps:
-
Grout the Joints: Depending on the design and type of stones used, you may need to fill the joints between the stones with grout. This not only enhances the visual appeal of the steps but also provides stability and prevents shifting over time.
-
Seal the Stones: Consider applying a sealant to the stones to protect them from the elements and minimize the risk of staining. This is particularly important for porous stones such as limestone and sandstone.
-
Add Lighting: To enhance both the safety and ambiance of your stone steps, consider adding lighting along the edges or strategically placed fixtures. This not only illuminates the steps for nighttime use but also adds a decorative element to your outdoor space.
-
Landscaping: Surrounding the stone steps with landscaping elements such as plants, flowers, or mulch can further enhance the overall aesthetic and seamlessly integrate the steps into your outdoor environment.
-
Regular Maintenance: To ensure the longevity of your stone steps, regular maintenance is essential. This may include sweeping away debris, removing weeds or moss, and periodically inspecting the structure for any signs of wear or damage.
-
Repair and Replacement: In the event of any damage or shifting, it's important to address the issue promptly. This may involve replacing a stone, reapplying grout, or addressing any drainage or stability concerns.
By attending to these finishing touches and implementing a proactive maintenance routine, you can ensure that your stone steps not only maintain their visual appeal but also continue to provide a safe and functional pathway for years to come. With the right care and attention, your stone steps can be a lasting and beautiful addition to your home.


