
Home>Knowledge & Skills>Masonry & Tilework>How To Build A Stone Wall
Masonry & Tilework
How To Build A Stone Wall
Published: February 20, 2024

Our Editor-in-Chief brings a fresh perspective with his expertise in modern home technologies and eco-friendly solutions. Philip bridges tradition with innovation across a wide range of DIY topics.
Learn the step-by-step process of building a durable and visually appealing stone wall with our comprehensive guide. Perfect for those interested in masonry and tilework.
(Many of the links in this article redirect to a specific reviewed product. Your purchase of these products through affiliate links helps to generate commission for Twigandthistle.com, at no extra cost. Learn more)
Introduction
Building a stone wall is a timeless craft that adds both beauty and functionality to any space. Whether you're creating a retaining wall, a garden border, or a stunning feature within your home, the art of stonemasonry allows you to connect with the earth and create something enduring. The process of constructing a stone wall requires patience, precision, and a deep appreciation for the materials at hand. Each stone bears a unique story, and as you bring them together, you're not just building a wall – you're crafting a piece of history.
In this comprehensive guide, we will walk through the steps of building a stone wall, from gathering the necessary materials and tools to the finishing touches that give your creation its distinct character. Whether you're a seasoned mason or a novice embarking on your first project, this guide will equip you with the knowledge and confidence to bring your vision to life. So, roll up your sleeves, gather your tools, and let's delve into the art of building a stone wall that will stand the test of time.
Step 1: Gather Materials and Tools
Before embarking on the journey of building a stone wall, it's essential to gather all the necessary materials and tools. This step is crucial for ensuring a smooth and efficient construction process. Here's a comprehensive list of what you'll need:
Materials:
- Stone: Selecting the right type of stone is paramount. Whether you opt for fieldstone, limestone, or granite, ensure that the stones are durable and well-suited for the intended purpose of the wall.
- Mortar: Depending on the style of wall you're building, you'll need either dry-stack mortar or traditional mortar mix. The mortar should complement the color and texture of the stones.
- Gravel: This will be used as a base for the wall, providing stability and drainage.
- Concrete: If your wall requires a concrete footing, make sure to have an adequate supply on hand.
- Backfill Material: This will be used to fill in behind the wall for added support and stability.
Tools:
- Masonry Trowel: An essential tool for applying mortar to the stones.
- Level: To ensure that the wall is straight and even as you build it.
- Hammer and Chisel: For shaping and resizing stones as needed.
- Wheelbarrow: For transporting stones, mortar, and other materials around the construction site.
- Gloves and Safety Glasses: Protect your hands and eyes during the construction process.
- String and Stakes: These will be used to create guidelines for the wall's layout and height.
Additional Considerations:
- Safety Gear: Prioritize safety by wearing appropriate clothing, including sturdy boots and long pants, to protect yourself from potential hazards.
- Local Regulations: Familiarize yourself with any local building codes or regulations that may apply to the construction of a stone wall.
By ensuring that you have all the necessary materials and tools at the outset, you'll set the stage for a successful and rewarding stone wall construction project. With these essentials in hand, you're ready to move on to the next step: preparing the foundation.
Step 2: Prepare the Foundation
The foundation serves as the backbone of your stone wall, providing stability and support to ensure its longevity. Proper preparation of the foundation is crucial for the structural integrity of the wall. Here's a detailed guide on how to prepare the foundation for your stone wall:
Clear the Area
Begin by clearing the area where the wall will be constructed. Remove any debris, vegetation, or obstacles that could impede the construction process. It's essential to create a clean and level surface for laying the foundation.
Mark the Layout
Using string and stakes, mark the layout of the wall. This will define the boundaries and guide the placement of the foundation. Ensure that the layout aligns with your intended design and takes into account any curves or corners in the wall.
Excavate the Trench
Excavate a trench for the foundation, ensuring that it is wide enough to accommodate the base of the wall and deep enough to provide stability. The depth of the trench will depend on the height and purpose of the wall, as well as the recommendations of local building codes.
Add Gravel Base
Once the trench is excavated, add a layer of gravel to the bottom. The gravel serves as a base for the foundation, providing drainage and preventing the accumulation of water, which could compromise the stability of the wall over time.
Compact the Gravel
Use a hand tamper or a mechanical compactor to compact the gravel base thoroughly. This step is essential for creating a solid and level foundation that will support the weight of the stone wall.
Install the First Course
Lay the first course of stones directly on the compacted gravel base. This initial layer of stones will serve as the starting point for building the wall. Ensure that the stones are level and firmly set in place, as they will provide the foundation upon which the rest of the wall will be built.
By meticulously preparing the foundation, you set the stage for a sturdy and enduring stone wall. The foundation not only supports the weight of the structure but also plays a critical role in preventing shifting and settling over time. With the foundation in place, you're ready to move on to the next step: laying the first course of stones.
Step 3: Lay the First Course of Stones
Laying the first course of stones is a pivotal stage in the construction of a stone wall. This initial layer not only establishes the alignment and levelness of the entire structure but also sets the tone for the wall's aesthetic appeal. Here's a detailed guide on how to lay the first course of stones with precision and finesse.
Arrange the Stones
Begin by carefully selecting and arranging the stones for the first course. Choose stones that are relatively flat on the top and bottom, as these will provide a stable foundation for the rest of the wall. It's essential to consider the size, shape, and color of the stones to create a visually appealing and structurally sound arrangement.
Apply Mortar (If Applicable)
If you're constructing a mortared stone wall, use a masonry trowel to apply a layer of mortar along the base where the first course will be laid. The mortar acts as an adhesive, securing the stones in place and providing additional stability to the wall.
Set the Stones
Carefully place each stone onto the prepared foundation, ensuring a snug fit and minimal gaps between the stones. Use a level to check the horizontal and vertical alignment of the stones, adjusting them as needed to maintain a uniform and straight first course.
Maintain Consistent Joint Width
As you lay the stones, pay attention to the width of the joints between them. Aim to maintain a consistent joint width throughout the first course, as this will contribute to the overall visual appeal and structural integrity of the wall.
Check for Stability
Once the first course is laid, gently tap each stone with a rubber mallet to ensure that it is firmly set in place. Stability is key to the longevity of the wall, so take the time to verify that each stone is securely positioned on the foundation.
Dry-Stacking Considerations
If you're constructing a dry-stacked stone wall, the process is similar, but without the use of mortar. In this case, focus on selecting stones that naturally interlock and fit together snugly, creating a stable and cohesive first course.
By meticulously laying the first course of stones, you establish a solid foundation for the rest of the wall. This foundational layer not only dictates the structural integrity of the wall but also contributes to its visual appeal. With the first course in place, you're ready to move on to the next step: building up the wall.
Step 4: Build Up the Wall
With the first course of stones meticulously laid and the foundation set, it's time to build up the wall and bring your vision to life. This stage marks the gradual ascent of the stone wall, where each layer of stones adds to the strength, character, and allure of the structure. Here's a detailed guide on how to effectively build up the wall, ensuring both structural integrity and aesthetic appeal.
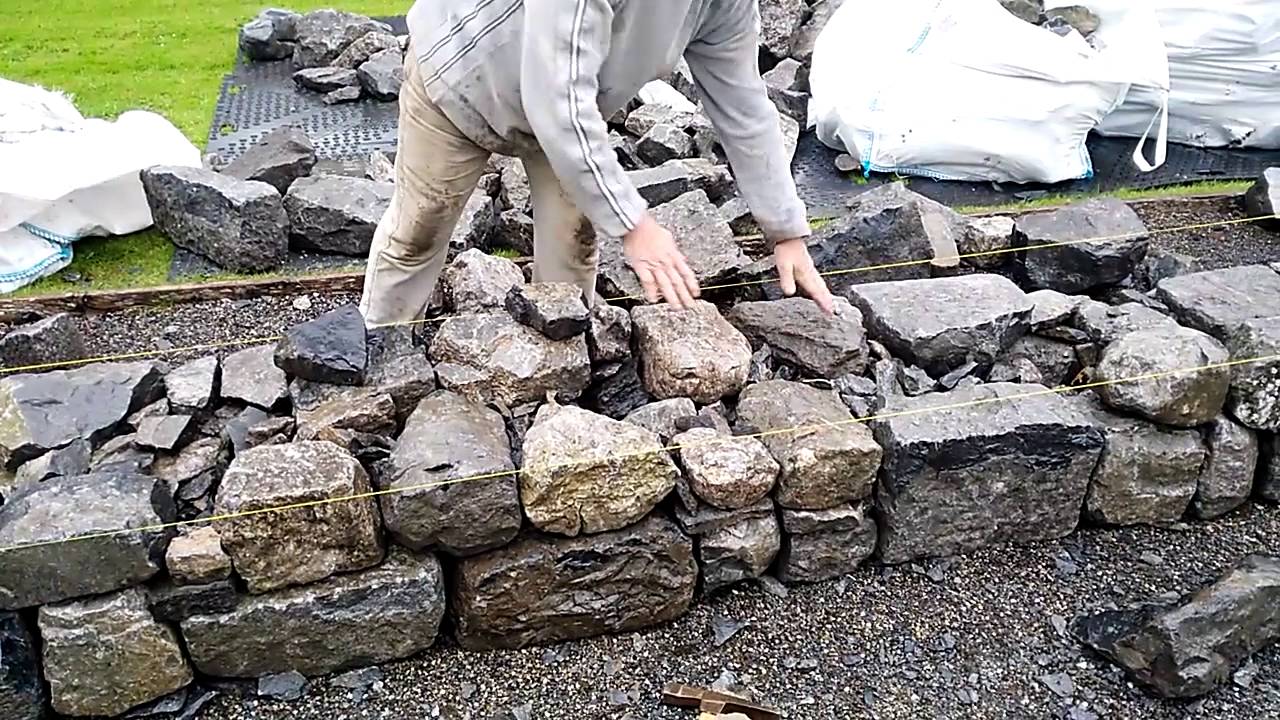
Select and Place Stones
Carefully select stones that complement the existing first course and fit well with the overall design. As you place each stone, consider its position in relation to the surrounding stones, aiming for a balanced and visually appealing arrangement. Pay attention to the shape, size, and color of the stones, as these elements contribute to the unique charm of the wall.
Maintain Stability and Alignment
As you build up the wall, use a level to ensure that each stone is positioned horizontally and vertically in line with the desired alignment. This meticulous attention to detail is crucial for maintaining the structural stability of the wall and preventing leaning or unevenness as the construction progresses.
Integrate Supportive Backfill
Incorporate backfill material behind the wall as you build it up. This supportive layer of backfill provides additional stability and helps counteract the pressure exerted by the retained earth or other forces acting on the wall. Properly placed backfill enhances the overall strength and resilience of the structure.
Consider Drainage and Weep Holes
If your stone wall is intended to retain earth or has a significant height, consider incorporating drainage features such as weep holes. These openings allow for the controlled release of water that may accumulate behind the wall, preventing hydrostatic pressure and potential damage to the structure over time.
Blend Aesthetics with Functionality
As you build up the wall, strive to strike a harmonious balance between aesthetics and functionality. The interplay of stone shapes, textures, and colors can create a visually captivating mosaic while serving the practical purpose of forming a durable and resilient barrier.
Embrace Creativity and Adaptability
Throughout the process of building up the wall, embrace creativity and adaptability. Allow the natural form of the stones to guide the construction, making adjustments as needed to accommodate variations in size and shape. This flexibility adds a touch of artistry to the construction process, resulting in a truly unique and personalized stone wall.
By methodically building up the wall, layer by layer, you infuse the structure with strength, character, and enduring beauty. Each stone contributes to the narrative of the wall, weaving together a story of craftsmanship and resilience. With the wall steadily rising, you're on your way to creating a masterpiece that will stand as a testament to the artistry of stonemasonry.
Step 5: Fill in the Gaps
As the stone wall reaches its desired height, the focus shifts to filling in the gaps between the stones, a crucial step that enhances both the structural integrity and visual appeal of the wall. Here's a detailed guide on how to effectively fill in the gaps, ensuring a seamless and enduring finish.
Select Suitable Fill Material
Before filling in the gaps, it's essential to choose the appropriate material that will complement the stones and provide stability to the wall. Depending on the style of the wall and personal preference, options such as mortar, crushed stone, or pea gravel can be used to fill the voids between the stones. The chosen material should blend harmoniously with the overall aesthetic of the wall while offering reliable support.
Apply Mortar or Fill Material
If you're constructing a mortared stone wall, use a masonry trowel to carefully apply mortar to the gaps between the stones. Ensure that the mortar is evenly distributed and neatly finished to create a uniform and polished appearance. For dry-stacked walls, fill the gaps with crushed stone or pea gravel, using a gentle hand to prevent displacement of the surrounding stones.
Compact and Level
Once the gaps are filled, use a tamping tool or a small hand compactor to gently compact the fill material. This step helps to secure the material in place and eliminate air pockets, promoting stability within the wall. Additionally, use a level to ensure that the filled gaps are even with the surface of the stones, creating a smooth and seamless finish.
Consider Aesthetic Enhancement
Incorporate creativity into the gap-filling process by considering opportunities for aesthetic enhancement. For mortared walls, the mortar joints can be finished in various styles, such as flush, weathered, or overgrout, to achieve different visual effects. In dry-stacked walls, the choice of fill material and its color can contribute to the overall texture and appearance of the wall, adding depth and character to the finished structure.
Ensure Structural Cohesion
Beyond aesthetics, the filling of gaps plays a critical role in enhancing the structural cohesion of the wall. Properly filled gaps provide essential support and stability, reducing the risk of displacement and ensuring the long-term durability of the wall. By meticulously attending to the gap-filling process, you fortify the integrity of the structure, creating a resilient and enduring stone wall.
As the gaps are filled and the wall attains its final form, the meticulous attention to detail in this step contributes to the overall strength, stability, and visual allure of the stone wall. With the gaps seamlessly filled, the wall stands as a testament to the craftsmanship and artistry of the mason, embodying the timeless beauty and enduring strength of stone.
Step 6: Finish the Wall
As the stone wall nears completion, the final touches play a pivotal role in elevating its aesthetic appeal and ensuring its long-term resilience. The finishing stage encompasses a series of meticulous steps that culminate in a polished and enduring structure. Here's a detailed guide on how to effectively finish the wall, infusing it with character, strength, and timeless allure.
Clean and Inspect
Begin by thoroughly cleaning the surface of the stone wall, removing any excess mortar, dirt, or debris that may have accumulated during the construction process. Inspect the entire structure, paying close attention to the joints, to ensure that the wall is free from any irregularities or imperfections that could compromise its integrity.
Pointing and Detailing
For mortared stone walls, pointing – the process of finishing the mortar joints – is a critical step in enhancing the overall appearance and durability of the wall. Use a pointing trowel to carefully fill any gaps or inconsistencies in the mortar joints, creating a smooth and uniform finish. Pay attention to the details, ensuring that the joints are neatly finished to complement the natural beauty of the stones.
Surface Treatment
Consider applying a surface treatment to the stone wall to enhance its weather resistance and visual appeal. Depending on the type of stone and the desired aesthetic, options such as a clear sealant, stone enhancer, or protective coating can be used to safeguard the wall against the elements while accentuating its natural colors and textures.
Incorporate Design Elements
Embrace the opportunity to incorporate design elements that add a distinctive flair to the finished wall. Whether it's the inclusion of decorative capstones, the integration of intricate patterns within the stonework, or the addition of personalized touches, these design elements contribute to the individuality and character of the wall.
Final Inspection
Conduct a comprehensive final inspection of the finished wall, ensuring that every aspect meets the highest standards of craftsmanship and quality. Verify that the joints are uniformly finished, the stones are securely in place, and the overall appearance aligns with your vision for the project.
Celebrate Your Achievement
As the finishing touches are applied and the stone wall stands in all its splendor, take a moment to celebrate your achievement. Each stone bears witness to the dedication and artistry poured into the construction, resulting in a timeless masterpiece that will endure for generations to come.
By meticulously attending to the finishing stage, you impart the stone wall with a sense of completion and refinement, elevating it from a mere structure to a work of art. With the final touches in place, the stone wall stands as a testament to the enduring beauty and strength of stonemasonry, a testament to the timeless craft that has shaped the world for centuries.
Conclusion
As we conclude this comprehensive guide to building a stone wall, it's evident that the art of stonemasonry is a testament to human ingenuity and craftsmanship. From the initial gathering of materials and tools to the meticulous placement of each stone, the construction of a stone wall is a journey that intertwines creativity, precision, and a deep connection to the earth.
Throughout the six essential steps outlined in this guide, we've delved into the intricacies of preparing the foundation, laying the first course of stones, building up the wall, filling in the gaps, and finally, finishing the wall. Each stage of the process represents a harmonious blend of artistry and engineering, where the natural beauty of stone converges with the structural integrity of the construction.
The completion of a stone wall is not merely the assembly of rocks and mortar; it's the creation of a living testament to human endeavor. Every stone, carefully chosen and placed, tells a story of resilience and endurance. The wall itself becomes a silent guardian, standing firm against the passage of time and the forces of nature.
As you embark on your own journey of building a stone wall, whether for practical purposes or as a labor of love, remember that each stone you lay is a tribute to the ancient craft of stonemasonry. It's a nod to the artisans of old, who, with their hands and hearts, shaped the world with stone.
So, as you stand back and admire the stone wall you've constructed, take pride in the knowledge that you've contributed to a tradition as old as human civilization itself. Your creation stands as a testament to the enduring beauty and strength of stone, a legacy that will endure for generations to come.
In the end, the construction of a stone wall is not just a physical endeavor; it's a journey of artistry, resilience, and the timeless connection between humanity and the earth. It's a reminder that, in a world of fleeting trends and ephemeral creations, the enduring allure of stone remains steadfast, a symbol of permanence and unwavering strength.