
Home>Knowledge & Skills>Masonry & Tilework>How To Build A Stone Pillar
Masonry & Tilework
How To Build A Stone Pillar
Published: March 6, 2024

Our Editor-in-Chief brings a fresh perspective with his expertise in modern home technologies and eco-friendly solutions. Philip bridges tradition with innovation across a wide range of DIY topics.
Learn the art of masonry and tilework with our comprehensive guide on how to build a sturdy and visually appealing stone pillar. Master the techniques and create impressive structures with confidence.
(Many of the links in this article redirect to a specific reviewed product. Your purchase of these products through affiliate links helps to generate commission for Twigandthistle.com, at no extra cost. Learn more)
Introduction
So, you've been thinking about adding a touch of elegance and sophistication to your home's exterior, and you've decided that a stone pillar is just the thing to do it. But where do you start? How do you even begin to build a stone pillar? Don't worry, we've got you covered. In this guide, we'll walk you through the step-by-step process of building your very own stone pillar, from choosing the right stone to putting on the finishing touches. Whether you're a seasoned DIY enthusiast or a beginner looking for a new challenge, this guide will help you bring your vision to life. Let's get started!
Choosing the Right Stone
When it comes to building a stone pillar, the first and most crucial step is choosing the right stone. The type of stone you select will not only determine the aesthetic appeal of your pillar but also its durability and longevity. Here are some popular options to consider:
1. Natural Stone
Natural stones like limestone, granite, or sandstone are timeless choices for building pillars. They offer a classic, rustic look and are known for their strength and durability. Each type of natural stone has its own unique texture and color, allowing you to create a pillar that perfectly complements your home's exterior.
2. Manufactured Stone
If you're looking for a more affordable and lightweight alternative, manufactured stone, also known as faux stone, is worth considering. Made from concrete and pigments, manufactured stone can mimic the appearance of natural stone while offering a wider range of colors and shapes to choose from.
3. Size and Shape
Consider the size and shape of the stones you'll be using. Irregularly shaped stones can create a charming, rustic look, while uniform, rectangular stones can give your pillar a more contemporary feel. Think about the overall aesthetic you want to achieve and choose stones that align with that vision.
4. Texture and Color
Pay attention to the texture and color of the stones. Rough, textured stones can add depth and character to your pillar, while smooth, polished stones can exude a more refined elegance. Similarly, the color of the stones should harmonize with the existing color scheme of your home's exterior.
5. Accessibility
Lastly, consider the accessibility of the stones. If you're sourcing natural stones, ensure that they are readily available in your area. For manufactured stones, check with local suppliers to find the best options that fit your budget and design preferences.
By carefully considering these factors, you can choose the right stone that not only enhances the beauty of your home but also withstands the test of time.
Preparing the Foundation
Before you start stacking stones, it's crucial to lay a solid foundation for your pillar. Here's how to prepare the foundation for your stone pillar:
-
Mark the Location: Begin by marking the exact location where you want the pillar to stand. Use stakes and string to outline the perimeter of the foundation. Ensure that the area is clear of any debris or vegetation.
-
Excavate the Area: Once the location is marked, it's time to excavate the area to create space for the foundation. Use a shovel to dig a hole that's deep enough to accommodate the foundation and provide stability for the pillar.
-
Level the Ground: After excavation, use a level to ensure that the ground is flat and even. This will prevent any uneven settling of the pillar over time.
-
Add Gravel: To enhance drainage and stability, add a layer of gravel to the bottom of the excavated area. The gravel will provide a solid base for the foundation and prevent water from accumulating around the pillar.
-
Build the Concrete Base: Mix concrete according to the manufacturer's instructions and pour it into the excavated area. Use a trowel to level the concrete and ensure that it reaches the desired thickness for the foundation.
-
Insert Rebar: For added strength, insert rebar into the wet concrete. The rebar will reinforce the foundation and provide extra support for the weight of the stone pillar.
-
Allow for Curing: Once the concrete is in place, allow it to cure for the recommended time as per the concrete manufacturer's instructions. This will ensure that the foundation is solid and ready to support the weight of the stone pillar.
By taking the time to properly prepare the foundation, you'll create a stable base for your stone pillar, ensuring its longevity and structural integrity.
Laying the Base Course
Laying the base course is a critical step in building a stone pillar, as it sets the foundation for the rest of the structure. Here's a detailed guide on how to lay the base course for your stone pillar:
-
Prepare the Mortar: Start by preparing the mortar mix. Use a blend of masonry cement, sand, and water to create a workable mortar. The consistency should be thick enough to hold the stones in place but not too dry that it becomes difficult to work with.
-
Moisten the Stones: Before laying the stones, moisten them with water. This helps the mortar adhere better and prevents the stones from absorbing moisture from the mortar too quickly, which can weaken the bond.
-
Lay the First Stone: Apply a generous amount of mortar to the foundation where the first stone will be placed. Press the stone firmly into the mortar, ensuring it is level and plumb. Use a level to check for both horizontal and vertical alignment.
-
Add Subsequent Stones: Once the first stone is in place, continue adding mortar and laying the subsequent stones. Be mindful of the joint width between the stones, aiming for consistent spacing throughout the base course.
-
Cut Stones as Needed: If necessary, use a masonry saw or chisel to cut stones to fit the desired shape and size. Ensure that the cut stones fit snugly against the neighboring stones, maintaining a uniform and stable base.
-
Check for Stability: Periodically check the stability of the laid stones. Tap each stone gently with a rubber mallet to ensure it is securely set in the mortar and does not wobble.
-
Clean Excess Mortar: As you work, be sure to clean off any excess mortar that squeezes out between the stones. A trowel or pointing tool can be used to neatly shape the mortar joints.
-
Allow for Setting: Once the base course is laid, allow the mortar to set for the recommended time, typically 24 to 48 hours, before proceeding to build the upper courses of the stone pillar.
By following these steps, you'll establish a solid and level base course for your stone pillar, setting the stage for the vertical construction of the pillar.
Building the Pillar
Now that the foundation and base course are in place, it's time to build the body of the stone pillar. This phase involves stacking the stones vertically to achieve the desired height and shape. Here's a comprehensive guide on how to build the pillar of your stone structure:
-
Select and Prepare Stones: Begin by selecting stones that are suitable for the vertical construction of the pillar. Ensure that the stones are of the appropriate size, shape, and texture to create a visually appealing and structurally sound pillar. As with the base course, moisten the stones before laying them to promote better mortar adhesion.
-
Apply Mortar and Stack Stones: Using the prepared mortar mix, apply a layer of mortar to the top surface of the base course. Carefully place the first stone on the mortar, pressing it firmly into place. Continue stacking the stones one by one, applying mortar between each layer to bond the stones together. Be mindful of maintaining plumb and level as you build upwards.
-
Create Staggered Joints: To enhance the stability and visual appeal of the pillar, stagger the vertical joints between the stones. This involves ensuring that the vertical seams between adjacent stones do not align, creating a stronger and more aesthetically pleasing structure.
-
Insert Rebar for Reinforcement: For added structural integrity, consider inserting vertical rebar rods into the pillar as you build. This reinforcement can provide extra support and stability, especially for taller pillars or those located in areas prone to environmental stressors.
-
Check Alignment and Stability: Throughout the stacking process, use a level to check for both vertical alignment and overall stability. Adjust the position of the stones as needed to maintain a straight and secure pillar.
-
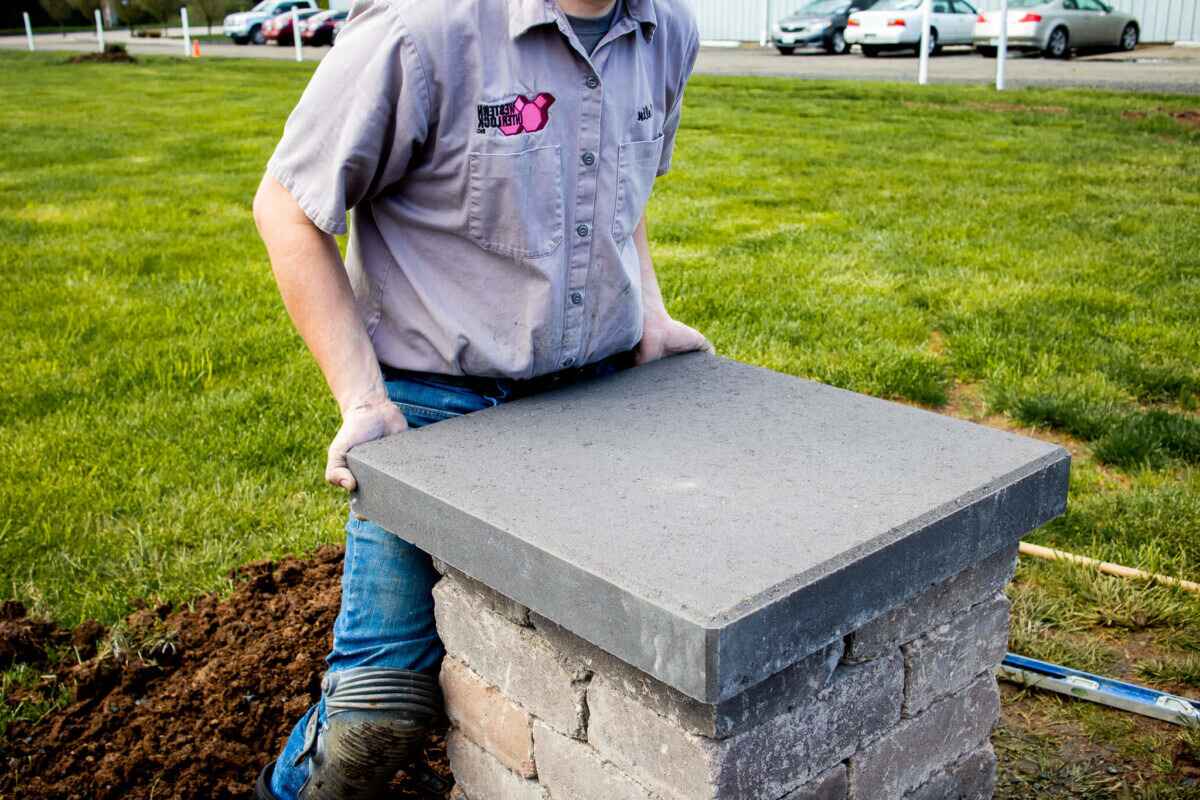
Cap the Pillar: Once the desired height is reached, cap the top of the pillar with a large, flat stone that serves as the pillar's "capstone." This final stone should be securely set in place with mortar, providing a finished look to the pillar while adding further stability.
-
Allow for Curing: After the pillar is built, allow the mortar to cure for the recommended time, typically 24 to 48 hours. This curing period is essential for the mortar to achieve its maximum strength and ensure the stability of the entire pillar structure.
By following these steps, you can successfully build the body of your stone pillar, creating a visually striking and durable feature that enhances the aesthetic appeal of your home's exterior.
Finishing Touches
After the construction of the stone pillar, attention to the finishing touches is essential to enhance its overall appearance and ensure its long-term durability. Here's a detailed look at the crucial steps involved in adding the finishing touches to your stone pillar:
-
Pointing the Joints: Once the mortar has set, inspect the joints between the stones. Use a pointing tool to fill any gaps or voids in the mortar joints, ensuring a clean and uniform appearance. Properly pointed joints not only improve the aesthetic appeal of the pillar but also contribute to its structural integrity by preventing water infiltration and minimizing the risk of mortar erosion.
-
Surface Treatment: Depending on the type of stone used, consider applying a surface treatment to protect the pillar from environmental elements and enhance its visual appeal. For natural stones, a sealant can be applied to protect against moisture penetration and staining, while manufactured stones may benefit from a protective coating to maintain their color and texture over time.
-
Cleaning and Sealing: After the mortar has fully cured, clean the entire surface of the pillar to remove any residual mortar, dirt, or debris. Use a stiff brush and water to gently scrub the stones and mortar joints, restoring the natural beauty of the stone. Once clean, consider applying a breathable sealer to the pillar to further protect it from the effects of weathering and aging.
-
Landscaping and Lighting: To complement the newly constructed stone pillar, consider landscaping around its base to create an inviting and cohesive outdoor space. Planting shrubs, flowers, or ornamental grasses can soften the transition between the pillar and the surrounding landscape. Additionally, strategic lighting can be installed to highlight the pillar's architectural features and create a captivating nighttime ambiance.
-
Customization and Personalization: For a truly unique touch, consider adding custom elements to the pillar, such as engraved plaques, decorative metal accents, or mosaic tile insets. These personalized touches can infuse the pillar with character and reflect your individual style, making it a standout feature of your home's exterior.
-
Regular Maintenance: Finally, establish a routine maintenance plan to ensure the longevity of your stone pillar. Periodically inspect the pillar for any signs of damage, erosion, or discoloration, and address any issues promptly. Regular cleaning, resealing, and minor repairs will help preserve the pillar's beauty and structural integrity for years to come.
By attending to these finishing touches, you can elevate the visual impact of your stone pillar and safeguard its resilience against the elements, ensuring that it remains a timeless and captivating addition to your home's exterior.
Conclusion
In conclusion, building a stone pillar is a rewarding endeavor that can add a touch of elegance and charm to your home's exterior. By carefully selecting the right stone, preparing a solid foundation, laying the base course, constructing the pillar, and adding the finishing touches, you can create a visually striking and durable structure that enhances the overall aesthetic of your property. Whether you opt for the timeless appeal of natural stone or the versatility of manufactured stone, the process of building a stone pillar requires attention to detail, patience, and a commitment to quality craftsmanship. With proper planning and execution, your stone pillar can become a standout feature that not only beautifies your home but also stands the test of time. So, roll up your sleeves, gather your materials, and embark on the journey of creating a stunning stone pillar that will be admired for years to come.