
Home>Create & Decorate>DIY & Crafts>How To Build A Murphy Bed Without A Kit
DIY & Crafts
How To Build A Murphy Bed Without A Kit
Published: April 24, 2024

Senior Editor in Create & Decorate, Kathryn combines traditional craftsmanship with contemporary trends. Her background in textile design and commitment to sustainable crafts inspire both content and community.
Learn how to create a DIY Murphy bed without a kit. Discover step-by-step instructions for building your own space-saving furniture. Ideal for DIY & Crafts enthusiasts.
(Many of the links in this article redirect to a specific reviewed product. Your purchase of these products through affiliate links helps to generate commission for Twigandthistle.com, at no extra cost. Learn more)
Introduction
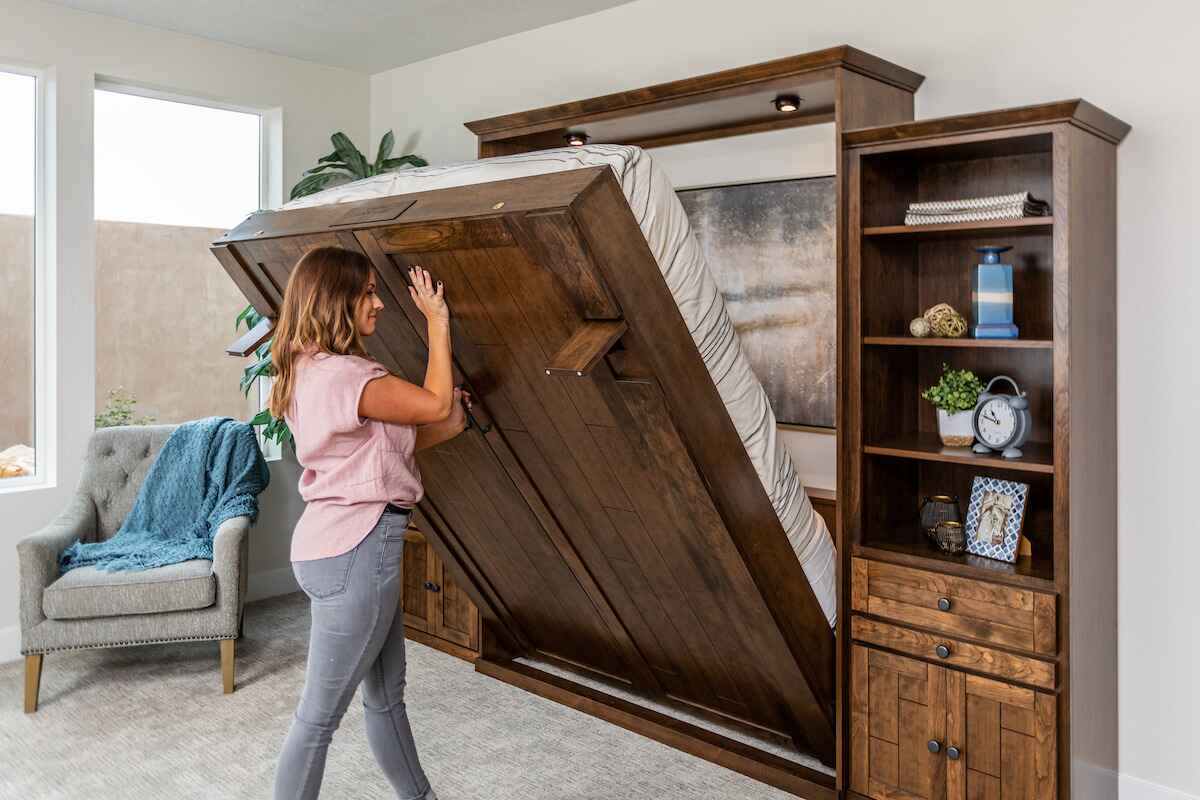
So, you want to create more space in your home without sacrificing comfort? Building a Murphy bed without a kit is a fantastic way to achieve this! Whether you have a small apartment, a guest room, or a home office, a Murphy bed can be the perfect solution to maximize your space. In this article, we'll guide you through the process of building your own Murphy bed without the need for a kit. With the right tools, materials, and a bit of DIY spirit, you can have a functional and stylish Murphy bed that seamlessly blends into your living space. Let's get started!
Materials Needed
To build a Murphy bed without a kit, you'll need the following materials:
- Plywood: This will be used for the bed frame and the cabinet that houses the bed when it's not in use. Make sure to choose a high-quality plywood that is sturdy and durable.
- Lumber: You'll need lumber for the support frame of the bed. Opt for strong and straight pieces of lumber that can bear the weight of the mattress and provide stability.
- Mattress: Choose a comfortable mattress that fits the dimensions of your Murphy bed frame. Consider a thinner mattress to ensure it fits properly when the bed is in the upright position.
- Hinges and Hardware: Select sturdy hinges that can handle the weight of the bed. Additionally, you'll need screws, bolts, and other hardware to assemble the bed and attach it to the wall.
- Wood Glue: This will be used to reinforce the joints and ensure the bed frame is sturdy and secure.
- Wood Stain or Paint: To add a finishing touch to your Murphy bed, consider using wood stain or paint to match the bed to your existing decor.
- Tools: You'll need a variety of tools including a saw, drill, screwdriver, measuring tape, and a level to complete the construction of your Murphy bed.
Gathering these materials will set you up for success as you embark on building your own Murphy bed without a kit.
Step 1: Measure and Cut the Wood
The first step in building a Murphy bed without a kit is to measure and cut the wood for the bed frame and cabinet. Start by measuring the dimensions of your mattress to determine the size of the bed frame. Use a pencil and measuring tape to mark the plywood and lumber according to your measurements. Ensure precise and accurate cuts to guarantee a snug fit for the mattress and a sturdy frame for the bed.
Once you have marked the wood, carefully use a saw to make the cuts. If you're using plywood for the bed frame and cabinet, consider using a circular saw or a table saw for straight and clean cuts. For the lumber, a miter saw or a hand saw can be used to achieve the desired lengths. Take your time with the cutting process to avoid errors and ensure that each piece of wood is cut to the correct dimensions.
After cutting the wood for the bed frame and cabinet, double-check the measurements and make any necessary adjustments. Precision in this step is crucial to the overall stability and functionality of your Murphy bed. With the wood cut to the appropriate sizes, you're ready to move on to the next step in the construction process.
Step 2: Assemble the Frame
With the wood cut to the correct dimensions, it's time to assemble the frame of your Murphy bed. Begin by laying out the pieces of the bed frame and cabinet in the designated assembly area. Use wood glue and screws to join the pieces together, ensuring that the joints are secure and stable. Pay close attention to the alignment of the frame to guarantee that the mattress will fit perfectly once the bed is complete.
As you assemble the frame, refer to the measurements and markings made during the cutting process to maintain accuracy. Use a level to ensure that the frame is even and well-balanced, which is essential for the proper functioning of the Murphy bed. Additionally, consider reinforcing the corners and joints with L-brackets for added strength and durability.
Once the bed frame is fully assembled, test it to ensure that it can support the weight of the mattress and provide a sturdy foundation for the bed. Making any necessary adjustments at this stage will save you time and effort in the long run. With the frame securely assembled, you're ready to move on to the next step in constructing your DIY Murphy bed.
Step 3: Install the Hardware
Installing the hardware is a crucial step in building a Murphy bed without a kit. Begin by attaching the hinges to the bed frame and the cabinet, ensuring that they are positioned to allow the bed to pivot smoothly. Use a drill to create pilot holes for the screws, then secure the hinges in place using the provided hardware. It's essential to use heavy-duty hinges that can support the weight of the bed and withstand frequent use.
Next, install the mechanism that will allow the bed to be raised and lowered securely. This may involve attaching springs or a piston lift mechanism to the bed frame and the cabinet. Follow the manufacturer's instructions carefully to ensure that the mechanism is installed correctly and functions smoothly. Testing the mechanism before proceeding further can help identify any issues that need to be addressed.
Once the hinges and lifting mechanism are in place, attach any additional hardware required to secure the bed in the upright position. This may include latches or straps that prevent the bed from accidentally lowering when it's not in use. Ensuring that the hardware is installed correctly and functions as intended is essential for the safety and convenience of the Murphy bed.
After installing the hardware, carefully test the bed to ensure that it can be raised and lowered smoothly and securely. Make any necessary adjustments to the hardware to guarantee that the bed operates as intended. With the hardware properly installed, you're one step closer to completing your DIY Murphy bed project.
Step 4: Attach the Bed to the Wall
Attaching the bed to the wall is a critical step in the construction of a Murphy bed. Begin by positioning the bed frame and cabinet against the wall in the desired location. Use a level to ensure that the bed is perfectly horizontal and aligned with the surrounding space. Once the bed is in the correct position, mark the locations for the mounting hardware on the wall.
Next, use a stud finder to locate the wall studs where the bed will be attached. It's essential to secure the bed to the wall studs to ensure that it can support the weight of the mattress and provide a safe sleeping environment. Once the studs are located, drill pilot holes into the studs at the marked locations.
After drilling the pilot holes, use lag bolts or heavy-duty screws to secure the bed frame and cabinet to the wall. Make sure to use hardware that is appropriate for the type of wall material and can bear the weight of the bed. It's crucial to fasten the bed securely to the wall to prevent any accidents or instability.
Once the bed is attached to the wall, test it to ensure that it is firmly in place and can be raised and lowered without any issues. Checking the stability of the bed at this stage is essential for the safety and functionality of the Murphy bed. Making any necessary adjustments to the mounting hardware will help ensure that the bed is securely attached to the wall.
With the bed successfully attached to the wall, you're one step closer to completing your DIY Murphy bed project. The secure attachment of the bed is essential for its safe and reliable operation, providing you with a functional and space-saving sleeping solution.
Step 5: Add Finishing Touches
Adding finishing touches to your DIY Murphy bed is the final step in completing your project and ensuring that it seamlessly integrates into your living space. One of the essential finishing touches is applying wood stain or paint to the bed frame and cabinet. Choose a finish that complements your existing decor and enhances the overall aesthetic appeal of the Murphy bed. Applying a protective coat of varnish or polyurethane can also help preserve the wood and ensure its longevity.
Consider adding decorative elements such as molding or trim to the cabinet to give it a polished and refined look. This can elevate the appearance of the Murphy bed and make it appear as a stylish piece of furniture when not in use. Additionally, adding a decorative handle or pull to the cabinet door can enhance its functionality and visual appeal.
To complete the look of your Murphy bed, consider adding a decorative headboard or integrating built-in lighting. A headboard can provide a finished look to the bed and create a cozy sleeping environment. Built-in lighting can serve a dual purpose by illuminating the area around the bed and adding a touch of ambiance to the space.
Once the finishing touches are in place, thoroughly inspect the Murphy bed to ensure that all components are secure and functioning correctly. Test the bed by raising and lowering it several times to verify that the hardware and mechanisms operate smoothly. Making any final adjustments at this stage will ensure that your DIY Murphy bed is not only functional but also visually appealing.
With the finishing touches added, your DIY Murphy bed is now ready to be enjoyed and admired. Whether it's for accommodating guests, creating a multifunctional space, or simply maximizing your living area, your custom-built Murphy bed is a testament to your creativity and craftsmanship. Now, sit back, relax, and enjoy the extra space and versatility that your new Murphy bed brings to your home.
Conclusion
In conclusion, building a Murphy bed without a kit is a rewarding and practical DIY project that can transform your living space. By following the steps outlined in this guide and utilizing the right materials and tools, you can create a custom Murphy bed that meets your specific needs and complements your home decor. From measuring and cutting the wood to installing the hardware and adding finishing touches, each step contributes to the construction of a functional and stylish space-saving solution.
With your DIY Murphy bed in place, you can enjoy the versatility of a comfortable sleeping area that seamlessly tucks away when not in use, providing you with valuable space for other activities. Whether you're looking to optimize a small apartment, create a guest room, or enhance a home office, a Murphy bed offers a practical and elegant solution.
By taking on the challenge of building a Murphy bed without a kit, you've not only expanded your DIY skills but also personalized your living space with a unique and functional piece of furniture. Embrace the satisfaction of a job well done and the joy of maximizing your space with a custom-built Murphy bed.