
Home>Create & Decorate>DIY & Crafts>How To Make A Raised Garden Bed
DIY & Crafts
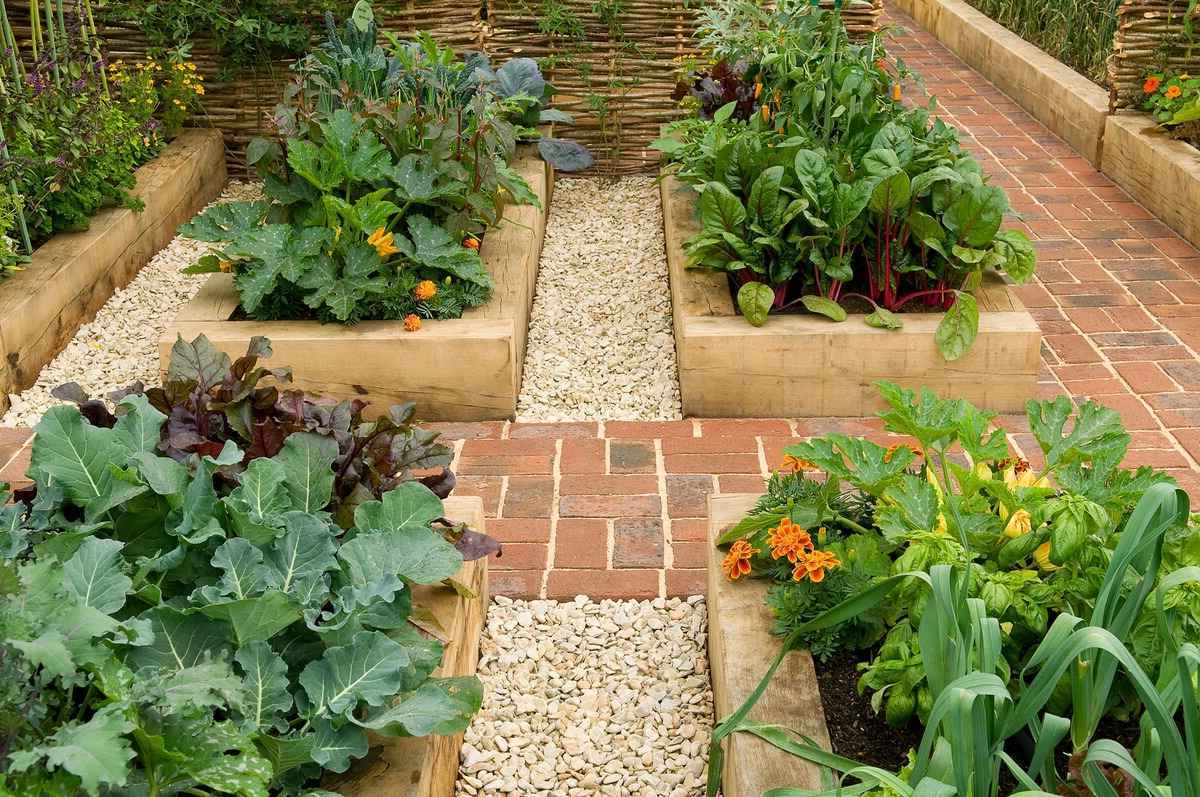
How To Make A Raised Garden Bed
Published: February 24, 2024

Senior Editor in Create & Decorate, Kathryn combines traditional craftsmanship with contemporary trends. Her background in textile design and commitment to sustainable crafts inspire both content and community.
Learn how to create a DIY raised garden bed with our easy step-by-step guide. Perfect for your gardening and crafting needs.
(Many of the links in this article redirect to a specific reviewed product. Your purchase of these products through affiliate links helps to generate commission for Twigandthistle.com, at no extra cost. Learn more)
Introduction
Creating a raised garden bed is an excellent way to bring life and vibrancy to your outdoor space. Whether you're a seasoned gardener or a novice with a green thumb, building a raised garden bed can be a fulfilling and rewarding DIY project. This elevated gardening method offers numerous benefits, including better soil quality, improved drainage, and easier access for planting, weeding, and harvesting.
By constructing a raised garden bed, you can customize the size, shape, and depth to suit your specific gardening needs. This allows for greater control over the soil composition, making it possible to grow a wide variety of plants, flowers, herbs, and vegetables. Additionally, the raised design provides a barrier against pests and minimizes the risk of soil compaction, ultimately contributing to healthier and more abundant yields.
Whether you have limited space or poor soil quality in your yard, a raised garden bed offers a practical solution. It's a versatile option for urban dwellers, suburban homeowners, and anyone seeking to optimize their gardening experience. With the right materials, a bit of creativity, and a willingness to get your hands dirty, you can embark on this enriching journey of building and nurturing your own raised garden bed.
In the following sections, we'll delve into the step-by-step process of creating a raised garden bed, from selecting the ideal location to filling it with nutrient-rich soil and planting your favorite flora. Let's roll up our sleeves and explore the art of constructing a raised garden bed that will not only enhance the aesthetics of your outdoor space but also provide a bountiful harvest and a sense of accomplishment.
Materials Needed
To embark on the journey of creating a raised garden bed, you'll need a selection of essential materials to bring your vision to life. Here's a comprehensive list of items required for this fulfilling DIY project:
Lumber:
Select high-quality, untreated lumber to construct the frame of your raised garden bed. Cedar and redwood are popular choices due to their natural resistance to rot and insects. The dimensions of the lumber will depend on the size and design of your desired garden bed. Be sure to choose boards that are at least 6 inches wide and 1 to 2 inches thick for sturdiness.
Screws or Nails:
Opt for corrosion-resistant screws or nails to assemble the lumber securely. Stainless steel or galvanized screws are ideal for outdoor use, as they can withstand exposure to moisture without rusting.
Level:
A level is essential for ensuring that the frame of your raised garden bed is even and balanced. This tool will help you achieve a professional and visually appealing result.
Weed Barrier:
To prevent weeds from infiltrating your garden bed, a weed barrier fabric or landscape fabric is necessary. This material will also aid in maintaining the integrity of the soil and promoting optimal drainage.
Soil:
Invest in high-quality soil to fill your raised garden bed. A blend of topsoil, compost, and other organic matter will provide the essential nutrients and structure for healthy plant growth. Consider the specific needs of the plants you intend to cultivate when selecting the soil components.
Shovel or Garden Trowel:
A sturdy shovel or garden trowel will be indispensable for filling the raised garden bed with soil and maneuvering it into place. These tools will facilitate the process of creating an optimal environment for your plants.
Optional: Irrigation System:
Depending on your preferences and the size of your garden bed, you may choose to incorporate an irrigation system, such as a soaker hose or drip irrigation, to ensure consistent and efficient watering.
Optional: Protective Finish:
If you desire a decorative finish for your raised garden bed, consider using a non-toxic wood stain or sealant to enhance its visual appeal and protect the lumber from the elements.
By gathering these essential materials, you'll be well-equipped to commence the construction of your raised garden bed and set the stage for a flourishing and vibrant garden space.
Choosing a Location
Selecting the ideal location for your raised garden bed is a crucial step that significantly influences the success of your gardening endeavors. When choosing a spot for your garden bed, consider the following factors to ensure optimal growing conditions for your plants.
Sunlight Exposure
Identify an area in your yard that receives ample sunlight throughout the day. Most plants thrive in full sun, which typically translates to at least 6 to 8 hours of direct sunlight. Take note of any potential obstructions, such as trees or buildings, that may cast shadows and obstruct sunlight. By maximizing sun exposure, you'll provide your plants with the energy they need to undergo photosynthesis and flourish.
Accessibility
Opt for a location that is easily accessible for planting, watering, and harvesting. Consider the convenience of tending to your garden bed and ensure that it's within reach of your gardening tools and water source. Accessibility is especially important if you have physical limitations or mobility concerns, as it allows for a more enjoyable and manageable gardening experience.
Soil Drainage
Assess the natural drainage patterns of the area you're considering for your raised garden bed. Avoid low-lying areas that are prone to water accumulation, as excess moisture can lead to root rot and other detrimental issues for your plants. Look for a well-draining site that allows excess water to flow away from the garden bed, promoting a healthy root environment.
Proximity to Water Source
Choose a location that is in close proximity to a water source, such as a garden hose or outdoor faucet. This proximity will simplify the task of watering your plants and ensure that they receive consistent moisture, which is essential for their growth and vitality. Additionally, easy access to water will streamline the maintenance of your garden bed, fostering a thriving and resilient plant ecosystem.
Aesthetic Considerations
Consider the visual impact of your raised garden bed within the overall landscape of your yard. Aim to integrate the garden bed seamlessly into the surroundings, taking into account the existing design elements and aesthetic appeal of your outdoor space. By harmonizing the garden bed with its environment, you can create a cohesive and visually pleasing focal point in your yard.
By carefully evaluating these factors, you can pinpoint the perfect location for your raised garden bed, setting the stage for a flourishing and productive gardening experience. Once you've identified the optimal spot, you'll be ready to embark on the construction phase and bring your garden bed to life.
Building the Frame
Constructing the frame of your raised garden bed is a pivotal step that lays the foundation for a sturdy and functional structure. Follow these detailed steps to ensure that your garden bed frame is built with precision and durability.
Step 1: Measure and Cut the Lumber
Begin by measuring and cutting the lumber to the desired dimensions for your garden bed. Whether you opt for a traditional rectangular shape or a more unconventional design, such as a hexagon or L-shaped bed, precise measurements are essential. Use a tape measure and a pencil to mark the lumber accurately before cutting, ensuring uniformity and symmetry in the frame assembly.
Step 2: Assemble the Frame
Lay out the cut lumber pieces in the designated location for your garden bed. Position the boards to form the outline of the frame, ensuring that the corners align perfectly. Use corrosion-resistant screws or nails to secure the boards at the joints, creating a robust and stable frame. A level can be employed to confirm that the frame is even and plumb, guaranteeing a professional and visually appealing result.
Step 3: Reinforce the Corners
To enhance the structural integrity of the frame, consider reinforcing the corners with metal brackets or additional lumber pieces. This reinforcement will fortify the joints and prevent the frame from shifting or becoming misshapen over time. By implementing this extra measure, you can ensure that your garden bed frame withstands the test of time and maintains its form under the weight of the soil and plants.
Step 4: Install the Weed Barrier
Once the frame is securely assembled, lay a weed barrier fabric or landscape fabric inside the bed to inhibit weed growth and preserve the quality of the soil. Trim the fabric to fit the dimensions of the bed, ensuring complete coverage. This protective layer will serve as a barrier against invasive weeds, allowing your plants to thrive without competition from unwanted vegetation.
Step 5: Optional: Apply a Protective Finish
If you desire a decorative touch or additional protection for the lumber, consider applying a non-toxic wood stain or sealant to the exterior of the frame. This optional step can enhance the visual appeal of your garden bed while safeguarding the wood from moisture, UV exposure, and general wear and tear. Select a finish that complements your outdoor aesthetic and aligns with your preferences for the overall appearance of the garden bed.
By meticulously following these steps, you can construct a robust and visually appealing frame for your raised garden bed. With the frame in place, you're ready to proceed to the next phase of filling the bed with nutrient-rich soil, laying the groundwork for a thriving and abundant garden space.
Filling the Bed
With the sturdy frame of your raised garden bed in place, the next crucial step is to fill it with the appropriate soil mixture to create an optimal growing environment for your plants. The process of filling the bed involves layering and blending various components to establish a nutrient-rich and well-structured foundation for your garden. Here's a detailed guide on how to effectively fill your raised garden bed:
Step 1: Layering the Base
Begin by layering the bottom of the garden bed with a combination of organic materials to promote healthy root development and optimal drainage. Start with a layer of coarse materials, such as small rocks or gravel, to facilitate drainage and prevent waterlogging. This base layer serves as a safeguard against water accumulation, ensuring that excess moisture can freely drain away from the root zone.
Step 2: Adding Nutrient-Rich Soil
Once the base layer is in place, proceed to fill the majority of the bed with a high-quality soil mixture. A blend of topsoil, compost, and organic matter will provide the essential nutrients, structure, and microbial activity necessary for robust plant growth. Aim for a well-balanced soil composition that offers a blend of nutrients, good drainage, and moisture retention, creating an ideal habitat for your plants' roots.
Step 3: Mixing and Leveling
After adding the soil mixture, use a garden rake or shovel to thoroughly mix and level the soil within the bed. This process ensures that the components are evenly distributed, creating a uniform growing medium for your plants. Pay attention to achieving a level surface, as this will facilitate consistent moisture distribution and promote healthy root establishment across the entire bed.
Step 4: Optional Amendments
Depending on the specific needs of the plants you intend to cultivate, you may consider incorporating additional soil amendments to tailor the growing environment. This could include organic fertilizers, lime, or specific soil conditioners to adjust pH levels and enhance the soil's fertility. By customizing the soil composition to suit the requirements of your plants, you can create an optimized and nurturing habitat for their growth.
Step 5: Final Bed Preparation
Before proceeding to plant your desired flora, take a moment to assess the soil level and texture within the bed. Make any necessary adjustments to ensure that the soil is uniformly distributed and adequately prepared for planting. Smooth out the surface and remove any debris or large clumps to create a clean and inviting canvas for your garden.
By meticulously following these steps, you can effectively fill your raised garden bed with a nutrient-rich and well-structured soil mixture, laying the groundwork for a thriving and bountiful garden space. With the bed filled and prepared, you're now ready to embark on the exciting phase of planting and nurturing a diverse array of plants within your elevated garden oasis.
Planting and Maintaining the Garden Bed
Once your raised garden bed is filled with nutrient-rich soil, it's time to embark on the fulfilling journey of planting and maintaining a diverse array of flora. This phase marks the transition from construction to cultivation, as you bring life and vibrancy to your elevated garden oasis. Here's a comprehensive guide on how to effectively plant and maintain your garden bed, nurturing a thriving and bountiful ecosystem.
Selecting Plants
Begin by carefully selecting the plants, flowers, herbs, or vegetables that align with your gardening goals and preferences. Consider factors such as sunlight requirements, mature plant size, and compatibility with neighboring species. Opt for a diverse mix of flora to create a visually appealing and ecologically balanced garden bed. Whether you're cultivating vibrant blooms, aromatic herbs, or nutritious vegetables, the selection process sets the stage for a harmonious and flourishing plant community.
Planting Techniques
When planting in a raised garden bed, it's essential to space and arrange the plants thoughtfully to optimize their growth and overall aesthetic appeal. Follow recommended spacing guidelines for each plant species, ensuring that they have ample room to thrive and access essential resources. Employ proper planting techniques, such as digging appropriately sized holes, gently loosening root balls, and backfilling with soil to secure the plants in place. By planting with care and precision, you set the foundation for healthy and resilient growth.
Watering and Maintenance
Consistent and adequate watering is crucial for the well-being of your garden bed. Monitor the moisture levels regularly and adjust your watering schedule based on environmental conditions and plant needs. Consider implementing an irrigation system, such as a soaker hose or drip irrigation, to ensure efficient and targeted watering. Additionally, practice vigilant weed control, removing any unwanted vegetation that may compete with your plants for resources. Regularly inspect the garden bed for pests and diseases, addressing any issues promptly to safeguard the health of your plants.
Seasonal Care and Crop Rotation
As the seasons change, adapt your gardening practices to accommodate the evolving needs of your plants. Implement seasonal care routines, such as mulching to conserve moisture and regulate soil temperature, and providing support for climbing or sprawling plants. Embrace the concept of crop rotation to optimize soil health and minimize disease pressure, strategically rotating plant families within the garden bed from one season to the next. By embracing seasonal care and crop rotation, you can foster a resilient and dynamic garden ecosystem.
Nurturing Growth and Harvesting
As your plants flourish within the raised garden bed, take joy in nurturing their growth and observing the beauty and bounty they bring to your outdoor space. Monitor their progress, provide support as needed, and celebrate the emergence of blooms, fruits, and foliage. When the time is right, savor the rewards of your labor by harvesting fresh herbs, vibrant flowers, and homegrown produce. Embrace the gratifying experience of cultivating and enjoying the fruits of your gardening efforts, fostering a deeper connection to nature and the cycle of growth.
By embracing these planting and maintenance practices, you can cultivate a thriving and vibrant garden bed within your outdoor space. With attentive care and a nurturing touch, your raised garden bed will evolve into a flourishing sanctuary, enriching your surroundings and providing a source of joy and inspiration. As you tend to your garden bed, relish the opportunity to connect with nature, cultivate beauty, and reap the rewards of a bountiful and sustainable garden ecosystem.
Conclusion
In conclusion, the journey of creating and nurturing a raised garden bed is a deeply rewarding and enriching experience that transcends the realm of gardening. From the initial stages of construction to the ongoing care and cultivation of a vibrant plant community, the process embodies a profound connection to nature, creativity, and the cycle of growth. As we reflect on the comprehensive steps involved in building and maintaining a raised garden bed, it becomes evident that this endeavor offers a multitude of benefits and opportunities for personal fulfillment.
The act of constructing a raised garden bed is not merely a practical undertaking but a creative expression of shaping and defining an outdoor space. It allows individuals to exercise their ingenuity and craftsmanship, customizing the design and layout to reflect their unique vision. The selection of materials, the precision of assembly, and the attention to detail in creating the frame all contribute to a sense of accomplishment and pride in bringing this project to fruition.
Furthermore, the act of filling the garden bed with nutrient-rich soil and planting a diverse array of flora represents a harmonious collaboration with the natural world. It is a testament to our role as stewards of the environment, fostering a thriving ecosystem within a confined space. The careful selection of plants, the nurturing of their growth, and the joy of witnessing their blossoming and fruiting all serve to deepen our appreciation for the interconnectedness of life and the beauty of the natural world.
As we tend to our raised garden beds, we are not merely cultivating plants but nurturing a sanctuary of tranquility and abundance. The act of maintaining the garden bed fosters a sense of mindfulness and attentiveness, as we observe the subtle changes in the plants, respond to their needs, and adapt our care practices to the evolving seasons. This ongoing engagement with the garden bed becomes a source of solace, inspiration, and a reminder of the resilience and beauty inherent in the cycle of life.
Ultimately, the journey of creating and nurturing a raised garden bed transcends the boundaries of a mere DIY project. It becomes a testament to our capacity for creativity, our reverence for nature, and our ability to cultivate beauty and abundance within our immediate surroundings. As we witness the transformation of a simple wooden frame into a flourishing garden oasis, we are reminded of the profound impact of our efforts and the enduring rewards of tending to a living, breathing ecosystem. In the embrace of a raised garden bed, we find not only a source of sustenance and beauty but a reflection of our innate connection to the natural world.