
Home>Outdoors & Camping>Landscaping>How To Build A Putting Green In Backyard
Landscaping
How To Build A Putting Green In Backyard
Published: March 7, 2024

Content Creator for Outdoors & Camping, Sophie turns any yard into a sustainable paradise. Her dedication to DIY outdoor projects and volunteer work in community gardens shares joy and knowledge.
Learn how to enhance your backyard with a custom putting green through expert landscaping tips and techniques. Create a stunning outdoor space for leisure and entertainment.
(Many of the links in this article redirect to a specific reviewed product. Your purchase of these products through affiliate links helps to generate commission for Twigandthistle.com, at no extra cost. Learn more)
Introduction
So, you want to bring the golf course to your own backyard? Building a putting green in your backyard can be a fun and rewarding project that will provide hours of entertainment for you, your family, and your friends. Whether you're a golf enthusiast or just looking for a unique addition to your outdoor space, creating your own putting green can be a great DIY project. In this guide, we'll take you through the step-by-step process of building a putting green in your backyard, from planning and design to adding the finishing touches. Let's get started!
Step 1: Planning and Design
Before you start digging up your backyard, it's essential to have a solid plan in place for your putting green. Here are some key factors to consider during the planning and design phase:
-
Determine the Size and Shape: Measure the available space in your backyard and decide on the size and shape of your putting green. Consider how much room you have and how it will fit into your existing landscape.
-
Select the Putting Green Surface: There are various options for putting green surfaces, including natural grass, synthetic turf, or modular putting green kits. Each option has its pros and cons, so choose the one that best suits your budget and maintenance preferences.
-
Consider the Slope and Contours: Think about the natural slope and contours of your backyard. A slight slope can add challenge and realism to your putting green, but it's essential to plan for proper drainage to prevent water buildup.
-
Evaluate Sunlight and Shade: Take note of the sunlight and shade patterns in your backyard. Most putting greens require ample sunlight for the grass to thrive, so choose a location that receives enough sun throughout the day.
-
Budget and Materials: Determine your budget for the project and research the materials needed for construction. Consider factors such as edging, drainage, and landscaping materials to create a professional-looking putting green.
By carefully planning and designing your putting green, you'll set the stage for a successful and enjoyable backyard project. Once you have a clear vision of your putting green, you can move on to the next step of choosing the right location.
Step 2: Choosing the Right Location
Selecting the perfect location for your backyard putting green is crucial to its overall success. Here are some essential considerations to keep in mind when choosing the right spot:
-
Sunlight Exposure: Opt for a location that receives ample sunlight throughout the day. Most putting green surfaces, whether natural grass or synthetic turf, require direct sunlight to thrive. Avoid areas with excessive shade, as this can hinder the growth and maintenance of the putting green.
-
Accessibility: Ensure that the chosen location is easily accessible from your home and other outdoor areas. You'll want to create a convenient pathway to the putting green, allowing for easy movement of equipment and providing a clear entry point for players.
-
Space and Layout: Consider the available space and layout of your backyard. The location should accommodate the desired size and shape of the putting green, leaving ample room for additional landscaping or seating areas around the perimeter.
-
Drainage: Assess the natural drainage patterns of the area. It's essential to choose a location with proper drainage to prevent water buildup on the putting green surface. Avoid low-lying areas that are prone to collecting water, as this can lead to maintenance issues and potential damage to the green.
-
Aesthetics: Take into account the overall aesthetics of your backyard. The putting green should complement the existing landscape and outdoor features. Consider how it will blend with the surrounding plants, trees, and hardscaping elements to create a cohesive and visually appealing outdoor space.
By carefully evaluating these factors, you can pinpoint the ideal location for your putting green, setting the stage for a successful and enjoyable backyard project. Once you've chosen the right location, you can move on to the next step of preparing the ground for the putting green installation.
Step 3: Preparing the Ground
Preparing the ground for your backyard putting green is a crucial step that sets the foundation for a smooth and durable installation. Here's a detailed breakdown of the ground preparation process:
-
Clear the Area: Begin by clearing the selected area of any existing vegetation, rocks, or debris. Use a shovel, rake, or sod cutter to remove the top layer of grass and create a clean, level surface for the putting green.
-
Excavation: Once the area is cleared, it's time to excavate the ground to the desired depth. Depending on the type of putting green surface you've chosen, the excavation depth may vary. For natural grass putting greens, you'll need to dig deeper to accommodate the root system and soil layers. In contrast, synthetic turf or modular putting green kits may require a shallower excavation.
-
Compact the Soil: After excavating the ground, use a soil compactor or hand tamper to compact the soil evenly. This step is essential for creating a stable and level base for the putting green surface. Pay close attention to any slopes or uneven areas, as proper compaction will ensure a smooth playing surface.
-
Install Edging: Once the soil is compacted, install edging around the perimeter of the putting green area. Edging serves multiple purposes, including defining the boundaries of the green, containing the putting surface materials, and providing a clean transition between the green and surrounding landscape.
-
Add Base Materials: Depending on the type of putting green surface you've chosen, you may need to add specific base materials to enhance performance and drainage. For natural grass greens, consider incorporating a layer of quality topsoil and sand to promote healthy turf growth and proper water drainage. Synthetic turf or modular putting green kits may require a base layer of compacted aggregate or specialized base panels.
-
Grade and Smooth the Surface: Use a grading rake or leveling tool to grade and smooth the surface of the prepared area. Pay attention to any low or high spots, and make necessary adjustments to achieve a uniform and level base for the putting green.
By following these detailed steps for preparing the ground, you'll ensure that your backyard putting green has a solid and stable foundation for the next phase of installation. Once the ground is properly prepared, you can move on to the exciting process of installing the putting green surface.
Step 4: Installing the Putting Green Surface
Now that the ground is prepared, it's time to move on to the exciting phase of installing the putting green surface. Whether you've opted for natural grass, synthetic turf, or a modular putting green kit, the installation process requires careful attention to detail and precision. Here's a comprehensive guide to installing the putting green surface:
-
Lay the Putting Green Material: If you've chosen natural grass, it's time to lay the sod or seed the area according to the specific requirements of the grass variety. Ensure that the soil is adequately prepared and that the grass is installed evenly to create a seamless and lush putting surface. For synthetic turf or modular putting green kits, carefully lay out the materials according to the manufacturer's instructions, ensuring proper alignment and fit.
-
Secure the Putting Green Surface: Once the putting green material is in place, secure it using appropriate fastening methods. For natural grass, ensure that the sod or seed is firmly pressed into the soil to establish strong root growth. Synthetic turf may require securing with adhesive or specialized turf fasteners, while modular putting green kits often feature interlocking panels or tiles for secure assembly.
-
Trim and Shape the Putting Green: After securing the putting green surface, trim and shape it to achieve the desired contours and edges. Use a sharp utility knife or specialized turf-cutting tools to create clean lines and smooth transitions. Pay attention to any seams or joins, ensuring that they are seamlessly integrated for a professional and polished look.
-
Infill and Compact (For Synthetic Turf): If you've opted for synthetic turf, the next step involves infilling the turf with specialized materials such as silica sand or rubber granules. This infill helps support the turf fibers, provides cushioning, and enhances the overall performance of the putting green. Once the infill is applied, use a power broom or brush to evenly distribute and compact the infill material into the turf fibers.
-
Water and Settle (For Natural Grass): If you've installed natural grass, it's essential to water the newly laid sod or seeded area thoroughly. Proper watering helps the grass establish strong roots and settle into the prepared soil. Follow recommended watering schedules and techniques to promote healthy growth and ensure the longevity of your natural grass putting green.
By following these detailed steps for installing the putting green surface, you'll bring your backyard project one step closer to completion. The next and final step involves adding the finishing touches to your newly installed putting green, transforming it into a functional and visually appealing outdoor feature.
Step 5: Adding the Finishing Touches
Once the putting green surface is installed, it's time to add the finishing touches that will elevate the overall look and functionality of your backyard putting green. Here's a detailed breakdown of the final steps to complete your project:
-
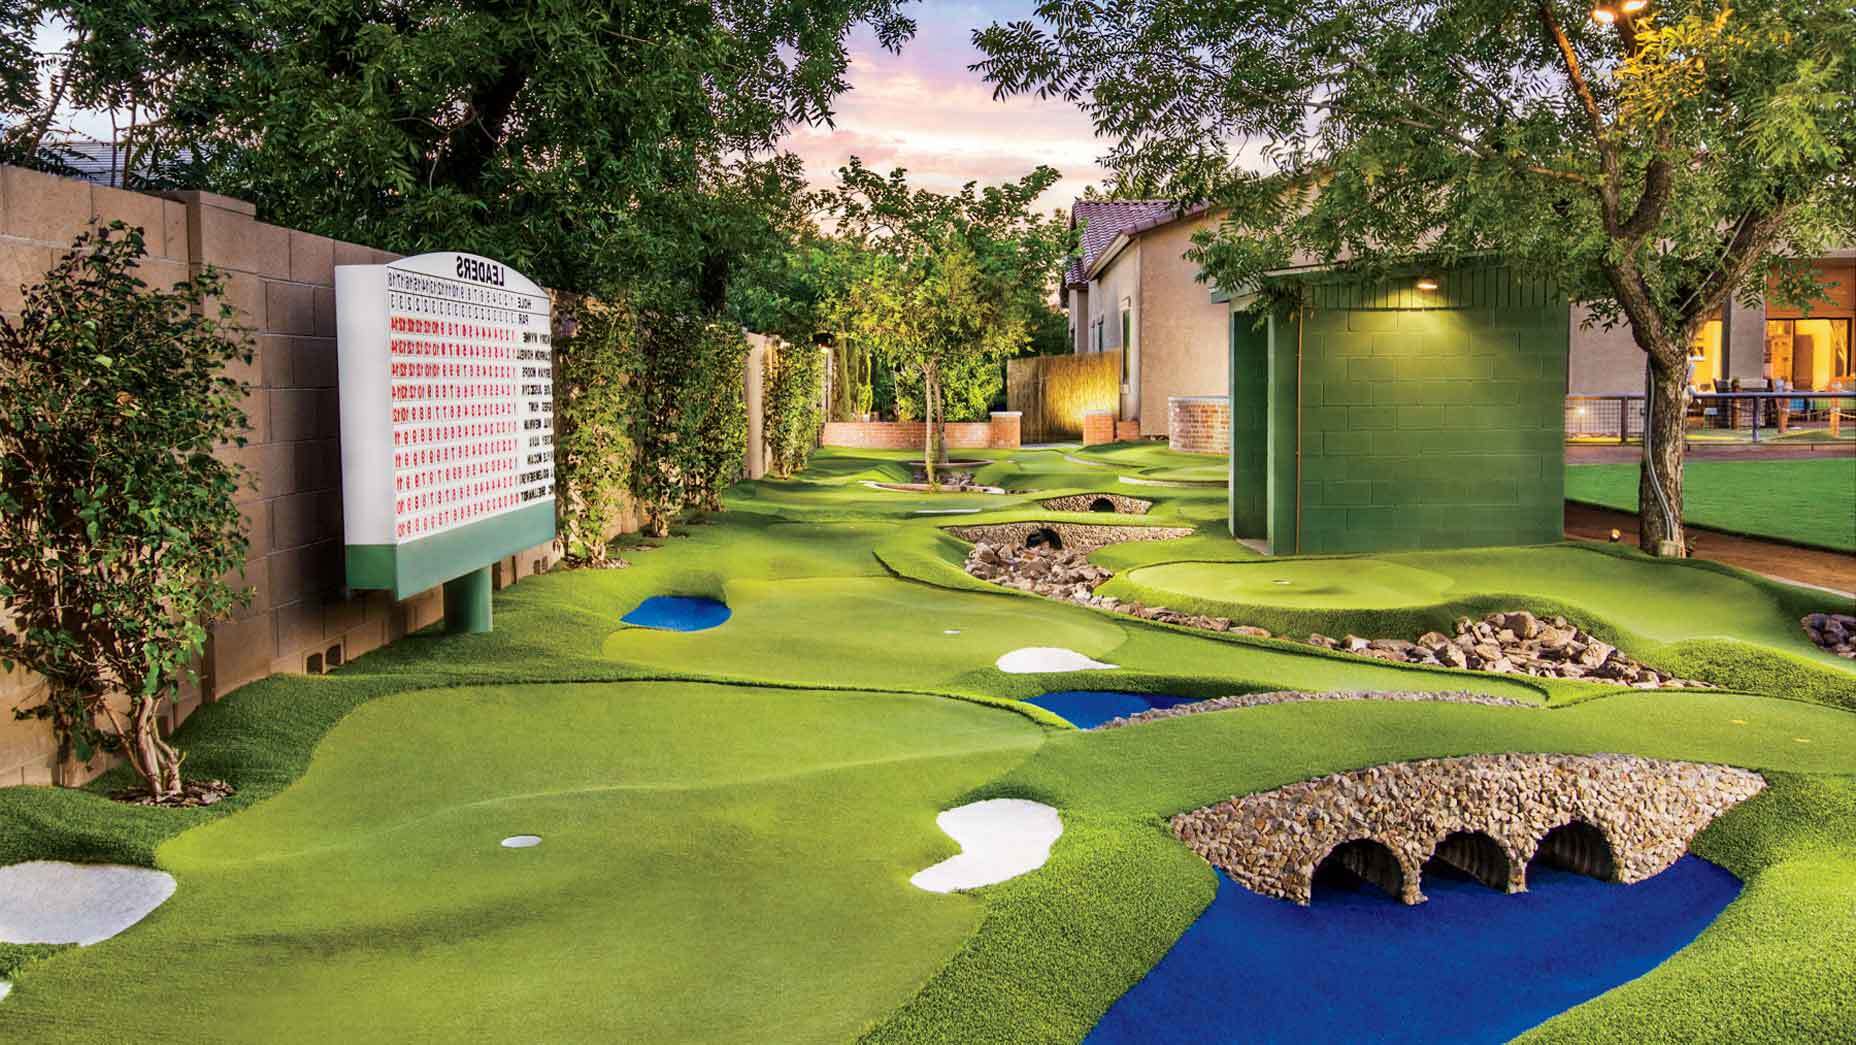
Create Putting Green Contours: Use landscaping materials such as rocks, bricks, or timber to create contours and borders around the putting green. These features not only enhance the visual appeal of the green but also serve practical purposes by defining the playing area and preventing errant balls from rolling into surrounding landscaping.
-
Install Flagsticks and Cups: Adding flagsticks and cups to your putting green provides an authentic golfing experience. Secure the flagsticks in designated holes on the green and place the cups at the desired locations. This step adds a professional touch and allows for realistic putting practice.
-
Incorporate Putting Green Accessories: Consider adding accessories such as ball washers, ball retrievers, and seating areas near the putting green. These accessories enhance the functionality and convenience of the space, creating a welcoming environment for players and spectators alike.
-
Landscaping and Surroundings: Enhance the overall aesthetics of your backyard putting green by incorporating landscaping elements around the perimeter. Planting shrubs, flowers, or ornamental grasses can soften the edges of the green and integrate it seamlessly into your backyard landscape.
-
Lighting for Nighttime Play: If you plan to use the putting green after dark, consider installing outdoor lighting to illuminate the area. LED landscape lights or solar-powered fixtures can create a captivating ambiance and extend the usability of the putting green into the evening hours.
-
Maintenance and Care: Develop a maintenance plan for your putting green to ensure its longevity and optimal performance. Regular mowing, watering, and grooming are essential for natural grass greens, while synthetic turf may require occasional brushing and debris removal.
By adding these finishing touches, you'll transform your backyard putting green into a functional, visually appealing, and enjoyable space for golf enthusiasts and outdoor enthusiasts alike. With careful planning and attention to detail, your DIY putting green project will become a standout feature of your home's outdoor landscape.
Conclusion
In conclusion, building a putting green in your backyard is a rewarding and enjoyable DIY project that can enhance your outdoor space and provide endless entertainment for golf enthusiasts. By carefully planning and designing the putting green, choosing the right location, preparing the ground, installing the putting green surface, and adding the finishing touches, you can create a professional-quality putting green that will be the envy of your friends and neighbors. Whether you opt for natural grass, synthetic turf, or a modular putting green kit, the key is to approach each step with attention to detail and precision. With proper maintenance and care, your backyard putting green will offer years of enjoyment and serve as a unique focal point for outdoor gatherings and friendly competitions. So, roll up your sleeves, grab your putter, and get ready to tee off in the comfort of your own backyard!