
Home>Home & Furniture>Bathroom>How To Build A Steam Room
Bathroom
How To Build A Steam Room
Published: March 7, 2024
Editor-in-Chief with a decade in home renovation and a passion for vintage furniture. Diane is known for her weekend treasure hunts at flea markets, enriching our content with unique style insights.
Learn how to create a luxurious steam room in your bathroom with our expert tips and ideas. Transform your space into a spa-like retreat today!
(Many of the links in this article redirect to a specific reviewed product. Your purchase of these products through affiliate links helps to generate commission for Twigandthistle.com, at no extra cost. Learn more)
Introduction
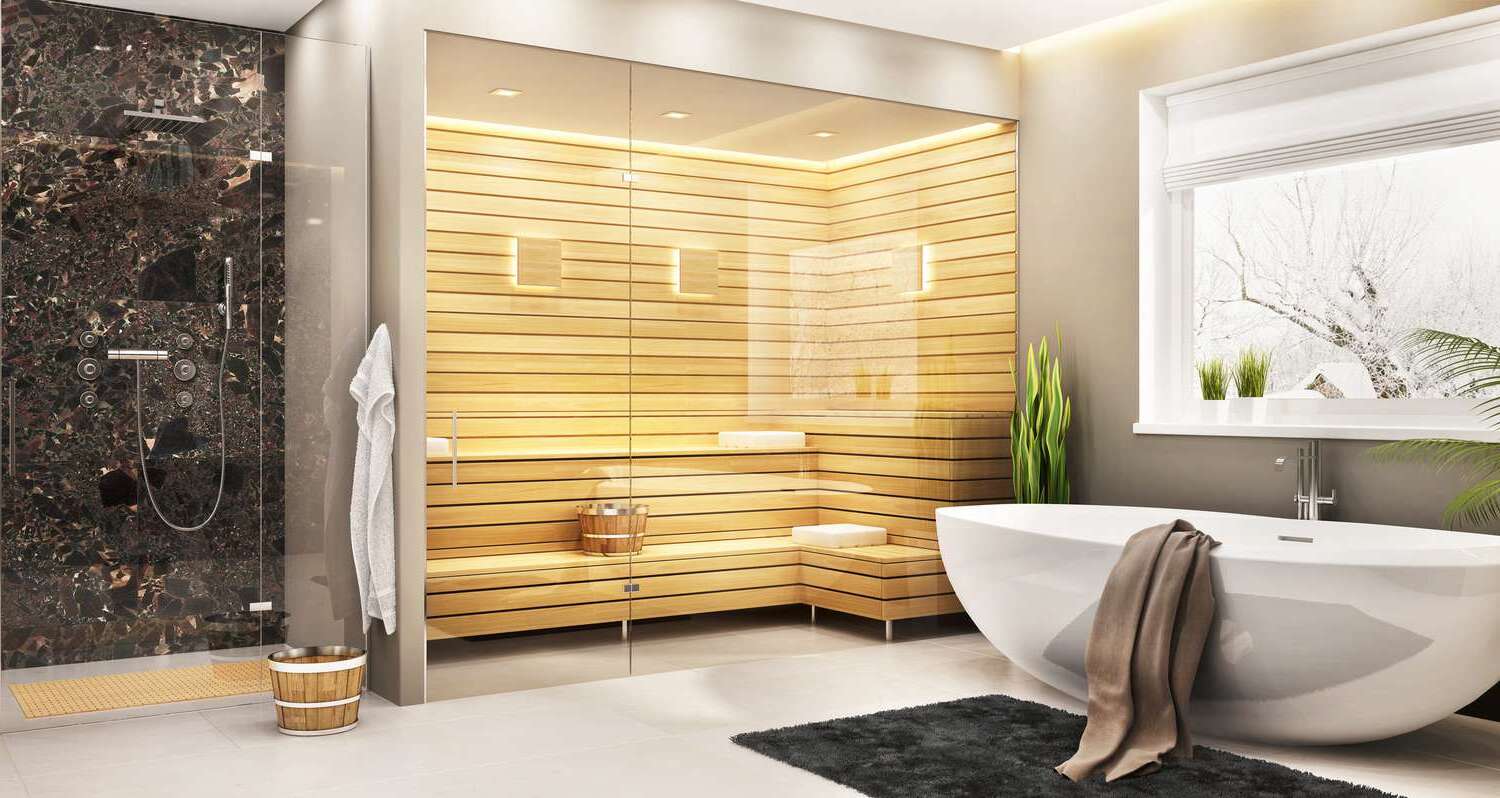
So, you're thinking about adding a touch of luxury to your home by building your very own steam room. Well, you're in for a treat! A steam room can provide a spa-like experience right in the comfort of your own home. Whether you're looking to relax, rejuvenate, or simply indulge in some self-care, having a steam room at home can be a game-changer. But before you dive into this DIY project, there are a few essential steps and considerations to keep in mind. Let's walk through the process of building a steam room from start to finish, so you can enjoy the ultimate relaxation retreat right in your own home.
Choosing the Right Location
When it comes to building a steam room, the first step is to carefully select the right location within your home. Here are some key factors to consider when choosing the perfect spot for your steam room:
-
Space: Ensure that you have enough space to accommodate a steam room. It's essential to select an area that is spacious enough to fit the steam room components comfortably.
-
Accessibility: Consider the accessibility of the location. You'll want to choose a spot that is easily accessible from the main areas of your home, such as the bathroom or a dedicated spa area.
-
Ventilation: Proper ventilation is crucial for a steam room. Choose a location that allows for adequate ventilation to prevent moisture buildup and ensure a comfortable steam room experience.
-
Privacy: If relaxation and privacy are important to you, select a location that offers a sense of seclusion and tranquility. This could be a spare room, a secluded corner of your bathroom, or a dedicated wellness area within your home.
-
Structural Considerations: Take into account the structural integrity of the chosen location. Ensure that the floor and walls can support the weight of the steam room components and withstand the moisture and heat generated by the steam.
By carefully considering these factors, you can choose the right location for your steam room, setting the stage for a relaxing and rejuvenating addition to your home.
Planning the Layout and Design
Planning the layout and design of your steam room is a crucial step in the DIY process. It involves envisioning the overall look and feel of your steam room and determining how it will fit into the existing space. Here are some essential considerations for planning the layout and design:
-
Space Utilization: Assess the available space and consider how to best utilize it for your steam room. Determine the dimensions of the steam room, including the height, width, and depth, to ensure that it fits comfortably within the chosen location.
-
Layout Efficiency: Plan the layout of the steam room components, such as the bench seating, steam generator, control panel, and lighting. Consider the most efficient and ergonomic arrangement to maximize comfort and functionality.
-
Aesthetic Appeal: Think about the overall aesthetic you want to achieve. Consider the design elements, such as the type of seating, wall materials, flooring, and lighting, to create a visually appealing and inviting steam room environment.
-
Accessibility and Safety: Ensure that the layout promotes accessibility and safety. Consider factors such as the placement of grab bars, non-slip flooring, and easy access to the steam generator for maintenance.
-
Customization Options: Explore customization options to personalize your steam room. This could include adding decorative elements, incorporating built-in shelving for towels and aromatherapy oils, or integrating music and entertainment systems for a truly immersive experience.
By carefully planning the layout and design of your steam room, you can create a space that not only offers the benefits of steam therapy but also reflects your personal style and enhances the overall ambiance of your home.
Selecting the Materials
Selecting the right materials for your steam room is essential to ensure durability, safety, and a visually appealing aesthetic. Here are the key materials to consider for building your steam room:
-
Steam Room Walls and Ceiling: Opt for non-porous, moisture-resistant materials for the walls and ceiling. Ceramic or porcelain tiles, glass mosaic tiles, or solid surface materials are excellent choices. These materials are easy to clean, resistant to mold and mildew, and can withstand the high humidity levels in a steam room.
-
Bench Seating: Choose a durable, water-resistant material for the bench seating. Teak, cedar, or moisture-resistant hardwoods are popular options for steam room benches. These materials are not only resistant to moisture and heat but also add a natural, spa-like aesthetic to the steam room.
-
Flooring: Select a non-slip, non-porous flooring material that can withstand moisture and heat. Porcelain or ceramic tiles with a textured surface are ideal for steam room floors, providing both safety and durability. Avoid materials like marble or natural stone, which can be slippery when wet.
-
Steam Generator Enclosure: When selecting materials for the steam generator enclosure, prioritize heat-resistant and moisture-proof options. Stainless steel, waterproofed wood, or specialized steam room construction materials are suitable for enclosing the steam generator, ensuring safety and longevity.
-
Sealing and Waterproofing: Invest in high-quality waterproofing and sealing materials to protect the structural elements of the steam room. Use waterproof membranes, vapor barriers, and sealants to prevent moisture from penetrating the walls, ceiling, and floor, safeguarding the integrity of the steam room.
By carefully selecting materials that are specifically designed for high-humidity environments and can withstand the rigors of steam room conditions, you can ensure that your steam room is not only visually stunning but also built to last, providing a luxurious and relaxing retreat within your home.
Installing the Steam Generator
Installing the steam generator is a critical step in building a functional and efficient steam room. Here's a detailed guide on how to install the steam generator:
-
Selecting the Location: Choose a suitable location for the steam generator, typically within close proximity to the steam room. The ideal placement is in a dry, well-ventilated area that allows for easy access for maintenance and repairs.
-
Preparing the Space: Ensure that the designated area for the steam generator is equipped with the necessary electrical and plumbing connections. Consult a licensed electrician and plumber to ensure compliance with building codes and safety standards.
-
Electrical Requirements: The steam generator requires a dedicated electrical circuit with the appropriate voltage and amperage capacity. Follow the manufacturer's specifications and guidelines for electrical connections to ensure safe and reliable operation.
-
Plumbing Connections: Connect the steam generator to the water supply and drainage system. Install a water shut-off valve, pressure relief valve, and drain line as per the manufacturer's instructions. Proper plumbing connections are essential for the safe and efficient operation of the steam generator.
-
Mounting the Generator: Securely mount the steam generator in the designated location, following the manufacturer's recommendations for mounting hardware and clearances. Ensure that the unit is level and securely anchored to the wall or floor to prevent vibration and noise during operation.
-
Electrical and Control Panel Installation: Connect the electrical wiring to the steam generator, including the power supply, control panel, and any additional accessories such as temperature sensors or timers. Follow the wiring diagram provided by the manufacturer and ensure that all electrical connections are secure and properly insulated.
-
Testing and Commissioning: Once the steam generator is installed and connected, perform a thorough system test to ensure proper functionality. Test the electrical and plumbing connections, check for leaks, and verify that the control panel and steam output are operating as intended.
-
Safety Precautions: Install safety features such as temperature sensors, pressure relief valves, and automatic shut-off mechanisms to ensure the safe operation of the steam generator. Adhere to all safety guidelines provided by the manufacturer and consult with a professional if you have any concerns about the installation process.
By following these steps and consulting the manufacturer's instructions, you can successfully install the steam generator, laying the foundation for a fully operational and rejuvenating steam room experience within your home.
Building the Steam Room Walls and Ceiling
Building the walls and ceiling of the steam room requires careful attention to detail and the use of materials that can withstand high humidity and temperature fluctuations. Here's a detailed guide on how to construct the walls and ceiling of your steam room:
-
Frame Construction: Begin by framing the walls and ceiling using moisture-resistant materials such as pressure-treated lumber or metal studs. Ensure that the framing is sturdy and able to support the weight of the wall and ceiling materials.
-
Vapor Barrier Installation: Install a vapor barrier on the interior side of the framed walls and ceiling. This barrier helps prevent moisture from penetrating the structural elements and provides an added layer of protection against mold and mildew.
-
Insulation: Consider adding insulation within the wall and ceiling cavities to improve energy efficiency and maintain a consistent temperature within the steam room. Use insulation materials that are suitable for high-humidity environments.
-
Non-Porous Wall Materials: Choose non-porous materials for the walls, such as ceramic or porcelain tiles, glass mosaic tiles, or solid surface panels. These materials are easy to clean, resistant to mold and mildew, and can withstand the high humidity levels in a steam room.
-
Ceiling Construction: When constructing the ceiling, ensure that it is sloped to allow condensation to drain away from the steam room. Use moisture-resistant materials for the ceiling, such as tiles or specialized steam room ceiling panels.
-
Waterproofing Seams and Joints: Pay close attention to sealing and waterproofing the seams and joints between the wall and ceiling materials. Use waterproof membranes, silicone sealants, and grout to create a watertight barrier that prevents moisture from seeping into the structural elements.
-
Vent Openings: Install vent openings in the walls or ceiling to allow for proper air circulation and ventilation within the steam room. These vents help prevent the buildup of excess moisture and ensure a comfortable and safe steam room environment.
-
Lighting and Fixtures: Consider the placement of lighting fixtures and other accessories on the walls and ceiling. Use waterproof and vapor-sealed light fixtures designed for steam room applications to ensure safety and longevity.
By following these steps and using appropriate materials, you can construct the walls and ceiling of your steam room to create a durable, visually appealing, and functional space for relaxation and rejuvenation.
Waterproofing and Sealing
Waterproofing and sealing are essential steps in the construction of a steam room to prevent moisture penetration and protect the structural integrity of the space. Here's a detailed guide on how to effectively waterproof and seal the steam room:
-
Waterproof Membranes: Apply waterproof membranes to the walls, ceiling, and floor of the steam room. These membranes create a barrier that prevents moisture from seeping into the underlying materials. Use a roller or brush to evenly coat the surfaces with the waterproofing membrane, ensuring complete coverage.
-
Vapor Barriers: Install vapor barriers behind the wall and ceiling materials to further enhance moisture resistance. Vapor barriers help control the diffusion of water vapor and prevent condensation within the structural cavities, reducing the risk of mold and mildew growth.
-
Sealing Joints and Seams: Pay close attention to sealing the joints and seams between the wall and ceiling materials. Use high-quality silicone sealants and waterproof grout to create a watertight seal that prevents water from infiltrating the gaps. Ensure that all seams are thoroughly sealed to maintain the integrity of the steam room.
-
Floor Waterproofing: Apply a waterproofing membrane to the steam room floor to protect the underlying structure from moisture damage. Use a waterproofing product specifically designed for high-humidity environments and ensure that the entire floor surface is adequately covered.
-
Drainage Considerations: Incorporate proper drainage systems into the steam room design to effectively manage water runoff and condensation. Install floor drains with a slope to direct water towards the drain, preventing standing water and promoting efficient drainage.
-
Waterproofing Fixtures and Openings: Seal around fixtures, such as steam heads, control panels, and lighting fixtures, to prevent water infiltration. Use waterproof gaskets, seals, and caulking to create a secure and waterproof seal around these openings, ensuring long-term durability.
-
Regular Maintenance: After completing the waterproofing and sealing process, regularly inspect the steam room for any signs of water damage or deterioration. Address any areas that show wear or damage promptly to maintain the effectiveness of the waterproofing measures.
By meticulously waterproofing and sealing the steam room, you can safeguard the structure against moisture-related issues, prolong its lifespan, and create a safe and enjoyable environment for steam therapy and relaxation.
Ventilation and Drainage
Proper ventilation and drainage are crucial aspects of creating a functional and comfortable steam room environment. Here's a detailed guide on how to effectively address ventilation and drainage in your steam room:
-
Ventilation System: Install a dedicated ventilation system to ensure adequate air circulation within the steam room. A ventilation fan or exhaust system helps remove excess humidity, odors, and airborne contaminants, creating a more comfortable and hygienic environment. Position the ventilation openings strategically to promote air exchange without compromising the steam room's heat retention.
-
Vent Openings: Incorporate vent openings in the walls or ceiling to facilitate the flow of fresh air into the steam room. These vents should be positioned to promote cross-ventilation and prevent the accumulation of stagnant air. Consider using adjustable vents to allow for customized airflow control based on the steam room's occupancy and usage.
-
Moisture Management: Implement measures to manage moisture buildup within the steam room. This includes selecting non-porous materials for the walls, ceiling, and flooring, as well as ensuring effective waterproofing and sealing to prevent moisture from permeating the structural elements. Additionally, regular maintenance and inspection of the ventilation system can help identify and address any moisture-related issues promptly.
-
Drainage System: Design an efficient drainage system to manage water runoff and condensation within the steam room. Install floor drains with a proper slope to direct water towards the drain, preventing standing water and minimizing the risk of slips and falls. The drainage system should be capable of handling the volume of water generated during steam sessions, ensuring quick and effective water removal.
-
Maintenance Considerations: Regularly inspect the ventilation and drainage systems to ensure optimal functionality. Clear any obstructions in the ventilation openings and clean or replace ventilation filters as needed. Similarly, keep the floor drains clear of debris and sediment to maintain their effectiveness. Consistent maintenance helps uphold the performance of the ventilation and drainage systems, contributing to a pleasant and safe steam room experience.
By addressing ventilation and drainage considerations in your steam room design, you can create a well-ventilated, moisture-managed space that promotes comfort, safety, and an enjoyable steam therapy experience.
Adding the Finishing Touches
Adding the finishing touches to your steam room is the exciting final step that brings together the aesthetic and functional elements of the space. Here's a detailed guide on how to add the perfect finishing touches to your DIY steam room:
-
Aromatherapy and Essential Oils: Enhance the ambiance of your steam room by incorporating aromatherapy and essential oils. Consider installing a built-in aromatherapy system or simply place a few drops of your favorite essential oils onto a designated diffuser. Popular choices include eucalyptus, lavender, and peppermint, each offering unique therapeutic benefits.
-
Comfortable Seating and Relaxation Area: Create a comfortable seating and relaxation area within the steam room. Choose ergonomic and moisture-resistant seating options, such as teak or cedar benches, to provide a comfortable space for relaxation and steam therapy sessions.
-
Soft Lighting and Ambiance: Install soft, ambient lighting to create a tranquil and inviting atmosphere. Consider using dimmable LED lights or waterproof light fixtures designed for steam room applications. Soft lighting can enhance the overall ambiance and contribute to a calming and rejuvenating experience.
-
Music and Entertainment: Incorporate a music or entertainment system to elevate the sensory experience in your steam room. Choose waterproof and moisture-resistant audio equipment to enjoy your favorite music, podcasts, or guided meditation sessions while unwinding in the steam room.
-
Towel Hooks and Storage: Install towel hooks or racks within the steam room for convenient access to towels and robes. Consider adding built-in storage shelves for storing additional essentials such as aromatherapy oils, skincare products, and reading materials.
-
Temperature and Humidity Controls: Integrate user-friendly temperature and humidity controls to customize the steam room environment to your preferences. Modern control panels offer precise adjustment options, allowing you to create the perfect steam therapy experience tailored to your comfort level.
-
Decorative Elements: Add decorative elements such as natural plants, artwork, or decorative stones to infuse personality and style into the steam room. Choose items that are resistant to high humidity and can withstand the steam room environment.
-
Safety Features: Ensure that safety features such as non-slip flooring, grab bars, and temperature sensors are installed to promote a safe and secure steam room environment. Safety should always be a priority when adding the finishing touches to your steam room.
By carefully considering and implementing these finishing touches, you can transform your DIY steam room into a luxurious and inviting space that promotes relaxation, rejuvenation, and overall well-being.
Maintenance and Care Tips
Maintaining your steam room is essential to ensure its longevity, performance, and the overall enjoyment of the steam therapy experience. Here are some crucial maintenance and care tips to keep your steam room in optimal condition:
-
Regular Cleaning: Establish a routine for cleaning the steam room surfaces, including walls, benches, and flooring. Use mild, non-abrasive cleaners suitable for the materials in your steam room. Regular cleaning helps prevent the buildup of soap scum, mineral deposits, and mold, preserving the cleanliness and appearance of the space.
-
Ventilation System Maintenance: Inspect and clean the ventilation system regularly to ensure proper airflow and moisture removal. Clear any obstructions in the vents and replace ventilation filters as recommended by the manufacturer. A well-maintained ventilation system promotes air quality and prevents the accumulation of excess humidity.
-
Steam Generator Care: Follow the manufacturer's guidelines for maintaining the steam generator. This may include periodic descaling to remove mineral deposits, checking and replacing gaskets and seals, and ensuring that the unit is operating at optimal efficiency. Proper steam generator care prolongs its lifespan and ensures consistent steam production.
-
Seal and Grout Inspection: Periodically inspect the seals and grout in the steam room to identify any signs of wear, cracking, or deterioration. Address any damaged seals promptly to prevent water infiltration and maintain the integrity of the waterproofing measures.
-
Drainage System Check: Regularly check the floor drains and drainage system for any blockages or buildup. Ensure that the drains are clear and functioning properly to prevent water pooling and potential water damage.
-
Temperature and Humidity Control: Monitor and calibrate the temperature and humidity controls as needed to maintain a comfortable and safe steam room environment. Verify that the controls are functioning accurately and make adjustments as per your preferences.
-
Inspecting for Leaks: Periodically inspect the steam room for any signs of leaks or water damage. Check for moisture accumulation, discoloration, or warping of materials, and address any leaks promptly to prevent structural damage and mold growth.
-
Professional Maintenance: Consider scheduling periodic professional maintenance for the steam room components, including the steam generator, ventilation system, and electrical connections. A professional service can identify and address any potential issues before they escalate.
By incorporating these maintenance and care tips into your steam room upkeep routine, you can ensure that your DIY steam room continues to provide a rejuvenating and relaxing retreat within your home for years to come.