
Home>Outdoors & Camping>Landscaping>How To Install Raised Garden Beds
Landscaping
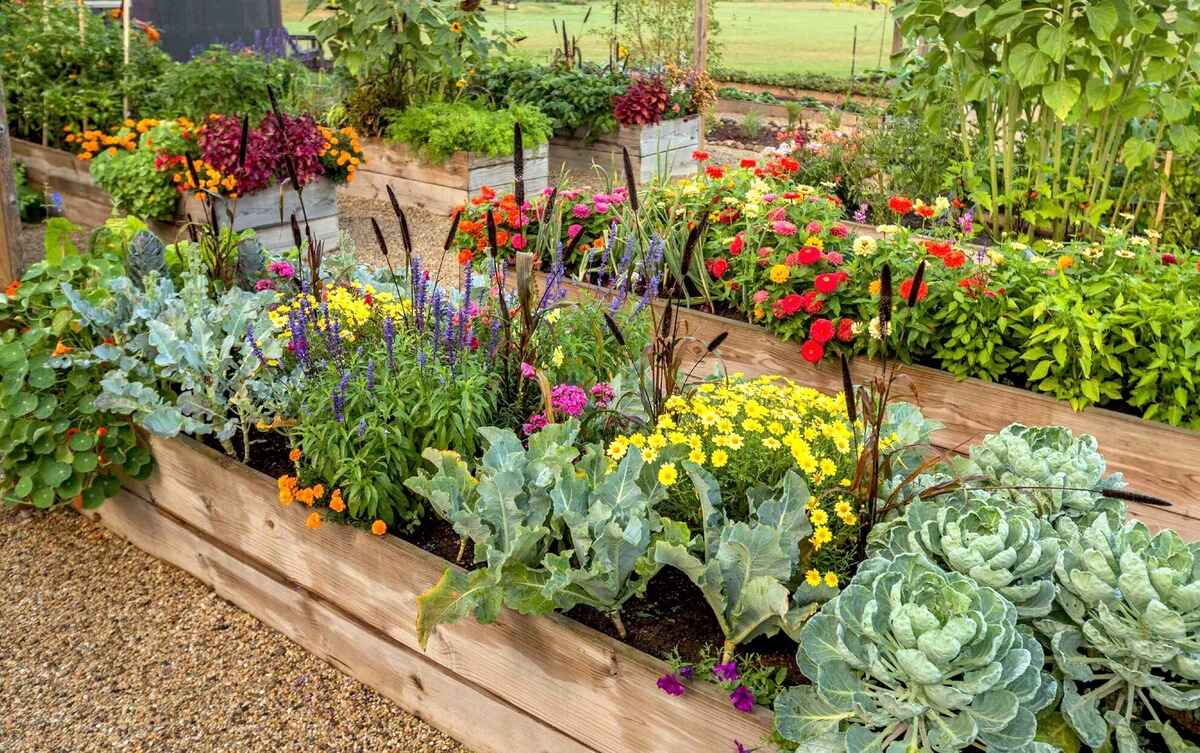
How To Install Raised Garden Beds
Published: March 7, 2024

Content Creator for Outdoors & Camping, Sophie turns any yard into a sustainable paradise. Her dedication to DIY outdoor projects and volunteer work in community gardens shares joy and knowledge.
Learn how to install raised garden beds for your landscaping project with our step-by-step guide. Create a beautiful and functional garden space today!
(Many of the links in this article redirect to a specific reviewed product. Your purchase of these products through affiliate links helps to generate commission for Twigandthistle.com, at no extra cost. Learn more)
Introduction
So, you've decided to take your gardening game to the next level and install raised garden beds. Congratulations! This decision will not only enhance the aesthetics of your garden but also provide a more controlled environment for your plants to thrive. In this article, we'll guide you through the step-by-step process of installing raised garden beds, from choosing the right location to planting and maintaining your garden. Let's get our hands dirty and dive into the wonderful world of raised bed gardening!
Choosing the Right Location
When it comes to installing raised garden beds, the location is key. Here are some important factors to consider when choosing the right spot for your raised garden beds:
-
Sunlight: Select a location that receives ample sunlight, ideally 6-8 hours per day. This will ensure that your plants receive the necessary light for photosynthesis and healthy growth.
-
Accessibility: Consider the accessibility of the location. You'll want a spot that is easy to reach for watering, weeding, and harvesting. Avoid placing the beds in areas that are difficult to access.
-
Water Drainage: Ensure that the chosen location has proper water drainage to prevent waterlogging, which can be detrimental to plant roots. Avoid low-lying areas that may accumulate excess water.
-
Soil Quality: Take note of the soil quality in the chosen area. Conduct a soil test to determine its composition and pH level. If the soil is poor, you may need to amend it or opt for a raised bed with imported soil.
-
Space: Consider the available space in the chosen location. Ensure that there is enough room for the raised garden beds and for you to move around them comfortably.
By carefully considering these factors, you can choose a location that sets the stage for a successful and thriving raised garden bed.
Selecting the Materials
Selecting the right materials for your raised garden beds is crucial for their durability and effectiveness. Here's what you'll need:
1. Wood or Composite Materials
- Wood: Cedar and redwood are popular choices for raised bed construction due to their natural resistance to rot and insects. Avoid using pressure-treated wood, as it may contain chemicals that can leach into the soil.
- Composite Materials: If you prefer a low-maintenance option, consider using composite materials, which are durable and long-lasting.
2. Fasteners
- Opt for galvanized or stainless steel screws and nails to assemble the raised garden beds. These materials are resistant to corrosion, ensuring the structural integrity of the beds over time.
3. Lining (Optional)
- While not mandatory, lining the interior of the raised beds with landscaping fabric can help prevent soil erosion and maintain the bed's shape. It also provides an additional barrier against weeds.
4. Soil Mix
- Depending on the plants you intend to grow, select a high-quality soil mix that is well-draining and rich in organic matter. You may need to import soil if the existing soil at the chosen location is of poor quality.
5. Tools
- Gather essential tools such as a saw, drill, level, measuring tape, and work gloves for the construction process.
By carefully selecting the right materials, you can ensure that your raised garden beds are built to last and provide an optimal growing environment for your plants.
Building the Raised Garden Bed
Now that you've chosen the perfect location and gathered all the necessary materials, it's time to roll up your sleeves and start building your raised garden bed. Follow these steps to construct a sturdy and functional raised bed:
-
Cutting the Materials: Begin by cutting the wood or composite materials to the desired dimensions for your raised garden bed. Use a saw to make precise cuts, ensuring that the pieces fit together seamlessly during assembly.
-
Assembling the Frame: Lay out the cut pieces of wood or composite materials to form the frame of the raised bed. Use a level to ensure that the frame is even and square. Once aligned, secure the corners with galvanized or stainless steel screws or nails. This will provide structural stability to the raised bed.
-
Adding Support: For longer beds, consider adding support beams across the middle of the bed to prevent bowing or warping over time. This additional reinforcement will maintain the integrity of the bed, especially when filled with soil.
-
Lining the Bed (Optional): If you choose to line the interior of the raised bed with landscaping fabric, now is the time to do so. Cut the fabric to fit the dimensions of the bed and secure it in place, creating a barrier between the soil and the surrounding environment.
-
Positioning the Bed: Once the frame is assembled, carefully position the raised garden bed in the chosen location. Ensure that it is level and properly aligned before proceeding to the next step.
-
Finishing Touches: Before filling the bed with soil, take a final look at the construction. Make any necessary adjustments to ensure that the bed is stable and ready for the next phase of the installation process.
By following these steps, you can construct a raised garden bed that is not only structurally sound but also visually appealing. With the frame in place, you're one step closer to creating a flourishing garden oasis right in your backyard.
Filling the Bed with Soil
Once the raised garden bed is constructed, the next crucial step is filling it with the right soil mixture to create an optimal growing environment for your plants. Here's how to fill the bed with soil:
-
Layering Technique: Start by layering the bottom of the bed with a few inches of coarse gravel or small rocks. This layer will aid in drainage, preventing water from accumulating at the bottom of the bed and causing root rot.
-
Weed Barrier (Optional): If you're concerned about weed growth, consider laying a weed barrier, such as landscaping fabric, over the gravel layer. This will help suppress weed growth and keep the soil in place.
-
Quality Soil Mix: Fill the raised bed with a high-quality soil mix that is well-draining and rich in organic matter. A blend of topsoil, compost, and other organic amendments will provide the essential nutrients and structure for healthy plant growth.
-
Leveling and Fluffing: As you fill the bed with soil, periodically stop to level and fluff the soil to ensure an even surface. This will create a uniform planting area and promote proper root development for your plants.
-
Filling to the Top: Continue adding soil until the bed is filled to the top, allowing for slight settling. Avoid compacting the soil excessively, as loose, aerated soil is beneficial for plant roots.
-
Watering the Soil: Once the bed is filled, lightly water the soil to settle it and provide initial moisture for the plants. This will also reveal any settling that may require additional soil.
By following these steps, you can ensure that your raised garden bed is filled with the right soil composition, setting the stage for a thriving and bountiful garden. With the bed filled and ready, it's time to move on to the exciting phase of planting and maintaining your garden.
Planting and Maintaining the Garden
Now that your raised garden bed is ready and filled with nutrient-rich soil, it's time to bring it to life with a variety of plants. Here's how to plant and maintain your garden for a flourishing and vibrant outdoor space:
1. Plant Selection
- Consider Your Climate: Choose plants that are well-suited to your local climate and growing conditions. This will ensure that they thrive in your garden environment.
- Companion Planting: Explore companion planting techniques to maximize the health and yield of your garden. Some plants complement each other by deterring pests or enhancing growth.
2. Planting Process
- Spacing: Follow the recommended spacing for each type of plant to allow for proper growth and airflow.
- Planting Depth: Ensure that you plant each seed or seedling at the appropriate depth to promote healthy root development.
- Watering: After planting, water the garden thoroughly to provide initial moisture to the plants.
3. Maintenance Tips
- Weeding: Regularly inspect and remove any weeds that may compete with your plants for nutrients and space.
- Watering Schedule: Establish a consistent watering schedule, ensuring that the soil remains moist but not waterlogged.
- Fertilization: Consider using organic fertilizers to provide essential nutrients to your plants as they grow.
- Pest Control: Monitor for pests and diseases, and take proactive measures to protect your garden from potential threats.
4. Seasonal Care
- Spring: Prepare the garden for the growing season by clearing debris and refreshing the soil as needed.
- Summer: Monitor the garden for signs of heat stress and ensure adequate watering during hot weather.
- Fall: Harvest mature crops and prepare the garden for the upcoming winter season.
- Winter: Protect the garden from frost and cold temperatures, and plan for the next growing season.
By following these planting and maintenance guidelines, you can cultivate a thriving garden in your raised beds, providing a bountiful harvest and a beautiful outdoor space to enjoy. With the right care and attention, your garden will flourish and bring joy throughout the seasons.
Conclusion
In conclusion, installing raised garden beds is a rewarding endeavor that offers numerous benefits for gardeners of all levels. By carefully selecting the location, materials, and soil, and following the step-by-step process of building and filling the beds, you can create an ideal environment for your plants to thrive. The planting and maintenance phase allows you to unleash your creativity and nurture a diverse range of plants, resulting in a flourishing garden that brings joy and satisfaction. With the right care and attention, your raised garden beds will not only enhance the beauty of your outdoor space but also provide a sustainable and productive gardening experience. So, roll up your sleeves, get your hands dirty, and enjoy the journey of creating and tending to your raised garden beds. Happy gardening!