
Home>Create & Decorate>DIY & Crafts>How To Build Free Standing Wooden Steps
DIY & Crafts
How To Build Free Standing Wooden Steps
Published: May 23, 2024

Content Creator specializing in woodworking and interior transformations. Caegan's guides motivate readers to undertake their own projects, while his custom furniture adds a personal touch.
Learn how to create your own free-standing wooden steps with our easy DIY guide. Perfect for DIY & Crafts enthusiasts looking to enhance their outdoor space.
(Many of the links in this article redirect to a specific reviewed product. Your purchase of these products through affiliate links helps to generate commission for Twigandthistle.com, at no extra cost. Learn more)
Introduction
So, you've got a spot in your yard that could use a set of free-standing wooden steps. Maybe it's a slope leading down to your garden, or perhaps it's just a way to add some charm to your outdoor space. Whatever the reason, building your own wooden steps can be a rewarding and cost-effective DIY project. In this article, we'll walk you through the steps to create your own free-standing wooden steps, from planning and preparation to finishing touches and safety considerations. Let's get started!
Planning and Preparation
Before you start building your free-standing wooden steps, it's essential to do some careful planning and preparation to ensure a successful project. Here's what you need to do:
-
Determine the Location: First, decide where you want to place your wooden steps. Consider the slope of the ground, the surrounding landscape, and any obstacles that may affect the placement.
-
Check Local Building Codes: It's crucial to check with your local building authority to ensure that your planned steps comply with any relevant building codes or regulations. This step will help you avoid any potential issues down the line.
-
Gather Necessary Permits: Depending on your location and the scope of your project, you may need to obtain permits before you can start building your steps. Check with your local authorities to determine what permits are required.
-
Create a Design Plan: Sketch out a design plan for your steps, including the dimensions, materials, and any additional features you want to incorporate. This plan will serve as a roadmap for the construction process.
-
Prepare the Work Area: Clear the area where the steps will be installed, removing any debris, rocks, or vegetation that could interfere with the construction process. Ensure that the ground is level and stable to provide a solid foundation for your steps.
By taking the time to carefully plan and prepare for your project, you'll set yourself up for a smoother construction process and a set of wooden steps that meets your needs and enhances your outdoor space.
Gathering Materials and Tools
When it comes to building free-standing wooden steps, having the right materials and tools on hand is crucial for a successful construction process. Here's what you'll need to gather before you get started:
Materials:
-
Pressure-Treated Lumber: This will serve as the main material for constructing the steps. Opt for high-quality pressure-treated lumber that can withstand outdoor elements and resist decay.
-
Gravel and Sand: These materials will be used to create a stable base for the steps. The gravel provides drainage, while the sand helps to level the ground.
-
Concrete Blocks or Pavers: These will be used to support the bottom of the steps, providing additional stability and preventing them from sinking into the ground over time.
-
Galvanized Screws or Nails: Choose fasteners that are suitable for outdoor use and can securely hold the wooden components together.
-
Wood Sealer or Stain: Applying a protective sealant or stain to the finished steps will help prolong their lifespan and enhance their appearance.
-
Safety Equipment: Don't forget to prioritize safety by having personal protective equipment such as gloves, safety glasses, and a dust mask on hand.
Tools:
-
Measuring Tape: Accurate measurements are essential for ensuring that the steps are level and properly aligned.
-
Circular Saw or Miter Saw: These tools will be used to cut the lumber to the required dimensions.
-
Level: A level will help you ensure that the steps are even and balanced during the construction process.
-
Drill and Bits: You'll need a drill to create pilot holes and drive screws or nails into the wood.
-
Shovel: Use a shovel to clear the area and create a level surface for the steps to rest on.
-
Trowel: This tool will come in handy for spreading and leveling the gravel and sand base.
By gathering the necessary materials and tools in advance, you'll be well-prepared to tackle the construction of your free-standing wooden steps with confidence and efficiency.
Measuring and Marking
Accurate measurements and precise marking are crucial steps in the construction of free-standing wooden steps. Here's a detailed guide on how to approach this essential phase of the project:
-
Measure the Area: Begin by measuring the width and depth of the location where the steps will be installed. Use a measuring tape to determine the exact dimensions, ensuring that you have sufficient space for the steps and that they will fit comfortably within the designated area.
-
Mark the Layout: Once you have the measurements, use marking paint or stakes and string to outline the layout of the steps on the ground. This visual guide will help you visualize the placement and ensure that the steps are aligned with the surrounding landscape.
-
Establish the Rise and Run: The rise refers to the height of each step, while the run is the depth or horizontal distance. Calculate the number of steps needed based on the total rise and desired step height, ensuring that the steps are comfortable and safe to use.
-
Mark the Position of Each Step: Using a level and a measuring tape, mark the position of each step on the ground, ensuring that they are evenly spaced and aligned. Double-check the measurements and markings to avoid any errors before proceeding to the next phase of construction.
-
Transfer the Layout to the Stringers: Once the ground markings are complete, transfer the layout to the stringers, which are the notched boards that will support the steps. Use the ground markings as a guide to cut and shape the stringers to the required dimensions, ensuring a precise fit for the steps.
-
Double-Check the Measurements: Before cutting any lumber for the steps, double-check all measurements and markings to ensure accuracy. It's essential to verify the dimensions multiple times to avoid costly mistakes during the construction process.
By meticulously measuring and marking the layout of the steps, you'll establish a solid foundation for the subsequent stages of construction. This attention to detail will contribute to the overall stability, safety, and aesthetic appeal of your free-standing wooden steps.
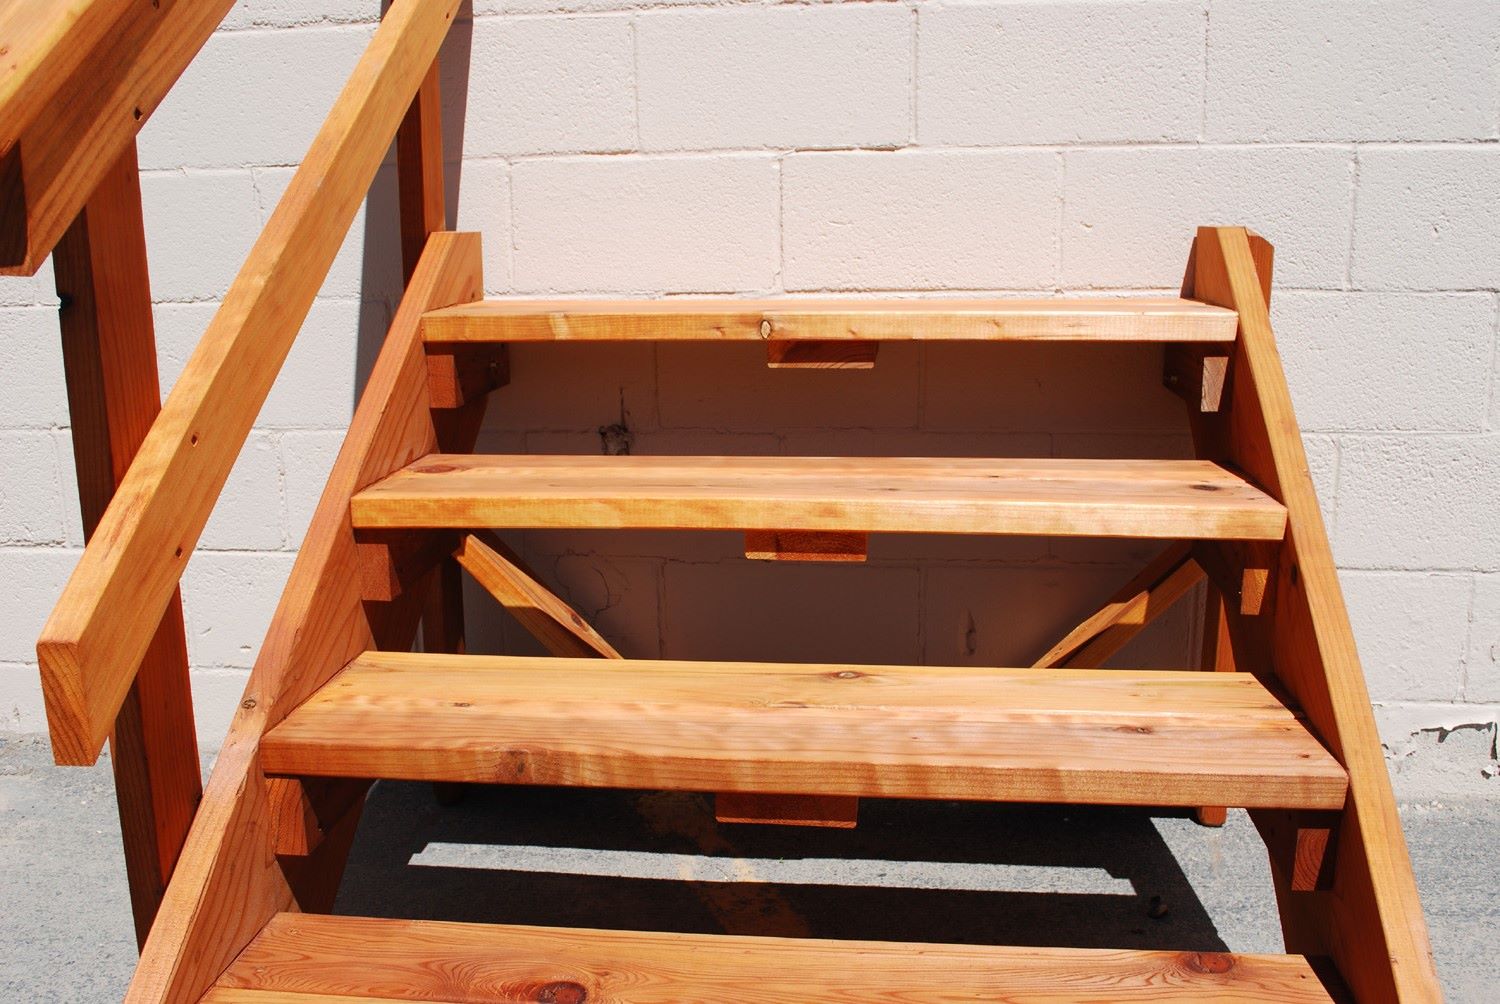
Cutting and Assembling the Steps
Once you have completed the crucial steps of planning, gathering materials, and measuring, it's time to move on to the cutting and assembling phase of building your free-standing wooden steps. This phase involves shaping the individual components and putting them together to create a sturdy and functional set of steps. Here's a detailed guide on how to approach this critical stage of the construction process:
-
Cut the Stringers: Using the marked layout as a guide, carefully cut the stringers to the required dimensions using a circular saw or miter saw. The stringers are the notched boards that will support the steps, so precision is key to ensure a secure and stable structure.
-
Cut the Treads and Risers: Measure and cut the treads and risers to the desired dimensions, ensuring that each step is uniform in size and shape. The treads are the horizontal boards that form the steps, while the risers are the vertical boards that provide additional support and prevent tripping hazards.
-
Assemble the Steps: With the individual components cut to size, begin assembling the steps by attaching the treads to the stringers. Use galvanized screws or nails to secure the treads in place, ensuring that they are evenly spaced and aligned. Next, attach the risers to the back of each tread, creating a solid and secure structure.
-
Check for Level and Stability: As you assemble the steps, use a level to ensure that each tread is level and that the overall structure is stable. Make any necessary adjustments to the positioning of the components to achieve a uniform and secure set of steps.
-
Apply Wood Sealer or Stain: Once the steps are assembled, consider applying a protective wood sealer or stain to enhance their durability and appearance. This step will help protect the wood from moisture, UV exposure, and general wear and tear, prolonging the lifespan of your wooden steps.
By carefully cutting and assembling the individual components, you'll create a set of free-standing wooden steps that are not only functional and safe but also visually appealing. This phase of the construction process requires attention to detail and precision to ensure that the steps meet your expectations in terms of both form and function.
Attaching the Steps to the Ground
Attaching the steps to the ground is a critical step that ensures the stability and safety of your free-standing wooden steps. Here's a detailed guide on how to securely anchor the steps to the ground:
-
Prepare the Base: Before attaching the steps, ensure that the ground beneath them is level and stable. Use a shovel to remove any debris or uneven patches, and consider adding a layer of gravel or sand to create a solid base for the steps to rest on.
-
Position the Steps: Carefully position the assembled steps in the desired location, ensuring that they are aligned with the markings and layout established during the planning phase. Use a level to confirm that the steps are even and balanced.
-
Attach the Bottom of the Steps: To secure the bottom of the steps to the ground, consider using concrete blocks or pavers as a supportive base. Place the blocks or pavers beneath the bottom of the steps, ensuring that they are level and evenly spaced. This additional support will prevent the steps from sinking into the ground over time.
-
Secure the Steps: Once the steps are positioned and supported by the concrete blocks or pavers, use galvanized screws or nails to attach the bottom of the stringers to the base material. Ensure that the fasteners are driven securely into the wood and the underlying support, creating a strong connection that prevents the steps from shifting or wobbling.
-
Check for Stability: After attaching the steps to the ground, carefully test their stability by applying pressure and walking up and down the stairs. Confirm that the steps feel secure and do not exhibit any movement or instability. Make any necessary adjustments to the attachment points to ensure a solid and reliable connection.
By following these steps, you'll effectively anchor your free-standing wooden steps to the ground, creating a safe and durable structure that enhances your outdoor space. The secure attachment of the steps is essential for ensuring their long-term stability and usability, providing you and your family with a reliable means of accessing different areas of your property.
Finishing Touches and Safety Considerations
As you near the completion of your free-standing wooden steps, it's essential to pay attention to the finishing touches and consider important safety aspects to ensure that your project meets both aesthetic and functional requirements.
Finishing Touches
-
Sand and Smooth Edges: After the steps are securely in place, take the time to sand any rough edges or surfaces to create a smooth and comfortable finish. This step not only enhances the appearance of the steps but also reduces the risk of splinters and injuries.
-
Apply a Protective Finish: Consider applying a protective finish, such as a wood sealer or stain, to the entire structure of the steps. This finishing touch not only adds a polished look to the wood but also provides essential protection against moisture, UV rays, and general wear and tear.
-
Add Non-Slip Tread Material: To enhance safety, especially in wet or slippery conditions, you may opt to add non-slip tread material to the steps. This can be in the form of adhesive strips or specialized paint designed to provide traction and reduce the risk of slipping.
-
Incorporate Decorative Elements: If desired, you can add decorative elements to the steps, such as handrails, post caps, or lighting. These features not only contribute to the visual appeal of the steps but also provide additional safety and functionality, especially in low-light conditions.
Safety Considerations
-
Ensure Proper Lighting: If the steps are used during the evening or night, ensure that adequate lighting is in place to illuminate the path. This can include installing outdoor lighting fixtures or solar-powered lights to enhance visibility and prevent accidents.
-
Regular Maintenance: Establish a routine for inspecting and maintaining the steps to address any wear and tear, loose components, or signs of deterioration. Regular maintenance will help uphold the safety and longevity of the steps over time.
-
Clear Surrounding Area: Keep the area around the steps clear of obstacles, debris, and tripping hazards. Maintaining a clear pathway to and from the steps reduces the risk of accidents and ensures safe access.
-
Educate Users: If the steps will be used by family members or visitors, take the time to educate them on the proper use of the steps and any safety considerations. This can include reminding individuals to use handrails, take caution in wet conditions, and avoid running or skipping steps.
By addressing these finishing touches and safety considerations, you'll not only enhance the overall look and functionality of your free-standing wooden steps but also prioritize the safety and well-being of those who will be using them. These final steps and safety measures contribute to the long-term enjoyment and usability of your DIY project.
Conclusion
In conclusion, building free-standing wooden steps is a rewarding DIY project that can enhance the functionality and aesthetic appeal of your outdoor space. By carefully planning and preparing, gathering the necessary materials and tools, measuring and marking the layout, cutting and assembling the steps, attaching them to the ground, and considering finishing touches and safety considerations, you can create a durable and visually appealing set of steps that provide safe access to different areas of your property.
Remember, attention to detail, precision in measurements, and adherence to safety guidelines are crucial throughout the construction process. Whether you're adding steps to a garden, patio, or other outdoor areas, the steps you build can become a practical and attractive feature of your landscape. With proper maintenance and periodic inspections, your free-standing wooden steps can serve you and your family reliably for years to come. So, roll up your sleeves, gather your materials, and get ready to take on this satisfying DIY project!