
Home>Create & Decorate>DIY & Crafts>How To Build A Wooden Crate For Shipping
DIY & Crafts
How To Build A Wooden Crate For Shipping
Published: May 23, 2024

Content Creator specializing in woodworking and interior transformations. Caegan's guides motivate readers to undertake their own projects, while his custom furniture adds a personal touch.
Learn how to create a sturdy wooden crate for shipping with this easy DIY guide. Perfect for DIY & Crafts enthusiasts.
(Many of the links in this article redirect to a specific reviewed product. Your purchase of these products through affiliate links helps to generate commission for Twigandthistle.com, at no extra cost. Learn more)
Introduction
So, you've got a valuable item that needs to be shipped, and you want to ensure it arrives at its destination safe and sound. Building a wooden crate for shipping is a great solution to protect your item from damage during transit. Whether you're sending a fragile piece of artwork, a delicate antique, or any other precious cargo, a well-constructed wooden crate can provide the necessary protection. In this guide, we'll walk you through the step-by-step process of building a sturdy wooden crate for shipping, so you can have peace of mind knowing your item is well-protected on its journey. Let's get started!
Materials Needed
To build a wooden crate for shipping, you will need the following materials:
- Wood: Select sturdy and durable wood such as plywood or pine boards. The thickness of the wood will depend on the size and weight of the item being shipped.
- Saw: A saw will be necessary for cutting the wood to the required dimensions.
- Measuring Tape: Accurate measurements are crucial for ensuring the crate is the right size for the item it will contain.
- Nails or Screws: These will be used to secure the wooden pieces together.
- Hammer or Screwdriver: Depending on whether you choose to use nails or screws, you will need the appropriate tool for fastening the wood.
- Wood Glue: This will provide additional strength and stability to the crate.
- Hinges and Latches: If you want to add a hinged lid to the crate, you will need hinges and latches to secure it.
- Protective Padding: Foam or other protective padding will be necessary to cushion the item inside the crate.
- Labeling Materials: Once the crate is built, you will need labels and markers to clearly indicate the contents and any handling instructions.
Gather these materials before you begin the crate-building process to ensure a smooth and efficient construction.
Cutting and Preparing the Wood
The first step in building a wooden crate for shipping is to cut and prepare the wood. Start by measuring the dimensions of the item you intend to ship. Use a measuring tape to accurately determine the length, width, and height of the item. Once you have these measurements, you can then proceed to cut the wood to the required dimensions using a saw.
When cutting the wood, ensure that the pieces are precise and uniform to create a sturdy and well-fitting crate. If you're using plywood, you may need to cut multiple pieces for the sides, top, and bottom of the crate. For pine boards, you'll need to cut them to the appropriate lengths for the frame of the crate.
After cutting the wood to size, it's essential to sand down any rough edges or splinters to create a smooth finish. This will not only enhance the crate's appearance but also prevent any potential damage to the item being shipped. Once the wood is cut and smoothed, you're ready to move on to the next step of assembling the crate.
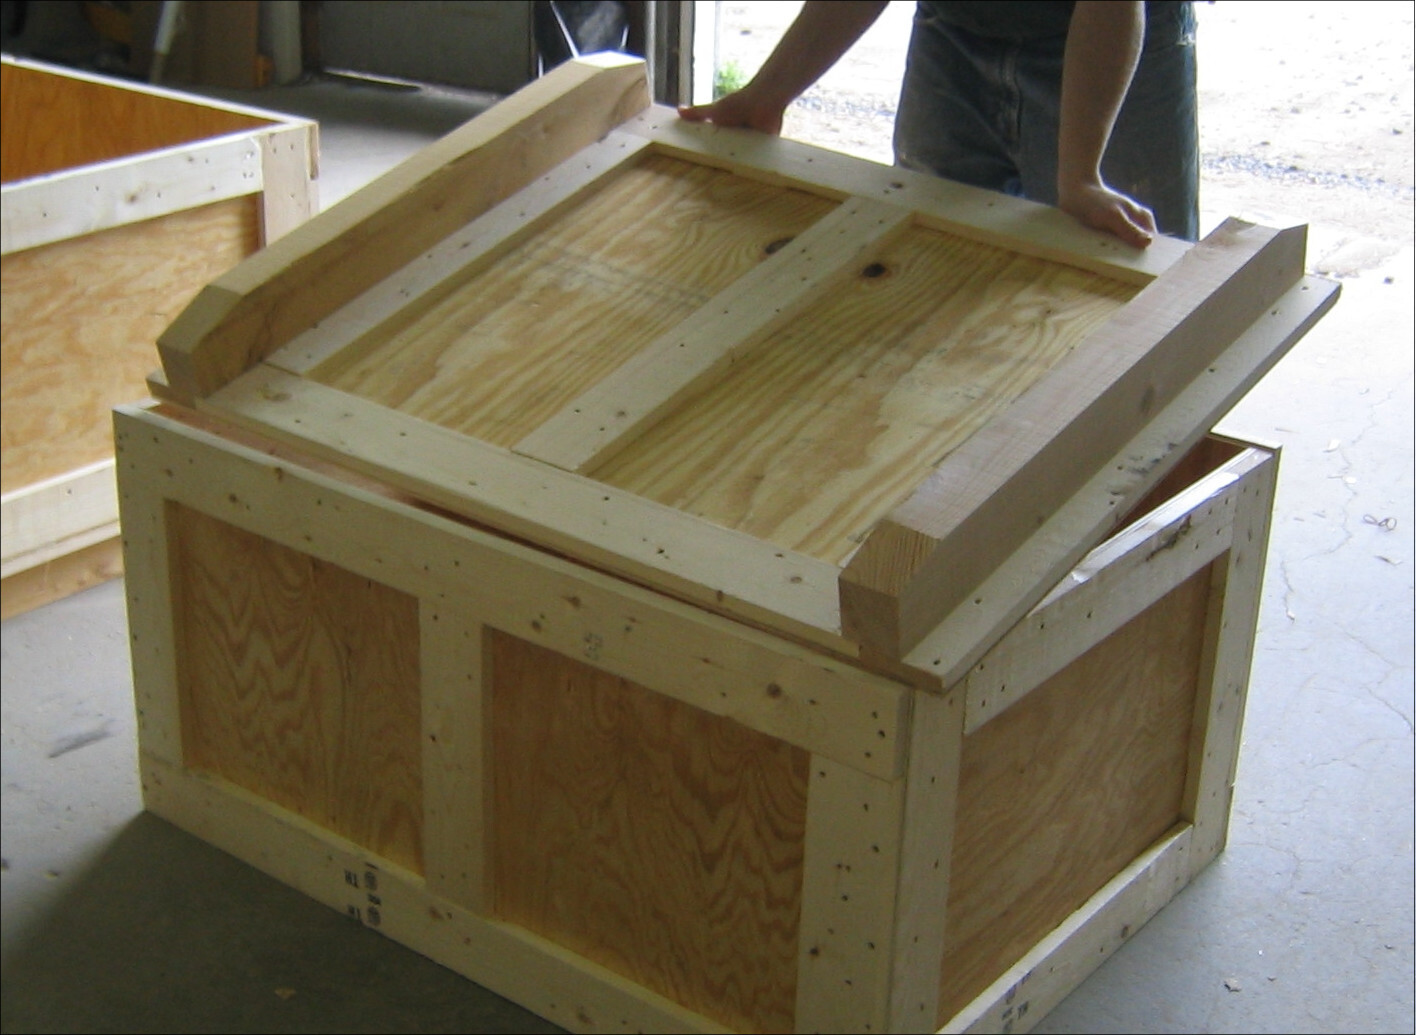
Assembling the Crate
Now that the wood is cut and prepared, it's time to assemble the crate. Begin by laying out the pieces of wood according to the crate's design. If you're using plywood, position the pieces for the sides, top, and bottom. For pine boards, arrange them to form the frame of the crate.
Once the pieces are laid out, it's time to join them together. Apply wood glue along the edges where the pieces will connect. This will provide additional strength and stability to the crate. After applying the glue, carefully position the pieces and use nails or screws to secure them in place. A hammer or screwdriver will be necessary for this step, depending on the fastening method chosen.
If you're opting for a hinged lid, attach the hinges to the back of the crate and the lid, ensuring they are properly aligned and securely fastened. This will allow for easy access to the contents while still providing the necessary protection during shipping.
As you assemble the crate, periodically check for squareness to ensure that the corners are at right angles. This will help prevent any misalignment or instability in the finished crate. Once the main structure is assembled, allow the wood glue to dry thoroughly before proceeding to the next step.
With the main structure in place, the crate is beginning to take shape. The next step is to reinforce the crate to provide additional strength and durability, ensuring that it can withstand the rigors of shipping.
Adding Reinforcements
After the main structure of the crate is assembled, it's essential to reinforce it to enhance its strength and durability. One effective way to reinforce the crate is by adding corner braces. These braces, typically made of metal, are positioned at each corner of the crate to provide additional support and prevent the corners from coming apart during transit.
To add corner braces, position them at each corner of the crate's interior, ensuring they are flush against both the sides and the base of the crate. Once in position, use screws to secure the corner braces firmly in place. This will significantly enhance the structural integrity of the crate, especially if it undergoes any rough handling during shipping.
In addition to corner braces, you can also consider adding reinforcing bars or straps along the sides of the crate. These bars or straps can be made of metal and are attached to the exterior of the crate to provide extra reinforcement. They help distribute the weight of the contents more evenly and prevent the sides from bowing outwards.
When adding reinforcing bars or straps, ensure they are securely fastened to the crate using screws or bolts. This added reinforcement will minimize the risk of the crate collapsing or sustaining damage, particularly if it is stacked or subjected to pressure during transit.
By adding these reinforcements, you can significantly increase the overall strength and stability of the wooden crate, providing an extra layer of protection for the item being shipped. With the reinforcements in place, the crate is now better equipped to withstand the challenges of the shipping process.
Securing the Contents
Once the wooden crate is reinforced, the next crucial step is to secure the contents inside. This is essential to prevent the item from shifting or moving during transit, which could lead to damage. To secure the contents, begin by lining the interior of the crate with protective padding. Foam padding or other cushioning materials can help create a protective barrier around the item, absorbing any shocks or impacts during shipping.
After lining the crate with protective padding, carefully place the item inside, ensuring that it fits snugly within the crate. If there is any empty space around the item, fill it with additional padding to prevent any movement. The goal is to immobilize the item within the crate, minimizing the risk of damage caused by shifting or impacts.
Once the item is securely positioned within the crate, use straps or strong adhesive tape to further secure it in place. Straps can be fastened around the item and tightened to hold it firmly against the padding. Similarly, adhesive tape can be used to create a crisscross pattern over the item, securing it to the padding and preventing any movement.
In addition to securing the item itself, it's also important to secure the lid of the crate. If the crate has a hinged lid, ensure that it is securely closed and latched. If necessary, add additional latches or locks to further secure the lid and prevent it from accidentally opening during transit.
By taking these measures to secure the contents inside the crate, you can minimize the risk of damage caused by movement, impacts, or shifting during shipping. This extra layer of protection will help ensure that the item arrives at its destination in the same condition it was in when it was placed inside the crate. With the contents securely in place, the final step is to add some finishing touches and labeling to the crate.
Final Touches and Labeling
After securing the contents inside the wooden crate, it's time to add the final touches and labeling to prepare it for shipping. Begin by inspecting the crate to ensure that all the components are securely fastened and that there are no loose parts. Any protruding nails or screws should be hammered down or covered to prevent them from catching on other items during transit.
Once the crate is inspected and any necessary adjustments are made, it's time to add labeling. Using a permanent marker or labels, clearly indicate the contents of the crate and any handling instructions. This is particularly important if the item is fragile or requires special care during handling. Indicate which side of the crate should be facing up and whether any specific precautions need to be taken during transportation.
In addition to labeling the contents, it's also a good idea to include contact information on the crate. Attach a label with the sender's and recipient's details, including names, addresses, and contact numbers. This will ensure that the crate can be easily identified and directed to the correct destination in case of any shipping-related queries or issues.
To provide an extra layer of protection and identification, consider wrapping the crate in plastic shrink wrap. This will help secure the contents and protect the crate from external elements during transit. It also provides a clear surface for labeling and ensures that the labels remain intact and visible throughout the shipping process.
With the final touches and labeling in place, the wooden crate is now ready for shipping. The careful construction, reinforcement, and securing of the contents, along with clear labeling, will help ensure that the item arrives safely at its destination. By following these steps, you can build a sturdy wooden crate for shipping that provides the necessary protection for your valuable items.
Conclusion
In conclusion, building a wooden crate for shipping is a practical and effective way to safeguard valuable items during transit. By following the step-by-step process outlined in this guide, you can construct a sturdy and secure crate that provides the necessary protection for fragile or delicate items. From cutting and preparing the wood to adding reinforcements, securing the contents, and adding final touches and labeling, each step plays a crucial role in ensuring the safety of the shipped item. With the right materials, careful construction, and attention to detail, you can have peace of mind knowing that your item is well-protected on its journey. Whether you're shipping artwork, antiques, or other precious cargo, a well-built wooden crate can make all the difference in ensuring that your item arrives at its destination safe and sound.