
Home>Create & Decorate>DIY & Crafts>DIY Butcher Block: How To Make Your Own Butcher Block Countertop
DIY & Crafts
DIY Butcher Block: How To Make Your Own Butcher Block Countertop
Published: May 22, 2024

Content Creator specializing in woodworking and interior transformations. Caegan's guides motivate readers to undertake their own projects, while his custom furniture adds a personal touch.
Learn how to create a stunning DIY butcher block countertop for your kitchen with our step-by-step guide. Perfect for DIY & Crafts enthusiasts!
(Many of the links in this article redirect to a specific reviewed product. Your purchase of these products through affiliate links helps to generate commission for Twigandthistle.com, at no extra cost. Learn more)
Introduction
So, you've been dreaming of a beautiful butcher block countertop for your kitchen, but the price tags at the home improvement store are giving you sticker shock. Fear not! With a little bit of elbow grease and some DIY spirit, you can create your very own butcher block right in your own workshop. Not only will you save a bundle of money, but you'll also have the satisfaction of knowing that you created a stunning and functional piece for your home. In this guide, we'll walk you through the step-by-step process of making your own butcher block countertop. Let's get started!
Materials Needed
To get started on your DIY butcher block countertop, you'll need a few essential materials. Here's a list of what you'll need:
- Wood: Look for high-quality hardwood such as maple, oak, cherry, or walnut. You'll need enough wood to create the desired size of your countertop.
- Wood Glue: Choose a food-safe wood glue that will provide a strong and durable bond for your butcher block.
- Clamps: You'll need a good set of clamps to hold the wood together during the gluing process.
- Sander and Sandpaper: A belt sander or orbital sander will make the sanding process much easier. Be sure to have a variety of sandpaper grits on hand.
- Table Saw or Circular Saw: You'll need a saw to cut the wood to the desired dimensions.
- Wood Conditioner: This will help prepare the wood for the sealing process.
- Butcher Block Sealer: Look for a food-safe sealer that will protect the wood from moisture and stains.
- Safety Gear: Don't forget safety glasses, a dust mask, and ear protection to keep yourself safe during the woodworking process.
Gather these materials, and you'll be well on your way to creating a stunning DIY butcher block countertop for your kitchen.
Step 1: Choosing the Right Wood
When it comes to creating a beautiful and durable butcher block countertop, selecting the right wood is crucial. You'll want to choose a high-quality hardwood that can withstand the rigors of daily kitchen use. Maple, oak, cherry, and walnut are popular choices for butcher block countertops due to their durability and attractive grain patterns.
Consider the overall aesthetic of your kitchen and select a wood species that complements your existing decor. Keep in mind that different wood species vary in terms of hardness, color, and grain pattern, so take the time to explore your options and choose the wood that best suits your preferences.
In addition to considering the visual appeal of the wood, it's important to think about its practicality. Since the butcher block will be used for food preparation, it's crucial to select a wood that is food-safe and non-toxic. Look for hardwoods that are naturally resistant to bacteria and mold, making them ideal for kitchen countertops.
Once you've chosen the right wood for your butcher block countertop, you can move on to the next step in the DIY process.
Step 2: Cutting and Sanding the Wood
Now that you have selected the perfect wood for your butcher block countertop, it's time to move on to the cutting and sanding process. Here's a detailed breakdown of what you need to do:
-
Measure and Cut the Wood: Using a table saw or circular saw, carefully measure and cut the wood pieces to the desired dimensions for your countertop. It's essential to be precise with your measurements to ensure that the pieces fit together seamlessly.
-
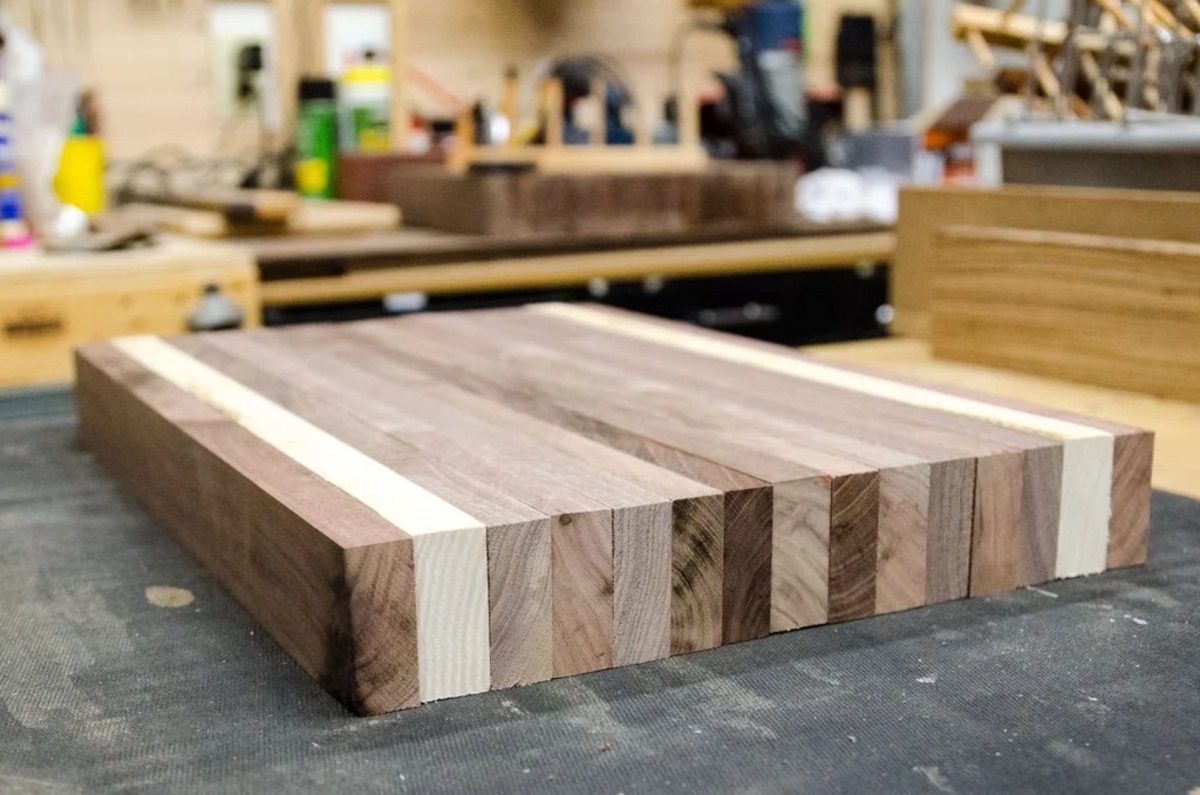
Arrange the Wood: Once the pieces are cut, lay them out in the desired pattern to create the butcher block effect. Consider alternating the grain patterns of the wood for an aesthetically pleasing look.
-
Sand the Wood: With the pieces arranged, use a belt sander or orbital sander to sand the surfaces of the wood. Start with a coarse grit sandpaper to remove any rough spots or imperfections, then gradually move to finer grits for a smooth finish. Be sure to sand both the faces and edges of the wood pieces.
-
Round the Edges: To give your butcher block countertop a more finished look, consider rounding the edges of the wood pieces using a router or sandpaper. This step adds a touch of elegance to the final product.
-
Check for Smoothness: After sanding, run your hands over the wood surfaces to ensure that they are smooth to the touch. Any rough spots or uneven areas should be addressed before moving on to the next step.
By carefully cutting and sanding the wood, you'll be well on your way to creating a beautiful and functional butcher block countertop for your kitchen. Once this step is complete, you can proceed to the next phase of the DIY process.
Step 3: Gluing and Clamping the Wood
Once the wood pieces are cut, sanded, and arranged in the desired pattern, it's time to bring them together through the gluing and clamping process. Follow these steps to ensure a strong and secure bond for your butcher block countertop:
-
Apply Wood Glue: Using a food-safe wood glue, apply a generous amount to the edges of the wood pieces that will be joined together. Ensure that the glue is spread evenly to create a solid bond.
-
Assemble the Pieces: Carefully bring the wood pieces together, aligning them according to the desired pattern. Press the pieces firmly to allow the glue to make full contact with the wood surfaces.
-
Use Clamps: Once the pieces are aligned, use clamps to hold them tightly together. Position the clamps along the edges of the wood, applying enough pressure to ensure that the pieces are firmly bonded. Be sure to wipe away any excess glue that may seep out during the clamping process.
-
Allow for Drying Time: Leave the clamped wood pieces undisturbed for the recommended drying time specified by the wood glue manufacturer. This will allow the glue to cure and create a strong, durable bond between the wood pieces.
-
Check for Alignment: After the glue has dried, carefully remove the clamps and inspect the joined wood pieces. Ensure that the alignment is correct and that the bond is secure. Any minor imperfections can be addressed during the trimming and sanding phase.
By following these steps, you'll effectively glue and clamp the wood pieces together, setting the stage for the next phase of creating your DIY butcher block countertop.
Step 4: Trimming and Sanding the Butcher Block
With the wood pieces firmly glued together, it's time to focus on trimming and sanding the butcher block to achieve a smooth and uniform surface. Follow these detailed steps to refine the appearance and texture of your DIY butcher block countertop:
-
Trim the Edges: Using a table saw or circular saw, carefully trim the edges of the butcher block to create clean, straight lines. This step is crucial for achieving a professional-looking finish and ensuring that the countertop fits perfectly in your kitchen space.
-
Sand the Surface: Begin the sanding process by using a coarse grit sandpaper to remove any excess glue, uneven surfaces, or rough edges. Work your way across the entire surface of the butcher block, paying close attention to achieving a consistent level of smoothness.
-
Gradually Increase Grit: As you progress with sanding, transition to finer grit sandpaper to refine the surface further. This will help eliminate any remaining imperfections and create a silky-smooth finish on the wood.
-
Round the Corners: Consider rounding the corners of the butcher block to soften the edges and prevent sharp corners. This not only enhances the visual appeal but also adds a touch of safety to your countertop.
-
Check for Uniformity: After sanding, run your hands over the entire surface to ensure that it is uniformly smooth. Pay attention to any areas that may require additional sanding to achieve a consistent texture across the entire countertop.
-
Inspect for Imperfections: Take a close look at the butcher block to identify any remaining imperfections, such as small gaps or uneven areas. Address these issues by carefully sanding and smoothing the affected areas until they blend seamlessly with the rest of the surface.
By meticulously trimming and sanding the butcher block, you'll transform it into a stunning centerpiece for your kitchen. Once this step is complete, you'll be ready to move on to the final phase of sealing and finishing the DIY butcher block countertop.
Step 5: Sealing and Finishing the Butcher Block
After all the hard work of crafting your DIY butcher block countertop, it's time to seal and finish the wood to protect it from moisture, stains, and daily wear and tear. Follow these essential steps to ensure that your butcher block is not only beautiful but also durable and long-lasting:
-
Apply Wood Conditioner: Before sealing the butcher block, it's crucial to apply a wood conditioner to prepare the surface for the sealing process. The conditioner helps the wood absorb the sealer more evenly, resulting in a smoother and more consistent finish.
-
Choose a Food-Safe Sealer: Select a high-quality butcher block sealer that is specifically designed for food preparation surfaces. Look for a product that is non-toxic, food-safe, and resistant to water and stains. Mineral oil and beeswax are popular natural options for sealing butcher blocks.
-
Evenly Coat the Surface: Using a clean cloth or brush, apply a generous coat of the sealer to the entire surface of the butcher block, including the edges. Ensure that the sealer is spread evenly and penetrates the wood to provide comprehensive protection.
-
Allow for Absorption Time: Let the sealer absorb into the wood for the recommended duration specified by the product manufacturer. This allows the wood to soak up the sealer, creating a strong barrier against moisture and enhancing the natural beauty of the wood grain.
-
Reapply Sealer as Needed: Depending on the type of sealer used, you may need to apply multiple coats to achieve the desired level of protection and sheen. Follow the manufacturer's instructions regarding the number of coats and the intervals between applications.
-
Buff the Surface: After the final coat of sealer has dried, gently buff the surface of the butcher block with a clean cloth to remove any excess sealer and achieve a smooth, lustrous finish. This step enhances the natural beauty of the wood and creates a welcoming surface for food preparation.
By carefully sealing and finishing your DIY butcher block countertop, you'll not only protect the wood from daily use but also enhance its visual appeal. Once the sealing and finishing process is complete, your custom-made butcher block will be ready to take its place as the centerpiece of your kitchen, adding warmth, functionality, and a touch of craftsmanship to your home.
Conclusion
In conclusion, creating your own DIY butcher block countertop is a rewarding and cost-effective way to add a touch of craftsmanship and functionality to your kitchen. By carefully selecting the right wood, cutting, sanding, gluing, trimming, and sealing the butcher block, you can achieve a stunning and durable countertop that will be the envy of your friends and family. With the satisfaction of knowing that you created a beautiful piece for your home, your DIY butcher block countertop will not only serve as a practical surface for food preparation but also as a testament to your creativity and skill in the world of home improvement. So, roll up your sleeves, gather your materials, and get ready to enjoy the fruits of your labor as you admire your handcrafted masterpiece in your kitchen.