
Home>Create & Decorate>DIY & Crafts>DIY Sliding Gate: Step-by-Step Guide To Building Your Own
DIY & Crafts
DIY Sliding Gate: Step-by-Step Guide To Building Your Own
Published: June 3, 2024

Content Creator specializing in woodworking and interior transformations. Caegan's guides motivate readers to undertake their own projects, while his custom furniture adds a personal touch.
Learn how to build your own DIY sliding gate with our step-by-step guide. Perfect for DIY & Crafts enthusiasts looking for a fun and practical project.
(Many of the links in this article redirect to a specific reviewed product. Your purchase of these products through affiliate links helps to generate commission for Twigandthistle.com, at no extra cost. Learn more)
Introduction
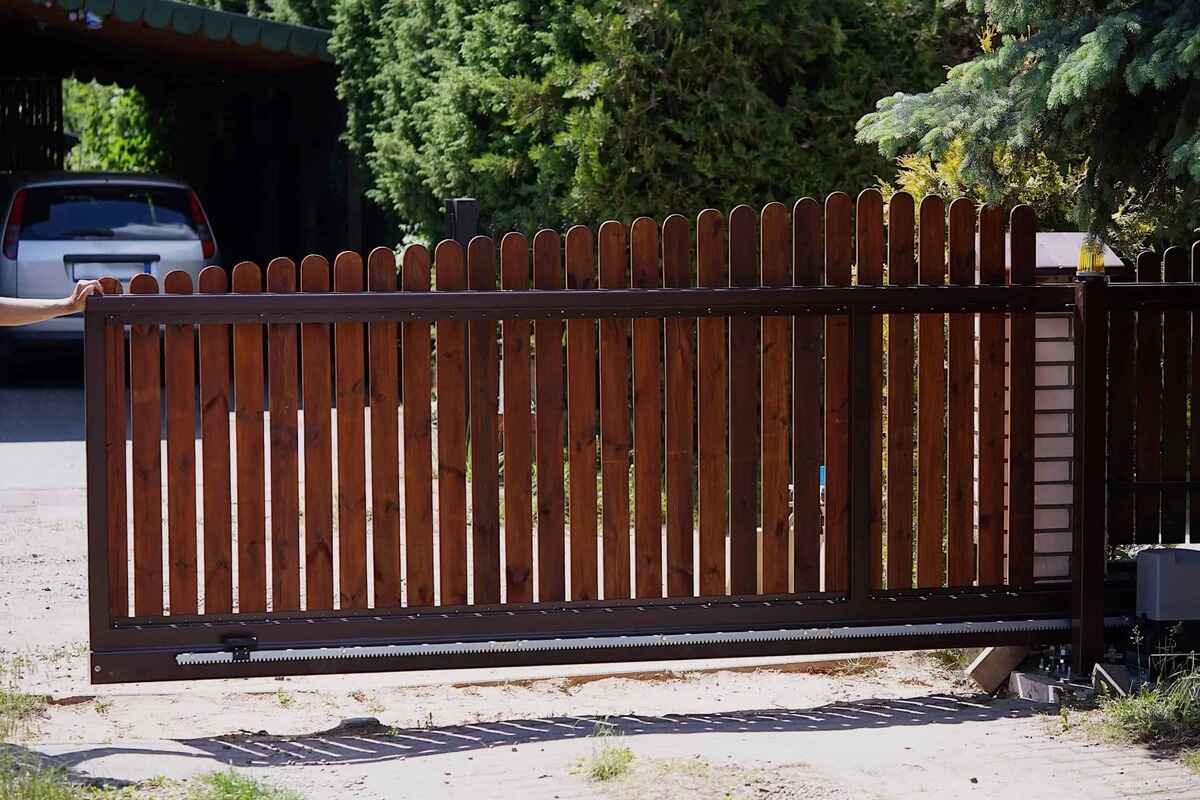
Are you tired of struggling with a traditional swing gate that takes up too much space in your driveway? If so, building a DIY sliding gate might be the perfect solution for you. Not only does a sliding gate save space, but it also adds a touch of modern elegance to your property. In this step-by-step guide, we will walk you through the process of designing, building, and installing your very own sliding gate. Whether you're a seasoned DIY enthusiast or a novice looking for a new project, this guide will help you create a functional and stylish sliding gate for your home.
Planning and Designing Your Sliding Gate
Before diving into the construction process, it's crucial to start with a well-thought-out plan for your sliding gate. Here's how to get started:
-
Measure Your Space: Begin by measuring the width of the opening where you intend to install the sliding gate. This measurement will determine the size of the gate you need to build.
-
Choose Your Materials: Consider the aesthetic you want to achieve and select materials that align with your vision. Common options for sliding gate construction include wood, metal, and composite materials.
-
Design Your Gate: Sketch out a design for your sliding gate, taking into account the materials you've chosen and any decorative elements you want to incorporate. Consider the overall style of your property to ensure that the gate complements the existing architecture.
-
Consider the Sliding Mechanism: Research different sliding gate mechanisms to determine the best fit for your project. Whether you opt for a traditional track and roller system or a more modern automatic gate opener, factor this into your design.
-
Check Local Regulations: Before finalizing your design, check with your local authorities to ensure that your planned gate complies with any relevant regulations or restrictions.
By carefully planning and designing your sliding gate, you'll set the stage for a successful construction process and a finished product that meets your needs and expectations.
Gathering Materials and Tools
When it comes to building a DIY sliding gate, having the right materials and tools is essential for a successful project. Here's a comprehensive list of what you'll need to gather before getting started:
Materials
- Gate Frame Material: Depending on your design preference, you'll need material for the frame, such as wood, metal tubing, or composite materials.
- Gate Panels: These will form the visible face of your gate. Choose a material that aligns with your aesthetic, whether it's wood, metal, or another option.
- Sliding Mechanism: This includes the track, rollers, and any additional hardware required for the gate to slide smoothly.
- Fasteners: Screws, bolts, and nuts will be necessary for securing the various components of the gate together.
- Concrete: If you're installing a concrete footing for the gate, you'll need concrete mix for the foundation.
Tools
- Measuring Tape: Accurate measurements are crucial for ensuring that your gate fits the opening properly.
- Saw: Depending on the materials you're using, you may need a circular saw, miter saw, or reciprocating saw for cutting.
- Drill and Bits: A drill will be essential for creating holes for fasteners and hardware installation.
- Level: To ensure that your gate is installed evenly and straight, a level is indispensable.
- Welding Equipment (if using metal): If you're working with metal materials, welding equipment may be necessary for fabrication.
Safety Gear
- Safety Glasses: Protect your eyes from debris and potential hazards during construction.
- Work Gloves: Keep your hands safe from sharp edges and splinters while handling materials.
By gathering the right materials and tools, you'll be well-prepared to tackle the construction of your DIY sliding gate with confidence and efficiency.
Building the Frame for Your Sliding Gate
Building the frame is a critical step in constructing your sliding gate, as it provides the structure and support for the entire gate assembly. Here's a detailed breakdown of the process:
-
Cutting the Frame Material: Begin by cutting the frame material to the appropriate lengths based on your gate design and measurements. Whether you're using wood, metal tubing, or composite materials, precise cuts are essential for a well-fitted frame.
-
Assembling the Frame: Once the individual pieces are cut, assemble them according to your design. This may involve using screws, bolts, or welding, depending on the materials chosen. Ensure that the frame is square and level during assembly to prevent issues with the gate's operation later on.
-
Adding Cross Bracing (if necessary): Depending on the size and material of your gate, adding cross braces to the frame can provide additional stability and prevent warping over time. This step is particularly important for larger gates or those made from wood.
-
Installing the Ground Track: If your sliding gate design includes a ground track for the gate to slide along, this is the time to install it. The track should be level and securely anchored to the ground to ensure smooth operation.
-
Attaching the Gate Support Wheels: If your gate design incorporates support wheels to bear the weight of the gate, attach them to the frame at this stage. These wheels will help distribute the gate's weight and facilitate smooth movement along the track.
-
Applying Protective Coating (if necessary): Depending on the material used for the frame, applying a protective coating or sealant can help enhance durability and weather resistance. This step is particularly important for wooden frames to prevent rot and decay.
By following these steps, you'll be well on your way to constructing a sturdy and reliable frame for your sliding gate. Once the frame is in place, you can proceed to the next phase of the construction process, bringing you one step closer to completing your DIY sliding gate project.
Installing the Sliding Mechanism
Installing the sliding mechanism is a crucial step in the construction of your DIY sliding gate, as it directly impacts the gate's functionality and ease of operation. Here's a detailed guide on how to install the sliding mechanism:
-
Prepare the Track: Begin by positioning the track along the intended path of the gate's movement. Ensure that the track is level and securely anchored to the ground. Depending on the material of the track, you may need to use anchors, bolts, or concrete fasteners to secure it in place.
-
Mount the Rollers: Attach the rollers to the gate frame, ensuring that they align with the track. The rollers will facilitate smooth movement along the track, so it's essential to position them accurately and securely. Depending on the type of rollers you're using, this may involve bolting them to the frame or using specialized mounting brackets.
-
Test the Movement: Before proceeding further, test the movement of the gate along the track to ensure that the rollers glide smoothly and without obstruction. Make any necessary adjustments to the track or roller positioning to achieve optimal movement.
-
Install the Guide Rollers (if applicable): If your sliding gate design includes guide rollers to prevent lateral movement and maintain alignment, install them along the track. Guide rollers are particularly important for longer gates to prevent swaying or misalignment during operation.
-
Attach the Sliding Gate Motor (if applicable): If you're opting for an automatic sliding gate, this is the stage where you would install the gate motor. Follow the manufacturer's instructions for mounting the motor to the gate frame and connecting it to the sliding mechanism.
-
Secure the End Stops: Install end stops at the open and closed positions of the gate to prevent overextension and ensure that the gate stops at the intended points. End stops can be mounted to the ground or adjacent structures, depending on the layout of your gate opening.
-
Lubricate the Mechanism: Once the sliding mechanism is fully installed, apply lubricant to the track and rollers to minimize friction and ensure smooth operation. Regular maintenance and lubrication will prolong the life of the sliding mechanism and prevent issues with gate movement.
By following these steps, you'll successfully install the sliding mechanism for your DIY sliding gate, bringing you closer to completing the construction process and enjoying the convenience of a functional and stylish sliding gate.
Attaching the Gate Panels
Attaching the gate panels is a pivotal step that brings your DIY sliding gate to its final form. Here's a detailed guide on how to attach the gate panels:
-
Aligning the Panels: Begin by aligning the gate panels with the constructed frame. Ensure that the panels are positioned evenly and symmetrically to create a cohesive and visually appealing gate.
-
Securing the Panels: Once the panels are aligned, use appropriate fasteners such as screws or bolts to secure them to the frame. The method of attachment will depend on the material of the panels and the frame. For wooden panels, pre-drilling pilot holes can prevent splitting when driving in the fasteners.
-
Adding Decorative Elements (if desired): If you want to enhance the aesthetic appeal of your sliding gate, consider adding decorative elements to the panels. This could include ornamental ironwork, carved designs, or other embellishments that align with your personal style and the overall look of your property.
-
Ensuring Smooth Movement: As you attach the panels, periodically test the movement of the gate along the track to ensure that the added weight of the panels does not impede its operation. Make any necessary adjustments to the attachment points to maintain smooth and effortless movement.
-
Applying a Protective Finish (if necessary): Depending on the material of the panels, applying a protective finish or sealant can help prolong their lifespan and maintain their appearance. This step is particularly important for wooden panels to protect them from the elements.
-
Checking for Alignment: Once the panels are attached, double-check the alignment and symmetry of the gate. Adjust the panels as needed to ensure that they are level and uniform, creating a polished and professional finish.
By following these steps, you'll successfully attach the gate panels, bringing your DIY sliding gate one step closer to completion. With the panels in place, your sliding gate will not only offer practical functionality but also enhance the visual appeal of your property.
Adding Finishing Touches
Once the main components of your DIY sliding gate are in place, it's time to add the finishing touches that will elevate its appearance and functionality. Here's a detailed guide on how to complete your sliding gate project with finesse:
-
Applying a Protective Coating: Depending on the material of your gate, applying a protective coating or paint can enhance its durability and weather resistance. For metal gates, a rust-resistant paint will prevent corrosion, while wooden gates can benefit from a weatherproof sealant or paint to protect against moisture and UV damage.
-
Installing Gate Hardware: Consider adding gate hardware such as handles, latches, and decorative accents to enhance the visual appeal and functionality of your sliding gate. Choose hardware that complements the overall style of your property and adds a touch of elegance to the gate.
-
Adding Lighting: Installing low-voltage lighting along the path of the sliding gate can improve visibility and security, especially during nighttime operation. Solar-powered lights or LED fixtures can be strategically placed to illuminate the gate area and enhance its aesthetic appeal.
-
Incorporating Landscaping: Surrounding the gate area with landscaping elements such as plants, shrubs, or decorative stones can soften its appearance and integrate it seamlessly into your property's overall design. Consider the visual impact of the gate within the context of your landscaping to create a cohesive look.
-
Customizing Gate Panels: If your gate panels are made of wood, consider adding custom designs, carvings, or engravings to personalize the gate and make it a unique focal point of your property. This customization can reflect your individual style and add a distinctive touch to the gate's appearance.
-
Regular Maintenance Plan: Establish a maintenance routine for your sliding gate, including periodic inspections, lubrication of moving parts, and cleaning to keep it in optimal condition. Regular maintenance will prolong the lifespan of your gate and ensure its continued smooth operation.
By adding these finishing touches, you'll not only enhance the visual appeal of your DIY sliding gate but also ensure its long-term functionality and durability. With attention to detail and a focus on the overall aesthetic, your sliding gate will become a standout feature of your property.
Conclusion
Congratulations! You've successfully completed the construction of your very own DIY sliding gate. By following this step-by-step guide, you've not only saved space in your driveway but also added a touch of modern elegance to your property. Your sliding gate is not just a functional entryway; it's a statement piece that enhances the overall aesthetic of your home. As you admire the finished product, take pride in the fact that you've tackled a challenging project and created a valuable addition to your property. Whether you're a seasoned DIY enthusiast or a novice looking for a new project, this guide has empowered you to design, build, and install a sliding gate that meets your needs and reflects your personal style. Enjoy the convenience, security, and visual appeal of your newly constructed DIY sliding gate!