
Home>Create & Decorate>DIY & Crafts>How To Build A Gate
DIY & Crafts
How To Build A Gate
Published: February 23, 2024

Senior Editor in Create & Decorate, Kathryn combines traditional craftsmanship with contemporary trends. Her background in textile design and commitment to sustainable crafts inspire both content and community.
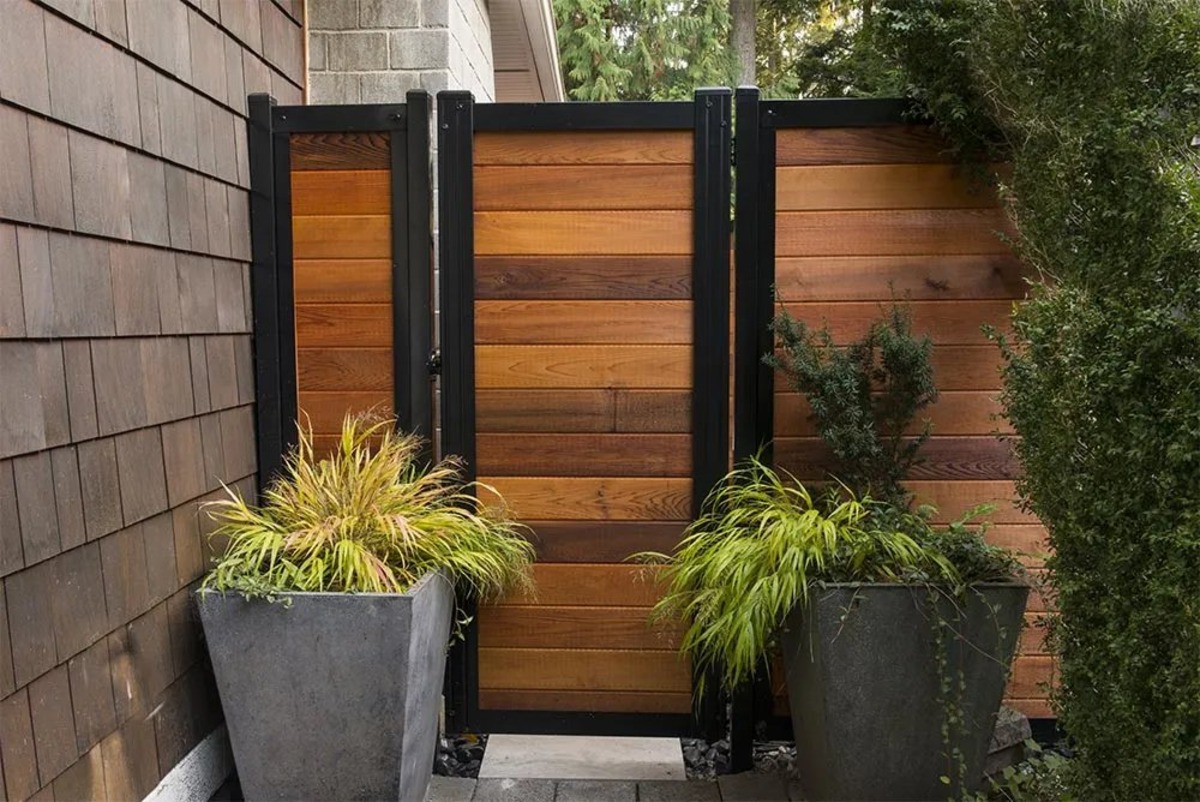
Learn how to build a gate with our easy DIY & Crafts guide. Get step-by-step instructions and tips for creating a sturdy and stylish gate for your home. Start your project today!
(Many of the links in this article redirect to a specific reviewed product. Your purchase of these products through affiliate links helps to generate commission for Twigandthistle.com, at no extra cost. Learn more)
Introduction
Building a gate can be a rewarding and practical DIY project that adds both functionality and aesthetic appeal to your property. Whether you're looking to enhance the security of your home, corral a garden, or simply create a welcoming entrance, constructing a gate allows you to customize and personalize an essential element of your outdoor space.
By crafting your own gate, you have the freedom to choose the materials, design, and dimensions that best suit your needs and style preferences. Additionally, the satisfaction of completing a project with your own hands and witnessing the tangible results can be immensely fulfilling.
Throughout this guide, you'll learn the step-by-step process of building a sturdy and visually appealing gate. From gathering the necessary materials and tools to installing the finished product, each stage is an opportunity to hone your carpentry skills and bring your vision to life.
Whether you're a seasoned DIY enthusiast or a newcomer to woodworking, this guide is designed to provide clear and accessible instructions that empower you to create a gate that not only serves its practical purpose but also becomes a standout feature of your outdoor space.
So, roll up your sleeves, gather your tools, and let's embark on this journey to construct a gate that not only enhances the functionality of your property but also reflects your unique style and craftsmanship.
Step 1: Gather Materials and Tools
Before diving into the construction process, it's crucial to gather all the necessary materials and tools to ensure a smooth and efficient workflow. Here's a comprehensive list to get you started:
Materials:
- Wood: Select high-quality lumber that is suitable for outdoor use, such as cedar, redwood, or pressure-treated pine. Ensure that the wood is durable and resistant to rot and insect damage.
- Gate Hardware: This includes hinges, a latch, and screws. Opt for heavy-duty hardware that can withstand the weight and constant use of the gate.
- Wood Glue: Choose a weather-resistant wood glue to reinforce the joints and enhance the overall strength of the gate.
- Galvanized Screws or Nails: These will be used to secure the various components of the gate, providing stability and longevity.
- Decorative Elements (Optional): If desired, consider adding decorative elements such as finials, ornamental hinges, or custom designs to personalize the appearance of the gate.
Tools:
- Measuring Tape: Accurate measurements are essential for ensuring a precise fit and alignment of the gate components.
- Circular Saw or Miter Saw: These tools will be used to cut the lumber to the required dimensions, allowing for precise and clean cuts.
- Drill and Bits: A drill is necessary for creating pilot holes and driving screws into the wood. Ensure that you have the appropriate drill bits for the screws and hardware you'll be using.
- Screwdriver: Both a manual screwdriver and/or a power screwdriver can be useful for assembling the gate and attaching hardware.
- Clamps: Clamps are invaluable for holding the gate components together during assembly, ensuring that everything remains aligned and secure.
- Level: A level is essential for ensuring that the gate is installed evenly and plumb, preventing any sagging or misalignment.
By gathering these materials and tools, you'll be well-equipped to commence the construction of your gate. With everything in place, you can proceed to the next step with confidence, knowing that you have everything you need to bring your vision to fruition.
Step 2: Measure and Plan
Accurate measurements and meticulous planning are the cornerstones of a well-constructed gate. Before making any cuts or assembling the components, it's essential to take precise measurements and devise a comprehensive plan to ensure that the gate fits perfectly and functions as intended.
Measure Twice, Cut Once
Begin by measuring the opening where the gate will be installed. Take both horizontal and vertical measurements to determine the exact dimensions required for the gate. It's crucial to account for any variations in the terrain or surrounding structures to ensure a proper fit.
Once you have the measurements, double-check them to ensure accuracy. Remember the old adage: "measure twice, cut once." This simple yet timeless advice can save you from costly mistakes and rework down the line.
Consider Clearance and Functionality
In addition to the dimensions of the opening, consider the necessary clearance for the gate to swing open and close without obstruction. Factor in any slopes or uneven ground that may affect the clearance and functionality of the gate. This foresight will prevent potential issues during installation and use.
Sketch the Design
With the measurements in hand, sketch out a design for the gate, incorporating the desired height, style, and any decorative elements. Consider whether you want a solid gate for privacy or a more open design for visibility. This sketch will serve as a visual reference and guide throughout the construction process.
Plan for Hardware Placement
As part of the planning phase, determine the placement of hinges and the latch. Ensure that the locations are strategically chosen to support the weight of the gate and provide secure closure. This proactive approach will streamline the installation of hardware during the later stages of construction.
By meticulously measuring the opening, accounting for clearance and functionality, sketching the design, and planning for hardware placement, you establish a solid foundation for the successful construction of your gate. This thoughtful preparation sets the stage for the next steps, where you'll bring your vision to life through precise cutting and assembly.
Step 3: Cut and Assemble Frame
With the measurements and plan in place, it's time to bring the gate to life by cutting the lumber and assembling the frame. This pivotal step forms the structural core of the gate, dictating its strength, stability, and overall appearance.
Cutting the Lumber
Using the measurements from the planning phase, carefully mark the lumber for cutting. A circular saw or miter saw is ideal for achieving precise and clean cuts. Remember to follow the adage "measure twice, cut once" to avoid errors and ensure that the components fit together seamlessly.
The frame typically consists of horizontal and vertical members, with additional bracing for support and stability. Each piece should be cut to the exact dimensions specified in the plan, taking into account any decorative elements or design features.
Assembling the Frame
Once the lumber is cut to size, it's time to assemble the frame. Begin by laying out the horizontal and vertical members according to the design sketch. Apply weather-resistant wood glue to the joints for added strength, then use galvanized screws or nails to secure the pieces together.
Clamps are invaluable for holding the frame components in place during assembly, ensuring that everything remains aligned and square. Check for squareness by measuring the diagonals of the frame; if the measurements are equal, the frame is square and true.
Consider adding diagonal bracing within the frame to prevent warping and enhance stability. This step is particularly crucial for larger gates or those subjected to strong winds and external forces.
Reinforcing the Joints
To further reinforce the joints and ensure the longevity of the gate, consider adding metal corner braces or brackets at the connections. These metal reinforcements provide additional support and prevent the frame from coming apart over time.
By meticulously cutting the lumber to the precise dimensions and assembling the frame with care and attention to detail, you establish a solid foundation for the subsequent stages of gate construction. With the frame taking shape, the next steps will focus on attaching hinges and a latch, followed by the installation of the completed gate.
This phase represents a significant milestone in the construction process, bringing you one step closer to realizing your vision of a functional and visually appealing gate that complements your outdoor space.
Step 4: Attach Hinges and Latch
With the frame of the gate securely assembled, the next critical step is to attach the hinges and latch, transforming the frame into a fully functional gate. Proper installation of the hinges and latch is essential for ensuring smooth operation, secure closure, and long-term durability of the gate.
Selecting the Right Hardware
Before attaching the hinges and latch, it's important to select hardware that is well-suited for the size and weight of the gate. Heavy-duty hinges capable of supporting the gate's mass should be chosen, and their quantity will depend on the dimensions and design of the gate. Additionally, opt for a robust latch mechanism that provides reliable security and ease of use.
Positioning the Hinges
Carefully position the hinges on the gate frame, ensuring that they are evenly spaced and aligned for proper weight distribution. It's advisable to have a helper assist with this step, holding the gate in place while you position and mark the placement of the hinges. Once marked, pre-drill pilot holes for the hinge screws to prevent splitting of the wood when attaching the hinges.
Attaching the Hinges
Secure the hinges to the gate frame using galvanized screws, driving them firmly into the pre-drilled pilot holes. It's crucial to verify that the hinges are securely fastened, as they will bear the weight of the gate and facilitate its smooth opening and closing. Once the hinges are attached, carefully test the gate's movement to ensure that it swings freely and without any obstructions.
Installing the Latch
With the hinges in place, proceed to install the latch mechanism on the gate frame. The latch should align with the corresponding component on the adjacent structure, such as a fence post or a stationary part of the gate opening. Ensure that the latch is positioned at an appropriate height for easy access and functionality.
Testing and Adjustments
After attaching the hinges and latch, thoroughly test the gate to verify that it operates smoothly and securely latches closed. Make any necessary adjustments to the hinge placement or latch mechanism to achieve optimal functionality. It's essential to address any issues at this stage to prevent future complications and ensure the long-term reliability of the gate.
By methodically attaching the hinges and latch, you bring the gate one step closer to completion, culminating in a fully operational and secure entryway. This pivotal stage sets the stage for the final step: installing the gate in its designated location, where it will serve as a testament to your craftsmanship and attention to detail.
Step 5: Install Gate
With the gate frame fully assembled and the hinges and latch securely attached, the final step is to install the gate in its designated location. This transformative stage brings the culmination of your efforts, as the gate transitions from a standalone structure to an integral part of your property's functionality and aesthetic appeal.
Preparing the Opening
Before installing the gate, it's essential to prepare the opening to ensure a seamless and secure fit. Clear any debris or obstructions from the gate's path, and verify that the adjacent structures, such as fence posts or gate posts, are sturdy and properly aligned. If necessary, make any adjustments to the surrounding elements to accommodate the gate's dimensions and swing path.
Aligning and Leveling
Carefully position the gate within the opening, ensuring that it aligns with the adjacent structures and the ground below. Use shims or spacers as needed to achieve a level and plumb orientation, preventing any undue stress on the hinges and ensuring smooth operation. A level is indispensable for confirming that the gate is installed evenly and without any tilt or misalignment.
Attaching the Hinges
With the gate in position, secure the hinges to the adjacent structures, such as fence posts or gate posts, using galvanized screws. It's crucial to verify that the hinges are firmly anchored, as they bear the weight of the gate and facilitate its smooth opening and closing. Once the hinges are attached, carefully test the gate's movement to ensure that it swings freely and without any obstructions.
Testing and Adjustments
Thoroughly test the gate to verify that it operates smoothly and securely latches closed. Make any necessary adjustments to the hinge placement or latch mechanism to achieve optimal functionality. It's essential to address any issues at this stage to prevent future complications and ensure the long-term reliability of the gate.
Final Inspection
After installing the gate, conduct a final inspection to ensure that it meets your expectations in terms of alignment, functionality, and overall appearance. Take a moment to appreciate the culmination of your efforts and the tangible impact the gate has on your property. With the gate securely installed, you can take pride in the craftsmanship and attention to detail that have resulted in a functional and visually appealing addition to your outdoor space.
By following these steps and exercising care and precision during the installation process, you can ensure that the gate not only serves its practical purpose but also becomes a standout feature that enhances the overall appeal and functionality of your property.
Conclusion
As you stand back and admire the newly installed gate, it's a testament to your dedication, craftsmanship, and the fulfillment of a vision brought to life. The journey of building a gate has not only added a practical and functional element to your property but has also provided a canvas for self-expression and creativity.
Throughout this process, you've ventured through the stages of gathering materials and tools, meticulously measuring and planning, cutting and assembling the frame, attaching hinges and a latch, and finally, installing the gate in its designated location. Each step has been an opportunity to hone your carpentry skills, exercise precision, and infuse your unique style into the creation.
The careful selection of materials, from durable lumber to robust hardware, ensures that the gate is not only visually appealing but also built to withstand the rigors of outdoor use. The attention to detail in measuring and planning has resulted in a gate that seamlessly integrates into its surroundings, providing a secure and functional entryway.
The process of cutting and assembling the frame has allowed you to witness the transformation of raw materials into a structured and sturdy framework, while the attachment of hinges and a latch has endowed the gate with the essential components for smooth operation and secure closure.
As the gate is installed and becomes a part of your property, it symbolizes the culmination of your efforts and the realization of a vision. It stands as a tangible representation of your craftsmanship and attention to detail, enhancing the functionality and aesthetic appeal of your outdoor space.
Beyond its practical purpose, the gate serves as a reflection of your creativity and personal touch, whether through its design, decorative elements, or the meticulous execution of each step. It's a reminder of the satisfaction that comes from creating something with your own hands and witnessing its seamless integration into your environment.
So, as you take a moment to appreciate the completed gate, remember that it's more than just a physical barrier; it's a manifestation of your dedication, creativity, and the joy of bringing a vision to fruition. Whether it's welcoming guests, securing a garden, or simply adding character to your property, the gate stands as a testament to the power of DIY craftsmanship and the transformative impact it can have on your surroundings.