
Home>Create & Decorate>DIY & Crafts>DIY Driveway Gate: Step-by-Step Guide To Building Your Own
DIY & Crafts
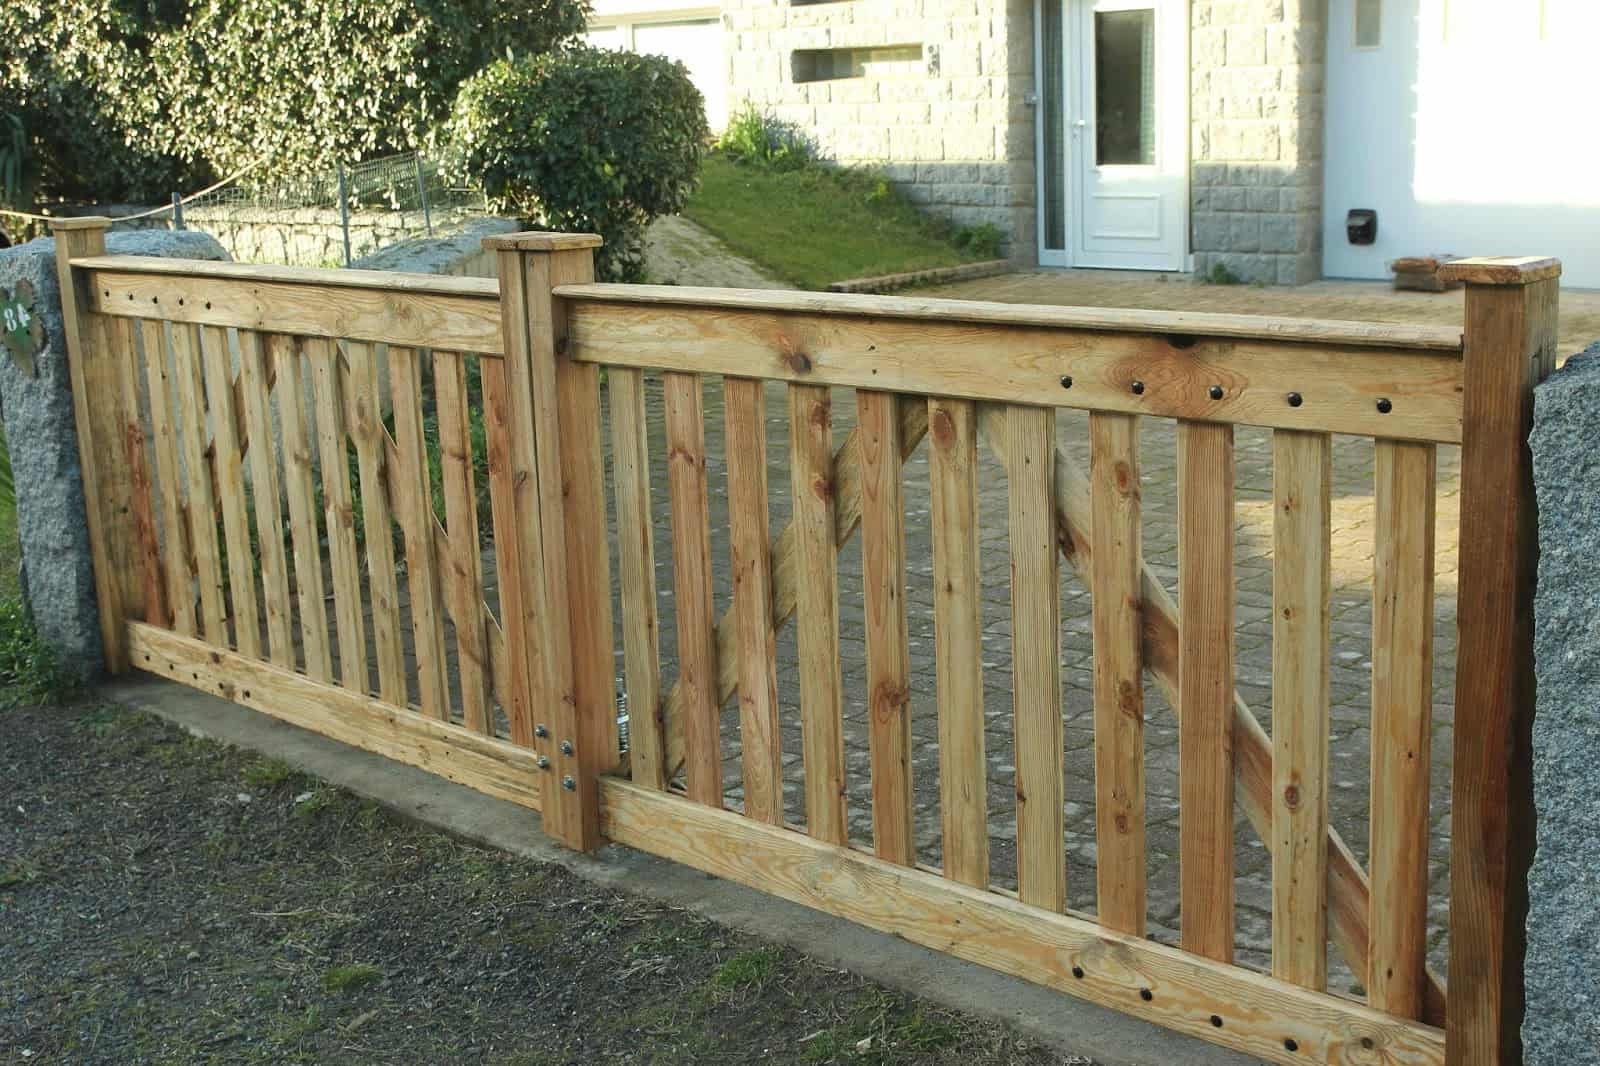
DIY Driveway Gate: Step-by-Step Guide To Building Your Own
Published: April 26, 2024

Senior Editor in Create & Decorate, Kathryn combines traditional craftsmanship with contemporary trends. Her background in textile design and commitment to sustainable crafts inspire both content and community.
Discover the ultimate step-by-step guide to building your own DIY driveway gate with our expert tips and techniques. Perfect for DIY & Crafts enthusiasts!
(Many of the links in this article redirect to a specific reviewed product. Your purchase of these products through affiliate links helps to generate commission for Twigandthistle.com, at no extra cost. Learn more)
Introduction
Are you looking to add some extra security and curb appeal to your property? Building your own DIY driveway gate can be a rewarding project that not only enhances the look of your home but also provides an added layer of security. Whether you're a seasoned DIY enthusiast or a beginner looking for a new challenge, constructing your own driveway gate can be a fulfilling endeavor. In this step-by-step guide, we'll walk you through the process of building a sturdy and stylish driveway gate that will leave your neighbors impressed. Let's dive in and get started on this exciting project!
Planning Your DIY Driveway Gate
Before diving into the construction process, it's crucial to start with a well-thought-out plan for your DIY driveway gate. Here are the essential steps to consider when planning your project:
-
Determine the Gate Type: The first decision to make is the type of gate you want. Whether it's a swing gate, sliding gate, or bi-fold gate, each type has its own set of requirements and installation methods. Consider the space available and the terrain of your driveway to choose the most suitable gate type.
-
Measurements and Design: Accurate measurements are key to a successful gate installation. Measure the width and height of your driveway entrance to determine the size of the gate needed. Additionally, consider the design elements such as the style of the gate, material choices, and any decorative features you want to incorporate.
-
Check Local Regulations: Before proceeding with your DIY driveway gate project, it's essential to check with local authorities or homeowner's associations for any regulations or permits required for installing a driveway gate. This step can save you from potential legal issues down the road.
-
Budget and Timeline: Establish a budget for the project, including the cost of materials, tools, and any professional assistance if needed. Set a realistic timeline for the construction process, taking into account any potential setbacks or delays.
By carefully planning these crucial aspects, you'll set the stage for a smooth and successful DIY driveway gate project. Once the planning phase is complete, you can move on to gathering the necessary materials and tools for the construction process.
Gathering Materials and Tools
Now that you have a solid plan in place, it's time to gather all the materials and tools needed for your DIY driveway gate project. Here's a comprehensive list to ensure you have everything required to start the construction process:
Materials:
- Wood or Metal: Depending on your design preference, you'll need the appropriate amount of wood or metal for constructing the gate frame and panels. Ensure that the material is durable and suitable for outdoor use.
- Gate Hardware: This includes hinges, latches, and any additional hardware required for the functioning of the gate. Opt for heavy-duty hardware to ensure the longevity and stability of the gate.
- Concrete and Gravel: If you're installing posts for a swing gate, you'll need concrete and gravel for securing the posts in the ground. Ensure that the concrete mix is suitable for outdoor applications.
- Decorative Elements: If you plan to add decorative elements such as finials, ornamental designs, or custom engraving, make sure to have these materials on hand.
Tools:
- Measuring Tape and Level: Accurate measurements are crucial for a well-aligned and functional gate. A measuring tape and level will help ensure precision during the construction process.
- Saw and Drill: Depending on the material you're using, a saw for cutting and a drill for creating pilot holes and installing hardware will be essential tools.
- Post-Hole Digger: If you're installing posts for a swing gate, a post-hole digger will make the task of digging holes much more manageable.
- Screwdriver and Wrench: These basic hand tools will be necessary for assembling the gate frame and attaching hardware.
- Safety Gear: Don't forget to prioritize safety. Ensure you have safety goggles, gloves, and any other protective gear required for the specific tasks involved.
By gathering all the necessary materials and tools beforehand, you'll streamline the construction process and minimize the chances of delays due to missing items. Once you have everything prepared, you can move on to the exciting phase of building the frame for your DIY driveway gate.
Building the Frame
Building the frame is a critical step in the construction of your DIY driveway gate. The frame provides the structural support for the gate panels and ensures the overall stability and durability of the gate. Here's a detailed guide to building the frame for your driveway gate:
-
Cutting the Frame Pieces: Begin by cutting the wood or metal pieces for the frame according to the measurements determined during the planning phase. Use a saw appropriate for the material to achieve clean and precise cuts.
-
Assembling the Frame: Lay out the cut pieces in the desired configuration, whether it's a single or double gate, and begin assembling the frame. Use corner brackets or braces to secure the frame joints and ensure that the corners are perfectly square for a balanced and professional-looking result.
-
Adding Cross Braces: Depending on the size of your gate, adding cross braces to the frame can provide additional support and prevent warping or sagging over time. Position the cross braces diagonally across the frame to distribute the weight evenly and enhance the structural integrity of the gate.
-
Securing the Frame: Once the frame pieces and cross braces are in place, secure them using appropriate screws or fasteners. Ensure that the frame is level and plumb during the assembly process to avoid any alignment issues later on.
-
Reinforcement and Finishing Touches: Consider reinforcing the frame with additional support if necessary, especially for larger or heavier gates. Sand the frame to smooth out any rough edges and apply a weather-resistant finish or sealant to protect the wood from the elements.
By following these steps, you'll be well on your way to constructing a sturdy and well-built frame for your DIY driveway gate. With the frame in place, the next phase involves attaching the gate panels to complete the structure.
Attaching the Gate Panels
Attaching the gate panels is a crucial step that brings your DIY driveway gate to life. The panels not only contribute to the aesthetics of the gate but also provide privacy and security for your property. Here's a detailed guide on how to attach the gate panels to the frame:
-
Measuring and Cutting: Begin by measuring the dimensions of the gate opening and cutting the panels to fit accordingly. Use a saw suitable for the material of the panels to ensure clean and precise cuts.
-
Positioning the Panels: With the frame in place, position the gate panels within the frame, ensuring an even and symmetrical alignment. Use spacers or shims to maintain consistent spacing between the panels and prevent any uneven gaps.
-
Securing the Panels: Once the panels are positioned correctly, secure them to the frame using appropriate screws or fasteners. Ensure that the panels are level and plumb during the attachment process to maintain a uniform and professional appearance.
-
Adding Decorative Elements: If desired, this is the stage to add any decorative elements to the gate panels, such as ornamental designs, custom cutouts, or decorative hardware. These elements can enhance the visual appeal of the gate and reflect your personal style.
-
Reinforcement and Finishing: Consider reinforcing the attachment points of the panels with additional support, especially for larger or heavier gates. Sand the edges of the panels to smooth out any rough areas and apply a weather-resistant finish or sealant to protect the panels from the elements.
By following these steps, you'll successfully attach the gate panels to the frame, bringing your DIY driveway gate one step closer to completion. The next phase involves installing the hinges and latch to ensure smooth operation and security for your newly constructed gate.
Installing the Hinges and Latch
Installing the hinges and latch is a pivotal step in the construction of your DIY driveway gate. Proper installation of these components ensures smooth operation, security, and longevity of the gate. Here's a detailed guide on how to install the hinges and latch for your driveway gate:
-
Selecting the Hinges: Choose heavy-duty hinges suitable for the size and weight of your gate. Depending on the gate type, such as a swing gate, you'll need either strap hinges or butt hinges. Ensure that the hinges are designed for outdoor use and capable of bearing the load of the gate.
-
Positioning the Hinges: With the gate frame and panels in place, position the hinges on the gate frame and the gate post. For a swing gate, the hinges should be installed on the inner side of the gate frame and the corresponding gate post. Use a level to ensure that the hinges are aligned and the gate will swing smoothly.
-
Securing the Hinges: Once the hinges are positioned correctly, secure them in place using appropriate screws or fasteners. Ensure that the screws penetrate deep into the frame and post for a secure attachment. Test the movement of the gate to ensure that the hinges allow smooth swinging without any binding.
-
Installing the Latch: Choose a latch mechanism that suits your preference for security and convenience. Common options include padlock latches, gravity latches, or magnetic latches. Position the latch on the gate panel and the adjacent post, ensuring that it aligns properly for secure closure.
-
Securing the Latch: Once the latch is positioned correctly, secure it in place using the provided hardware or screws. Test the latch to ensure that it engages smoothly and securely, providing the desired level of security for your driveway gate.
-
Adjustments and Lubrication: After installing the hinges and latch, make any necessary adjustments to ensure that the gate swings or slides smoothly and aligns properly with the latch. Apply lubricant to the hinge pivot points and latch mechanism to reduce friction and prolong the lifespan of the components.
By following these steps, you'll successfully install the hinges and latch, completing the functional aspects of your DIY driveway gate. With the hinges and latch in place, your newly constructed gate is ready to enhance the security and visual appeal of your property.
Adding Finishing Touches
Once the structural components of your DIY driveway gate are in place, it's time to add the finishing touches that will elevate the overall appearance and functionality of the gate. Here's a detailed guide on how to add those final details:
-
Weatherproofing: Apply a weather-resistant sealant or paint to the entire gate, including the frame and panels. This protective layer will shield the gate from the elements, preventing moisture damage, rot, and corrosion. Choose a finish that complements the aesthetic of your property while providing long-lasting protection.
-
Gate Automation: If you desire added convenience and security, consider integrating gate automation systems. This can include electric gate openers, intercom systems, or remote access controls. Consult with a professional if you're considering this upgrade to ensure proper installation and functionality.
-
Customization: Personalize your gate with custom details such as house numbers, decorative metalwork, or personalized signage. These elements not only add a unique touch to your gate but also contribute to the overall character of your property.
-
Lighting: Install outdoor lighting fixtures near the gate to enhance visibility and security, especially during nighttime. Consider options such as solar-powered lights, LED fixtures, or low-voltage landscape lighting to illuminate the gate and its surroundings.
-
Landscaping: Enhance the visual impact of your gate by incorporating landscaping elements around its perimeter. This can include planting shrubs, flowers, or ornamental grasses to frame the gate and create an inviting entrance to your property.
-
Maintenance Schedule: Establish a regular maintenance schedule for your gate, including inspections, cleaning, and lubrication of moving parts. Proper maintenance will prolong the lifespan of your gate and ensure its continued functionality and visual appeal.
By adding these finishing touches, you'll not only enhance the aesthetic appeal of your DIY driveway gate but also maximize its functionality and longevity. With the completion of these final details, step back and admire the impressive transformation of your property with the newly constructed driveway gate.
Conclusion
Congratulations on successfully completing the construction of your DIY driveway gate! By following this step-by-step guide, you've not only added a touch of elegance to your property but also enhanced its security and functionality. Your dedication to this project has resulted in a valuable addition to your home that reflects your craftsmanship and attention to detail. As you admire the finished gate, take pride in the fact that you've tackled a challenging project and emerged with a stunning and practical enhancement to your property. Whether it's the visual appeal, the added security, or the sense of accomplishment, your DIY driveway gate stands as a testament to your creativity and determination. Now, sit back, relax, and enjoy the fruits of your labor as you admire your beautifully constructed driveway gate.