
Home>Home & Furniture>Studios>DIY Shed Office: Transforming A Storage Space Into A Productive Workspace
Studios
DIY Shed Office: Transforming A Storage Space Into A Productive Workspace
Published: February 22, 2024
Editor-in-Chief with a decade in home renovation and a passion for vintage furniture. Diane is known for her weekend treasure hunts at flea markets, enriching our content with unique style insights.
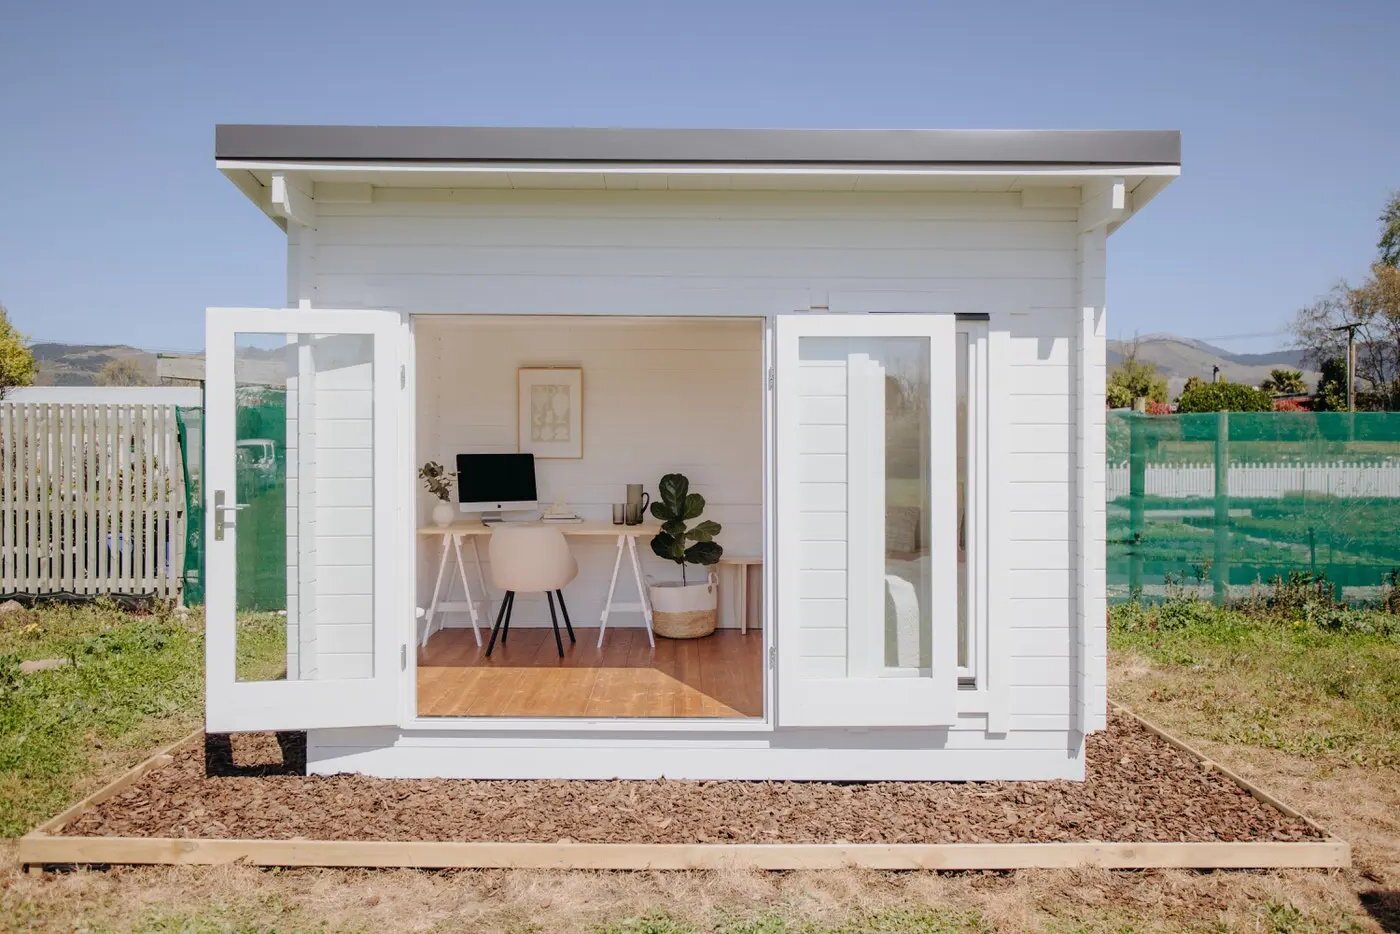
Transform your storage shed into a productive studio with our DIY tips and ideas. Create a functional workspace with our shed office transformation guide.
(Many of the links in this article redirect to a specific reviewed product. Your purchase of these products through affiliate links helps to generate commission for Twigandthistle.com, at no extra cost. Learn more)
Introduction
Transforming a humble shed into a functional and inviting workspace is an exciting endeavor that offers a multitude of benefits. Whether you're seeking a quiet retreat to focus on your projects, a dedicated space for remote work, or a creative studio for your hobbies, a DIY shed office can provide the perfect solution. This comprehensive guide will walk you through the step-by-step process of converting a simple storage space into a productive and inspiring environment tailored to your needs.
By repurposing an existing shed, you can minimize costs and reduce the environmental impact associated with new construction. Additionally, the transformation of a neglected shed into a vibrant office space presents an opportunity to unleash your creativity and showcase your personal style. From the initial clearing out of the space to the final touches of decoration, each stage of the transformation allows for personalization and customization, resulting in a truly unique and functional workspace.
The DIY shed office project is not only a practical endeavor but also a rewarding journey that fosters a sense of accomplishment and ownership. As you embark on this transformation, envision the possibilities that await – a tranquil retreat bathed in natural light, a cozy haven adorned with plants and artwork, or a sleek, modern workspace equipped with all the amenities you require. The potential for personalization is boundless, and the end result will be a space that reflects your individuality and supports your productivity.
Moreover, the process of converting a shed into an office space encourages resourcefulness and problem-solving, as you navigate the challenges of insulation, electrical wiring, and interior design. Embrace the opportunity to learn new skills and tackle hands-on tasks, as each accomplishment brings you closer to the realization of your dream workspace.
As you embark on this transformative journey, prepare to unleash your creativity, embrace practical challenges, and ultimately craft a space that seamlessly integrates productivity and comfort. With careful planning and attention to detail, your DIY shed office will soon become a cherished retreat where inspiration flourishes and productivity thrives.
Step 1: Clearing out the Shed
The initial step in transforming a shed into a functional office space involves clearing out the existing contents to create a blank canvas for the renovation. This process not only sets the stage for the upcoming renovations but also provides an opportunity to assess the condition of the shed and address any necessary repairs.
Begin by removing all items stored within the shed, including tools, equipment, and miscellaneous belongings. As you declutter the space, consider donating or discarding items that are no longer needed, thereby streamlining the contents and creating a more spacious environment for the upcoming transformation.
Once the shed is emptied, thoroughly clean the interior to remove dust, debris, and any signs of pest infestation. This step is crucial in preparing the space for insulation and interior enhancements, ensuring a clean and hygienic foundation for the office conversion.
As you clear out the shed, take note of any structural issues or damage that may require attention. Inspect the walls, flooring, and roof for signs of wear and tear, water damage, or pest intrusion. Addressing these issues at the outset of the project will prevent potential complications during the later stages of renovation.
In addition to physical clearing and cleaning, consider the shed's exterior surroundings. Trim overgrown vegetation, remove debris from the immediate vicinity, and assess the overall condition of the shed's exterior. By tidying up the surroundings, you can create a more inviting and aesthetically pleasing environment for your future office space.
By diligently clearing out the shed and addressing any underlying maintenance needs, you set the stage for a successful transformation. This initial step not only paves the way for subsequent renovations but also provides an opportunity to evaluate the shed's condition and ensure a solid foundation for the upcoming improvements. With the space cleared and prepared, you are ready to embark on the next phase of the DIY shed office project.
Step 2: Insulating and Weatherproofing
Insulating and weatherproofing the shed is a critical phase in the transformation process, as it ensures that the future office space is comfortable, energy-efficient, and protected from the elements. By effectively insulating the walls, ceiling, and floor, you can create a cozy and climate-controlled environment that is conducive to productivity and comfort.
The first step in insulating the shed involves selecting the appropriate insulation materials based on the shed's construction and your local climate. Common options include fiberglass batts, foam board insulation, and spray foam insulation, each offering unique benefits in terms of thermal performance and installation ease. Consider factors such as R-value, moisture resistance, and fire safety when choosing the insulation type best suited for your project.
Once the insulation materials are selected, carefully install them within the walls, ceiling, and floor of the shed according to the manufacturer's guidelines. Pay close attention to sealing any gaps, cracks, or air leaks to maximize the insulation's effectiveness and prevent energy loss. Proper insulation not only regulates the indoor temperature but also reduces noise transmission, creating a quieter and more peaceful workspace.
In addition to insulation, weatherproofing the shed is essential to safeguard the interior from moisture infiltration and drafts. Seal gaps around windows and doors with weatherstripping and caulk to prevent air and water intrusion. Consider installing a vapor barrier to control moisture and humidity levels within the insulated space, further enhancing the comfort and longevity of the office environment.
Furthermore, assess the shed's exterior for potential vulnerabilities to weather elements. Repair any damaged siding, roofing, or trim to fortify the structure against rain, wind, and temperature fluctuations. By fortifying the shed's exterior, you create a durable and resilient envelope that protects the interior from the impact of inclement weather.
By meticulously insulating and weatherproofing the shed, you establish a well-insulated, airtight, and weather-resistant environment that forms the foundation for a comfortable and energy-efficient office space. This crucial step not only enhances the shed's structural integrity but also sets the stage for the subsequent phases of electrical installation, interior design, and furnishing. With the insulation and weatherproofing complete, your DIY shed office is one step closer to becoming a functional and inviting workspace tailored to your needs.
Step 3: Adding Electrical and Lighting
The integration of electrical systems and lighting is a pivotal stage in the transformation of a shed into a fully functional office space. This phase involves the installation of electrical wiring, outlets, switches, and lighting fixtures, thereby providing the essential infrastructure for powering electronic devices, illuminating the workspace, and creating a safe and efficient environment.
The first step in adding electrical components to the shed is to carefully plan the layout of outlets, switches, and lighting fixtures to accommodate the intended use of the office space. Consider the placement of desks, workstations, and equipment to strategically position electrical outlets for convenient access. Additionally, plan the location of light fixtures to ensure uniform illumination throughout the workspace, taking into account natural light sources and potential glare.
Next, enlist the assistance of a qualified electrician to install the electrical wiring, outlets, and switches in compliance with local building codes and safety standards. The electrician will assess the shed's electrical load requirements and determine the appropriate gauge of wiring to support the planned usage of the office space. By entrusting this task to a professional, you can ensure the safe and reliable operation of the electrical system.
In parallel with the electrical installation, the selection and placement of lighting fixtures play a crucial role in shaping the ambiance and functionality of the office space. Choose lighting options that align with the intended use of the workspace, such as overhead lighting for general illumination, task lighting for focused work areas, and accent lighting to enhance the aesthetic appeal of the environment.
Consider energy-efficient LED fixtures to minimize electricity consumption and reduce long-term operational costs. Additionally, explore smart lighting solutions that offer customizable settings and remote control capabilities, allowing you to tailor the lighting ambiance to suit different tasks and preferences.
As the electrical and lighting components are integrated into the shed, prioritize safety measures such as ground fault circuit interrupters (GFCIs) for outlets located in proximity to water sources and adequate ventilation for electronic equipment to prevent overheating. By adhering to safety guidelines and best practices, you can create a secure and comfortable workspace that promotes productivity and well-being.
Upon the completion of the electrical and lighting installation, the shed office is equipped with the essential infrastructure to power devices, illuminate the environment, and support a productive workflow. This transformative phase sets the stage for the subsequent steps of designing the layout, furnishing, and decorating the office space, bringing you closer to the realization of a personalized and efficient workspace tailored to your needs.
Step 4: Designing the Layout
Designing the layout of your shed office is a pivotal phase that shapes the functionality, flow, and aesthetic appeal of the workspace. This step involves thoughtful consideration of spatial organization, furniture arrangement, and ergonomic design to create an environment that supports productivity, comfort, and personal expression.
Begin by envisioning the primary activities that will take place within the office space, such as desk work, meetings, creative projects, or relaxation. This vision will guide the layout design, dictating the allocation of zones for different functions. Consider the placement of desks, seating areas, storage units, and any specialized equipment to optimize the use of space and facilitate seamless workflow.
Take into account the shed's dimensions, architectural features, and natural light sources when conceptualizing the layout. Maximize the utilization of natural light by positioning workstations near windows and incorporating translucent window treatments to diffuse sunlight and minimize glare. Additionally, assess the potential for cross-ventilation and outdoor views to enhance the overall ambiance of the workspace.
Ergonomics play a crucial role in the layout design, as it directly impacts the comfort and well-being of the office occupants. Select ergonomic furniture that promotes proper posture, supports varied work postures, and accommodates the specific needs of the users. Consider adjustable chairs, standing desks, and ergonomic accessories to create a workspace that prioritizes health and productivity.
Furthermore, embrace the opportunity to infuse the layout with personal style and creativity. Explore versatile storage solutions, decorative elements, and accent pieces that reflect your aesthetic preferences and contribute to a welcoming and inspiring environment. Integrate plants, artwork, and personal mementos to infuse the space with character and personality, fostering a sense of ownership and connection.
As you finalize the layout design, visualize the flow of movement within the office space, ensuring that pathways are unobstructed and functional areas are easily accessible. Strive for a harmonious balance between openness and privacy, delineating distinct zones for focused work, collaborative activities, and relaxation.
By meticulously designing the layout of your shed office, you create a tailored environment that harmonizes functionality, comfort, and personal expression. This transformative phase sets the stage for the subsequent step of furnishing and decorating the office space, bringing you closer to the realization of a personalized and efficient workspace that supports your unique needs and aspirations.
Step 5: Furnishing and Decorating
Furnishing and decorating the shed office marks the culminating phase of the transformation, where the vision of a functional and inviting workspace comes to fruition. This step involves the selection of furniture, decor, and accessories to outfit the office space with comfort, style, and functionality.
Begin by selecting furniture that aligns with the layout and intended use of the office space. Choose a desk or workstation that suits your work habits and accommodates the necessary equipment. Consider ergonomic chairs that promote comfort and support during extended work sessions. Additionally, explore storage solutions such as shelves, cabinets, and organizers to maintain a tidy and organized environment.
When selecting furniture, prioritize quality, durability, and versatility to ensure long-term satisfaction and functionality. Opt for pieces that complement the scale and architectural features of the shed, maximizing the utilization of space while creating a harmonious and balanced environment.
In parallel with furnishing, decorating the office space allows for personalization and expression of individual style. Introduce elements of decor that resonate with your aesthetic preferences, such as artwork, textiles, and decorative accents. Consider incorporating plants to infuse the space with natural beauty and a sense of tranquility, fostering a connection to the outdoors within the confines of the shed.
Lighting plays a pivotal role in both functionality and ambiance, making it essential to select lighting fixtures that complement the overall design while providing adequate illumination. Explore options for task lighting, ambient lighting, and decorative fixtures to create a well-lit and visually appealing environment that supports various activities and moods.
Furthermore, consider the integration of technology and connectivity within the office space. Ensure that the shed is equipped with reliable internet access, power outlets for electronic devices, and any additional technology required for your work or leisure activities. By seamlessly integrating technology, you can create a modern and efficient workspace that meets the demands of contemporary work and lifestyle.
As you furnish and decorate the shed office, strive to strike a balance between functionality and aesthetics, creating a space that inspires productivity and reflects your personal style. Embrace the opportunity to infuse the environment with elements that resonate with your passions, interests, and aspirations, ultimately crafting a workspace that feels uniquely yours.
With the completion of the furnishing and decorating phase, the shed office is transformed into a personalized and efficient workspace that supports your individual needs and preferences. This transformative journey culminates in the realization of a functional and inviting environment where productivity thrives, creativity flourishes, and inspiration abounds.
Conclusion
The journey of transforming a simple shed into a productive and inviting office space is a testament to the power of creativity, resourcefulness, and hands-on craftsmanship. As the final touches are added and the vision of a personalized workspace comes to fruition, the DIY shed office stands as a testament to the transformative potential inherent in repurposing existing structures.
Throughout the process, each step has presented an opportunity for learning, problem-solving, and self-expression. From the initial clearing out of the shed to the meticulous insulation and weatherproofing, the integration of electrical systems and lighting, the thoughtful design of the layout, and the careful selection of furnishings and decor, every decision and action has contributed to the creation of a space that seamlessly integrates functionality and comfort.
The DIY shed office is more than just a physical space; it is a reflection of individuality, aspirations, and the pursuit of a balanced and fulfilling work-life environment. It embodies the spirit of innovation and adaptability, as a humble storage structure is reimagined as a sanctuary for productivity, creativity, and personal growth.
As the doors of the shed office open to reveal the culmination of the transformation, a sense of pride and accomplishment permeates the air. The space is now poised to support a myriad of activities – from focused work sessions and collaborative endeavors to moments of relaxation and inspiration. It stands as a testament to the potential for reinvention and the ability to craft environments that nurture well-being and productivity.
The DIY shed office is a celebration of individuality and ingenuity, where the convergence of practicality and personal expression gives rise to a space that is both functional and inspiring. It serves as a reminder that with vision, determination, and a willingness to embrace challenges, remarkable transformations can unfold, enriching our daily lives and expanding the horizons of what is possible.
As the journey of transforming a shed into an office space draws to a close, the space stands as a testament to the transformative power of creativity, determination, and the pursuit of a workspace that seamlessly integrates functionality and personal expression. It embodies the spirit of innovation and adaptability, serving as a sanctuary for productivity, creativity, and personal growth.