
Home>Create & Decorate>DIY & Crafts>DIY Corrugated Metal Fence: Step-by-Step Guide
DIY & Crafts
DIY Corrugated Metal Fence: Step-by-Step Guide
Published: May 30, 2024

Content Creator specializing in woodworking and interior transformations. Caegan's guides motivate readers to undertake their own projects, while his custom furniture adds a personal touch.
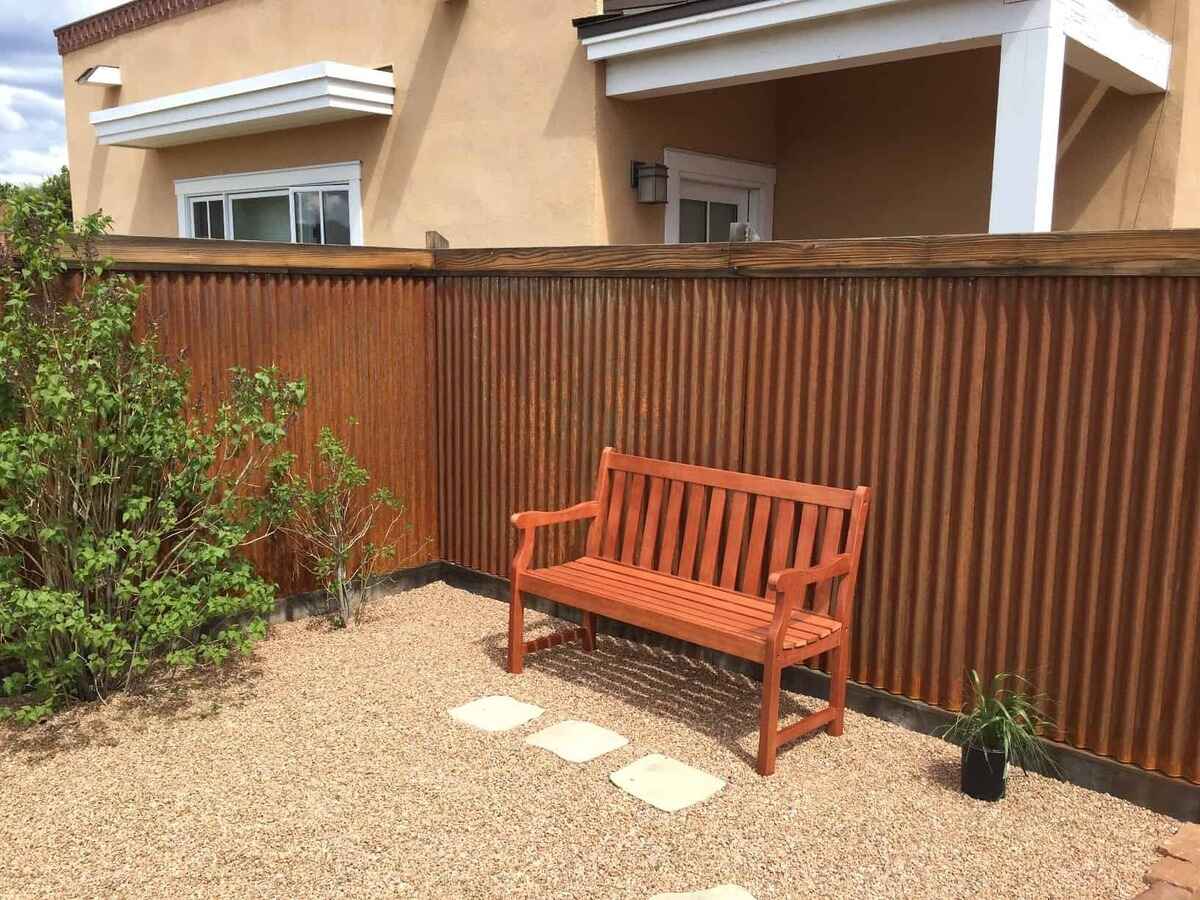
Learn how to build a stunning DIY corrugated metal fence with our step-by-step guide. Perfect for DIY & Crafts enthusiasts looking to enhance their outdoor space.
(Many of the links in this article redirect to a specific reviewed product. Your purchase of these products through affiliate links helps to generate commission for Twigandthistle.com, at no extra cost. Learn more)
Introduction
Are you looking to add a touch of modern industrial style to your property while also enhancing privacy and security? A DIY corrugated metal fence might just be the perfect project for you. This step-by-step guide will walk you through the process of creating your own corrugated metal fence, providing you with the satisfaction of completing a practical and visually appealing home improvement project. Whether you're a seasoned DIY enthusiast or a newcomer to the world of home improvement, this guide will equip you with the knowledge and confidence to tackle this project with ease. So, roll up your sleeves and get ready to transform your outdoor space with a stylish and durable corrugated metal fence.
Materials Needed
To get started on your DIY corrugated metal fence project, you'll need the following materials:
- Corrugated Metal Panels: These will form the main body of your fence, providing both strength and a unique aesthetic.
- Fence Posts: Choose durable, weather-resistant posts to support your corrugated metal panels.
- Concrete Mix: For securing the fence posts in the ground and providing stability.
- Gravel: Use gravel for drainage and to create a stable base for your fence posts.
- Wooden Rails: These will be used to attach the corrugated metal panels to the fence posts.
- Screws or Nails: Depending on your preference, choose the appropriate fasteners for securing the panels to the wooden rails.
- Circular Saw or Angle Grinder: Essential for cutting the corrugated metal panels to the desired size.
- Safety Gear: This includes gloves, safety glasses, and ear protection to ensure your safety during the construction process.
- Level and Measuring Tape: These tools will help you ensure that your fence is straight and accurately positioned.
- Post Hole Digger or Auger: For digging the holes to accommodate the fence posts.
- Paint or Sealant: Optional, but you may choose to paint or seal the corrugated metal panels for added protection and visual appeal.
Gathering these materials before you begin will help streamline the construction process and ensure that you have everything you need to bring your DIY corrugated metal fence to life.
Preparing the Site
Before diving into the construction of your corrugated metal fence, it's crucial to prepare the site properly. Follow these steps to ensure a smooth and efficient building process:
-
Clear the Area: Remove any debris, rocks, or vegetation from the area where the fence will be installed. This will provide a clean and level surface for the fence installation.
-
Mark the Fence Line: Use stakes and string to mark the exact location where the fence will be positioned. This will serve as a guide for the placement of the fence posts and panels.
-
Check for Utility Lines: Before digging any holes, contact your local utility companies to ensure that there are no underground utility lines in the vicinity of the fence line. This step is crucial for safety and to avoid any accidental damage to utility lines.
-
Dig the Post Holes: Using a post hole digger or auger, dig holes for the fence posts at regular intervals along the marked fence line. The depth of the holes will depend on the height of your fence and the frost line in your area. Typically, a depth of 1/3 to 1/2 of the above-ground post height is recommended.
-
Add Gravel and Concrete: Place a layer of gravel at the bottom of each post hole to facilitate drainage and prevent the posts from sitting in water. Then, set the fence posts in the holes and fill them with concrete, ensuring that the posts are level and plumb. Allow the concrete to cure according to the manufacturer's instructions.
By taking the time to properly prepare the site, you'll create a solid foundation for your corrugated metal fence, setting the stage for the next steps in the construction process.
Cutting and Preparing the Corrugated Metal Panels
When it comes to creating a DIY corrugated metal fence, the cutting and preparation of the metal panels are crucial steps that require precision and attention to detail. Here's a detailed guide on how to tackle this essential phase of the construction process:
-
Measure and Mark: Begin by measuring the area where the corrugated metal panels will be installed. Use a measuring tape to determine the exact dimensions needed for each panel. Mark the measurements clearly using a pencil or marker directly on the metal surface.
-
Safety First: Before cutting the metal panels, prioritize safety by wearing gloves, safety glasses, and ear protection. This will safeguard you from potential injuries and ensure a safe working environment.
-
Choose the Right Tool: Depending on the thickness of the corrugated metal panels, you'll need to select the appropriate cutting tool. A circular saw with a metal-cutting blade or an angle grinder equipped with a metal-cutting disc are commonly used for this purpose. Ensure that the cutting blade is suitable for cutting metal and is securely attached to the tool.
-
Cutting Technique: When cutting the metal panels, position them on a stable work surface or sawhorses to prevent movement during the cutting process. Use the marked measurements as a guide and carefully cut along the lines. Take your time and maintain a steady hand to achieve clean and precise cuts.
-
Smooth the Edges: After cutting the panels to the required size, use a metal file or grinder to smooth out any rough or sharp edges. This step is essential for both safety and aesthetics, as it ensures that the edges are smooth and free from any jagged points.
-
Prevent Rust: Corrugated metal panels are susceptible to rust, especially after being cut. To protect the exposed edges from corrosion, consider applying a rust-resistant primer or sealant to the cut edges. This additional layer of protection will help prolong the lifespan of the metal panels.
By following these steps, you'll be able to accurately cut and prepare the corrugated metal panels for installation, ensuring that they fit seamlessly into your DIY corrugated metal fence project. Paying attention to safety, precision, and rust prevention during this phase will contribute to the overall success and longevity of your metal fence.
Setting the Posts
Setting the posts for your DIY corrugated metal fence is a critical step that lays the foundation for the entire structure. Properly installed posts will provide the necessary support and stability for the fence, ensuring its longevity and structural integrity. Here's a detailed breakdown of the process for setting the posts:
-
Positioning the Posts: Once the post holes have been dug and the concrete has been poured, it's time to position the fence posts. Place the posts in the center of each hole, ensuring that they are aligned with the marked fence line. Use a level to check for plumb and adjust the position of the posts as needed.
-
Bracing the Posts: To keep the posts in position while the concrete sets, use temporary bracing. This can be achieved by attaching angled braces from the posts to stakes driven into the ground. The braces will prevent the posts from shifting during the curing process, ensuring that they remain perfectly upright.
-
Checking Alignment: Once the posts are braced, double-check their alignment and adjust as necessary. Ensuring that the posts are perfectly aligned with each other and the intended fence line is crucial for the overall appearance and functionality of the corrugated metal fence.
-
Allowing the Concrete to Cure: The concrete used to secure the posts needs time to cure and harden. Follow the manufacturer's recommendations for the curing time, which typically ranges from 24 to 48 hours. During this period, avoid any disturbances to the posts or braces that could compromise the curing process.
-
Removing Braces: After the concrete has fully cured, carefully remove the temporary bracing from the fence posts. Take this opportunity to inspect the posts and ensure that they are solidly anchored in the ground and perfectly upright.
By meticulously following these steps for setting the posts, you'll establish a solid and reliable foundation for your corrugated metal fence. This foundational stage is essential for the overall stability and longevity of the fence, setting the stage for the subsequent phases of the construction process.
Attaching the Panels
With the posts securely in place, it's time to move on to the exciting phase of attaching the corrugated metal panels to create the visual and functional barrier of your fence. Follow these steps to ensure a smooth and effective panel attachment process:
-
Positioning the Panels: Begin by positioning the first corrugated metal panel against the first set of fence posts. Ensure that the panel is aligned with the ground and the top of the posts, maintaining a consistent height and angle. Use wooden spacers to create a small gap between the bottom of the panel and the ground, allowing for adequate airflow and preventing moisture buildup.
-
Securing the Panels to the Rails: Use screws or nails to attach the corrugated metal panels to the wooden rails that run horizontally between the fence posts. Start at one end of the panel and work your way across, fastening the panel securely to the rails. Be sure to space the fasteners evenly along the rails to provide consistent support for the panels.
-
Pre-Drilling Holes: To prevent the metal panels from warping or distorting during the attachment process, consider pre-drilling holes for the screws or nails. This will allow for smoother and more controlled fastening, reducing the risk of damage to the panels and ensuring a professional-looking finish.
-
Maintaining Alignment: As you progress to additional panels, pay close attention to maintaining alignment and uniform spacing between each panel. Consistency in the positioning and attachment of the panels will contribute to the overall visual appeal and structural integrity of the fence.
-
Trimming Panels as Needed: Depending on the layout of your fence and any obstacles such as posts or structures, you may need to trim the corrugated metal panels to fit specific areas. Use a circular saw or angle grinder to carefully trim the panels to the required size, ensuring a precise and seamless fit within the overall fence design.
-
Overlapping Panels: If your fence design calls for overlapping panels, ensure that each overlap is consistent and visually appealing. Properly overlapping the panels will enhance the privacy and security provided by the fence while also adding a touch of aesthetic sophistication to the overall design.
By following these detailed steps for attaching the corrugated metal panels, you'll be well on your way to completing the construction of your DIY corrugated metal fence. This phase of the process not only contributes to the functionality and security of the fence but also allows you to witness the transformation of your outdoor space as the fence takes shape.
Finishing Touches
As you near the completion of your DIY corrugated metal fence project, it's time to focus on the finishing touches that will elevate the overall appearance and functionality of the fence. Paying attention to these final details will ensure that your fence not only serves its practical purposes but also stands out as a visually appealing and well-crafted addition to your property. Here's a breakdown of the essential finishing touches to consider:
-
Paint or Seal the Panels: Depending on your aesthetic preferences and the level of protection you desire for the metal panels, consider applying a coat of paint or sealant. This step can enhance the visual appeal of the fence while also providing an additional layer of protection against the elements. Choose a high-quality exterior paint or metal sealant that is designed to withstand outdoor conditions.
-
Add Decorative Elements: To infuse personality and style into your corrugated metal fence, consider incorporating decorative elements such as metal accents, artistic designs, or even integrated planters. These embellishments can transform your fence from a purely functional structure into a unique and eye-catching feature of your outdoor space.
-
Gate Installation: If your fence includes a gate for entry and exit, ensure that the gate is properly installed and functions smoothly. Pay attention to the alignment, hinges, and latching mechanism to guarantee that the gate operates seamlessly and securely.
-
Inspect and Secure Fasteners: Take a thorough look at the fasteners used to attach the metal panels to the wooden rails. Ensure that all screws or nails are securely in place and tighten any loose fasteners. This step is crucial for maintaining the structural integrity of the fence over time.
-
Landscaping Integration: Consider how the completed fence integrates with the surrounding landscaping. Whether it's adding climbing plants for a green accent, incorporating lighting fixtures, or creating a defined border, thoughtful landscaping can enhance the overall impact of your corrugated metal fence.
-
Final Inspection: Walk the entire length of the fence, inspecting each panel, post, and connection point. Look for any areas that may require additional touch-ups or adjustments. Addressing any minor issues at this stage will ensure that your fence is in top condition upon completion.
By attending to these finishing touches, you'll bring your DIY corrugated metal fence project to its full potential, creating a durable, visually striking, and functional addition to your property. These final details will not only enhance the immediate impact of the fence but also contribute to its long-term durability and appeal.
Conclusion
In conclusion, embarking on a DIY corrugated metal fence project offers a rewarding opportunity to enhance your property with a blend of modern style, durability, and practical functionality. By following the step-by-step guide provided, you can confidently tackle each phase of the construction process, from preparing the site and setting the posts to attaching the panels and adding the finishing touches. The result is a visually striking and robust fence that not only provides privacy and security but also serves as a distinctive feature of your outdoor space. With careful attention to detail and a commitment to safety and precision, your DIY corrugated metal fence has the potential to become a standout element of your property, showcasing your craftsmanship and creativity. So, roll up your sleeves, gather your materials, and get ready to transform your outdoor space with a stylish and durable corrugated metal fence.