
Home>Create & Decorate>DIY & Crafts>How To Build A Picket Fence
DIY & Crafts
How To Build A Picket Fence
Published: May 11, 2024

Senior Editor in Create & Decorate, Kathryn combines traditional craftsmanship with contemporary trends. Her background in textile design and commitment to sustainable crafts inspire both content and community.
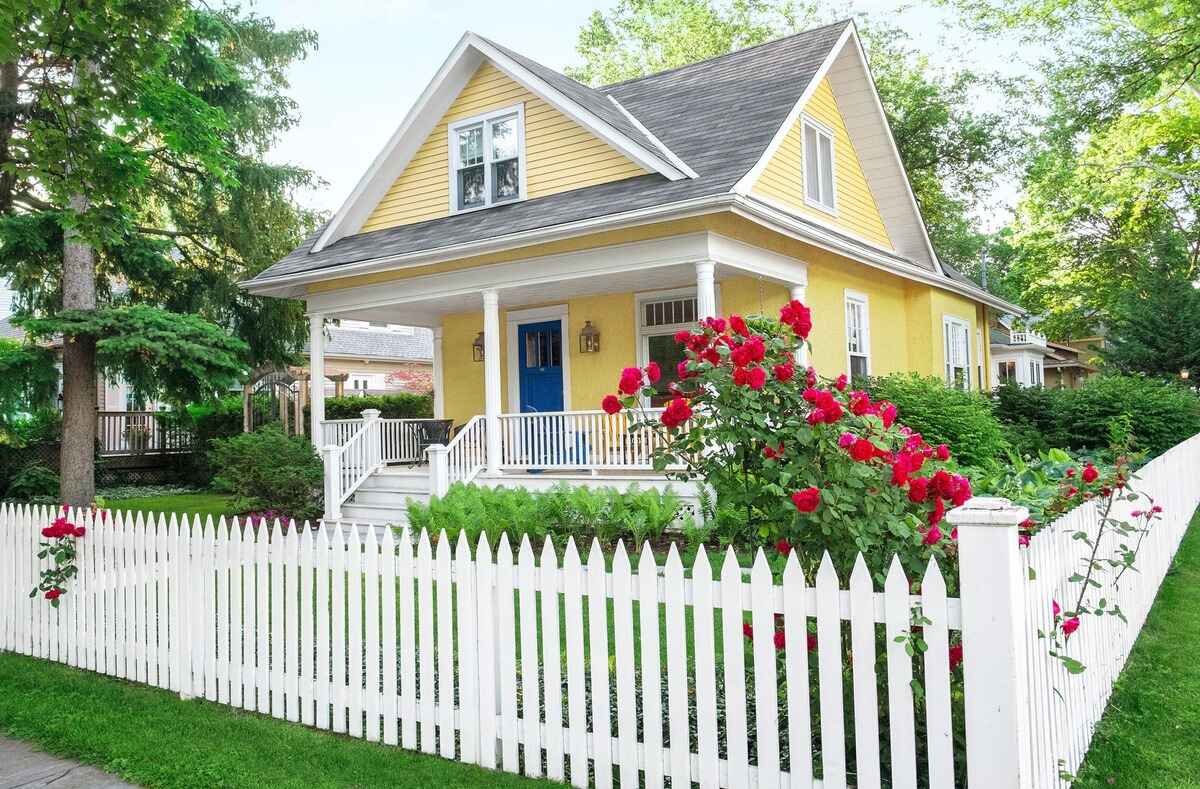
Learn how to build a picket fence with our DIY & Crafts guide. Get step-by-step instructions and tips for creating a charming and functional fence for your home.
(Many of the links in this article redirect to a specific reviewed product. Your purchase of these products through affiliate links helps to generate commission for Twigandthistle.com, at no extra cost. Learn more)
Introduction
So, you've decided to add a touch of classic charm to your property by building a picket fence. A picket fence not only enhances the aesthetic appeal of your home but also provides a sense of security and privacy. Whether you're a seasoned DIY enthusiast or a novice looking for a new project, building a picket fence can be a rewarding and achievable endeavor. In this guide, we'll walk you through the step-by-step process of constructing your very own picket fence, from planning and preparation to adding those finishing touches that will make your fence stand out. Let's roll up our sleeves and get started!
Planning and Preparation
Before you start digging post holes and hammering nails, it's crucial to plan and prepare for your picket fence project. Here's what you need to do:
-
Check Local Regulations: First and foremost, check with your local authorities or homeowner's association to ensure that you comply with any regulations or guidelines regarding fence construction. This step will save you from potential headaches down the road.
-
Determine the Layout: Take measurements of the area where you want to install the fence. Decide on the fence's height, length, and the spacing between the posts. This will help you estimate the amount of materials needed for the project.
-
Gather Tools and Materials: Make a list of all the tools and materials required for the job. This may include fence posts, pickets, rails, concrete, gravel, nails, a post hole digger, a level, and a saw. Having everything on hand will streamline the building process.
-
Mark the Fence Line: Use stakes and string to mark the outline of your fence. This will give you a clear visual of where the fence will be situated and help you make any necessary adjustments before you start digging.
-
Prepare the Ground: Clear the area where the fence will be installed. Remove any rocks, debris, or vegetation that may obstruct the fence's construction. Ensuring a clean and level surface will make the installation process much smoother.
By taking the time to plan and prepare, you'll set yourself up for a successful and efficient picket fence project. Now that you've got the groundwork covered, it's time to move on to the next steps in bringing your charming picket fence to life.
Choosing the Right Materials
When it comes to building a picket fence, selecting the right materials is essential for ensuring the durability and visual appeal of your project. Here's what you need to consider:
-
Fence Posts: Opt for pressure-treated wooden posts that are resistant to rot and decay. Alternatively, you can choose metal posts for added strength and longevity.
-
Pickets: Choose high-quality, durable pickets that can withstand the elements. Cedar and redwood are popular choices due to their natural resistance to insects and decay. Ensure that the pickets are of uniform size and shape for a polished look.
-
Rails: The horizontal rails provide structural support for the pickets. Select rails that are sturdy and weather-resistant. Pressure-treated or rot-resistant wood is ideal for this purpose.
-
Fasteners: Use galvanized or stainless steel nails and screws to secure the components of your picket fence. These materials are corrosion-resistant and will help maintain the integrity of the fence over time.
-
Concrete and Gravel: If you're setting the fence posts in the ground, you'll need concrete and gravel for stability. Opt for high-quality concrete mix and gravel to ensure the longevity of the fence foundation.
-
Finishing Touches: Consider adding decorative elements such as post caps or finials to enhance the aesthetic appeal of your picket fence. These finishing touches can elevate the overall look of the fence and showcase your attention to detail.
By choosing the right materials, you'll not only create a visually appealing picket fence but also ensure its longevity and resilience. Now that you've gathered the necessary materials, it's time to roll up your sleeves and move on to the next steps in the construction process.
Setting the Posts
Setting the posts is a critical step in the construction of your picket fence, as it provides the foundation and structural support for the entire fence. Here's a detailed guide on how to set the posts for your picket fence:
-
Digging the Holes: Use a post hole digger to dig holes for the fence posts. The depth of the holes should be approximately one-third of the length of the posts, with an additional 6 inches for gravel at the bottom. Ensure that the diameter of the holes is wide enough to accommodate the posts and provide room for the concrete.
-
Adding Gravel: Place a layer of gravel at the bottom of each hole. The gravel will help with drainage and prevent the posts from sitting directly in water, which can lead to rot over time.
-
Positioning the Posts: Place the posts in the holes, ensuring that they are level and plumb. Use a level to check for vertical alignment and make adjustments as needed. It's crucial to ensure that the posts are straight and properly aligned to maintain the overall integrity of the fence.
-
Bracing the Posts: To keep the posts in position while the concrete sets, brace them using stakes and lumber. This will prevent the posts from shifting or leaning during the curing process.
-
Pouring Concrete: Once the posts are in position and braced, it's time to pour the concrete. Prepare the concrete mix according to the manufacturer's instructions and fill the holes around the posts. Ensure that the concrete is thoroughly compacted and sloped at the top to allow for water runoff.
-
Allowing for Curing: Allow the concrete to cure for the recommended time as per the product instructions. This typically takes a few days, during which the posts should remain braced and undisturbed.
By following these steps, you'll ensure that the posts for your picket fence are securely anchored and ready to support the rest of the structure. With the posts set in place, you're one step closer to completing your charming picket fence.
Attaching the Rails and Pickets
With the posts securely set, it's time to move on to the next phase of building your picket fence: attaching the rails and pickets. This step is crucial for creating the framework and visual appeal of your fence. Here's a detailed guide on how to attach the rails and pickets to complete your charming picket fence:
-
Measuring and Cutting the Rails: Begin by measuring the distance between the posts to determine the length of the rails. Use a saw to cut the rails to the appropriate size, ensuring that they fit snugly between the posts.
-
Positioning the Bottom Rail: Start by attaching the bottom rail to the posts. Use a level to ensure that the rail is straight and level. Secure the rail to the posts using galvanized or stainless steel screws, ensuring a sturdy connection.
-
Installing the Middle and Top Rails: Once the bottom rail is in place, proceed to install the middle and top rails. Use the same level and secure the rails to the posts, maintaining consistent spacing between each rail.
-
Spacing the Pickets: With the rails securely attached, it's time to position the pickets. Use spacers to ensure uniform spacing between the pickets. This will not only enhance the visual appeal of the fence but also provide a consistent barrier.
-
Attaching the Pickets: Secure the pickets to the rails using galvanized or stainless steel nails or screws. Ensure that the pickets are aligned vertically and are evenly spaced for a polished look.
-
Adding Decorative Elements: Consider adding decorative elements such as post caps or finials to the top of the pickets for an extra touch of charm. These elements can elevate the overall aesthetic of your picket fence.
By following these steps, you'll successfully attach the rails and pickets, bringing your picket fence one step closer to completion. With the framework in place, your charming picket fence is well on its way to becoming a standout feature of your property.
Finishing Touches
After the main structure of your picket fence is in place, it's time to add those finishing touches that will truly make your fence stand out. Here are some essential steps to consider for adding the perfect finishing touches to your picket fence:
-
Paint or Stain: Choose a high-quality paint or stain that complements the style of your home and the overall aesthetic you want to achieve. Whether you prefer a classic white picket fence or a more contemporary color, a fresh coat of paint or stain can enhance the visual appeal and longevity of your fence.
-
Seal and Protect: Apply a weatherproof sealant to protect the wood from the elements. This extra layer of protection can help prevent rot, decay, and insect damage, ensuring that your picket fence remains in top condition for years to come.
-
Add Post Caps: Consider adding decorative post caps to the top of each fence post. Post caps not only provide a polished look but also offer additional protection against moisture, ultimately extending the lifespan of your fence.
-
Trim and Edging: Install trim or edging along the top and bottom of the fence to add a refined finish. This detail not only enhances the overall appearance of the fence but also provides additional structural support.
-
Gates and Hardware: If your picket fence includes a gate, ensure that it is properly installed and equipped with sturdy hardware. The gate should complement the design of the fence and provide secure access to your property.
-
Landscaping: Consider incorporating landscaping elements around the perimeter of the fence to further enhance its visual appeal. Planting flowers, shrubs, or climbing vines can soften the transition between the fence and the surrounding landscape.
By paying attention to these finishing touches, you can elevate the overall look and functionality of your picket fence, turning it into a standout feature of your property. With these final steps completed, step back and admire the timeless charm and practical benefits of your newly constructed picket fence.
Conclusion
Congratulations! You've successfully completed the construction of your very own picket fence. By following the step-by-step guide outlined in this article, you've not only added a touch of classic charm to your property but also enhanced its security and privacy. Your newly constructed picket fence stands as a testament to your DIY skills and dedication to improving your home. As you admire the timeless appeal of your picket fence, take pride in the fact that you've created a standout feature that will be enjoyed for years to come. Whether you're a seasoned DIY enthusiast or a novice looking for a rewarding project, building a picket fence is an achievable endeavor that brings both aesthetic and practical benefits to your property. So, take a moment to bask in the satisfaction of a job well done, and enjoy the enduring beauty of your charming picket fence.