
Home>Create & Decorate>DIY & Crafts>DIY Computer Desk: Build Your Own Custom Workspace
DIY & Crafts
DIY Computer Desk: Build Your Own Custom Workspace
Published: May 21, 2024

Content Creator specializing in woodworking and interior transformations. Caegan's guides motivate readers to undertake their own projects, while his custom furniture adds a personal touch.
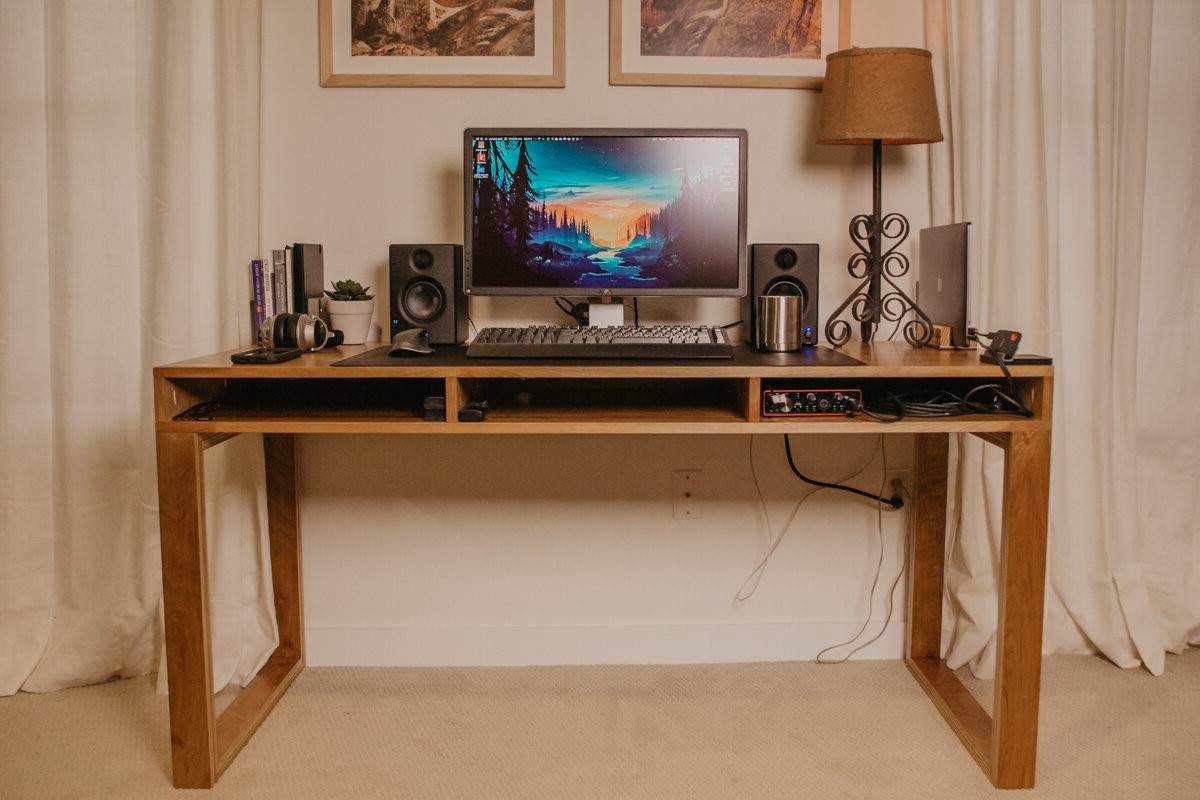
Create your ideal workspace with our DIY computer desk ideas. Discover how to build a custom desk that suits your style and needs. Perfect for DIY & Crafts enthusiasts!
(Many of the links in this article redirect to a specific reviewed product. Your purchase of these products through affiliate links helps to generate commission for Twigandthistle.com, at no extra cost. Learn more)
Introduction
Are you tired of using a generic, mass-produced computer desk that doesn't quite fit your needs or style? Building your own DIY computer desk allows you to create a custom workspace that perfectly suits your space, preferences, and budget. Whether you're a seasoned DIY enthusiast or a beginner looking for a fun project, constructing your own computer desk can be a rewarding and practical endeavor. In this guide, we'll walk you through the process of designing and building a personalized computer desk that meets your specific requirements. Let's dive in and explore the exciting world of DIY desk construction!
Planning Your DIY Computer Desk
Before you start hammering and sawing, it's crucial to lay the groundwork for your DIY computer desk project. Here are some essential steps to consider during the planning phase:
-
Assess Your Needs: Take a moment to evaluate your specific requirements. Do you need ample space for multiple monitors, a dedicated area for a printer, or built-in cable management? Understanding your needs will help you design a desk that caters to your workflow and equipment.
-
Measure Your Space: Grab a tape measure and determine the dimensions of the area where your new desk will reside. Consider the height, width, and depth, ensuring that the desk will fit comfortably in the designated space without obstructing traffic flow.
-
Sketch Your Design: Whether you're a skilled artist or a doodler, sketching out your desk design can provide a visual roadmap for the project. Consider the layout, including the placement of shelves, drawers, and any additional features you desire.
-
Budget Wisely: Set a realistic budget for your DIY computer desk. Research the cost of materials and factor in any tools you may need to purchase or rent. Keeping a close eye on your budget will help prevent overspending as the project progresses.
-
Consider Ergonomics: Think about the ergonomics of your workspace. Ensure that the desk height and layout promote a comfortable and efficient working environment. Your body will thank you for considering ergonomics during the planning stage.
By carefully planning your DIY computer desk, you'll set the stage for a successful and satisfying construction process. Taking the time to consider your needs, space, budget, and ergonomic factors will help ensure that your custom desk meets your expectations and enhances your productivity.
Choosing the Right Materials
When it comes to building a sturdy and visually appealing DIY computer desk, selecting the right materials is paramount. Here are some key considerations to keep in mind as you choose the materials for your project:
-
Wood: Opting for high-quality wood is essential for crafting a durable and aesthetically pleasing desk. Hardwoods such as oak, maple, or walnut are popular choices due to their strength and attractive grain patterns. Alternatively, if you prefer a more budget-friendly option, consider using plywood or MDF (medium-density fiberboard) for a smooth and uniform finish.
-
Metal: Incorporating metal elements into your desk design can add a modern and industrial flair. Consider using metal legs, brackets, or accents to enhance the structural integrity and visual appeal of your desk. Look for sturdy metal components that complement the overall design aesthetic.
-
Hardware: Choosing the right hardware, such as screws, nails, and drawer slides, is crucial for ensuring the stability and functionality of your desk. Opt for high-quality hardware that is appropriate for the materials you're working with. Additionally, consider decorative hardware, such as drawer pulls and knobs, to add a personalized touch to your desk.
-
Finishing Materials: Selecting the appropriate finishing materials, such as paint, stain, or varnish, can significantly impact the overall look and durability of your desk. If you opt for a natural wood finish, consider using a clear coat to protect the surface and highlight the wood's natural beauty. Alternatively, if you prefer a painted finish, choose a high-quality paint that complements your workspace's color scheme.
By carefully considering the materials for your DIY computer desk, you can ensure that your finished product is not only visually appealing but also built to withstand the demands of daily use. Whether you prioritize durability, aesthetics, or a combination of both, choosing the right materials is a crucial step in creating a custom workspace that reflects your style and functionality needs.
Tools You'll Need
Before diving into the construction of your DIY computer desk, it's essential to gather the necessary tools to ensure a smooth and efficient building process. Here's a comprehensive list of tools you'll need to bring your custom workspace to life:
-
Measuring Tape: Accurate measurements are crucial for ensuring that your desk fits perfectly in its designated space. A reliable measuring tape will be your best friend throughout the construction process.
-
Circular Saw or Table Saw: Whether you're cutting large panels of wood or trimming boards to size, a circular saw or table saw is indispensable for achieving precise and clean cuts.
-
Power Drill: A power drill equipped with a variety of drill bits will be essential for creating pilot holes, driving screws, and assembling the components of your desk.
-
Screwdriver Set: While a power drill is excellent for efficiency, a set of manual screwdrivers will come in handy for delicate tasks and final adjustments.
-
Clamps: Clamps are essential for holding wood pieces together securely during assembly, ensuring that your desk components align perfectly before fastening.
-
Level: Maintaining a level surface is crucial for the stability and functionality of your desk. A reliable level will help you ensure that your desk remains balanced and even.
-
Wood Glue: In addition to mechanical fasteners, such as screws and nails, wood glue provides added strength and stability when joining wood components.
-
Sandpaper and Sanding Block: Achieving a smooth and uniform surface is essential for a professional-looking finish. Sandpaper and a sanding block will help you smooth out rough edges and prepare the wood for finishing.
-
Safety Gear: Prioritize safety by wearing protective gear, including safety goggles, ear protection, and a dust mask, especially when cutting, sanding, or using power tools.
By equipping yourself with these essential tools, you'll be well-prepared to tackle the construction of your DIY computer desk with confidence and precision. Having the right tools at your disposal will not only streamline the building process but also contribute to the overall quality and functionality of your custom workspace.
Building the Desk Frame
The desk frame serves as the foundational structure of your DIY computer desk, providing stability and support for the desktop surface and any additional features, such as shelves or drawers. Here's a step-by-step guide to constructing a sturdy and reliable desk frame:
-
Cutting the Frame Components: Begin by measuring and cutting the wood or metal components for the desk frame according to your design specifications. Use a circular saw or table saw to achieve precise cuts, ensuring that the frame pieces are uniform in size and length.
-
Assembling the Legs and Supports: If your desk design includes legs for support, attach them to the frame's horizontal supports using wood screws or metal brackets. Ensure that the legs are securely fastened and aligned to provide a stable foundation for the desk.
-
Adding Cross Bracing for Stability: To reinforce the desk frame and prevent wobbling or sagging, consider adding cross braces between the legs or along the length of the frame. This additional bracing will enhance the overall strength and rigidity of the desk, especially if it will support heavy equipment or multiple monitors.
-
Securing the Desktop Surface: Once the frame structure is assembled, carefully place and secure the desktop surface on top of the frame. Depending on your design, you may use screws, brackets, or adhesive to affix the desktop to the frame, ensuring a secure and level attachment.
-
Checking for Level and Stability: Use a level to ensure that the desk frame is perfectly horizontal and that the desktop surface is even. Make any necessary adjustments to the frame or legs to achieve a stable and level workspace.
-
Applying Wood Glue for Added Strength: For wooden desk frames, applying wood glue to the joints and connections before securing them with screws or brackets can provide additional strength and stability. Be sure to wipe off any excess glue to maintain a clean and professional finish.
By following these steps, you can construct a robust and well-built desk frame that forms the backbone of your DIY computer desk. A carefully constructed frame will ensure that your custom workspace is not only visually appealing but also capable of withstanding the demands of daily use.
Adding Shelves and Storage
Expanding the functionality of your DIY computer desk with strategically placed shelves and storage solutions can enhance organization and efficiency in your workspace. Here's a detailed guide on incorporating shelves and storage into your custom desk design:
-
Assessing Storage Needs: Evaluate your storage requirements based on the items you need to keep within arm's reach while working. Consider the dimensions and types of items, such as books, files, or office supplies, that the shelves and storage compartments will accommodate.
-
Designing Shelf Layout: Sketch out the placement and dimensions of the shelves and storage compartments within your desk design. Consider adjustable shelving options to accommodate varying storage needs over time.
-
Selecting Materials for Shelves: Choose sturdy and visually appealing materials for the shelves, such as solid wood, plywood, or MDF. Ensure that the selected materials complement the overall aesthetic of your desk while providing ample support for the items they will hold.
-
Incorporating Built-in Storage: Integrate drawers, cubbies, or compartments directly into the desk frame or under the desktop surface to maximize space and keep clutter at bay. Utilize drawer slides and hardware that facilitate smooth and effortless operation.
-
Installing Adjustable Shelving: If flexibility is a priority, consider incorporating adjustable shelving systems that allow you to reconfigure the storage layout as your needs evolve. Adjustable shelf brackets and supports provide versatility and adaptability.
-
Securing Shelves and Storage Compartments: Whether you're attaching shelves to the desk frame or installing standalone storage units, ensure that they are securely fastened to withstand the weight of items and maintain stability during use.
-
Enhancing Aesthetics with Trim and Finishes: Add decorative trim, such as molding or edge banding, to the exposed edges of the shelves for a polished and professional look. Apply matching finishes or paint to the shelves to seamlessly blend them with the overall desk design.
By incorporating well-planned shelves and storage solutions into your DIY computer desk, you can optimize space utilization and keep essential items organized and easily accessible. Whether you prioritize practicality, aesthetics, or a combination of both, thoughtful integration of shelves and storage will elevate the functionality and visual appeal of your custom workspace.
Finishing Touches and Customization
As you near the completion of your DIY computer desk project, the finishing touches and customization play a pivotal role in elevating the overall aesthetic appeal and functionality of your custom workspace. Here's a comprehensive guide to adding those final flourishes and personal touches to your desk:
-
Applying a Protective Finish: Once the construction and assembly are complete, consider applying a protective finish to the desk surface and any exposed wood components. Whether you opt for a clear varnish to showcase the natural beauty of the wood or a durable paint to complement your workspace's color scheme, a protective finish will safeguard the desk from daily wear and tear while enhancing its visual appeal.
-
Routing and Sanding Edges: For a refined and professional look, use a router to round over or chamfer the edges of the desk surface and any exposed wood edges. This not only adds a touch of elegance but also minimizes the risk of splinters and sharp corners. Follow up with fine-grit sandpaper to achieve a smooth and uniform edge profile.
-
Cable Management Solutions: Integrate cable management features into your desk design to keep unsightly cords and cables organized and out of sight. Consider incorporating cable pass-throughs, grommets, or built-in cable trays to maintain a tidy and clutter-free workspace.
-
Personalized Accents: Add personalized accents, such as custom engraving, decals, or decorative hardware, to infuse your desk with a touch of personality. Whether it's your initials, a favorite quote, or a unique design, these personalized touches can make your desk truly one-of-a-kind.
-
Task Lighting Integration: Enhance the functionality of your desk by incorporating task lighting solutions. Consider installing under-desk LED lighting or attaching a desk lamp to provide focused illumination for work tasks while adding a stylish and practical element to your workspace.
-
Accessorizing with Desk Organizers: Explore the use of desk organizers, pen holders, and accessory trays to keep essential items within reach and maintain a clutter-free work surface. Choose organizers that complement the overall design aesthetic of your desk while promoting organization and efficiency.
-
Ergonomic Considerations: Prioritize ergonomics by incorporating adjustable features, such as a keyboard tray or monitor stand, to promote a comfortable and healthy working posture. Customizing your desk with ergonomic accessories can contribute to long-term comfort and productivity.
By attending to these finishing touches and customization details, you can transform your DIY computer desk into a personalized and functional workspace that reflects your style, enhances organization, and supports your daily work activities. Embrace the opportunity to add those final touches that make your custom desk uniquely yours.
Conclusion
In conclusion, embarking on the journey of building your own DIY computer desk opens up a world of possibilities for creating a personalized workspace that aligns with your specific needs and style preferences. By carefully planning, selecting the right materials, and utilizing essential tools, you can construct a sturdy and visually appealing desk frame. Incorporating shelves, storage solutions, and adding the finishing touches and customization not only enhances the functionality of your desk but also infuses it with a unique personality. Whether you prioritize practicality, aesthetics, or a combination of both, the process of building a DIY computer desk is a rewarding endeavor that culminates in a workspace tailored to your exact specifications. Embrace the creativity and satisfaction that come with crafting a custom desk that serves as the centerpiece of your productive and inspiring work environment.