
Home>Create & Decorate>DIY & Crafts>DIY Desk Building: How To Create Your Own Custom Workspace
DIY & Crafts
DIY Desk Building: How To Create Your Own Custom Workspace
Published: February 22, 2024

Content Creator specializing in woodworking and interior transformations. Caegan's guides motivate readers to undertake their own projects, while his custom furniture adds a personal touch.
Learn how to build your own custom workspace with our DIY desk building guide. Get creative with DIY & Crafts to design the perfect desk for your needs. Start building today!
(Many of the links in this article redirect to a specific reviewed product. Your purchase of these products through affiliate links helps to generate commission for Twigandthistle.com, at no extra cost. Learn more)
Introduction
Welcome to the world of DIY desk building! Creating your own custom workspace is not only a rewarding endeavor but also a fantastic way to tailor your desk to your specific needs and style. Whether you're a seasoned DIY enthusiast or a newcomer to the world of crafting, building your own desk allows you to unleash your creativity and construct a functional and personalized workspace that perfectly suits your requirements.
Building a desk from scratch provides a sense of accomplishment and ownership that simply can't be matched by purchasing a pre-made desk. From choosing the materials and design to assembling the components, every step of the process offers an opportunity for self-expression and ingenuity. Additionally, by crafting your own desk, you have the freedom to customize its size, shape, and features to fit seamlessly into your home or office environment.
This comprehensive guide will walk you through the step-by-step process of creating a custom desk that reflects your unique personality and meets your practical needs. Whether you're aiming for a minimalist, industrial, rustic, or modern design, this guide will equip you with the knowledge and inspiration to bring your vision to life. With a bit of creativity, patience, and the right tools, you'll soon be on your way to enjoying a one-of-a-kind workspace that you can proudly call your own.
So, roll up your sleeves, gather your tools, and let's embark on this exciting journey of DIY desk building. Whether you're looking to revamp your home office, craft room, or studio, this guide will empower you to design and construct a desk that not only enhances your productivity but also adds a touch of personality to your space. Let's dive in and discover the fulfilling world of creating your very own custom workspace!
Step 1: Planning Your Desk Design
Before diving into the construction process, it's crucial to lay a solid foundation by meticulously planning your desk design. This initial step sets the stage for a successful and satisfying DIY desk building experience. Here's a detailed breakdown of the essential aspects to consider when planning your custom desk:
-
Purpose and Functionality: Begin by defining the primary purpose of your desk. Will it serve as a dedicated workspace for a home office, a crafting station, or a multipurpose surface for various activities? Understanding the intended functionality will guide the design process and help determine the desk's size, layout, and features.
-
Space and Location: Assess the available space where the desk will be situated. Measure the dimensions of the area to ensure that the desk fits comfortably without obstructing traffic flow or creating a cramped environment. Consider factors such as natural lighting, proximity to power outlets, and ergonomic placement within the room.
-
Style and Aesthetics: Explore different design styles and aesthetics to identify the look and feel that resonates with your personal taste and complements the existing decor. Whether you prefer a sleek and modern appearance, a rustic and reclaimed vibe, or a minimalist and space-saving approach, the design should harmonize with the overall ambiance of the room.
-
Materials and Construction: Research various materials suitable for desk construction, such as wood, metal, or a combination of both. Consider the durability, cost, and visual appeal of each material to align with your design vision. Additionally, determine the construction method, whether it involves traditional woodworking techniques, metal fabrication, or a blend of DIY approaches.
-
Ergonomics and Comfort: Pay attention to ergonomic principles to ensure that the desk promotes comfort and productivity. Factors such as desk height, legroom, and storage accessibility play a crucial role in creating a functional and user-friendly workspace. Incorporating ergonomic features from the planning stage will result in a desk that supports your well-being during extended use.
-
Customization and Personalization: Embrace the opportunity to infuse your desk with personalized elements that reflect your individuality. Whether it's integrating a built-in cable management system, adding a custom finish, or incorporating unique storage solutions, customization allows you to tailor the desk to your specific preferences and requirements.
By meticulously planning your desk design, you set the stage for a seamless and enjoyable DIY building process. This preparatory phase empowers you to make informed decisions, unleash your creativity, and ultimately bring your envisioned workspace to life with precision and purpose.
Step 2: Gathering Materials and Tools
The next crucial step in your DIY desk building journey is gathering the necessary materials and tools to bring your design to fruition. This phase involves careful consideration of the components that will form the foundation of your custom workspace. By selecting high-quality materials and acquiring the appropriate tools, you set the stage for a successful and satisfying construction process.
Materials Selection
The choice of materials plays a pivotal role in determining the durability, aesthetics, and overall quality of your desk. Depending on your design preferences and budget, you may opt for wood, metal, or a combination of both. When selecting wood, consider the species, grain pattern, and finish that align with your desired aesthetic. Popular options include oak, pine, maple, and walnut, each offering unique characteristics in terms of color and texture. For a modern and industrial look, metal components such as steel or aluminum can be incorporated to add structural integrity and visual interest to the desk.
In addition to the primary structural materials, you'll need to source supplementary items such as screws, brackets, and adhesives to ensure secure assembly. If your design incorporates a desktop surface, consider materials such as laminate, hardwood plywood, or reclaimed wood for a distinctive and environmentally conscious touch. Furthermore, if your desk design involves specialized features such as integrated lighting, cable management systems, or drawer slides, be sure to procure the necessary components to seamlessly integrate these elements into the construction.
Essential Tools
Equipping yourself with the right tools is essential for executing the construction process with precision and efficiency. Basic hand tools such as a tape measure, level, hammer, screwdriver set, and adjustable wrench are indispensable for accurate measurements, assembly, and fastening. For woodworking tasks, a circular saw, jigsaw, and power drill with assorted drill bits are essential for cutting and shaping wood components, as well as creating pilot holes for screws and fasteners.
If metal fabrication is part of your desk construction, a metal cutting saw, angle grinder, and welding equipment may be required to work with metal components. Additionally, having a workbench or sturdy sawhorses to support and stabilize the materials during assembly is crucial for safety and ease of construction. Depending on the complexity of your design, specialty tools such as a router for creating decorative edges, a pneumatic nail gun for efficient fastening, or a wood lathe for turning custom wooden components may also be beneficial for achieving intricate details and personalized touches.
By meticulously gathering the requisite materials and tools, you lay a solid foundation for the construction phase, ensuring that you have everything needed to bring your custom desk design to life. This thoughtful preparation sets the stage for a seamless and enjoyable building process, allowing you to focus on the creative and technical aspects of crafting a workspace that embodies your vision and functionality.
Step 3: Building the Desk Frame
The construction of the desk frame forms the structural backbone of your custom workspace, providing stability and support for the desktop surface while defining the overall form and functionality of the desk. Building the desk frame involves a series of precise measurements, accurate assembly, and strategic reinforcement to ensure a sturdy and reliable foundation for your DIY desk. Here's a detailed breakdown of the essential steps involved in constructing the desk frame:
1. Measurement and Cutting
Begin by measuring and marking the dimensions for the desk frame components based on your design specifications. Using a tape measure and a pencil, carefully mark the lengths of the wood or metal pieces that will form the frame's structure. If using wood, a circular saw or miter saw can be employed to make precise cuts, ensuring that the components fit together seamlessly. For metal components, a metal cutting saw or angle grinder equipped with a cutting wheel is utilized to achieve accurate lengths and angles.
2. Assembly and Joinery
Once the individual frame pieces are cut to size, the assembly process commences. Depending on your design, you may employ various joinery techniques such as butt joints, miter joints, or lap joints to connect the frame components. Utilizing wood screws, metal brackets, or specialized fasteners, carefully join the frame pieces together, ensuring that the corners are square and the connections are secure. For added reinforcement, wood glue can be applied to the joints before assembly to enhance the overall strength and stability of the frame.
3. Reinforcement and Bracing
To further fortify the desk frame, strategic reinforcement and bracing are incorporated to distribute the weight of the desktop surface and enhance the structural integrity of the desk. Diagonal braces or cross supports can be added to prevent lateral movement and ensure that the frame remains rigid and stable. Additionally, corner brackets or metal gussets may be installed to reinforce the joints and minimize any potential wobbling or shifting of the frame during use.
4. Integration of Additional Features
If your desk design includes specialized features such as built-in shelving, drawers, or integrated storage compartments within the frame, this is the stage to incorporate these elements. Carefully integrate these additional features into the frame construction, ensuring that they seamlessly align with the overall design and contribute to the functionality of the desk.
By meticulously following these steps, you'll successfully construct a robust and well-engineered desk frame that forms the cornerstone of your custom workspace. The careful attention to detail and precision in the construction process ensures that your desk frame not only provides structural support but also contributes to the aesthetic appeal and functionality of your DIY desk.
Step 4: Adding the Desktop Surface
With the desk frame solidly constructed, the next pivotal step in the DIY desk building process is adding the desktop surface. The desktop serves as the functional work area where productivity and creativity converge, making it essential to approach this phase with precision and attention to detail. Whether you opt for a sleek and minimalist tabletop or a rustic, reclaimed wood surface, the addition of the desktop brings your custom workspace one step closer to completion.
Selecting the Desktop Material
The choice of material for the desktop surface plays a significant role in defining the desk's aesthetic appeal, durability, and functionality. Common options include hardwood plywood, solid wood planks, laminate, or even reclaimed materials for a unique and eco-friendly touch. Consider factors such as visual appeal, ease of maintenance, and compatibility with the overall design when selecting the desktop material. Additionally, take into account the intended use of the desk, whether it will primarily serve as a writing surface, a computer workstation, or a multifunctional area for various activities.
Cutting and Shaping
Once the desktop material is selected, precise measurements are taken to determine the dimensions of the desktop surface. Using a circular saw, jigsaw, or table saw, the material is carefully cut to the desired size, ensuring straight edges and accurate angles. If a custom shape or design is desired, such as rounded corners or a curved edge profile, a router equipped with the appropriate bit can be used to achieve the desired aesthetic.
Finishing and Edge Treatment
To enhance the visual appeal and longevity of the desktop surface, finishing treatments such as sanding, staining, or painting are applied. Sanding the surface smooth removes any imperfections and prepares the material for the chosen finish. Whether opting for a natural wood finish to showcase the grain patterns or applying a protective sealant to laminate or reclaimed materials, the finishing process adds a layer of refinement and protection to the desktop surface. Additionally, edge treatments such as beveling, chamfering, or adding decorative trim can further elevate the aesthetics of the desktop while providing a comfortable and visually appealing edge profile.
Securing the Desktop to the Frame
Once the desktop surface is prepared and finished, it is securely attached to the desk frame. Depending on the design, this may involve fastening the desktop to the frame using screws from underneath, utilizing specialized brackets or hardware, or employing adhesive methods for a seamless and clean attachment. Careful attention is given to ensure that the desktop is level, securely anchored, and free from any wobbling or instability.
By meticulously executing the process of adding the desktop surface, you bring your custom desk one step closer to realization. The careful selection of materials, precise cutting and shaping, thoughtful finishing treatments, and secure attachment to the frame culminate in a functional and visually striking workspace that embodies your unique vision and craftsmanship.
Step 5: Finishing Touches and Customization
As you approach the final phase of your DIY desk building journey, the opportunity to infuse your custom workspace with personalized touches and thoughtful details arises. The finishing touches and customization stage not only adds character and functionality to your desk but also elevates it from a mere furniture piece to a reflection of your individual style and creativity. Here's a detailed exploration of the essential aspects involved in adding the finishing touches and customization to your DIY desk:
Surface Treatment and Protection
Applying a protective finish to the desk surface serves as a crucial step in safeguarding the material from wear and tear while enhancing its visual appeal. Whether opting for a clear polyurethane sealant to showcase the natural beauty of wood or selecting a durable laminate coating for easy maintenance, the surface treatment ensures that your desk withstands daily use and retains its luster for years to come. Additionally, incorporating a desk pad or protective mat provides an extra layer of defense against scratches and spills, preserving the pristine condition of the desktop surface.
Cable Management Solutions
Incorporating effective cable management solutions contributes to a clutter-free and organized workspace. Strategically placed grommets, cable trays, or integrated wire channels allow for seamless routing and concealment of power cords, cables, and electronic accessories, promoting a tidy and streamlined desk environment. By addressing cable management during the customization phase, you ensure that the functionality of your desk is enhanced without compromising its visual appeal.
Personalized Accents and Decor
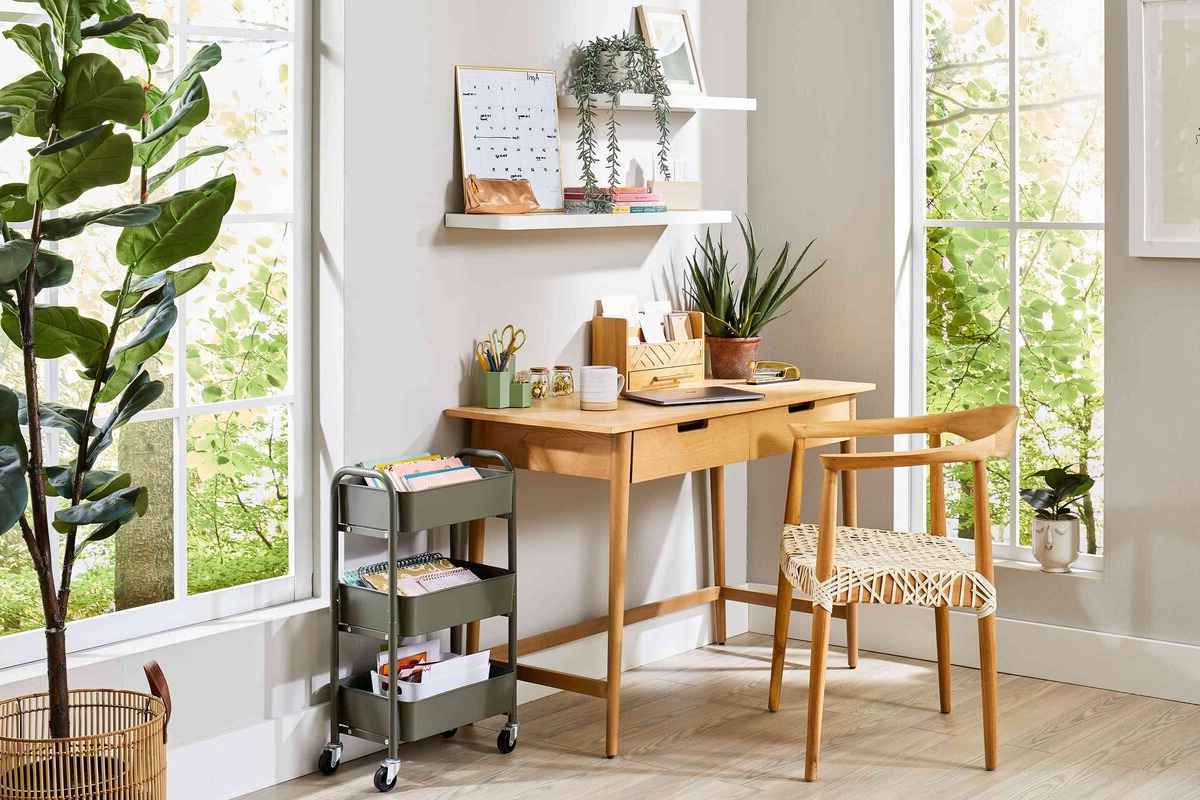
Infusing your desk with personalized accents and decor items adds a touch of personality and warmth to the workspace. Whether it's displaying cherished photographs, incorporating potted plants or succulents, or arranging decorative desk accessories, these elements contribute to a welcoming and inspiring environment. Additionally, incorporating ambient lighting solutions such as desk lamps or LED strips not only enhances the aesthetic appeal but also creates a conducive atmosphere for productivity and creativity.
Ergonomic Accessories
Prioritizing ergonomic accessories such as an adjustable monitor stand, an ergonomic keyboard tray, or a supportive desk chair elevates the comfort and functionality of your workspace. By customizing your desk with ergonomic solutions, you promote a healthy and ergonomic work environment, reducing strain and fatigue during extended periods of desk use.
Personalized Branding and Signage
For those utilizing the desk in a professional or business setting, incorporating personalized branding elements such as a custom nameplate, logo decal, or engraved signage adds a professional and distinctive touch to the workspace. These branding elements not only convey a sense of ownership and identity but also contribute to a cohesive and polished aesthetic within the environment.
By embracing the process of adding finishing touches and customization to your DIY desk, you transform it into a personalized and functional centerpiece that harmonizes with your lifestyle and work preferences. The thoughtful integration of protective treatments, organizational solutions, personalized decor, ergonomic accessories, and branding elements culminates in a workspace that not only meets your practical needs but also reflects your unique identity and creativity.
Conclusion
Congratulations on completing the exhilarating journey of DIY desk building! As you put the finishing touches on your custom workspace, you've not only crafted a functional and personalized desk but also embarked on a fulfilling creative endeavor that reflects your ingenuity and style. The process of planning, gathering materials, constructing the frame, adding the desktop surface, and customizing the details has culminated in the creation of a workspace that seamlessly integrates practicality with individuality.
By meticulously planning your desk design, you've laid the groundwork for a workspace that aligns with your specific needs and aesthetic preferences. The thoughtful consideration of space, style, materials, and customization has empowered you to bring your vision to life with precision and purpose.
Gathering the necessary materials and tools has equipped you with the essential components to execute your design with confidence and craftsmanship. The careful selection of materials and the acquisition of the right tools have set the stage for a successful construction process, ensuring that every element of your desk reflects quality and intention.
The construction of the desk frame has provided a solid foundation for your workspace, embodying structural integrity and stability. Through precise measurements, accurate assembly, and strategic reinforcement, you've engineered a frame that not only supports the desktop surface but also contributes to the overall form and functionality of the desk.
Adding the desktop surface has brought your custom desk one step closer to realization, infusing it with a functional work area that embodies your chosen material, finish, and edge treatment. The careful selection, cutting, shaping, finishing, and secure attachment of the desktop surface have transformed the frame into a fully functional and visually striking workspace.
As you've added the finishing touches and customization to your DIY desk, you've personalized it with thoughtful details that elevate its functionality and aesthetic appeal. The incorporation of surface treatments, cable management solutions, personalized accents, ergonomic accessories, and branding elements has transformed your workspace into a reflection of your individual style and work preferences.
In conclusion, the journey of DIY desk building has not only resulted in the creation of a custom workspace but has also empowered you to unleash your creativity, craftsmanship, and personal expression. Your newly crafted desk stands as a testament to your dedication, ingenuity, and the joy of creating a space that seamlessly integrates practicality with personality. Embrace your custom workspace with pride, knowing that it embodies your unique vision and serves as a functional and inspiring centerpiece in your home or office.