
Home>Create & Decorate>DIY & Crafts>How To Make Drawers
DIY & Crafts
How To Make Drawers
Published: February 23, 2024

Senior Editor in Create & Decorate, Kathryn combines traditional craftsmanship with contemporary trends. Her background in textile design and commitment to sustainable crafts inspire both content and community.
Learn how to make drawers with our easy DIY & Crafts tutorial. Create functional and stylish storage solutions for your home.
(Many of the links in this article redirect to a specific reviewed product. Your purchase of these products through affiliate links helps to generate commission for Twigandthistle.com, at no extra cost. Learn more)
Introduction
Making your own drawers can be a rewarding and practical DIY project that adds both functionality and aesthetic appeal to your furniture. Whether you're building a new piece of furniture or upgrading an existing one, custom-made drawers can elevate the overall look and usability of your creation. By crafting your own drawers, you have the freedom to customize the size, style, and materials to perfectly suit your needs and preferences.
Creating drawers from scratch allows you to exercise your creativity and woodworking skills, resulting in a sense of accomplishment and pride in your craftsmanship. Additionally, building your own drawers can be a cost-effective alternative to purchasing pre-made ones, especially if you have access to quality wood and basic carpentry tools.
Not only does this DIY project offer a practical solution for storage needs, but it also provides an opportunity to personalize your furniture with unique and bespoke drawer designs. Whether you prefer sleek and modern drawer fronts or rustic and distressed finishes, making your own drawers enables you to tailor every aspect to complement your personal style and the existing decor of your space.
Furthermore, mastering the art of creating drawers opens up a world of possibilities for future woodworking endeavors. The skills and techniques acquired during this project can be applied to various other woodworking tasks, empowering you to take on more complex and ambitious projects with confidence.
In the following sections, we will guide you through the step-by-step process of making drawers, from selecting the right materials and tools to assembling and installing the finished product. Whether you're a seasoned woodworker or a novice DIY enthusiast, this comprehensive guide will equip you with the knowledge and inspiration to embark on your drawer-making journey. So, roll up your sleeves, gather your supplies, and let's dive into the fulfilling world of crafting your own drawers.
Materials and Tools Needed
Before embarking on the journey of making your own drawers, it's essential to gather the necessary materials and tools to ensure a smooth and efficient crafting process. Here's a comprehensive list of what you'll need to bring your drawer-making project to life:
Materials:
-
Wood: Select high-quality wood that suits your preferences and complements the furniture piece where the drawers will be installed. Common options include oak, maple, birch, and pine. Ensure that the wood is appropriately sized for the dimensions of your drawers.
-
Drawer Slides: Invest in durable and smooth-operating drawer slides to facilitate seamless opening and closing of the drawers. Options include side-mount, center-mount, and undermount slides, so choose the type that best suits your project.
-
Drawer Front Material: If you desire a specific finish or design for the drawer fronts, acquire the appropriate material, such as hardwood, plywood, or MDF, based on your aesthetic vision.
-
Wood Glue: A reliable wood glue is essential for securely bonding the various components of the drawer, ensuring structural integrity and longevity.
-
Screws and Fasteners: Stock up on screws and fasteners suitable for woodworking to assemble the drawer box and attach the slides and fronts.
-
Sandpaper and Finish: Prepare for the finishing touches by obtaining sandpaper of varying grits to smooth the wood surfaces, as well as a finish of your choice, such as varnish, stain, or paint, to enhance the appearance and protect the wood.
Tools:
-
Measuring Tape and Square: Accurate measurements are crucial in creating well-fitted drawers, so a reliable measuring tape and square are indispensable tools.
-
Table Saw or Circular Saw: A table saw or circular saw is essential for cutting the wood to the precise dimensions required for the drawer components.
-
Clamps: Secure the wood pieces during assembly with clamps to ensure tight and stable joints.
-
Drill and Drill Bits: A power drill and a selection of drill bits are necessary for creating holes for screws and installing the drawer slides.
-
Screwdriver: Both manual and electric screwdrivers will be needed for driving screws into the wood.
-
Sanding Block or Orbital Sander: Smooth the wood surfaces efficiently with a sanding block or an orbital sander, saving time and effort.
-
Paintbrushes or Sprayer: If you opt for a painted finish, have the appropriate paintbrushes or a sprayer on hand for a professional and even application.
By ensuring that you have all the required materials and tools at your disposal, you can approach the process of making drawers with confidence and readiness, setting the stage for a successful and gratifying woodworking endeavor.
Step 1: Measure and Cut the Wood
The initial step in crafting your own drawers involves precise measurements and accurate cutting of the wood components to construct the drawer box. This phase is crucial as it sets the foundation for the structural integrity and functionality of the drawers. Here's a detailed guide to executing this fundamental stage with precision and finesse.
1.1 Gather the Necessary Wood
Begin by selecting the appropriate wood for your drawers, ensuring that it aligns with the overall aesthetic and durability requirements of your project. Once you have chosen the wood, carefully inspect it for any defects or irregularities that may affect the quality of the finished drawers.
1.2 Take Accurate Measurements
Using a reliable measuring tape and square, meticulously measure the dimensions for the drawer box components, including the front, back, sides, and bottom. It's essential to adhere to the precise measurements to guarantee a snug fit and smooth operation of the drawers within the furniture piece.
1.3 Mark the Wood for Cutting
After obtaining the accurate measurements, mark the wood pieces accordingly, clearly indicating the intended cuts and ensuring that each piece is labeled to avoid confusion during the cutting process. Double-check the markings to confirm that they align with the specified dimensions before proceeding to the next step.
1.4 Utilize a Table Saw or Circular Saw
With the wood pieces marked and ready, carefully use a table saw or circular saw to make the necessary cuts, following the designated measurements with precision. Exercise caution and focus during this stage to achieve clean and accurate cuts, as they will directly impact the assembly and overall appearance of the drawers.
1.5 Ensure Smooth Edges
Once the wood components are cut to size, use sandpaper or a sander to smooth the edges and surfaces, removing any roughness or splinters. This step not only enhances the visual appeal of the wood but also ensures a seamless fit when assembling the drawer box.
By meticulously measuring and cutting the wood for your drawers, you establish a solid groundwork for the subsequent stages of the project, laying the groundwork for a well-crafted and functional end result. With this critical phase completed, you are ready to progress to the assembly of the drawer box, bringing you one step closer to the fulfillment of your custom drawer-making endeavor.
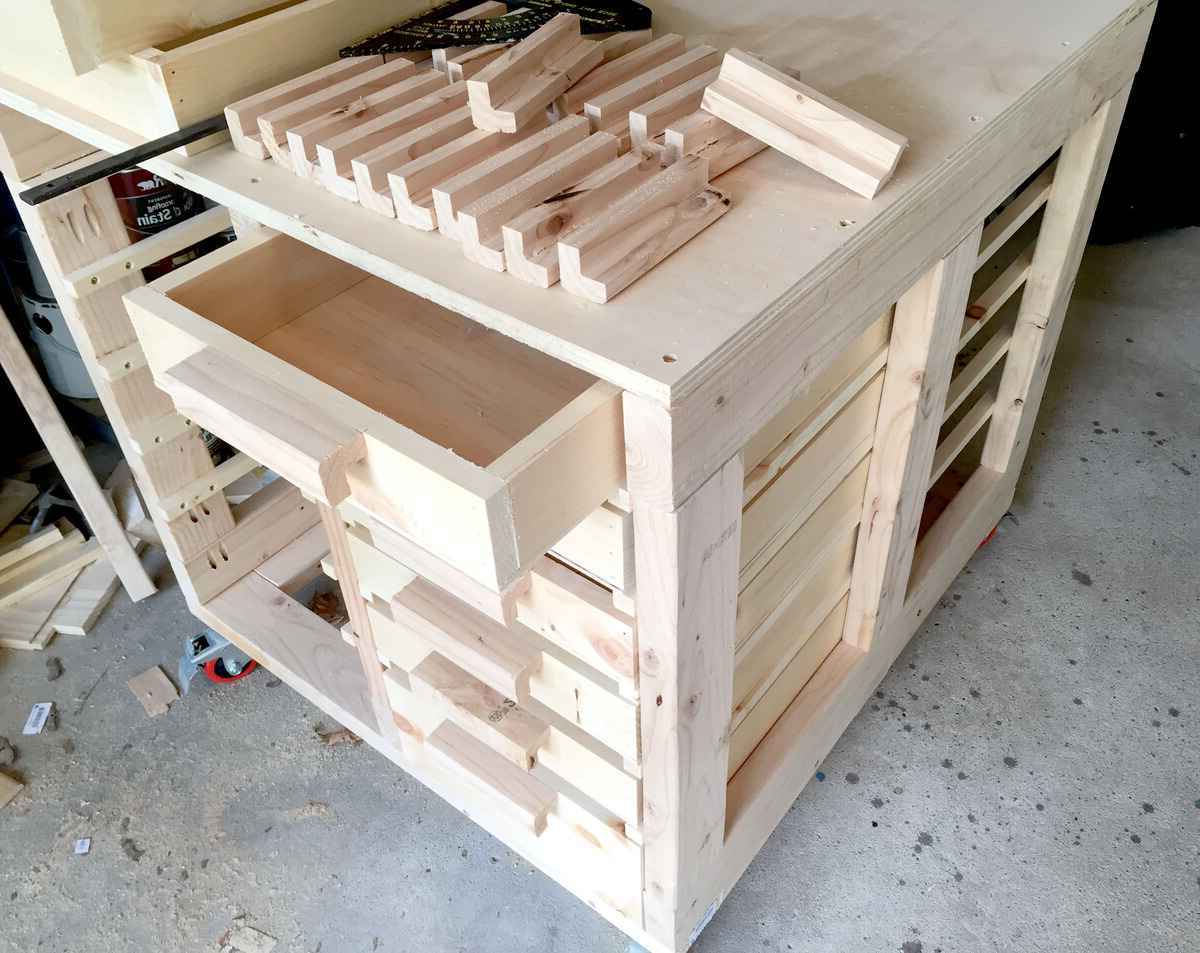
Step 2: Assemble the Drawer Box
With the wood components precisely measured and cut, the next pivotal phase in the creation of custom drawers is the assembly of the drawer box. This step involves joining the individual pieces of wood to form the structural framework of the drawer, laying the groundwork for the integration of the drawer slides and the attachment of the drawer front. Here's a comprehensive guide to executing this crucial stage with precision and finesse.
2.1 Arrange the Drawer Components
Begin by organizing the cut wood pieces in a clean and spacious work area, ensuring that all components are readily accessible. Lay out the front, back, sides, and bottom of the drawer box, inspecting each piece to confirm that they align with the designated measurements and exhibit smooth, splinter-free edges.
2.2 Apply Wood Glue
Prior to joining the wood components, apply a thin, even layer of high-quality wood glue along the edges that will be connected. The application of wood glue is essential for creating strong and durable joints, enhancing the overall stability and longevity of the drawer box.
2.3 Assemble the Drawer Box
Carefully align the edges of the wood pieces according to the predetermined layout, ensuring that the corners are square and the components fit together seamlessly. Utilize clamps to secure the pieces in place, exerting gentle pressure to promote a tight and secure bond between the joined surfaces.
2.4 Reinforce with Screws
To further fortify the structural integrity of the drawer box, drive screws through the assembled components at strategic intervals, creating robust connections that withstand the rigors of everyday use. Ensure that the screws are of appropriate length and gauge to prevent protrusion through the wood surfaces.
2.5 Verify Alignment and Squareness
Once the assembly is complete, meticulously inspect the drawer box to verify that the corners are square and the overall structure is aligned and stable. This step is crucial in ensuring that the drawer box is well-constructed and ready for the subsequent installation of the drawer slides and attachment of the drawer front.
By meticulously assembling the drawer box with precision and attention to detail, you establish a sturdy and reliable foundation for the drawers, setting the stage for the seamless integration of the remaining components. With the completion of this pivotal phase, you are poised to progress to the installation of the drawer slides, bringing you one step closer to the realization of your custom drawer-making endeavor.
Step 3: Install the Drawer Slides
Installing the drawer slides is a critical step in the process of making drawers, as it directly influences the functionality and smooth operation of the finished product. Proper installation of the drawer slides ensures that the drawers glide effortlessly in and out, providing convenient access to the contents while maintaining structural stability. Here's a comprehensive guide to executing this essential stage with precision and attention to detail.
3.1 Select the Appropriate Drawer Slides
Before commencing the installation process, carefully choose the type of drawer slides that best suit your project. Consider factors such as the weight capacity required, the available space within the furniture piece, and the desired aesthetic and functionality. Whether opting for side-mount, center-mount, or undermount slides, ensure that they align with the dimensions and specifications of your drawers.
3.2 Positioning and Marking
Begin by positioning the drawer slides within the furniture piece, aligning them meticulously to guarantee smooth and consistent movement of the drawers. Use a pencil to mark the precise locations where the slides will be installed, ensuring that they are level and parallel to each other. Accurate marking is crucial for the subsequent attachment of the slides and the seamless operation of the drawers.
3.3 Secure the Drawer Slides
With the marked positions as a guide, securely attach the drawer slides to the interior sides of the furniture piece, employing screws of appropriate length and gauge to ensure a firm and stable connection. Exercise precision and attention to detail during this stage, as the proper alignment and secure fastening of the slides are paramount to the overall functionality and longevity of the drawers.
3.4 Test for Smooth Movement
After installing the drawer slides, carefully test the movement of the drawers to verify that they glide in and out effortlessly, without any obstructions or misalignments. This step allows you to identify and address any potential issues related to the installation of the slides before proceeding to the final phase of attaching the drawer front.
By meticulously installing the drawer slides with precision and care, you pave the way for the seamless integration of the drawer front and the completion of your custom drawer-making endeavor. With this pivotal phase accomplished, you are well-equipped to progress to the final steps of attaching the drawer front, sanding, and finishing the drawers, bringing you closer to the realization of your woodworking masterpiece.
Step 4: Attach the Drawer Front
Attaching the drawer front is a crucial step that adds the finishing touch to your custom-made drawers, enhancing both their functionality and visual appeal. The seamless integration of the drawer front not only contributes to the overall aesthetics of the furniture piece but also ensures a snug and precise fit, completing the cohesive look of the entire ensemble. Here's a detailed guide to executing this essential stage with precision and finesse.
4.1 Positioning and Alignment
Begin by carefully positioning the drawer front in alignment with the assembled drawer box, ensuring that it is centered and level within the furniture piece. Utilize shims or spacers to maintain uniform gaps around the edges of the drawer front, guaranteeing a consistent and polished appearance once installed. Accurate positioning is essential for achieving a professional and visually pleasing result.
4.2 Secure the Drawer Front
Once the drawer front is positioned to your satisfaction, secure it to the drawer box using appropriate screws or fasteners from the inside of the drawer. Exercise caution and attention to detail during this stage to prevent any visible marks or damage to the exterior surface of the drawer front. Ensure that the attachment is firm and stable, providing the necessary support for the functional use of the drawers.
4.3 Test for Smooth Operation
After attaching the drawer front, carefully test the functionality of the drawers to verify that they open and close smoothly, without any resistance or misalignment. This step allows you to make any necessary adjustments to the attachment of the drawer front, ensuring that it contributes to the seamless operation and overall integrity of the drawers.
4.4 Apply Finish (Optional)
If desired, this is the opportune moment to apply the chosen finish to the drawer front, whether it be a coat of varnish, a stain, or a fresh coat of paint. The application of a finish not only enhances the visual appeal of the drawer front but also provides protection against wear and tear, ensuring its longevity and durability.
By meticulously attaching the drawer front with precision and attention to detail, you bring your custom drawer-making project to its completion, culminating in a functional and aesthetically pleasing addition to your furniture piece. With this pivotal phase accomplished, you have successfully navigated through the essential steps of making drawers, from measuring and cutting the wood to assembling, installing, and finishing the final components.
Step 5: Sand and Finish the Drawer
After the meticulous assembly and integration of the drawer components, the final step in the process of making drawers involves sanding and finishing the surfaces to achieve a polished and professional appearance. This crucial phase not only enhances the visual appeal of the drawers but also ensures the longevity and durability of the wood, providing protection against wear and tear. Here's a detailed guide to executing this essential stage with precision and finesse.
5.1 Sanding the Wood Surfaces
Commence the sanding process by using sandpaper of medium grit to smooth the surfaces of the drawer box and the attached front. Work methodically, applying even pressure to eliminate any rough spots, imperfections, or uneven edges. Gradually progress to finer grit sandpaper to achieve a silky-smooth finish, paying particular attention to the edges and corners to ensure a seamless and uniform texture across the entire surface.
5.2 Removing Dust and Residues
Following the sanding process, thoroughly remove any accumulated dust and wood residues from the surfaces of the drawers. Utilize a clean, dry cloth or a soft-bristled brush to eliminate all traces of debris, ensuring that the wood is pristine and ready for the application of the chosen finish. This step is crucial for achieving a flawless and blemish-free result.
5.3 Applying the Finish
Select the appropriate finish for your drawers, whether it be a clear varnish to showcase the natural beauty of the wood, a rich stain to add depth and character, or a fresh coat of paint to complement the existing decor. Apply the chosen finish evenly and consistently, using a paintbrush, roller, or sprayer to achieve a professional and uniform coating. Ensure that the finish is applied in a well-ventilated area, allowing for adequate drying time between coats as per the manufacturer's recommendations.
5.4 Final Inspection
Once the finish has been applied and allowed to dry, meticulously inspect the drawers for any imperfections or inconsistencies in the surface. Verify that the finish has been evenly distributed and that the wood surfaces exhibit a lustrous and refined appearance. This final inspection allows you to address any potential issues and make any necessary touch-ups to ensure a flawless and impeccable result.
By meticulously sanding and finishing the drawers with precision and attention to detail, you elevate the overall quality and visual appeal of your custom-made drawers, culminating in a refined and professional addition to your furniture piece. With this pivotal phase accomplished, you have successfully navigated through the essential steps of making drawers, from measuring and cutting the wood to assembling, installing, and finishing the final components.
Conclusion
In conclusion, the process of making drawers is a gratifying and fulfilling endeavor that combines craftsmanship, creativity, and practicality. By embarking on this DIY project, you have the opportunity to not only enhance the functionality of your furniture but also express your individual style and woodworking skills. The journey of creating custom drawers from scratch encompasses a series of meticulous steps, from measuring and cutting the wood to assembling, installing, and finishing the final components. Each phase of the process demands precision, attention to detail, and a passion for woodworking, resulting in a tangible and rewarding outcome.
Crafting your own drawers empowers you to tailor every aspect of the design, ensuring that the finished product seamlessly integrates with the existing furniture piece while meeting your specific storage needs. The ability to select high-quality wood, choose the perfect finish, and install durable drawer slides provides a sense of ownership and pride in the completed project. Moreover, the skills and techniques acquired during the drawer-making process can be applied to future woodworking endeavors, expanding your capabilities and confidence in tackling more ambitious projects.
The custom-made drawers not only serve as functional storage solutions but also contribute to the overall aesthetic appeal of your living space. Whether you opt for a sleek and modern design or a rustic and timeless finish, the personalized touch of handmade drawers adds a unique and distinctive element to your furniture. Furthermore, the satisfaction derived from utilizing drawers that you have meticulously crafted with your own hands is unparalleled, creating a sense of connection and appreciation for the art of woodworking.
As you reflect on the journey of making drawers, from the initial selection of materials to the final application of the finish, you have honed your woodworking skills and gained a deeper understanding of the intricacies involved in creating functional and visually appealing furniture components. The sense of accomplishment and pride that accompanies the completion of this DIY project serves as a testament to your dedication and creativity in the realm of woodworking.
In essence, the process of making drawers transcends the mere construction of functional storage units; it embodies a fusion of artistry, craftsmanship, and practicality, culminating in a tangible manifestation of your woodworking prowess. As you admire the finished drawers seamlessly integrated into your furniture piece, you can take pride in the fact that you have not only created a practical storage solution but also added a touch of your personality and skill to your living space.