
Home>Create & Decorate>DIY & Crafts>DIY Pickleball Court: How To Create Your Own Backyard Pickleball Court
DIY & Crafts
DIY Pickleball Court: How To Create Your Own Backyard Pickleball Court
Published: April 8, 2024

Content Creator specializing in woodworking and interior transformations. Caegan's guides motivate readers to undertake their own projects, while his custom furniture adds a personal touch.
Learn how to build your own backyard pickleball court with our DIY guide. Get creative with our DIY & Crafts tips and enjoy the game at home!
(Many of the links in this article redirect to a specific reviewed product. Your purchase of these products through affiliate links helps to generate commission for Twigandthistle.com, at no extra cost. Learn more)
Introduction
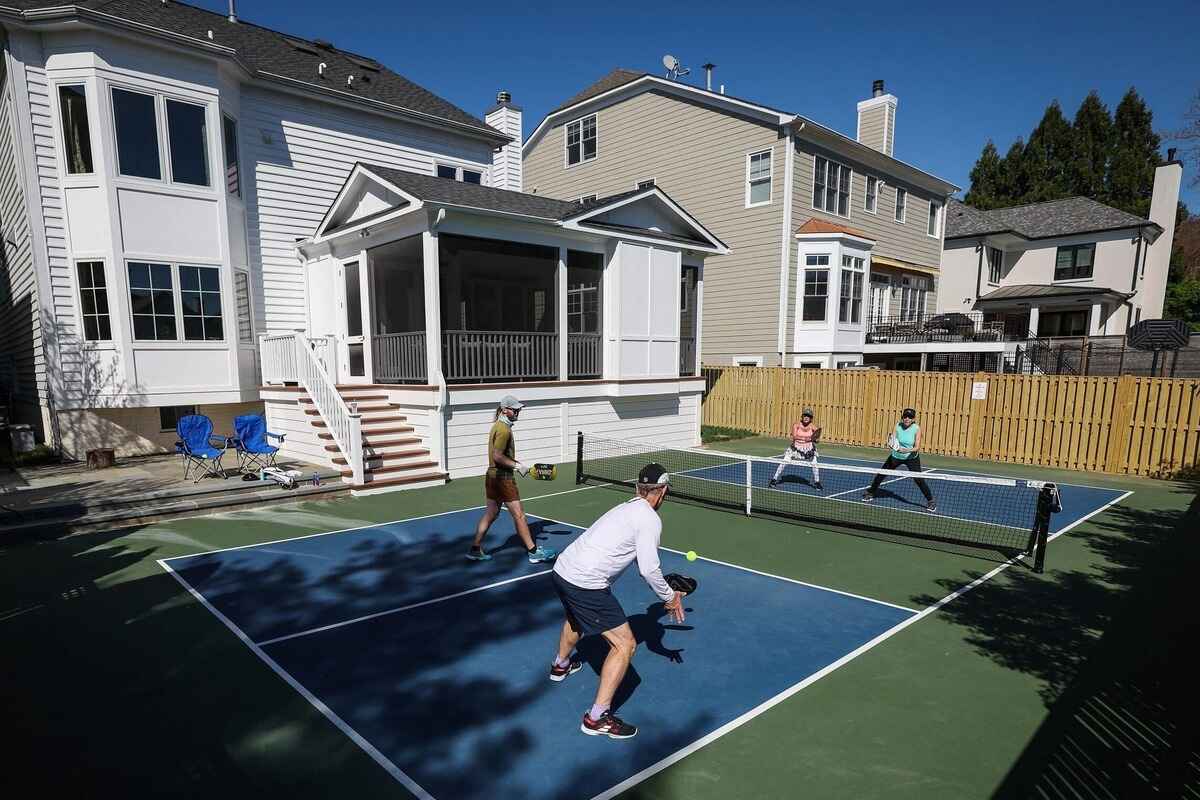
Are you a fan of pickleball and looking to bring the fun of this popular sport to your own backyard? Creating your own DIY pickleball court can be a rewarding project that provides hours of entertainment for family and friends. In this guide, we'll walk you through the steps to plan, build, and maintain your very own backyard pickleball court. Whether you're a seasoned DIY enthusiast or a beginner looking for a new project, creating a pickleball court in your backyard is a fantastic way to stay active and enjoy the outdoors. Let's dive in and get started on this exciting endeavor!
Planning Your Backyard Pickleball Court
When planning your backyard pickleball court, there are several key factors to consider to ensure a successful and enjoyable playing experience. Here are some essential steps to take when planning your DIY pickleball court:
-
Space Requirements: The first step in planning your backyard pickleball court is to assess the available space. A standard pickleball court measures 20 feet wide and 44 feet long for both singles and doubles play. Ensure that you have enough space to accommodate the court dimensions, including additional space around the court for player movement and safety.
-
Surface Material: Consider the surface material for your pickleball court. While asphalt and concrete are popular choices, there are also DIY-friendly options such as interlocking tiles or compacted gravel. Each material has its own benefits and considerations, so choose the one that best suits your budget and DIY skill level.
-
Sunlight and Shade: Take into account the position of the sun and shade in your backyard. Ideally, the court should be situated in an area that receives ample sunlight for most of the day, as this can enhance playing conditions and minimize moisture buildup on the court surface.
-
Accessibility: Ensure that the location of your pickleball court allows for easy access from your home and other outdoor areas. Consider pathways, lighting, and any potential obstructions that may affect the accessibility and usability of the court.
By carefully planning these aspects, you can set the foundation for a well-designed and functional backyard pickleball court that will provide endless enjoyment for years to come.
Materials and Tools Needed
Before embarking on the construction of your DIY pickleball court, it's essential to gather the necessary materials and tools to ensure a smooth and efficient building process. Here's a comprehensive list of the items you'll need:
Materials:
- Surface Material: Depending on your preference, you'll need asphalt, concrete, interlocking tiles, or compacted gravel to create the playing surface of the court.
- Boundary Marking Material: This includes paint or tape for marking the boundaries and lines of the pickleball court.
- Net and Posts: Purchase a regulation-size pickleball net and sturdy posts to set up the net system.
- Base Material: If you're opting for a non-concrete surface, you may need base materials such as gravel or sand for proper foundation and leveling.
Tools:
- Measuring Tools: Tape measure, chalk line, and stakes for accurately marking the court dimensions.
- Excavation Tools: Shovel, wheelbarrow, and a compacting tool for preparing the ground and laying the surface material.
- Painting Tools: Paint rollers, brushes, and a sprayer for marking the court lines and boundaries.
- Leveling Tools: A level and a straight edge for ensuring a flat and even playing surface.
- Installation Tools: Wrenches, screws, and a drill for assembling the net and posts securely.
By ensuring that you have all the necessary materials and tools at your disposal, you can streamline the construction process and minimize any potential delays or interruptions. With these items in hand, you'll be well-prepared to bring your backyard pickleball court to life.
Step-by-Step Instructions for Building the Court
-
Prepare the Site: Begin by clearing the designated area for your pickleball court, ensuring that the ground is level and free of any debris or obstructions. If necessary, use excavation tools to remove any existing materials and create a smooth, even surface for the court foundation.
-
Lay the Base Material: If you've opted for a non-concrete surface such as interlocking tiles or compacted gravel, spread the base material evenly across the court area. Use a compactor to firmly pack the base material, ensuring stability and proper drainage.
-
Install the Playing Surface: Whether you've chosen asphalt, concrete, or interlocking tiles, carefully lay and secure the playing surface material according to the manufacturer's instructions. Pay close attention to proper alignment and leveling to achieve a professional-quality playing surface.
-
Mark the Boundaries and Lines: Using measuring tools and high-quality paint or tape, mark the boundaries and lines of the pickleball court. Ensure precise measurements and straight lines for accurate gameplay.
-
Set Up the Net and Posts: Install the pickleball net and posts at the center of the court, following the official regulations for height and tension. Securely anchor the posts to maintain stability during play.
-
Add Finishing Touches: Once the court structure is in place, perform a thorough inspection to ensure that all components are securely installed and aligned. Make any necessary adjustments to guarantee a safe and professional-quality playing environment.
-
Test the Court: Before inviting friends and family to enjoy the new pickleball court, conduct a test run to ensure that the playing surface is even, the lines are clearly marked, and the net is properly tensioned. This step allows you to address any potential issues before regular use.
By following these step-by-step instructions, you can successfully build your own backyard pickleball court and create a space for countless hours of active enjoyment and friendly competition.
Adding Lines and Net
Once the foundation of your pickleball court is in place, the next crucial step is to add the lines and net, transforming the playing area into a regulation-compliant pickleball court.
Marking the Lines
Using high-quality paint or tape, carefully mark the boundaries and lines of the pickleball court. It's essential to ensure precise measurements and straight lines for accurate gameplay. The dimensions of a standard pickleball court for both singles and doubles play are 20 feet wide and 44 feet long. The centerline divides the court into two equal halves, and the non-volley zone, also known as the "kitchen," is marked 7 feet from the net on both sides. Accurate marking is crucial for maintaining the integrity of the game and ensuring fair play.
Setting Up the Net
Install the pickleball net and posts at the center of the court, following the official regulations for height and tension. The net should be positioned at a height of 34 inches at the sidelines and 36 inches at the center. The tension of the net is vital to prevent sagging during play, so ensure that it is securely fastened and properly aligned. Sturdy posts and an appropriately tensioned net contribute to a professional-quality playing environment, allowing for enjoyable and competitive pickleball matches.
Ensuring Accuracy and Precision
When adding the lines and net, attention to detail is paramount. Utilize measuring tools and guidelines to guarantee that the court markings and net placement adhere to official standards. By meticulously following the prescribed measurements and guidelines, you can create a pickleball court that meets regulatory requirements and provides an authentic playing experience.
Final Inspection
After adding the lines and net, conduct a final inspection to ensure that all components are securely installed and aligned. Verify that the court dimensions, line markings, and net positioning are accurate and compliant with official pickleball regulations. This meticulous attention to detail will result in a professionally finished court that is ready for countless hours of competitive and recreational play.
By meticulously adding the lines and net according to official standards, you can transform your backyard space into a bona fide pickleball court, ready for spirited matches and enjoyable recreational play.
Maintenance and Care for Your DIY Pickleball Court
Maintaining your DIY pickleball court is essential to ensure its longevity, safety, and optimal playing conditions. By implementing a regular maintenance routine, you can preserve the quality of the court and provide a consistent playing experience for yourself and others. Here are some key maintenance tasks and care tips to keep your pickleball court in top shape:
Regular Cleaning
Regularly clean the playing surface of the court to remove debris, dirt, and any organic matter that may accumulate over time. Use a leaf blower, broom, or pressure washer to clear the surface, ensuring that it remains free from obstructions and hazards. Keeping the court clean not only enhances its appearance but also prevents potential slip and trip hazards during gameplay.
Surface Repairs
Inspect the court surface for any signs of damage, such as cracks, uneven areas, or deterioration. Promptly address any issues by repairing the surface material or addressing the underlying cause of the damage. Depending on the surface material used, repairs may involve patching, resurfacing, or re-leveling to maintain a smooth and safe playing surface.
Net and Post Maintenance
Regularly inspect the pickleball net and posts for signs of wear, corrosion, or instability. Ensure that the net remains taut and securely fastened to the posts, making any necessary adjustments or replacements as needed. Proper maintenance of the net and posts contributes to a safe and professional playing environment.
Line Retouching
Over time, the painted lines on the court may fade or wear due to regular use and exposure to the elements. Periodically retouch the lines using high-quality paint to maintain their visibility and adherence to official dimensions. Clear and distinct court lines are essential for accurate gameplay and fair competition.
Drainage Management
If your pickleball court is susceptible to water accumulation or drainage issues, take proactive measures to address these concerns. Ensure that the court surface promotes proper drainage and consider installing drainage solutions to prevent water buildup, especially during inclement weather. Effective drainage management helps preserve the integrity of the court and minimizes the risk of water-related damage.
Seasonal Inspections
Conduct seasonal inspections of the entire court, including the playing surface, net system, and surrounding areas. Assess the impact of seasonal changes, such as temperature fluctuations and precipitation, on the court's condition. Address any seasonal effects promptly to maintain the court's functionality and safety throughout the year.
By incorporating these maintenance and care practices into your routine, you can uphold the quality and performance of your DIY pickleball court, ensuring that it remains a reliable and enjoyable space for pickleball enthusiasts of all levels. Regular attention to maintenance not only extends the lifespan of the court but also enhances the overall playing experience for you and your fellow players.
Conclusion
In conclusion, creating your own DIY pickleball court in your backyard is a fulfilling and rewarding endeavor that can bring endless hours of enjoyment and physical activity. By carefully planning the space, gathering the necessary materials and tools, and following the step-by-step construction process, you can bring your vision of a backyard pickleball court to life. Additionally, the meticulous addition of court lines and a regulation-compliant net, coupled with regular maintenance and care, ensures that your pickleball court remains a safe, professional, and inviting space for players of all skill levels. Whether you're a dedicated pickleball enthusiast or someone looking to add a unique recreational feature to your home, a DIY pickleball court offers a fantastic opportunity to stay active, socialize, and have fun right in your own backyard. So, roll up your sleeves, gather your materials, and get ready to enjoy the thrill of pickleball in the comfort of your home.