
Home>Outdoors & Camping>Landscaping>How To Build A Natural Pond
Landscaping
How To Build A Natural Pond
Published: March 7, 2024

Content Creator for Outdoors & Camping, Sophie turns any yard into a sustainable paradise. Her dedication to DIY outdoor projects and volunteer work in community gardens shares joy and knowledge.
Learn how to create a stunning natural pond with our expert landscaping tips. Enhance your outdoor space with a beautiful and eco-friendly water feature.
(Many of the links in this article redirect to a specific reviewed product. Your purchase of these products through affiliate links helps to generate commission for Twigandthistle.com, at no extra cost. Learn more)
Introduction
So, you've been dreaming of having a serene and natural oasis right in your backyard, and you've decided that a natural pond is the perfect addition to your outdoor space. But where do you start? Building a natural pond may seem like a daunting task, but with the right guidance and a bit of elbow grease, you can create a beautiful and thriving ecosystem that will bring joy and tranquility to your home. In this article, we'll walk you through the step-by-step process of building your very own natural pond, from planning and design to maintenance and care. Let's dive in!
Planning and Design
Before you start digging up your backyard, it's crucial to put some thought into the planning and design of your natural pond. Here are the essential steps to consider:
-
Set Your Goals: Determine the purpose of your pond. Do you want it to be a habitat for wildlife, a peaceful retreat, or a combination of both? Understanding your goals will guide the design and construction process.
-
Size and Shape: Consider the available space in your yard and decide on the size and shape of your pond. Keep in mind that larger ponds are generally easier to maintain and provide a more stable environment for fish and plants.
-
Sunlight and Shade: Take note of the sunlight and shade patterns in your yard. Most aquatic plants require at least 6 hours of sunlight per day, so it's essential to design your pond in an area that receives adequate sunlight.
-
Safety: If you have children or pets, safety should be a top priority. Consider incorporating shallow areas, gradual slopes, and sturdy edging to ensure the safety of all inhabitants.
-
Water Source: Plan for a reliable water source to fill your pond. This could be from a well, rainwater harvesting system, or a hose connected to your home's water supply.
-
Permits and Regulations: Check with your local authorities to determine if any permits or regulations apply to building a pond on your property. Some areas have specific guidelines regarding pond size, depth, and proximity to property lines.
By carefully planning and designing your natural pond, you'll set the stage for a successful and harmonious aquatic environment that will bring joy and tranquility to your outdoor space.
Choosing the Right Location
When it comes to building a natural pond, choosing the right location is paramount to the success and longevity of your aquatic ecosystem. Here are some key factors to consider when selecting the perfect spot for your pond:
-
Sunlight and Shade: Assess the sunlight and shade patterns in your yard. Most aquatic plants require at least 6 hours of sunlight per day, so it's crucial to choose a location that receives adequate sunlight. Avoid placing the pond under large trees that may shed leaves and debris into the water.
-
Proximity to Trees and Shrubs: While trees can provide shade and a natural aesthetic, it's important to consider the implications of falling leaves and roots. Select a location that is not too close to large trees whose roots could potentially puncture the pond liner.
-
Accessibility: Choose a location that is easily accessible for maintenance tasks such as cleaning, plant care, and potential repairs. You'll want to be able to reach all areas of the pond without difficulty.
-
Visibility: Consider the visibility of the pond from your home and outdoor living spaces. A well-placed pond can serve as a focal point and enhance the overall aesthetics of your yard.
-
Safety: If you have children or pets, safety should be a top priority. Avoid placing the pond in an area where it poses a potential hazard. Consider incorporating shallow areas, gradual slopes, or protective barriers to ensure the safety of all inhabitants.
-
Water Source: Ensure that the location is within reasonable proximity to a water source for filling and topping up the pond. This could be a hose connected to your home's water supply, a well, or a rainwater harvesting system.
By carefully considering these factors and choosing the right location for your natural pond, you'll create an environment that is conducive to the growth of aquatic plants, the well-being of fish and wildlife, and the overall enjoyment of your outdoor space.
Excavation and Shaping
Once you've planned and designed the layout of your natural pond, it's time to roll up your sleeves and get digging. The excavation and shaping phase is where the groundwork for your aquatic haven takes place. Here's a detailed look at the steps involved in this crucial stage:
-
Marking the Layout: Use a garden hose or spray paint to outline the shape and size of your pond directly on the ground. This will serve as a guide for excavation and ensure that you stay within the planned dimensions.
-
Excavation Depth: The depth of your pond will depend on its intended use. For a wildlife habitat and optimal plant growth, aim for a depth of at least 2 feet. Use a shovel or, for larger ponds, consider renting a small excavator to dig out the marked area.
-
Shaping the Pond: As you excavate, pay attention to the contours and slopes of the pond. Create shelves or varying depths to accommodate different types of aquatic plants and provide refuge for wildlife. A gradual slope towards the center can mimic natural ponds and provide easy access for maintenance.
-
Remove Debris: Once the excavation is complete, remove any rocks, roots, or debris from the bottom and sides of the pond. Smooth out the surfaces to prevent puncturing the pond liner during installation.
-
Compact the Soil: After excavation, use a tamper or compacting tool to firm up the soil at the bottom of the pond. This will help prevent settling and unevenness once the pond is filled with water.
-
Test the Layout: Before proceeding to the next phase, take a step back and visualize the layout of your pond. Make any necessary adjustments to the shape and depth to ensure it aligns with your initial design.
By meticulously executing the excavation and shaping process, you'll lay the groundwork for a natural pond that not only looks visually appealing but also provides a conducive environment for aquatic life to thrive.
Adding Rocks and Plants
The addition of rocks and plants is a pivotal step in creating a natural pond that mimics the beauty and functionality of a true ecosystem. Here's a detailed guide on how to incorporate rocks and plants into your pond:
Rocks
-
Selecting the Right Rocks: Choose a variety of rocks in different shapes and sizes to create a natural and visually appealing landscape. Flat rocks can be used for ledges and shelves, while larger boulders can provide a focal point and structural support.
-
Placement and Arrangement: Carefully place the rocks around the edges and within the pond, creating a naturalistic layout. Consider the natural flow of water and aim to mimic the appearance of a natural water feature. Stagger the rocks to create hiding spots for fish and wildlife.
-
Securing the Rocks: To prevent shifting and movement, ensure that the rocks are securely positioned on the pond liner. Use a layer of sand or gravel underneath the rocks to provide stability and prevent puncturing the liner.
Plants
-
Choosing Aquatic Plants: Select a variety of aquatic plants, including submerged, floating, and marginal plants, to create a balanced ecosystem. Submerged plants oxygenate the water, floating plants provide shade and cover, and marginal plants soften the pond edges.
-
Planting Techniques: Depending on the type of aquatic plants, use planting baskets or containers filled with aquatic soil to anchor the plants. Submerged plants can be weighted and placed at different depths, while marginal plants can be positioned along the shelves and edges of the pond.
-
Establishing Plant Zones: Create distinct zones within the pond for different types of plants. This includes deep-water zones for submerged plants, shallow-water zones for marginal plants, and open areas for floating plants. This zoning creates a diverse habitat for aquatic life.
-
Maintenance and Care: Regularly trim and thin out the plants to prevent overgrowth and maintain a healthy balance. Remove any decaying plant matter to prevent nutrient buildup and algae growth. Additionally, fertilize the plants as needed to promote healthy growth.
By thoughtfully incorporating rocks and a diverse selection of aquatic plants, you'll not only enhance the natural beauty of your pond but also create a thriving ecosystem that supports a variety of aquatic life.
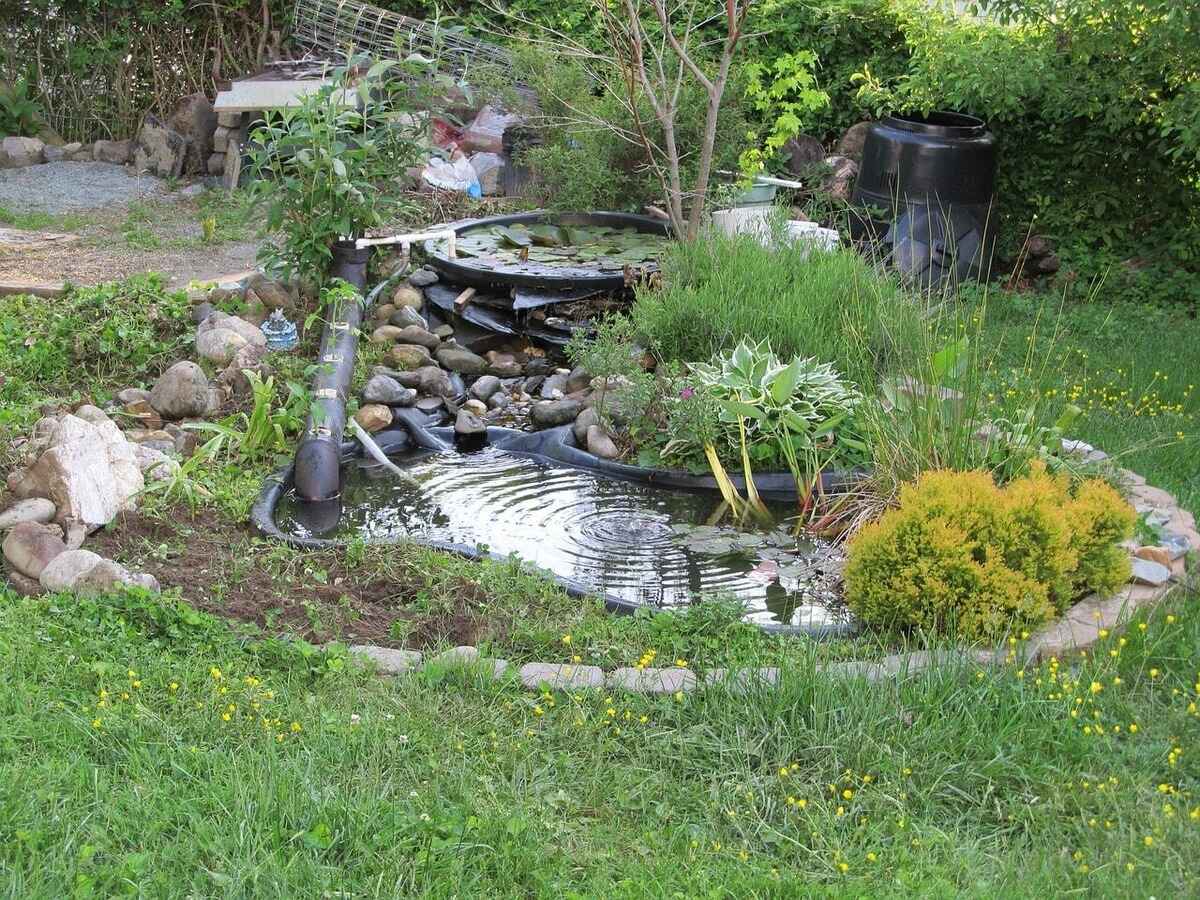
Installing a Filtration System
Installing a filtration system is a critical component of maintaining a healthy and balanced ecosystem within your natural pond. Here's a comprehensive guide on how to effectively install a filtration system:
-
Selecting the Right Filtration System: There are various types of filtration systems available, including biological filters, mechanical filters, and UV clarifiers. Choose a filtration system that is suitable for the size and depth of your pond, as well as the intended aquatic life. Consider factors such as flow rate, filter media, and energy efficiency when making your selection.
-
Determining Placement: Identify the optimal location for installing the filtration system. Ideally, the system should be placed near the pond's edge for easy access and maintenance. Ensure that the chosen location allows for proper water circulation and distribution throughout the pond.
-
Installing the Biological Filter: If utilizing a biological filter, position it in an area where it can receive a continuous flow of water from the pond. Connect the inlet and outlet hoses to the appropriate water pump or circulation system. Follow the manufacturer's instructions for proper installation and setup.
-
Incorporating a Mechanical Filter: Mechanical filters are effective at removing debris and particulate matter from the water. Install the mechanical filter in conjunction with the biological filter to ensure comprehensive filtration. Regularly clean and maintain the mechanical filter to prevent clogging and maintain optimal performance.
-
Utilizing UV Clarifiers: UV clarifiers are beneficial for controlling algae and pathogens in the pond water. If incorporating a UV clarifier into your filtration system, install it in a location where the water passes through the UV light effectively. Follow the manufacturer's guidelines for proper installation and replacement of UV bulbs.
-
Establishing a Pump System: A reliable pump system is essential for circulating water through the filtration system. Select a pump that is appropriately sized for your pond's volume and depth. Install the pump in a location that allows for efficient water circulation and aeration.
-
Connecting the Components: Once the individual filtration components are in place, connect them to form a cohesive filtration system. Ensure that all hoses, pipes, and electrical connections are secure and properly sealed to prevent leaks and inefficiencies.
-
Testing and Calibration: After installation, thoroughly test the filtration system to ensure proper functionality. Monitor the water clarity, oxygen levels, and overall water quality to verify that the filtration system is effectively maintaining a healthy aquatic environment.
By meticulously installing a comprehensive filtration system, you'll promote water clarity, reduce the buildup of organic matter, and provide a conducive habitat for fish, plants, and other aquatic life within your natural pond.
Filling the Pond
Once the groundwork for your natural pond is in place, it's time to fill it with water and bring your aquatic oasis to life. Here's a detailed guide on the process of filling your pond:
-
Water Source: Determine the source of water for filling your pond. This could be from a nearby hose connected to your home's water supply, a well, or a rainwater harvesting system. Ensure that the water source is reliable and free from any harmful contaminants.
-
Dechlorination: If you're using tap water to fill your pond, it's essential to dechlorinate the water to create a safe environment for fish and plants. Use a dechlorinator or allow the water to sit for a few days to allow the chlorine to dissipate naturally.
-
Slow and Steady: When filling the pond, do so gradually to prevent disturbing the pond's substrate and plants. A slow and steady fill rate also allows the pond's ecosystem to adjust to the new water and minimizes the risk of sudden temperature or pH fluctuations.
-
Monitoring Water Level: As the pond fills, monitor the water level closely to ensure that it reaches the desired depth. Use a level or measuring tape to verify that the water level is consistent throughout the pond.
-
Temperature Considerations: If possible, fill the pond with water that is close to the ambient temperature to minimize stress on any existing aquatic life. Avoid filling the pond with water that is excessively cold or warm, as this can shock the ecosystem.
-
Adjusting Water Chemistry: Once the pond is filled, test the water for pH, ammonia, nitrite, and nitrate levels. Make any necessary adjustments to ensure that the water chemistry is conducive to the health of fish and plants.
-
Circulation and Aeration: After filling the pond, ensure that the water is circulating effectively through the use of a pump or filtration system. Adequate aeration is crucial for maintaining oxygen levels and promoting a healthy aquatic environment.
-
Observation Period: Allow the pond to settle for a few days after filling. Observe the water clarity, monitor for any signs of stress in fish or plants, and make any necessary adjustments to the pond's environment.
By following these steps, you'll successfully fill your natural pond with water, creating a thriving aquatic habitat that enhances the beauty and tranquility of your outdoor space.
Maintenance and Care
Maintaining and caring for your natural pond is essential to ensure the longevity and health of the aquatic ecosystem. Here's a comprehensive guide on the ongoing maintenance and care tasks that will keep your pond in optimal condition:
-
Water Quality Testing: Regularly test the water quality parameters such as pH, ammonia, nitrite, and nitrate levels. This can be done using test kits specifically designed for pond water. Monitoring these parameters allows you to make timely adjustments to maintain a healthy aquatic environment.
-
Algae Control: Keep an eye on algae growth in the pond. While some algae is normal and beneficial, excessive growth can disrupt the balance of the ecosystem. Use natural algae control methods such as adding aquatic plants, using barley straw, or incorporating UV clarifiers to manage algae growth.
-
Plant Maintenance: Prune and thin out aquatic plants as needed to prevent overgrowth and maintain a balanced ecosystem. Remove any decaying plant matter to prevent nutrient buildup and algae proliferation. Fertilize the plants as necessary to promote healthy growth.
-
Fish Care: If your pond is home to fish, monitor their health and behavior regularly. Ensure that they are receiving adequate nutrition and observe for any signs of illness or stress. Provide proper feeding and consider seasonal adjustments to their diet.
-
Pond Cleaning: Periodically remove debris such as leaves, twigs, and sediment from the pond. Use a skimmer net or pond vacuum to clean the bottom and surface of the pond. This helps maintain water clarity and prevents the accumulation of organic matter.
-
Filter Maintenance: Regularly clean and maintain the filtration system to ensure optimal performance. This includes cleaning mechanical filters, replacing filter media as needed, and checking the functionality of UV clarifiers. Keep the pump and filtration components free from debris and obstructions.
-
Winter Preparation: If you live in a region with cold winters, prepare your pond for the winter months. This may include installing a pond heater or de-icer to prevent the water from freezing completely. Adjust the feeding and care of fish to accommodate colder temperatures.
-
Seasonal Adjustments: Make seasonal adjustments to the care and maintenance of your pond. This includes adapting plant care, fish feeding, and water treatments based on the changing environmental conditions throughout the year.
By consistently implementing these maintenance and care practices, you'll create a thriving and balanced ecosystem within your natural pond, providing a serene and beautiful outdoor space for years to come.
Conclusion
Building a natural pond is a rewarding endeavor that allows you to create a harmonious aquatic ecosystem right in your own backyard. By following the step-by-step process outlined in this guide, from planning and design to maintenance and care, you can bring to life a serene and beautiful oasis that enhances the natural beauty of your outdoor space. A well-designed natural pond not only provides a habitat for aquatic life but also serves as a tranquil retreat for relaxation and enjoyment. With careful consideration of the location, thoughtful incorporation of rocks and plants, and the implementation of a reliable filtration system, you can create a thriving and balanced ecosystem that will bring joy and tranquility for years to come. So, roll up your sleeves, unleash your creativity, and embark on the journey of building your very own natural pond – a captivating and sustainable addition to your home.