
Home>Create & Decorate>DIY & Crafts>How To Build A Horizontal Fence
DIY & Crafts
How To Build A Horizontal Fence
Published: April 6, 2024

Content Creator specializing in woodworking and interior transformations. Caegan's guides motivate readers to undertake their own projects, while his custom furniture adds a personal touch.
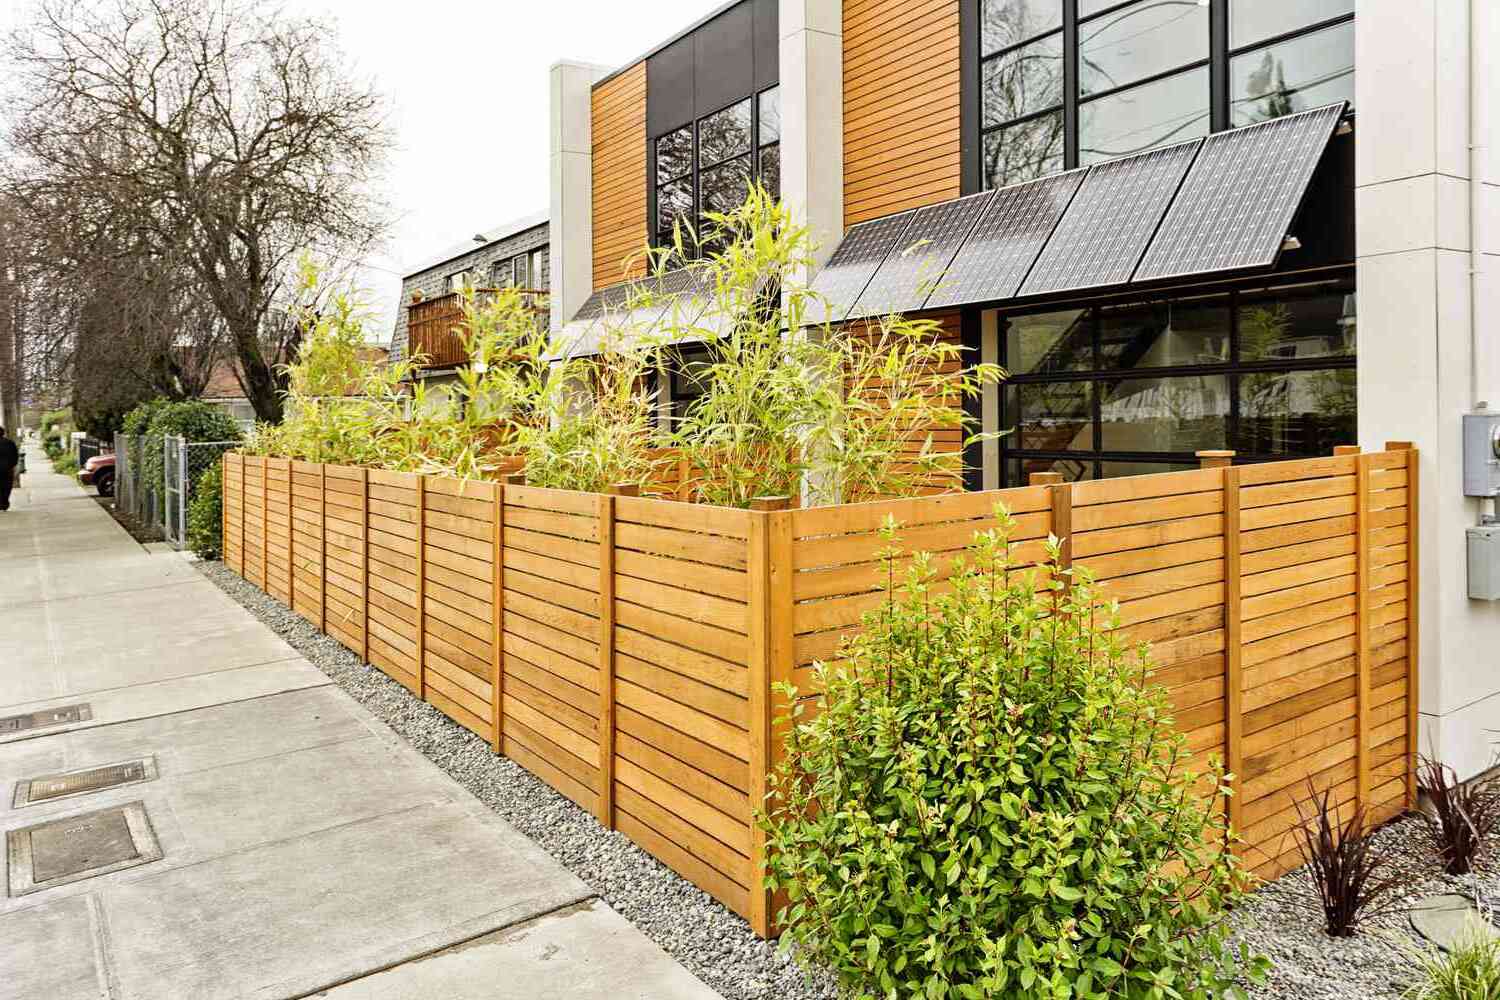
Learn how to build a stylish horizontal fence with our step-by-step DIY guide. Perfect for adding a modern touch to your outdoor space. Ideal for DIY & Crafts enthusiasts.
(Many of the links in this article redirect to a specific reviewed product. Your purchase of these products through affiliate links helps to generate commission for Twigandthistle.com, at no extra cost. Learn more)
Introduction
So, you've decided to give your yard a fresh new look by building a horizontal fence. A horizontal fence can add a modern and sleek touch to your property, and it's a great DIY project for those looking to enhance their outdoor space. Whether you're a seasoned DIY enthusiast or a beginner looking to take on a new challenge, building a horizontal fence can be a rewarding and satisfying endeavor. In this guide, we'll walk you through the steps to create a stunning horizontal fence that will not only enhance the aesthetics of your property but also provide privacy and security. Let's dive in and get started on this exciting project!
Choosing the Right Materials
When it comes to building a horizontal fence, selecting the right materials is crucial for the overall look, durability, and maintenance of your project. Here are some key materials you'll need to consider:
1. Wood
Opting for high-quality, durable wood is essential for a long-lasting horizontal fence. Cedar and redwood are popular choices due to their natural resistance to rot and insects. These woods also offer a beautiful, natural finish that can complement various outdoor settings.
2. Metal Posts
To ensure the stability and strength of your horizontal fence, using metal posts is highly recommended. Steel or aluminum posts provide excellent support and can withstand the elements, contributing to the longevity of your fence.
3. Fasteners
Choosing the right fasteners, such as screws and nails, is essential for securing the components of your horizontal fence. Stainless steel or coated screws and nails are ideal for outdoor use, as they are resistant to corrosion and will help maintain the structural integrity of your fence over time.
4. Finishes and Sealants
To protect your horizontal fence from weathering and enhance its appearance, consider using a high-quality wood finish or sealant. These products can help prevent moisture damage, UV exposure, and other environmental factors that may affect the longevity of your fence.
5. Tools
Don't forget to gather the necessary tools for the project, including a saw, drill, level, measuring tape, and other carpentry tools. Having the right tools on hand will make the construction process smoother and more efficient.
By carefully selecting the appropriate materials for your horizontal fence, you can ensure that your project not only looks visually appealing but also stands the test of time in terms of durability and functionality.
Planning and Measuring
Before diving into the construction of your horizontal fence, thorough planning and precise measurements are essential for a successful outcome. Here's how to approach the planning and measuring phase:
-
Sketch Your Design: Begin by sketching out the design of your horizontal fence. Consider the desired height, the spacing between slats, and any additional features such as gates or decorative elements. A visual representation of your design will serve as a helpful reference throughout the project.
-
Check Local Regulations: It's crucial to check with your local building authorities or homeowner's association to ensure compliance with any regulations or restrictions regarding fence height, materials, and property lines. Understanding these guidelines will prevent potential issues in the future.
-
Measure the Area: Take precise measurements of the area where the fence will be installed. Use a measuring tape to determine the length and height of the fence, as well as any variations in the terrain that may impact the installation process.
-
Calculate Materials: Based on your design and measurements, calculate the amount of wood, metal posts, fasteners, and finishes needed for the project. Having a clear understanding of the required materials will streamline the purchasing process and prevent delays during construction.
-
Mark Post Locations: Once you have the measurements and design in place, mark the locations for the metal posts along the fence line. Use stakes and string to outline the position of each post, ensuring consistent spacing and alignment.
-
Consider Ground Preparation: If the terrain is uneven or requires leveling, factor in the necessary groundwork to ensure a stable and uniform installation. This may involve digging post holes, adding gravel for drainage, or using concrete for secure anchoring.
By meticulously planning and accurately measuring the dimensions and requirements of your horizontal fence, you'll lay a solid foundation for the construction phase and minimize potential setbacks. This thoughtful approach will contribute to a well-executed and visually appealing end result.
Setting the Posts
Setting the posts is a critical step in the construction of your horizontal fence, as it establishes the foundation for the entire structure. Here's a detailed guide on how to effectively set the posts for your fence:
-
Mark Post Locations: Begin by referring to the previously marked locations for the metal posts along the fence line. Use a measuring tape and level to ensure accurate placement of the posts. Mark the spots where the posts will be installed, maintaining consistent spacing between each one.
-
Digging Post Holes: With the locations marked, it's time to dig the post holes. The depth and diameter of the holes will depend on the specific requirements of your project and the type of soil in your area. Typically, a post hole should be approximately one-third the length of the post and twice the width. Use a post hole digger or an auger to excavate the holes, ensuring that they are deep enough to provide stability and support for the posts.
-
Adding Gravel and Concrete: To enhance the stability of the posts, consider adding a layer of gravel to the bottom of each hole. This will aid in drainage and prevent water accumulation, which can lead to rot over time. For added reinforcement, pour concrete into the holes around the posts. Use a level to ensure that the posts are perfectly vertical and aligned with one another. Allow the concrete to set and cure according to the manufacturer's instructions.
-
Securing the Posts: Once the concrete has fully cured, the posts should be securely anchored in place. Double-check the alignment and vertical positioning of each post before proceeding. Use braces or clamps to hold the posts in position while the concrete sets, ensuring that they remain straight and level. This step is crucial for the overall stability and uniformity of the fence.
-
Allow for Proper Drying Time: It's important to allow sufficient time for the concrete to fully dry and cure before moving on to the next phase of construction. This typically takes at least 24 to 48 hours, depending on the specific type of concrete used and the prevailing weather conditions. Rushing this step can compromise the integrity of the posts and the overall structure of the fence.
By following these detailed steps for setting the posts, you'll establish a solid and reliable foundation for your horizontal fence. The careful execution of this phase will contribute to the structural integrity and longevity of your fence, ensuring that it stands the test of time while enhancing the visual appeal of your outdoor space.
Attaching the Rails
Attaching the rails is a crucial step in the construction of your horizontal fence, as it forms the framework that supports the slats and contributes to the overall stability and visual appeal of the structure. Here's a detailed guide on how to effectively attach the rails to your fence posts:
-
Measure and Cut the Rails: Begin by measuring and cutting the rails to the appropriate length, ensuring that they align with the spacing of the posts and the overall design of the fence. Use a saw to achieve precise cuts, and double-check the measurements to maintain consistency across all the rails.
-
Positioning the Bottom Rail: Start by attaching the bottom rail to the posts, ensuring that it is level and securely anchored. Use a level to confirm that the rail is perfectly horizontal, and make any necessary adjustments before securing it in place. Depending on your design, you may opt to attach the rail to the face of the posts or between the posts for a seamless look.
-
Securing the Rails: Use stainless steel screws or nails to secure the rails to the posts, ensuring a strong and durable connection. Pre-drilling pilot holes can help prevent splitting and ensure precise placement of the fasteners. Additionally, using a clamp to hold the rails in position while attaching them can aid in achieving a uniform and professional finish.
-
Spacing the Rails: Maintain consistent spacing between the rails to accommodate the placement of the slats and achieve a visually appealing layout. Use a measuring tape to ensure equal distances between each rail, and make adjustments as needed to achieve the desired aesthetic.
-
Consider Additional Support: Depending on the height and design of your fence, you may need to incorporate additional support for the rails to enhance stability. This can involve adding diagonal braces or reinforcing the connections between the rails and the posts to withstand external forces and maintain the structural integrity of the fence.
-
Double-Check Alignment: Throughout the process of attaching the rails, regularly check the alignment and levelness of each rail to guarantee a uniform and professional outcome. Making small adjustments as you progress can prevent issues with the placement of the slats and contribute to the overall visual appeal of the fence.
By following these detailed steps for attaching the rails, you'll establish a sturdy and well-structured framework for your horizontal fence. The careful execution of this phase will contribute to the overall strength and visual cohesiveness of the fence, setting the stage for the next steps in the construction process.
Adding the Slats
Adding the slats is a pivotal stage in the construction of your horizontal fence, as it contributes to the privacy, security, and visual appeal of the structure. Here's a comprehensive guide on how to effectively add the slats to your fence framework:
-
Preparation of Slats: Begin by preparing the slats to the desired dimensions and ensuring that they are free from any defects or imperfections. If staining or painting the slats, this is the stage where you would apply the finish to protect the wood and enhance its appearance.
-
Placement and Spacing: Carefully position the first slat at one end of the fence, ensuring that it is level and aligned with the top and bottom rails. Use spacers or a measuring tool to maintain consistent spacing between each slat, creating a uniform and visually appealing layout.
-
Securing the Slats: Once the positioning and spacing are confirmed, use stainless steel screws or nails to secure the slats to the rails. Pre-drilling pilot holes can help prevent splitting and ensure precise placement of the fasteners. Additionally, using a clamp to hold the slats in position while attaching them can aid in achieving a professional and polished finish.
-
Maintaining Consistency: As you progress along the fence, continue to verify the levelness and alignment of each slat, making any necessary adjustments to ensure a seamless and cohesive appearance. Consistency in the placement and spacing of the slats is key to achieving a visually appealing and structurally sound horizontal fence.
-
Consideration for Expansion Gaps: Depending on the type of wood used and the local climate, it's important to account for potential expansion and contraction of the slats. Incorporating small gaps between the slats can accommodate natural wood movement and prevent issues such as warping or buckling over time.
-
Customization and Design: If desired, consider incorporating variations in the slat layout to add visual interest and uniqueness to your fence. Alternating the widths or staggering the heights of the slats can create a modern and dynamic aesthetic, allowing you to personalize the design to suit your preferences.
By following these detailed steps for adding the slats, you'll contribute to the privacy, security, and overall visual impact of your horizontal fence. The careful execution of this phase will result in a well-constructed and visually appealing fence that enhances the aesthetics of your outdoor space.
Finishing Touches
After completing the primary construction of your horizontal fence, it's time to focus on the finishing touches that will elevate the overall appearance and functionality of the structure. Here are the essential steps to add those final details to your newly built fence:
-
Sand and Smooth Surfaces: Prior to applying any finishes or sealants, it's important to sand the surfaces of the fence to ensure a smooth and even texture. Use sandpaper to remove any rough spots, splinters, or imperfections, creating a polished surface that is both visually appealing and safe to touch.
-
Apply Protective Finish: To protect the wood from the elements and enhance its natural beauty, consider applying a high-quality wood finish or sealant. Whether you opt for a clear sealant to maintain the wood's natural color or a tinted finish to add depth and richness, the protective coating will shield the fence from moisture, UV exposure, and other environmental factors.
-
Inspect and Reinforce Connections: Take the time to inspect the connections, fasteners, and structural elements of the fence to ensure that everything is securely in place. Tighten any loose screws or nails, reinforce any weak points, and address any potential issues that may compromise the integrity of the fence over time.
-
Add Decorative Elements: If you desire a personalized touch, consider incorporating decorative elements such as post caps, trim pieces, or lattice accents to enhance the visual appeal of your horizontal fence. These details can add character and charm to the structure, elevating its overall aesthetic.
-
Install Gate and Hardware: If your fence includes a gate, ensure that it is properly installed and equipped with durable hardware. The gate should open and close smoothly, and the latching mechanism should provide secure closure. Additionally, consider adding a lock or latch for added security and peace of mind.
-
Landscaping and Lighting: To complement the newly constructed fence, consider landscaping around its perimeter to create a cohesive and inviting outdoor space. Planting shrubs, flowers, or ornamental grasses can soften the transition between the fence and the surrounding landscape. Furthermore, adding outdoor lighting along the fence line can enhance its visibility and create a welcoming ambiance during the evening hours.
-
Regular Maintenance Plan: Finally, develop a regular maintenance plan to ensure the longevity and durability of your horizontal fence. This may include periodic cleaning, reapplication of finishes or sealants, and inspections for any signs of wear or damage. By staying proactive with maintenance, you can preserve the beauty and functionality of your fence for years to come.
By focusing on these finishing touches, you'll not only enhance the visual appeal of your horizontal fence but also ensure its long-term durability and performance. These details will contribute to a well-crafted and inviting outdoor space that you can enjoy for years to come.
Conclusion
Congratulations on successfully completing the construction of your horizontal fence! By following the comprehensive steps outlined in this guide, you've not only enhanced the aesthetics of your outdoor space but also created a functional and durable structure that provides privacy and security. Your meticulous selection of materials, precise planning and measurements, and careful execution of each construction phase have culminated in a visually appealing and structurally sound fence.
As you admire the finished result, take pride in the craftsmanship and effort you've invested in this DIY project. Your new horizontal fence not only adds a modern touch to your property but also serves as a testament to your ability to take on and conquer a challenging home improvement endeavor.
Remember that regular maintenance and upkeep are essential for preserving the beauty and functionality of your fence. By staying proactive with maintenance tasks and addressing any issues promptly, you can ensure that your horizontal fence continues to enhance your outdoor space for years to come.
Whether you're enjoying a peaceful moment in your backyard or hosting gatherings with friends and family, your new horizontal fence will serve as a defining feature of your outdoor environment. Embrace the sense of accomplishment that comes with completing this project and take pleasure in the enhanced beauty and functionality it brings to your home.
Now, sit back, relax, and revel in the transformation you've brought to your outdoor space through the construction of your stunning horizontal fence. Cheers to your DIY success!