
Home>Create & Decorate>Reusing & Recycling>How To Start A Worm Farm
Reusing & Recycling
How To Start A Worm Farm
Published: March 7, 2024

Content Creator specializing in woodworking and interior transformations. Caegan's guides motivate readers to undertake their own projects, while his custom furniture adds a personal touch.
Learn how to start a worm farm and contribute to reusing and recycling with our comprehensive guide. Start reducing waste and creating nutrient-rich compost today!
(Many of the links in this article redirect to a specific reviewed product. Your purchase of these products through affiliate links helps to generate commission for Twigandthistle.com, at no extra cost. Learn more)
Introduction
So, you're thinking about starting a worm farm, huh? Well, you're in for a treat! Starting a worm farm is not only a fun and rewarding DIY project, but it's also a fantastic way to produce nutrient-rich fertilizer for your garden. Whether you're an experienced gardener or just starting out, a worm farm can be a valuable addition to your home. In this article, we'll guide you through the process of setting up and maintaining your very own worm farm, from choosing the right location to troubleshooting common issues. Let's dig in and get those worms wriggling!
Choosing the Right Location
When it comes to setting up your worm farm, choosing the right location is crucial for the success of your little wriggly friends. Here are some key factors to consider when selecting the perfect spot for your worm farm:
-
Temperature: Worms thrive in moderate temperatures, so it's essential to place your worm bin in an area where the temperature remains relatively stable. Avoid extreme heat or cold, as it can be detrimental to the worms' well-being.
-
Moisture: The location should have good ventilation to prevent the worm bin from becoming too damp or too dry. Adequate airflow will help maintain the optimal moisture level for the worms.
-
Accessibility: Consider the convenience of accessing your worm farm for feeding and maintenance. Choose a location that is easily accessible and allows you to check on your worms without hassle.
-
Protection from Elements: While worms love the dark, they don't appreciate being exposed to direct sunlight or heavy rain. Select a sheltered area, such as a garage, shed, or under a canopy, to shield the worm bin from harsh weather conditions.
-
Odor Control: Though a well-maintained worm farm shouldn't emit strong odors, it's wise to place it in an area where any potential earthy smells won't cause a nuisance to you or your neighbors.
By considering these factors, you can ensure that your worm farm is positioned in an optimal location, providing a comfortable and suitable environment for your wriggly workforce.
Selecting the Right Worms
When it comes to selecting the right worms for your worm farm, not all worms are created equal. The most commonly used worms for vermicomposting are Eisenia fetida, also known as red wigglers, and Lumbricus rubellus, or red worms. These species are highly efficient at breaking down organic matter and thrive in the confined space of a worm bin. Here are some key considerations when choosing your worm workers:
-
Eisenia Fetida (Red Wigglers): These voracious eaters are well-suited for the confined space of a worm bin and can consume large amounts of organic waste. They are also known for their ability to reproduce quickly, making them an ideal choice for vermicomposting.
-
Lumbricus Rubellus (Red Worms): Similar to red wigglers, red worms are highly efficient composters and can adapt well to the conditions within a worm bin. They are particularly adept at breaking down organic matter and producing nutrient-rich castings.
When obtaining worms for your worm farm, it's essential to source them from a reputable supplier to ensure that you are getting healthy, active worms. Avoid using worms collected from the wild, as they may not be well-suited for the controlled environment of a worm bin and could introduce pests or diseases. Once you have selected the right worms for your vermicomposting venture, you'll be well on your way to establishing a thriving worm farm.
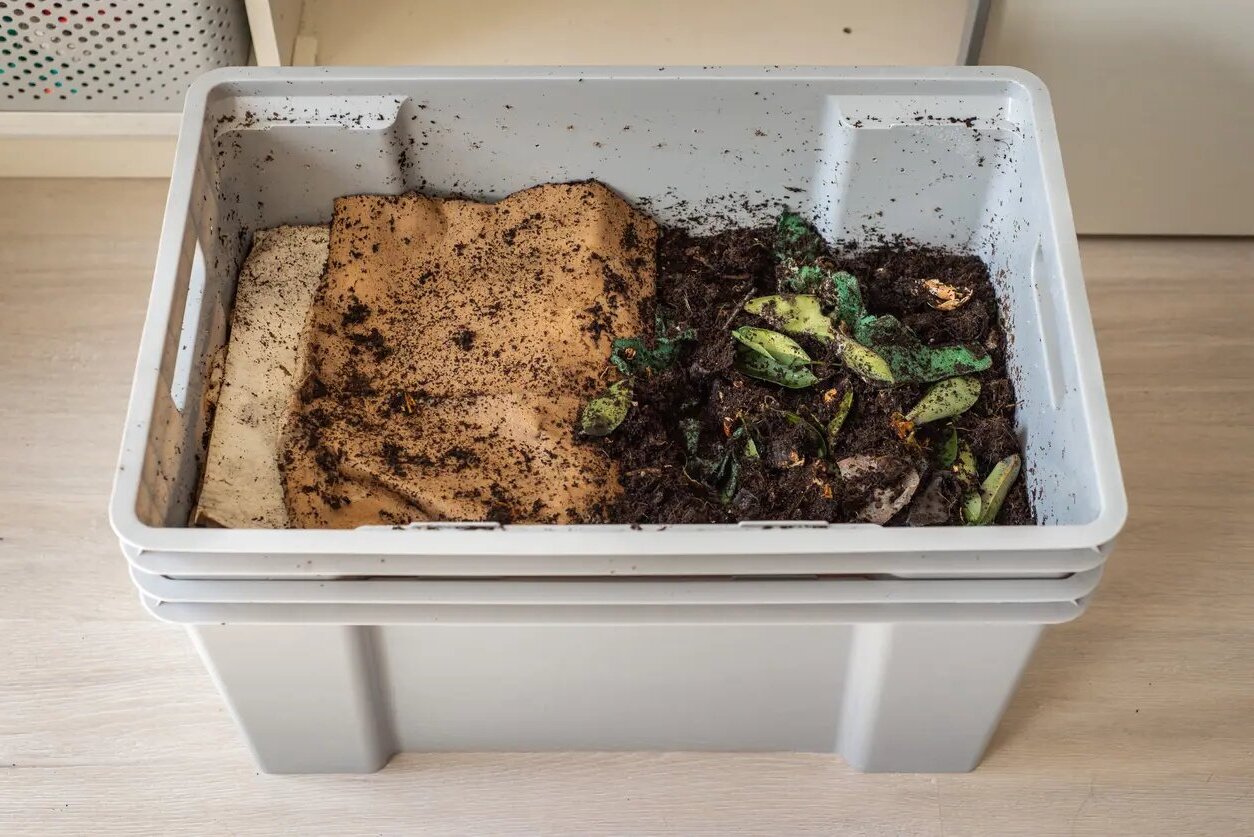
Setting Up the Worm Bin
Setting up the worm bin is a crucial step in creating a conducive environment for your worm farm. Here's a detailed guide on how to set up your worm bin for optimal vermicomposting success:
1. Choose the Right Container
Select a suitable container for your worm bin. This could be a purpose-made worm bin, a repurposed plastic storage container, or a wooden box. Ensure that the container is well-ventilated and has drainage holes to prevent excess moisture buildup.
2. Create Bedding
Prepare bedding material for the worms. Shredded newspaper, cardboard, coconut coir, or peat moss are excellent choices for creating a comfortable bedding environment. Moisten the bedding material until it reaches the consistency of a wrung-out sponge.
3. Add Worms
Introduce the selected worms into the prepared bedding. Spread them evenly across the surface and allow them to burrow into the bedding on their own.
4. Provide Food
Start by feeding the worms small amounts of kitchen scraps, such as fruit and vegetable peels, coffee grounds, and crushed eggshells. Avoid adding meat, dairy, oily, or excessively acidic foods.
5. Cover and Maintain
Cover the worm bin with a breathable lid or a dampened piece of burlap to keep the environment dark and moist. Place the worm bin in the chosen location and monitor the moisture levels regularly. Ensure that the bedding remains moist but not waterlogged.
6. Monitor and Adjust
Keep an eye on the worm bin and adjust the feeding schedule as needed. If the bedding becomes too wet, add more dry bedding material. If it becomes too dry, lightly mist the bedding with water.
By following these steps, you can effectively set up your worm bin and create a comfortable, productive home for your wriggly composting companions.
Feeding and Maintaining the Worms
Feeding and maintaining your worm farm is essential for the well-being of your wriggly workforce and the production of nutrient-rich castings. Here's a detailed guide on how to feed and care for your worms:
1. Feeding Schedule
Establish a regular feeding schedule for your worms. Start by feeding small amounts of organic kitchen scraps, such as fruit and vegetable peels, coffee grounds, tea bags, and crushed eggshells. Avoid adding meat, dairy, oily, or excessively acidic foods, as these can disrupt the balance of the worm bin and lead to unpleasant odors.
2. Proper Food Preparation
To aid in the breakdown of organic matter, chop or blend the food scraps into smaller pieces before adding them to the worm bin. This will make it easier for the worms to consume and accelerate the composting process.
3. Monitoring Moisture Levels
Regularly monitor the moisture levels in the worm bin. The bedding should remain moist, similar to the consistency of a wrung-out sponge. If the bedding becomes too dry, lightly mist it with water. Conversely, if it becomes too wet, add more dry bedding material to absorb the excess moisture.
4. Adjusting Feeding Habits
Adjust the feeding habits based on the rate at which the worms consume the food. If there are leftover scraps from the previous feeding, reduce the amount of food provided to prevent overfeeding. Conversely, if the worms quickly consume the food, gradually increase the feeding amounts.
5. Balancing the Diet
Maintain a balanced diet for your worms by incorporating a variety of organic materials. This diversity will provide essential nutrients and promote a healthy microbial environment within the worm bin.
6. Avoiding Overfeeding
Be mindful not to overfeed the worms, as this can lead to food spoilage, foul odors, and an increase in unwanted pests. It's better to underfeed initially and gradually increase the food as the worm population and composting activity grow.
7. Harvesting Castings
As the worms consume the organic matter, they will produce nutrient-rich castings, also known as worm poop. Harvest the castings periodically by gently moving the worms to one side of the bin and removing the finished compost from the other side. The harvested castings can be used as a natural fertilizer for your garden or potted plants.
By following these feeding and maintenance practices, you can ensure the health and productivity of your worm farm, leading to a bountiful supply of vermicompost for your gardening endeavors.
Harvesting and Using the Worm Castings
Harvesting the nutrient-rich worm castings is a rewarding culmination of your vermicomposting efforts. These castings are a valuable organic fertilizer that can significantly enhance the health and vitality of your plants. Here's a detailed guide on how to harvest and utilize the worm castings from your worm farm:
-
Separating the Worms: Before harvesting the castings, it's essential to separate the worms from the finished compost. One effective method is to create a pile of bedding and food scraps on one side of the worm bin. The worms will migrate towards the fresh food source, allowing you to scoop out the castings from the opposite side.
-
Gathering the Castings: Once the worms have migrated, carefully scoop out the dark, crumbly worm castings from the designated area. Use a small hand trowel or a dedicated scoop to collect the castings, being mindful not to disturb the remaining worms.
-
Screening the Castings: To remove any remaining debris and undigested material, consider screening the harvested castings through a fine mesh screen or a purpose-made compost sifter. This process will yield a finer, more uniform texture, suitable for immediate use or storage.
-
Using the Castings: The harvested worm castings can be used in various ways to enrich the soil and promote plant growth. Mix the castings into potting soil for container plants, sprinkle them around the base of established plants, or incorporate them into garden beds and vegetable patches. The nutrient-rich properties of worm castings provide a natural boost to the soil, enhancing its fertility and microbial activity.
-
Brewing Worm Casting Tea: Another method of utilizing worm castings is by brewing a nutrient-rich liquid fertilizer known as worm casting tea. Simply steep a small amount of castings in water for a few days, then use the resulting liquid to water your plants. This organic "tea" provides a gentle, slow-release source of nutrients for your garden.
By following these steps, you can effectively harvest and utilize the valuable worm castings produced by your worm farm, contributing to the overall health and vitality of your garden or indoor plants.
Troubleshooting Common Issues
Even with proper care and maintenance, worm farms may encounter common issues that can affect the well-being of the worms and the composting process. Here are some common problems and their solutions:
-
Foul Odors: If your worm farm emits unpleasant odors, it may be a sign of overfeeding, excessive moisture, or anaerobic conditions. To address this issue, reduce the feeding amounts, ensure proper ventilation, and add dry bedding material to absorb excess moisture. Turning the bedding to aerate the bin can also help alleviate foul odors.
-
Fruit Flies or Other Pests: Fruit flies and other pests can be attracted to the worm bin if the food scraps are not adequately covered or if the bin becomes too acidic. To deter pests, cover the food scraps with a layer of bedding, avoid adding citrus or acidic foods, and maintain proper moisture levels to discourage pest infestations.
-
Worm Attempting to Escape: If you notice worms trying to escape from the bin, it may indicate unfavorable conditions within the worm farm. Check the moisture levels, ensure proper ventilation, and assess the overall environment to identify and rectify any factors causing distress to the worms.
-
Slow Composting Process: A slow composting process could be due to insufficient food, improper moisture levels, or an imbalance in the worm bin. Increase the feeding amounts gradually, monitor and adjust the moisture levels, and ensure a diverse diet for the worms to accelerate the composting activity.
-
Mold Growth: Mold growth in the worm bin can occur if the bedding becomes excessively wet or if certain types of food are prone to mold. Address this issue by adjusting the moisture levels, adding dry bedding material, and avoiding foods that are prone to mold, such as bread or dairy products.
-
Temperature Extremes: Extreme temperatures can adversely affect the worms' well-being. If the worm farm is exposed to excessive heat or cold, consider relocating it to a more suitable environment, such as a shaded area during hot weather or a sheltered spot during cold spells.
By identifying and addressing these common issues, you can ensure the continued health and productivity of your worm farm, creating an optimal environment for vermicomposting and the production of nutrient-rich worm castings.
Conclusion
In conclusion, starting a worm farm is a rewarding and environmentally friendly endeavor that offers numerous benefits for both gardeners and the planet. By carefully selecting the right location, choosing the appropriate worms, setting up the worm bin, feeding and maintaining the worms, harvesting and utilizing the worm castings, and troubleshooting common issues, you can establish a thriving vermicomposting system right in your own home.
The nutrient-rich worm castings produced by your worm farm can significantly enhance the fertility and vitality of your garden soil, promoting healthy plant growth and reducing the need for chemical fertilizers. Additionally, vermicomposting helps divert organic waste from landfills, contributing to sustainable waste management practices.
As you embark on your vermicomposting journey, remember that patience and attentiveness are key. Observing and caring for your wriggly composting companions can be a fulfilling and educational experience, offering insights into the natural processes of decomposition and soil enrichment.
So, roll up your sleeves, grab a shovel, and get ready to witness the magic of nature at work in your very own worm farm. Whether you're an avid gardener, an eco-conscious enthusiast, or simply someone looking to reduce their environmental footprint, starting a worm farm is a small but impactful step towards a greener, more sustainable future. Happy vermicomposting!