
Home>Create & Decorate>DIY & Crafts>How To Build A Ramp For A Deck
DIY & Crafts
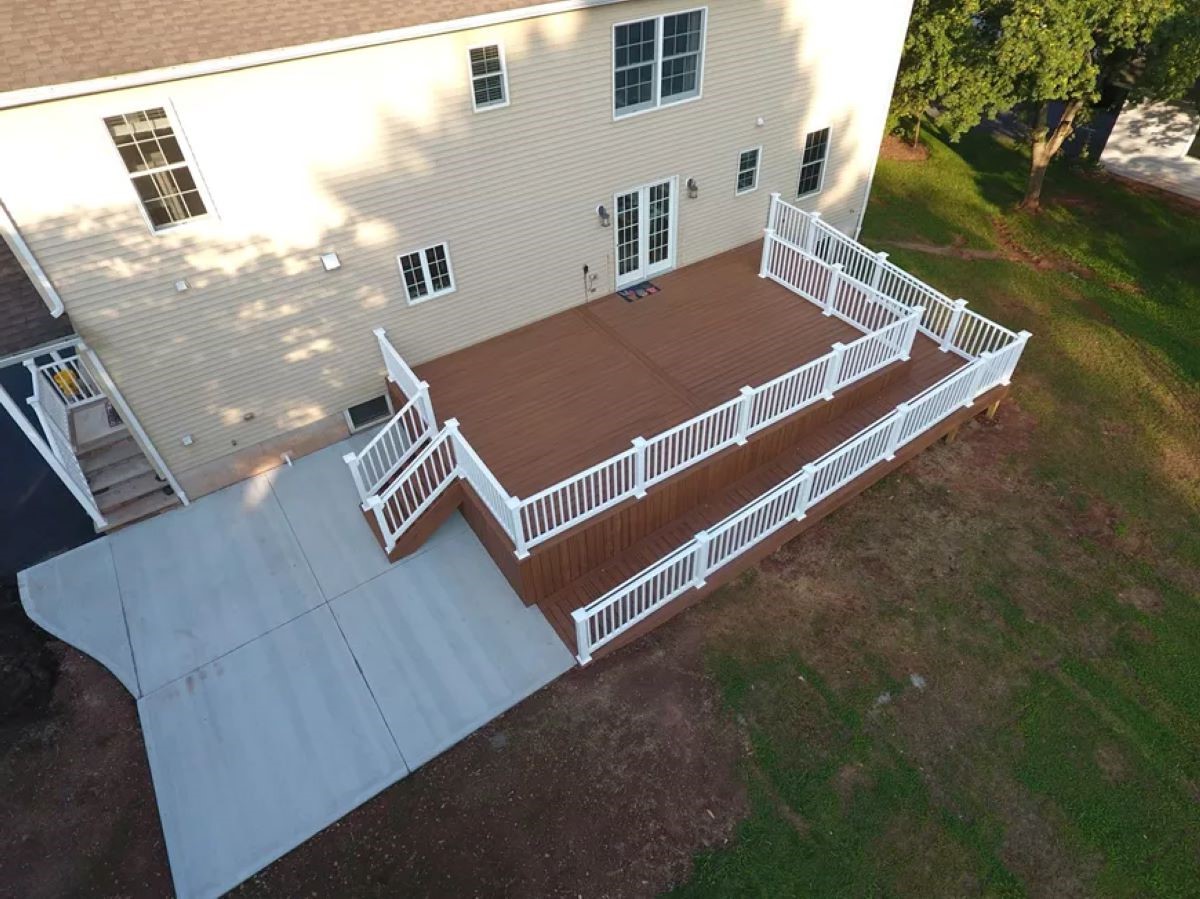
How To Build A Ramp For A Deck
Published: February 27, 2024

Senior Editor in Create & Decorate, Kathryn combines traditional craftsmanship with contemporary trends. Her background in textile design and commitment to sustainable crafts inspire both content and community.
Learn how to build a sturdy and safe ramp for your deck with our step-by-step DIY guide. Perfect for DIY & Crafts enthusiasts.
(Many of the links in this article redirect to a specific reviewed product. Your purchase of these products through affiliate links helps to generate commission for Twigandthistle.com, at no extra cost. Learn more)
Introduction
Welcome to the world of DIY deck building! Adding a ramp to your deck can significantly enhance its accessibility and functionality. Whether you're looking to accommodate individuals with mobility challenges or simply seeking a convenient way to move heavy items onto your deck, constructing a ramp is a valuable addition to your outdoor space.
In this comprehensive guide, we'll walk you through the step-by-step process of building a ramp for your deck. From gathering the necessary materials and tools to the final touches, you'll gain the knowledge and confidence to tackle this project with ease.
By following these instructions, you'll not only create a practical and aesthetically pleasing ramp but also gain a sense of accomplishment and pride in your DIY skills. So, roll up your sleeves, gather your tools, and let's get started on this rewarding journey of building a custom ramp for your deck!
Step 1: Gather Materials and Tools
Before diving into the construction process, it's crucial to gather all the necessary materials and tools. Here's a comprehensive list to ensure you have everything on hand before starting the project:
Materials:
- Pressure-Treated Lumber: This will serve as the primary material for constructing the ramp. Opt for high-quality, durable lumber that can withstand outdoor elements.
- Plywood or Composite Decking: Choose a sturdy material for the ramp's surface, ensuring it provides ample traction and durability.
- Concrete Footings: These will provide a stable foundation for the ramp, ensuring it remains secure and level.
- Galvanized Screws and Nails: Invest in corrosion-resistant fasteners to ensure the structural integrity of the ramp over time.
- Handrail Components: If you plan to include handrails, gather the necessary components such as balusters, rails, and post sleeves.
Tools:
- Circular Saw: Essential for cutting lumber and plywood to the required dimensions.
- Drill/Driver: A versatile tool for driving screws and drilling pilot holes.
- Level: To ensure the ramp is constructed on a perfectly even plane.
- Tape Measure: Precise measurements are crucial for a well-built ramp.
- Shovel and Trowel: For preparing the ground and setting the concrete footings.
- Safety Gear: Don't forget safety glasses, work gloves, and hearing protection to ensure a safe working environment.
By gathering these materials and tools, you'll set the stage for a smooth and efficient construction process. With everything at your disposal, you'll be well-prepared to move on to the next step of measuring and planning the ramp's design.
Step 2: Measure and Plan
Before diving into the physical construction of the ramp, meticulous measurements and thoughtful planning are essential for a successful outcome. Here's a detailed breakdown of the crucial steps involved in measuring and planning the ramp for your deck.
Assess the Space:
Begin by evaluating the available space for the ramp. Consider the slope of the terrain and the desired length and width of the ramp. It's important to ensure that the ramp adheres to local building codes and accessibility standards, especially if it's intended to accommodate individuals with mobility challenges.
Determine the Ramp Length:
Measure the vertical rise from the ground to the deck's surface to determine the required length of the ramp. For every inch of vertical rise, the ramp should extend horizontally by at least 12 inches to ensure a gentle incline. This ratio is crucial for creating a safe and easily navigable ramp.
Calculate the Ramp Width:
The width of the ramp is equally important, especially if it will be used for transporting bulky items or accommodating individuals with mobility aids. A standard ramp width ranges from 36 to 48 inches, providing ample space for comfortable passage.
Sketch the Design:
With precise measurements in hand, sketch a detailed design of the ramp, incorporating the dimensions, slope, and any additional features such as landings or handrails. This visual representation will serve as a valuable reference during the construction phase, ensuring that the project stays on track.
Plan for Landings:
If the ramp's length exceeds a certain threshold, it's essential to incorporate landings at strategic intervals to provide resting points and facilitate directional changes. Ensure that the landings are spacious and level to accommodate smooth transitions.
Consider Handrail Placement:
If the ramp's height exceeds a specified limit, local building codes may require the installation of handrails for safety. Plan the placement of handrails, ensuring they offer sturdy support and comply with relevant regulations.
By meticulously measuring the space, calculating dimensions, and sketching a comprehensive plan, you'll lay a solid foundation for the construction phase. This thoughtful preparation will streamline the building process and contribute to the creation of a functional and visually appealing ramp for your deck.
Step 3: Build the Frame
With the measurements and design plan in hand, it's time to embark on the construction of the ramp's frame. This foundational step forms the structural backbone of the ramp, providing stability and support for the decking and ensuring the overall integrity of the structure. Here's a detailed guide on how to build the frame for your deck ramp.
1. Cut the Lumber
Using a circular saw, carefully cut the pressure-treated lumber to the required dimensions based on the design plan. Ensure precise cuts to achieve uniformity and structural cohesion. The frame will typically consist of joists and headers, forming the primary framework for the ramp.
2. Assemble the Joists
Lay out the cut lumber to assemble the joists, which will run perpendicular to the ramp's length, providing crucial support for the decking. Space the joists according to the design plan, ensuring they are evenly distributed to uphold the decking material securely.
3. Install Headers and Bracing
Position the headers at the ends of the joists to create a sturdy frame structure. Additionally, incorporate diagonal bracing within the frame to enhance stability and prevent lateral movement. Secure the components using galvanized screws, ensuring a robust and durable connection.
4. Set the Frame in Place
Carefully position the assembled frame in the designated location, ensuring it aligns with the planned slope and dimensions. Use a level to confirm that the frame is perfectly horizontal, making any necessary adjustments to achieve an even and balanced foundation.
5. Secure the Frame
Once the frame is in position, anchor it securely to the deck's structure using appropriate fasteners. This step is crucial for integrating the ramp seamlessly with the existing deck, creating a unified and cohesive outdoor space.
6. Verify Structural Integrity
Thoroughly inspect the assembled frame to ensure it exhibits structural integrity and meets the specified design criteria. Check for any signs of misalignment or instability, addressing any issues promptly to guarantee a solid foundation for the subsequent construction phases.
By meticulously constructing the frame according to the design plan, you'll establish a robust and reliable base for the ramp. This foundational framework sets the stage for the seamless installation of the decking and the addition of handrails, bringing the vision of a functional and accessible deck ramp to fruition.
Step 4: Install the Decking
With the frame securely in place, the next pivotal phase in building your deck ramp involves the installation of the decking material. This step not only enhances the visual appeal of the ramp but also ensures a durable and safe surface for traversing the incline. Here's a comprehensive guide on how to effectively install the decking for your deck ramp.
1. Select the Decking Material
Carefully choose the decking material based on your preferences for aesthetics, durability, and maintenance. Opt for high-quality plywood or composite decking that offers weather resistance and traction, ensuring a safe and long-lasting surface for the ramp.
2. Cut the Decking to Size
Using precise measurements based on the ramp's design plan, use a circular saw to cut the decking material to the required dimensions. Ensure clean and accurate cuts to achieve a seamless fit within the frame, promoting structural integrity and a polished appearance.
3. Position and Secure the Decking
Lay the cut decking panels onto the frame, ensuring they align evenly and snugly to create a uniform surface. Use galvanized screws or nails to secure the decking to the frame, ensuring a secure and steadfast attachment that withstands outdoor elements and regular use.
4. Create a Non-Slip Surface
To enhance safety, consider incorporating non-slip additives or textured strips onto the decking surface. This simple yet crucial addition provides traction, especially during wet or slippery conditions, ensuring secure footing for anyone using the ramp.
5. Ensure Proper Drainage
If your deck ramp is exposed to the elements, it's essential to incorporate proper drainage features into the decking design. This may involve creating a slight slope or incorporating drainage channels to prevent water accumulation, ultimately preserving the longevity of the decking material.
6. Verify Alignment and Stability
Thoroughly inspect the installed decking to ensure it aligns with the design plan and exhibits structural stability. Check for any protruding screws or uneven surfaces, addressing any discrepancies to achieve a smooth and secure decking installation.
By meticulously following these steps, you'll successfully install the decking for your deck ramp, culminating in a visually appealing, durable, and safe surface for seamless navigation. This pivotal phase brings you one step closer to completing your custom deck ramp, enhancing accessibility and functionality within your outdoor space.
Step 5: Add Handrails and Finishing Touches
As the construction of the ramp nears completion, the addition of handrails and finishing touches not only enhances the visual appeal but also ensures the safety and accessibility of the structure. This crucial step adds a final layer of functionality and aesthetics to the ramp, elevating its overall impact within your outdoor space.
1. Install Handrail Components
Begin by assembling and installing the handrail components, including balusters, rails, and post sleeves, if not already in place. Ensure that the handrails comply with local building codes and accessibility standards, providing sturdy support and guidance for individuals using the ramp. Secure the handrail components firmly to the frame, ensuring they withstand the intended load and usage.
2. Consider Ergonomic Design
When positioning the handrails, consider the ergonomic aspects to ensure optimal comfort and usability. The height and placement of the handrails should cater to individuals of varying heights and mobility aids, promoting a user-friendly experience. Additionally, smooth and rounded edges on the handrail components contribute to a safe and comfortable grip, enhancing the overall accessibility of the ramp.
3. Incorporate Finishing Details
To add a polished and cohesive look to the ramp, consider incorporating finishing details such as trim pieces, decorative caps for posts, and paint or stain to complement the existing deck aesthetics. These subtle yet impactful touches elevate the visual appeal of the ramp, seamlessly integrating it with the surrounding outdoor environment.
4. Ensure Compliance and Safety
Prioritize safety by conducting a thorough inspection of the installed handrails and finishing details. Verify that all components are securely fastened, free from sharp edges, and compliant with relevant safety standards. Additionally, ensure that the finishing touches contribute to the overall structural integrity and longevity of the ramp, safeguarding its functionality for years to come.
5. Test and Refine
Once the handrails and finishing touches are in place, conduct a comprehensive test to ensure that the ramp meets the intended functionality and safety requirements. Test the handrails for stability and weight-bearing capacity, and assess the overall user experience to identify any refinements or adjustments needed to optimize the ramp's performance.
By meticulously adding handrails and finishing touches, you'll elevate the ramp from a functional structure to a seamlessly integrated and visually appealing addition to your deck. This final phase marks the culmination of your efforts, resulting in a custom-built ramp that enhances accessibility, safety, and the overall aesthetic appeal of your outdoor space.
Conclusion
Congratulations on successfully completing the construction of a custom ramp for your deck! By embarking on this DIY journey, you've not only enhanced the accessibility and functionality of your outdoor space but also demonstrated your prowess in tackling a rewarding and impactful project.
As you stand back and admire the newly constructed ramp, take pride in the meticulous planning, precise measurements, and skilled craftsmanship that have culminated in this valuable addition to your deck. The ramp serves as a testament to your dedication to creating a safe, inclusive, and aesthetically pleasing environment for yourself, your family, and your guests.
Beyond its practical utility, the ramp represents a harmonious integration of form and function within your outdoor setting. The carefully selected materials, the seamless alignment with the existing deck, and the thoughtful incorporation of handrails and finishing details have transformed the ramp into a cohesive and visually appealing element of your outdoor landscape.
Moreover, the completion of this project signifies your ability to overcome challenges, adapt to varying terrain, and adhere to construction standards, showcasing your versatility as a DIY enthusiast. The skills and knowledge gained from this endeavor will undoubtedly empower you to undertake future projects with confidence and finesse.
As you reflect on the journey from gathering materials to adding the finishing touches, remember the sense of accomplishment and fulfillment that accompanies the successful realization of a vision. The ramp stands as a testament to your creativity, resourcefulness, and commitment to creating a space that seamlessly caters to the needs and preferences of those who enjoy it.
With the ramp in place, you've not only expanded the usability of your deck but also fostered an environment that welcomes individuals of all abilities, ensuring that everyone can partake in the outdoor experience. This inclusivity and thoughtfulness exemplify the transformative power of DIY projects in enriching the lives of those around you.
In closing, the completion of the ramp for your deck marks a significant achievement, embodying the fusion of practicality, craftsmanship, and creativity. As you envision the countless moments and memories that will unfold on this newly enhanced deck, take pride in the lasting impact of your efforts and the enduring legacy of your DIY prowess.