
Home>Create & Decorate>DIY & Crafts>How To Make A Skate Ramps
DIY & Crafts
How To Make A Skate Ramps
Published: February 23, 2024

Senior Editor in Create & Decorate, Kathryn combines traditional craftsmanship with contemporary trends. Her background in textile design and commitment to sustainable crafts inspire both content and community.
Learn how to make a skate ramp with our easy DIY guide. Get creative with our DIY & Crafts tips for building the perfect skate ramp at home.
(Many of the links in this article redirect to a specific reviewed product. Your purchase of these products through affiliate links helps to generate commission for Twigandthistle.com, at no extra cost. Learn more)
Introduction
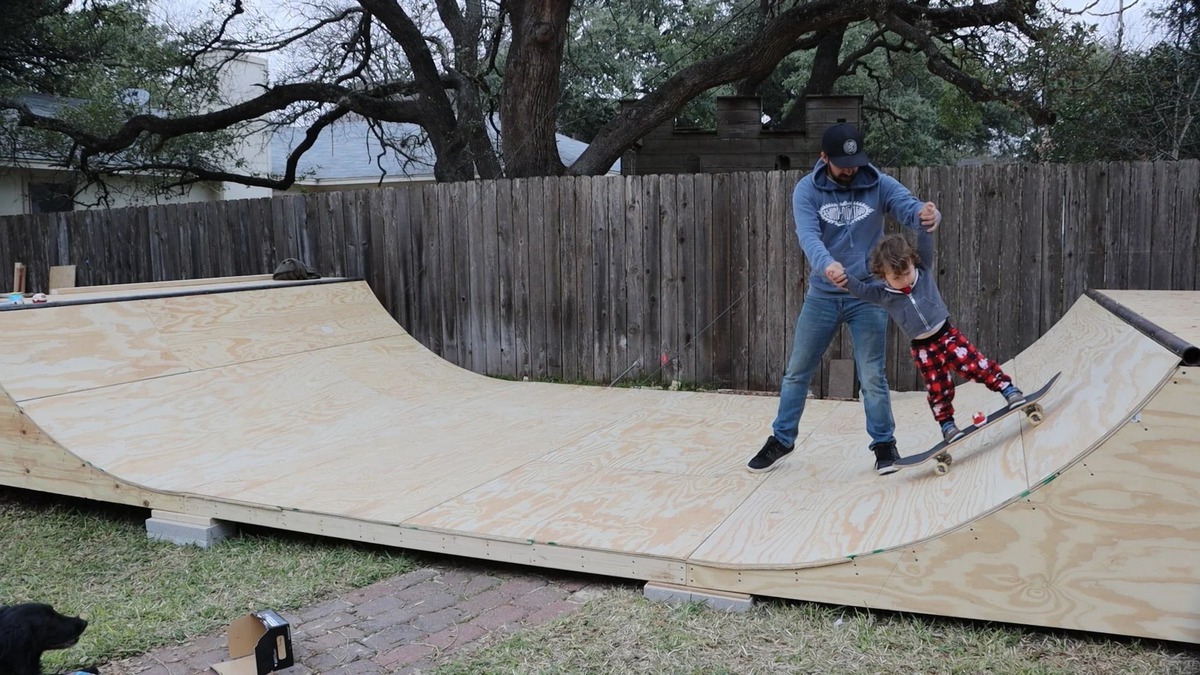
Skateboarding is not just a sport; it's a lifestyle. The freedom, creativity, and adrenaline rush that come with riding a skateboard are unparalleled. One of the most thrilling aspects of skateboarding is the ability to perform tricks and stunts, and what better way to do so than on a custom-built skate ramp? Building your own skate ramp is not only a fulfilling DIY project but also a fantastic way to enhance your skateboarding experience.
Whether you're a seasoned skateboarder or just starting out, having a skate ramp in your backyard can provide endless hours of fun and skill development. Imagine the satisfaction of cruising up the ramp, catching air, and landing a perfect trick right in your own backyard. The sense of accomplishment and joy that comes with mastering new tricks on a ramp you built yourself is truly unmatched.
In this comprehensive guide, we will walk you through the step-by-step process of building a skate ramp from scratch. From gathering the necessary materials to designing and constructing the ramp, we'll cover everything you need to know to bring your skateboarding dreams to life. Whether you're aiming to build a small practice ramp for honing your skills or a larger ramp for hosting skate sessions with friends, this guide will equip you with the knowledge and confidence to embark on this exciting DIY endeavor.
So, roll up your sleeves, grab your tools, and get ready to embark on an exhilarating journey of creativity, craftsmanship, and skateboarding mastery. By the end of this guide, you'll be well on your way to creating a custom skate ramp that not only reflects your unique style but also serves as a hub for endless skateboarding adventures. Let's dive in and unleash the skater within you!
Materials Needed
To embark on the exciting journey of building your own skate ramp, you'll need a variety of materials to ensure a sturdy and well-constructed final product. Here's a comprehensive list of the essential items you'll need to gather before diving into the construction process:
Wood:
- Plywood: This will serve as the primary material for the ramp's surface. Opt for high-quality plywood to ensure durability and smooth riding experience.
- 2×4 and 2×6 Lumber: These will be used for framing and supporting the ramp structure. Select sturdy, pressure-treated lumber to withstand the rigors of skateboarding.
Hardware:
- Screws and Nails: Choose high-quality, corrosion-resistant screws and nails to secure the ramp's components firmly in place.
- Metal Brackets and Anchors: These will be essential for reinforcing the ramp's frame and ensuring structural stability.
Ramp Surface:
- Skateboard Ramp Surface Sheets: Consider using specialized ramp surface sheets designed for skateboarding ramps. These sheets offer excellent traction and durability, enhancing the riding experience.
Tools:
- Circular Saw: A reliable circular saw will be indispensable for cutting plywood and lumber with precision.
- Drill/Driver: You'll need a drill/driver for assembling the ramp's frame and attaching the surface sheets securely.
- Measuring Tape and Carpenter's Square: Accurate measurements and precise angles are crucial for constructing a safe and functional skate ramp.
- Safety Gear: Prioritize safety by ensuring you have protective gear such as goggles, gloves, and ear protection.
Miscellaneous:
- Ramp Plans or Blueprints: Having detailed plans or blueprints will guide you through the construction process, ensuring that your ramp meets your desired specifications.
- Weatherproofing Sealant/Paint: Consider weatherproofing the ramp with a suitable sealant or paint to protect it from the elements and prolong its lifespan.
By gathering these materials, you'll be well-equipped to commence the construction of your skate ramp. With careful planning and attention to detail, you can transform these raw materials into a thrilling skateboarding haven that will inspire creativity and skill development. Now that you have the necessary materials in hand, it's time to move on to the next phase: designing the ramp.
Designing the Ramp
Designing the skate ramp is a critical phase that sets the foundation for a successful construction process. Before picking up your tools, take the time to carefully plan and visualize the ramp's layout, dimensions, and features. Whether you're aiming for a simple mini ramp or a more elaborate quarter pipe, the design phase is where your creativity and skateboarding preferences come into play.
Considerations for Design
Size and Dimensions
Begin by determining the size and dimensions of your skate ramp. Consider the available space in your backyard or desired location for the ramp. Assess the terrain and ensure that the chosen area is level and suitable for constructing a ramp. Whether you opt for a compact mini ramp or a larger half pipe, ensure that the dimensions align with your skill level and intended usage.
Ramp Configuration
Next, decide on the ramp's configuration. Will it be a straight ramp, a quarter pipe, or a combination of various elements? Visualize the flow of the ramp and how it complements your skateboarding style. Factor in elements such as transitions, heights, and angles to create a design that caters to your skill level and trick repertoire.
Safety and Stability
Prioritize safety and stability in your design. Consider incorporating features such as sturdy support beams, proper transitions, and ample space for riding and landing. By focusing on safety during the design phase, you can ensure that your ramp provides a secure environment for honing your skateboarding skills.
Sketching the Design
With the key considerations in mind, sketch out the design of your skate ramp. You don't need to be an artist; a simple hand-drawn sketch will suffice. Outline the dimensions, transitions, and key features of the ramp. This visual representation will serve as a guide during the construction phase, helping you stay on track and bring your vision to life.
Utilizing Ramp Plans or Blueprints
If you prefer a more structured approach, consider using pre-existing ramp plans or blueprints. These resources provide detailed guidance on ramp dimensions, angles, and construction techniques. Whether sourced from reputable DIY sources or skateboarding communities, ramp plans can serve as invaluable tools for translating your design ideas into a tangible structure.
By investing time and thought into the design phase, you set the stage for a successful and rewarding construction process. Your carefully crafted design will serve as the blueprint for building a skate ramp that not only meets your skating needs but also reflects your unique style and creativity. With the design in place, you're ready to embark on the exciting journey of bringing your skate ramp to life.
Building the Frame
Building the frame is a pivotal step in the construction of a sturdy and reliable skate ramp. The frame serves as the structural backbone, providing support and stability for the entire ramp. By meticulously crafting a robust frame, you lay the groundwork for a safe and durable skateboarding structure that can withstand the rigors of frequent use.
Frame Construction Process
-
Cutting the Lumber: Begin by cutting the 2×4 and 2×6 lumber to the specified dimensions outlined in your ramp design. Utilize a circular saw to ensure precise cuts, paying close attention to angles and measurements. Consistency in the dimensions of the lumber is crucial for maintaining uniformity and structural integrity throughout the frame.
-
Assembling the Support Structure: With the cut lumber at hand, assemble the support structure according to the design specifications. Secure the framing members using high-quality screws and metal brackets to reinforce the joints. Pay careful attention to the alignment and verticality of the support beams to ensure a level and stable foundation for the ramp.
-
Creating Transitions and Curves: If your ramp design incorporates transitions or curves, carefully shape the lumber to achieve the desired contours. This may involve cutting and joining the lumber at specific angles to form smooth transitions and curves that facilitate seamless riding and trick execution.
-
Anchoring the Frame: Once the support structure is assembled, anchor it securely to the ground or base surface. Utilize heavy-duty anchors or concrete footings to ensure that the frame remains firmly in place, even during intense skateboarding sessions. Proper anchoring is essential for preventing shifting or instability, thereby enhancing the safety and longevity of the ramp.
Emphasizing Structural Integrity
During the frame construction process, prioritize structural integrity and load-bearing capacity. The frame should be engineered to withstand the weight and impact of skateboarders performing tricks and maneuvers. By using high-quality lumber, strategic bracing, and secure fastening methods, you can fortify the frame against the forces exerted during skateboarding activities.
Incorporating Safety Measures
As you build the frame, consider incorporating safety features such as rounded edges and smooth transitions to minimize the risk of injuries. Smooth, well-defined transitions not only enhance the riding experience but also reduce the likelihood of falls and collisions. Additionally, ensure that all protruding hardware is recessed or capped to prevent potential hazards to riders.
By meticulously constructing a robust frame, you set the stage for the subsequent phases of ramp construction, ultimately leading to the realization of a high-performance skateboarding structure. With the frame in place, the next steps will involve adding the surface and applying finishing touches to transform the frame into a fully functional skate ramp.
Adding the Surface
Once the sturdy frame of the skate ramp is in place, the next crucial step is adding the surface, which directly impacts the riding experience and overall durability of the ramp. The surface serves as the interface between the skateboard wheels and the ramp structure, significantly influencing traction, smoothness, and the ability to execute tricks with precision. Here's a detailed overview of the process of adding the surface to your skate ramp:
Selecting the Surface Material
When it comes to surfacing a skate ramp, the choice of material is paramount. While plywood can serve as a basic surface, opting for specialized skateboard ramp surface sheets can elevate the riding experience. These sheets are designed specifically for skateboarding ramps, offering enhanced durability, weather resistance, and superior traction. Additionally, they are available in various textures, allowing skaters to customize the feel of their ramp to suit their preferences.
Securing the Surface Sheets
Begin by carefully measuring and cutting the surface sheets to fit the dimensions of the ramp. Precision is key to ensuring a seamless and uniform surface. Once the sheets are cut to size, secure them to the ramp frame using corrosion-resistant screws or nails. It's essential to fasten the surface sheets securely to prevent shifting or warping during use. Pay attention to the spacing and distribution of fasteners to maintain a consistent and level surface across the entire ramp.
Ensuring Smooth Transitions
As you lay the surface sheets, focus on achieving smooth transitions and seamless joints between adjoining sections. Smooth transitions not only enhance the aesthetics of the ramp but also contribute to a fluid riding experience. Carefully blend the edges of the surface sheets to create gradual transitions, eliminating any abrupt changes that could impede the flow of tricks and maneuvers.
Weatherproofing and Maintenance
To prolong the lifespan of the ramp surface, consider applying a weatherproofing sealant or paint specifically formulated for outdoor use. This protective layer shields the surface from moisture, UV exposure, and general wear and tear, preserving its integrity over time. Additionally, regular maintenance, such as cleaning and inspecting the surface for signs of damage, is essential for ensuring a safe and enjoyable skating environment.
By meticulously adding the surface to your skate ramp, you not only enhance the functionality and safety of the structure but also create a visually appealing and inviting space for skateboarding enthusiasts. The carefully selected surface material, precise installation, and attention to detail during this phase culminate in a high-performance skate ramp that beckons skaters to push their limits and unleash their creativity. With the surface in place, the final phase of the construction process involves adding finishing touches to complete the skate ramp and prepare it for exhilarating skateboarding sessions.
Finishing Touches
With the structural elements and surface of the skate ramp in place, attention turns to the crucial phase of adding finishing touches. This stage not only adds aesthetic appeal but also contributes to the overall safety, functionality, and longevity of the ramp. Here's a detailed exploration of the essential finishing touches that elevate the skate ramp to its full potential.
Edge Protection
To enhance safety and minimize wear and tear, consider adding edge protection to the ramp. PVC edge caps or metal railings can be affixed along the edges of the ramp, providing a protective barrier that reduces the risk of splintering and damage. Additionally, edge protection adds a polished look to the ramp while safeguarding riders and the ramp itself from potential hazards.
Ramp Surface Treatment
Applying a surface treatment to the ramp not only enhances its visual appeal but also contributes to its resilience against the elements. Consider using a specialized skate ramp paint or sealant designed for outdoor use. This protective coating not only adds vibrant color to the ramp but also shields the surface from moisture, UV rays, and general wear, extending its lifespan and maintaining a smooth riding experience.
Customization and Branding
Injecting a personal touch into the ramp through customization and branding can make it truly unique. Whether it's adding decals, stenciling artwork, or incorporating personalized elements, customizing the ramp allows skaters to express their individuality and create a space that reflects their style and identity. Additionally, incorporating branding elements such as logos or graphics can infuse the ramp with a professional and cohesive aesthetic.
Lighting and Accessibility
For enthusiasts who enjoy skating into the evening hours, integrating lighting solutions can extend the usability of the ramp. Strategically placed outdoor lights or solar-powered fixtures can illuminate the ramp, enabling safe and enjoyable skating sessions after sunset. Furthermore, ensuring accessibility to the ramp area, such as adding pathways and clear signage, enhances the overall experience for skaters and spectators alike.
Safety Signage and Guidelines
Promoting safety awareness by displaying signage with skateboarding guidelines and safety tips can contribute to a secure and responsible skating environment. Clear and visible signage outlining rules, etiquette, and safety precautions fosters a culture of respect and mindfulness among skaters, ensuring that the ramp remains a safe and inclusive space for all participants.
By meticulously attending to these finishing touches, the skate ramp evolves into a dynamic and inviting space that not only facilitates exhilarating skateboarding experiences but also promotes safety, creativity, and community engagement. With the addition of these essential elements, the skate ramp transcends being a mere structure and becomes a vibrant hub for skateboarding enthusiasts to gather, express themselves, and push the boundaries of their skills.
Conclusion
In conclusion, the journey of building a skate ramp from inception to completion is a testament to the fusion of creativity, craftsmanship, and passion for skateboarding. As the final hammer strikes and the finishing touches are applied, the culmination of this DIY endeavor marks the birth of a dynamic space where skaters can unleash their potential, connect with their community, and embark on exhilarating skateboarding adventures.
The process of constructing a skate ramp transcends the mere assembly of wood and hardware; it embodies the spirit of self-expression and the pursuit of mastery. From meticulously designing the ramp to crafting a robust frame, adding the surface, and incorporating finishing touches, every step is a testament to the dedication and vision of the builder. The result is not just a ramp, but a canvas for creativity, a stage for progression, and a haven for camaraderie.
As the wheels of skateboards roll onto the freshly built ramp, a sense of accomplishment permeates the air. The clattering of wheels, the whoops of triumph, and the collective energy of skaters converging on the ramp create an atmosphere charged with excitement and possibility. Each trick landed, each new skill mastered, and each shared moment of triumph reinforces the significance of the skate ramp as a catalyst for personal growth and community bonding.
Beyond the physical structure, the skate ramp embodies the ethos of resilience and perseverance. It stands as a testament to the determination to surmount challenges, adapt to change, and push boundaries. The ramp becomes a symbol of resilience, echoing the spirit of skateboarders who persistently rise after falls, conquer new heights, and carve their paths with unwavering resolve.
In essence, the completion of a skate ramp is not just the end of a construction project; it marks the beginning of a vibrant chapter filled with laughter, learning, and the pursuit of excellence. It becomes a hub where friendships are forged, skills are honed, and memories are etched in the grain of the wood. The skate ramp is a living testament to the enduring spirit of skateboarding, a tangible embodiment of the freedom, creativity, and boundless potential that define the sport.
As the sun sets on the construction journey, the skate ramp stands proudly, ready to witness the stories of triumph, the echoes of laughter, and the evolution of skaters who dare to dream and defy limits. It beckons all who approach with the promise of adventure, growth, and the timeless allure of skateboarding. With each push of the skateboard, the ramp becomes a stage for self-expression, a canvas for innovation, and a sanctuary for those who seek to soar, one trick at a time.