
Home>Home & Furniture>Roof>How To Build A Lean To Roof
Roof
How To Build A Lean To Roof
Published: March 6, 2024
Editor-in-Chief with a decade in home renovation and a passion for vintage furniture. Diane is known for her weekend treasure hunts at flea markets, enriching our content with unique style insights.
Learn how to build a lean-to roof with our step-by-step guide. Find tips and techniques for constructing a sturdy and functional roof.
(Many of the links in this article redirect to a specific reviewed product. Your purchase of these products through affiliate links helps to generate commission for Twigandthistle.com, at no extra cost. Learn more)
Introduction
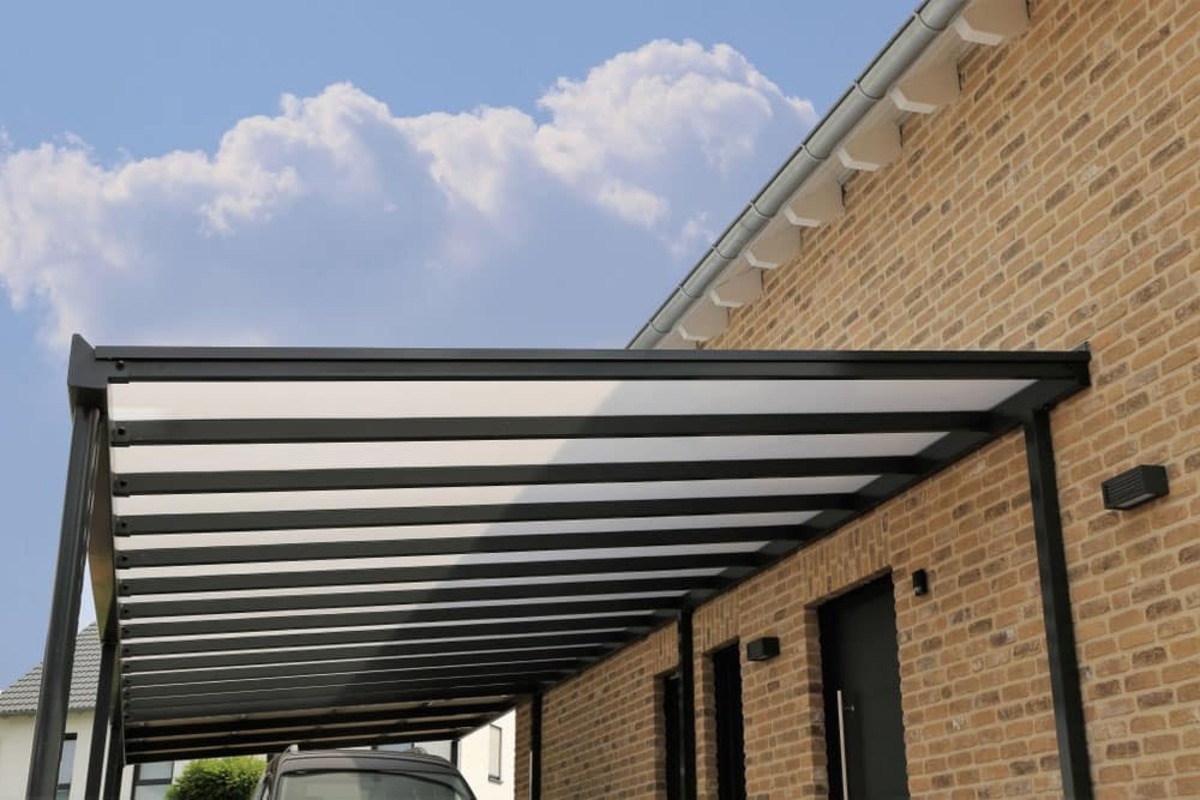
So, you've got some extra space on your property and you're thinking about adding a lean-to roof. Whether you want to create a cozy outdoor sitting area, a covered space for your firewood, or a shelter for your garden tools, a lean-to roof can be a practical and stylish addition to your home. In this article, we'll walk you through the steps to build your own lean-to roof, from choosing the right location to installing the roofing materials. Let's get started!
Materials Needed
To get started on your lean-to roof project, you'll need to gather the necessary materials. Here's a list of what you'll need:
- Pressure-treated lumber: This will be used for the support structure of your lean-to roof. Make sure to choose high-quality, durable lumber that can withstand the elements.
- Roofing materials: Depending on your preference and the overall aesthetic of your home, you can choose from a variety of roofing materials such as metal sheets, shingles, or polycarbonate panels.
- Fasteners: Nails, screws, and other fasteners will be essential for securing the various components of your lean-to roof.
- Concrete: If you're building a freestanding lean-to roof, you'll need concrete to create a sturdy foundation for the support posts.
- Tools: A saw, drill, level, measuring tape, and other basic carpentry tools will be necessary for cutting and assembling the lumber.
Once you have all these materials on hand, you'll be well-equipped to start building your lean-to roof.
Choosing the Right Location
When it comes to building a lean-to roof, selecting the right location is crucial for both practical and aesthetic reasons. Here's how to choose the perfect spot for your lean-to roof:
-
Consider the Purpose: Think about the intended use of your lean-to roof. If you're building it to create a shaded outdoor seating area, you'll want to place it in a spot that receives the right amount of sunlight and offers a pleasant view. For storage purposes, consider proximity to the items you'll be storing.
-
Evaluate the Slope: The slope of the land where you plan to build your lean-to roof is an important factor. Ensure that the ground is relatively level to make construction easier and to prevent water from pooling on the roof.
-
Check Local Regulations: Before you start building, check with your local building department to ensure compliance with any zoning or building code requirements. This step is crucial to avoid any legal issues down the line.
-
Consider Drainage: It's essential to choose a location that allows for proper drainage. Position the lean-to roof so that water can easily run off and away from your home or any other structures.
-
Account for Wind Direction: If your area experiences strong winds, consider the prevailing wind direction when choosing the location for your lean-to roof. Positioning it perpendicular to the prevailing winds can help minimize the impact of strong gusts.
By carefully considering these factors, you can select a location that not only meets your practical needs but also enhances the overall look and feel of your outdoor space.
Measuring and Marking
Before you start assembling the support structure for your lean-to roof, it's crucial to take accurate measurements and mark the location where the posts will be placed. Here's a step-by-step guide to measuring and marking for your lean-to roof:
-
Gather Your Tools: Begin by gathering your measuring tape, level, and marking tools. These will be essential for ensuring precision in your measurements and markings.
-
Measure the Area: Use your measuring tape to determine the exact dimensions of the area where the support posts will be installed. Take into account the length, width, and height of the lean-to roof, as well as the spacing between the support posts.
-
Mark the Post Locations: Once you have the measurements, use a marking tool to clearly indicate where each support post will be placed. Double-check the accuracy of your markings to avoid any errors during the construction phase.
-
Check for Level: Use a level to ensure that the marked locations for the support posts are perfectly level. Adjust the markings as needed to maintain a consistent level across all the posts.
-
Consider Load-Bearing Capacity: If your lean-to roof will be supporting heavy loads, such as snow in winter, it's important to consider the load-bearing capacity of the support structure. Consult with a structural engineer if necessary to ensure that the support posts are adequately spaced and can bear the weight of the roof.
-
Account for Overhang: If your lean-to roof will have an overhang, be sure to mark the locations where the overhanging rafters will be attached to the support structure. This will help you visualize the final dimensions of the roof and ensure that the overhang is symmetrical and balanced.
By meticulously measuring and marking the location for your lean-to roof's support structure, you'll set the stage for a smooth and precise construction process. Taking the time to get this step right will ultimately contribute to the stability and visual appeal of your finished lean-to roof.
Building the Support Structure
Now that you've chosen the location and marked the positions for the support posts, it's time to move on to building the support structure for your lean-to roof. Here's a detailed guide to help you through this crucial phase of the construction process:
-
Prepare the Site: Clear the area where the support posts will be installed, ensuring that it is free from any obstructions. If you're building a freestanding lean-to roof, you'll need to dig holes for the support post footings. Make sure the holes are deep enough to provide a stable foundation for the posts.
-
Install the Support Posts: Place the support posts in the marked locations, ensuring that they are perfectly plumb and securely anchored. If you're using concrete footings, pour the concrete into the holes and set the posts in position. Use a level to check the vertical alignment of each post and brace them temporarily until the concrete sets.
-
Add Crossbeams and Rafters: Once the support posts are in place, it's time to add the crossbeams that will connect the posts and provide additional support for the roof. Secure the crossbeams to the support posts using appropriate fasteners, ensuring that they are level and evenly spaced.
-
Attach the Rafters: With the crossbeams in place, you can now attach the rafters that will form the framework of the roof. The number of rafters and their spacing will depend on the size and design of your lean-to roof. Make sure the rafters are securely fastened to the crossbeams and extend evenly over the entire length of the roof.
-
Consider Bracing and Reinforcement: Depending on the size and design of your lean-to roof, you may need to add additional bracing or reinforcement to ensure the stability and structural integrity of the support system. Consult relevant building codes and structural engineering guidelines to determine the necessary bracing and reinforcement requirements.
-
Inspect for Stability: Once the support structure is fully assembled, carefully inspect it to ensure that all components are securely fastened and that the entire structure is stable and level. Make any necessary adjustments or reinforcements to address any potential issues before proceeding to the next phase of construction.
By following these steps and paying close attention to the details of building the support structure, you'll lay a solid foundation for the rest of the lean-to roof construction process. Taking the time to ensure that the support structure is well-built and structurally sound will contribute to the long-term durability and safety of your lean-to roof.
Installing the Roofing Materials
Once the support structure of your lean-to roof is in place, the next crucial step is to install the roofing materials. The choice of roofing materials will depend on your personal preference, the overall design of your home, and the specific requirements of your local climate. Here's a detailed guide to help you through the process of installing the roofing materials for your lean-to roof:
-
Prepare the Surface: Before installing the roofing materials, ensure that the surface of the roof is clean, dry, and free from any debris. If necessary, add a layer of sheathing or underlayment to provide additional protection and support for the roofing materials.
-
Choose the Right Roofing Material: Depending on your budget, aesthetic preferences, and climate considerations, you can choose from a variety of roofing materials such as metal sheets, shingles, or polycarbonate panels. Each type of roofing material has its own unique installation requirements, so be sure to follow the manufacturer's guidelines for the specific material you've chosen.
-
Start at the Bottom: When installing the roofing materials, it's important to start at the bottom and work your way up. For example, if you're using shingles, begin by installing a starter strip along the eaves of the roof. This will provide a secure base for the rest of the shingles to be installed.
-
Follow Manufacturer's Instructions: Whether you're working with metal sheets, shingles, or polycarbonate panels, it's essential to carefully follow the manufacturer's instructions for installation. This includes using the correct fasteners, adhesives, and installation techniques to ensure that the roofing materials are properly secured and weatherproof.
-
Ensure Proper Overlap and Sealing: As you install each row of roofing materials, pay close attention to the overlap and sealing of the individual components. Proper overlap and sealing are essential for preventing water infiltration and ensuring the long-term durability of your lean-to roof.
-
Consider Roof Ventilation: Depending on the type of roofing material you've chosen, it may be necessary to incorporate roof ventilation to ensure proper airflow and temperature regulation. Ventilation can help prevent moisture buildup and prolong the lifespan of your roofing materials.
-
Inspect for Quality and Uniformity: Once the roofing materials are installed, take the time to inspect the finished roof for quality and uniformity. Check for any loose or improperly installed components, and make any necessary adjustments to ensure that the roof is structurally sound and visually appealing.
By following these steps and paying careful attention to the installation of the roofing materials, you'll be well on your way to completing your lean-to roof construction project. Proper installation of the roofing materials is essential for creating a durable, weatherproof, and aesthetically pleasing roof that will enhance the functionality and visual appeal of your outdoor space.
Finishing Touches and Maintenance
After completing the construction of your lean-to roof, it's time to add the finishing touches that will enhance its functionality and visual appeal. Additionally, proper maintenance is essential to ensure the longevity and performance of your new outdoor structure. Here's a detailed guide to the finishing touches and ongoing maintenance of your lean-to roof:
-
Add Gutter System: Installing a gutter system along the edge of your lean-to roof can help efficiently channel rainwater away from the structure and prevent water damage to the surrounding area. Ensure that the gutters are securely attached and sloped to allow proper drainage.
-
Apply Protective Coating: Depending on the type of roofing material you've used, applying a protective coating can help enhance its durability and weather resistance. For example, if you've opted for metal roofing, a protective coating can prevent corrosion and extend the lifespan of the roof.
-
Seal Joints and Seams: To further enhance the weatherproofing of your lean-to roof, seal any exposed joints and seams with a high-quality sealant. This will help prevent water infiltration and ensure that the interior of the structure remains dry and protected.
-
Consider Decorative Elements: If you want to add a touch of style to your lean-to roof, consider incorporating decorative elements such as trim, moldings, or paint. These finishing touches can complement the overall design of your home and create a polished, cohesive look.
-
Regular Inspection and Cleaning: To maintain the structural integrity of your lean-to roof, make it a habit to conduct regular inspections for any signs of damage, wear, or deterioration. Additionally, keeping the roof clean from debris, leaves, and other obstructions will prevent potential issues and prolong its lifespan.
-
Address Repairs Promptly: If you notice any damage or issues during your inspections, address them promptly to prevent further deterioration. Whether it's loose fasteners, damaged roofing materials, or signs of water damage, timely repairs can prevent more extensive and costly problems down the line.
-
Seasonal Maintenance: Consider implementing a seasonal maintenance routine for your lean-to roof. This may include tasks such as clearing snow and ice in winter, removing debris in fall, and inspecting for any weather-related damage in spring and summer.
By attending to these finishing touches and implementing a proactive maintenance plan, you'll ensure that your lean-to roof remains in top condition and continues to enhance your outdoor space for years to come. Regular maintenance not only preserves the structural integrity of the roof but also contributes to the overall safety and enjoyment of your outdoor living area.