
Home>Create & Decorate>DIY & Crafts>How To Build A Lean To Off A House
DIY & Crafts
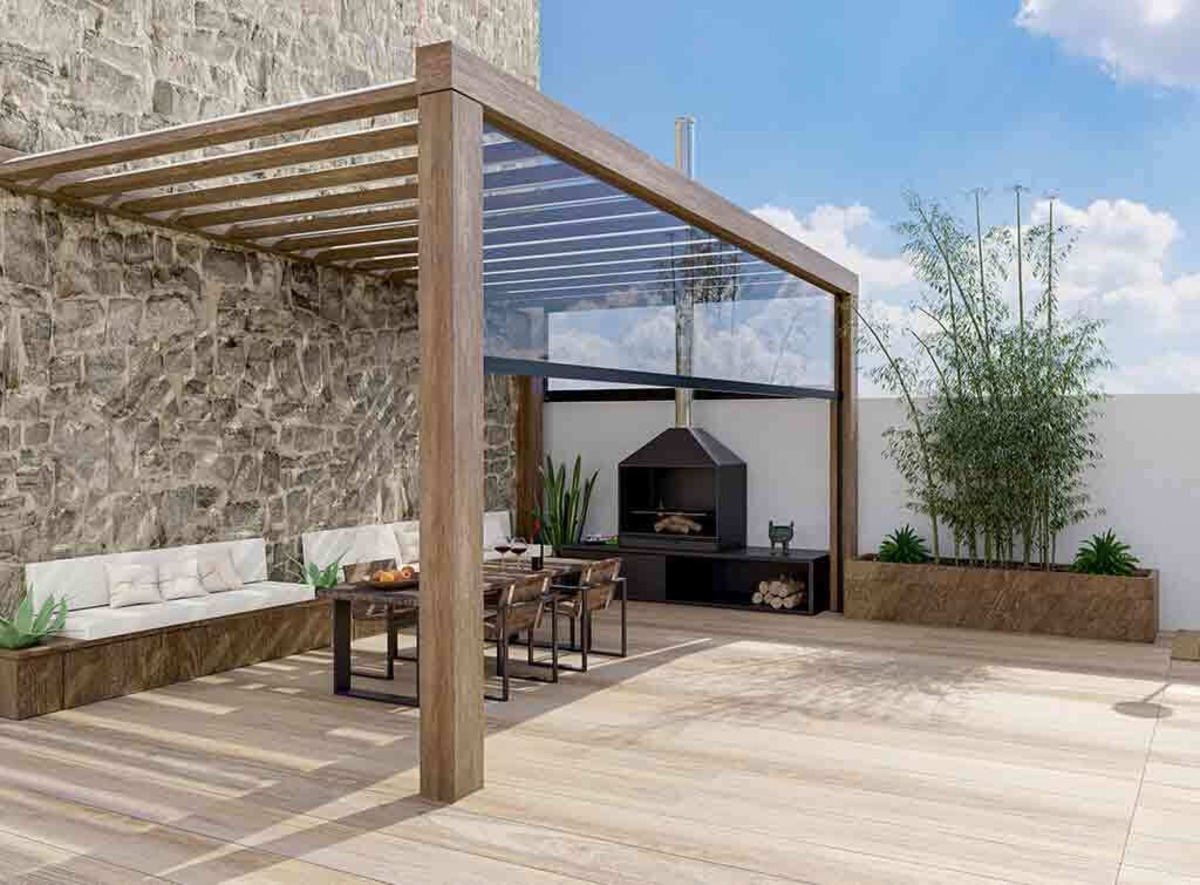
How To Build A Lean To Off A House
Published: April 5, 2024

Content Creator specializing in woodworking and interior transformations. Caegan's guides motivate readers to undertake their own projects, while his custom furniture adds a personal touch.
Learn how to build a lean-to off a house with our step-by-step DIY guide. Get creative with DIY & Crafts and add value to your home. Start your project today!
(Many of the links in this article redirect to a specific reviewed product. Your purchase of these products through affiliate links helps to generate commission for Twigandthistle.com, at no extra cost. Learn more)
Introduction
So, you're thinking about adding some extra space to your house, huh? Well, building a lean-to off a house can be a great way to create a covered outdoor area or even expand your indoor living space. Whether you want to build a cozy little patio or a convenient storage area, a lean-to can be a practical and cost-effective solution. In this article, we'll walk you through the steps to build your own lean-to, from choosing the right location to adding the finishing touches. Let's get started!
Choosing the Right Location
When it comes to building a lean-to, choosing the right location is crucial. Here are some key factors to consider:
-
Orientation: Determine the best orientation for your lean-to based on the sun's path and prevailing winds. This will help you maximize natural light and airflow.
-
Proximity to the House: Consider how the lean-to will connect to your house. It should be easily accessible from an existing door or window.
-
Ground Stability: Ensure that the ground where you plan to build is stable and level. Avoid areas prone to flooding or standing water.
-
Local Building Codes: Check with your local authorities to ensure compliance with any zoning regulations or building codes that may affect the location of your lean-to.
-
Functionality: Think about how you intend to use the lean-to. If it's for outdoor dining or relaxation, you might want it closer to the kitchen or living areas. If it's for storage, easy access from the house may be more important.
By carefully considering these factors, you can select the optimal location for your lean-to that suits your needs and enhances the overall functionality of your home.
Gathering Materials and Tools
Before you start building your lean-to, it's essential to gather all the necessary materials and tools. Here's a comprehensive list to ensure you have everything you need:
Materials
- Lumber: Purchase pressure-treated lumber for durability and resistance to rot. You'll need various sizes of boards and beams for the frame and support structure.
- Roofing Materials: Depending on your preference and local climate, you can choose from asphalt shingles, metal roofing, or polycarbonate panels.
- Siding: Select siding materials that complement your existing house exterior. Options include wood, vinyl, or metal siding.
- Concrete: If you're building a concrete foundation, you'll need bags of concrete mix and gravel.
- Fasteners: Stock up on galvanized screws, nails, and anchors suitable for outdoor use.
- Waterproofing and Sealants: Invest in quality waterproofing materials to protect the structure from moisture and weather damage.
- Hardware: Purchase hinges, latches, and any other necessary hardware for doors or windows.
Tools
- Circular Saw: A versatile tool for cutting lumber to size.
- Level: Ensure your structure is straight and plumb with a reliable level.
- Drill/Driver: A cordless drill/driver will be indispensable for fastening and assembling components.
- Shovel: If you're building a concrete foundation, a shovel will be essential for excavation and mixing concrete.
- Ladder: Depending on the height of your lean-to, a sturdy ladder will be necessary for reaching elevated areas.
- Measuring Tape: Accurate measurements are crucial, so have a quality measuring tape on hand.
- Safety Gear: Don't forget safety glasses, work gloves, and hearing protection to keep yourself safe during construction.
By ensuring you have all the required materials and tools, you'll be well-prepared to tackle the construction of your lean-to without unnecessary interruptions.
Preparing the Site
Before you can start building your lean-to, it's crucial to properly prepare the site to ensure a solid foundation and smooth construction process. Here's a detailed guide on how to prepare the site for your lean-to project:
-
Clear the Area: Begin by clearing the area where the lean-to will be constructed. Remove any vegetation, rocks, or debris from the site. This will provide a clean and level surface for the foundation.
-
Mark the Layout: Use stakes and string to mark the layout of the lean-to on the ground. This will help you visualize the size and placement of the structure and ensure accurate measurements.
-
Excavation: If you're building a concrete foundation, you'll need to excavate the area to the required depth. Use a shovel to dig out the soil, creating a level and uniform space for the foundation.
-
Level the Ground: Once the area is excavated, use a level to ensure the ground is flat and even. This will prevent any issues with the foundation and provide a stable base for the structure.
-
Install Formwork: If you're pouring a concrete foundation, install formwork to contain the concrete. Use wooden boards to create a frame that outlines the shape and dimensions of the foundation.
-
Add Gravel Base: For a concrete foundation, add a layer of gravel to the excavated area. This will provide drainage and support for the concrete slab.
-
Compact the Soil: If you're not using a concrete foundation, compact the soil to create a stable base for the lean-to. Use a tamper or compactor to firmly pack the soil.
-
Consider Drainage: Evaluate the site for proper drainage. Ensure that water will flow away from the lean-to to prevent any potential water damage.
By following these steps to prepare the site, you'll set the stage for a successful construction process and ensure that your lean-to has a stable and durable foundation.
Building the Foundation
Building a solid foundation is essential for the stability and longevity of your lean-to structure. Here's a detailed guide on how to build the foundation for your lean-to:
-
Lay the Concrete Footings: If you're opting for a concrete foundation, start by digging holes for the footings. The size and depth of the footings will depend on the size and weight of your lean-to. Typically, footings should extend below the frost line to prevent movement due to freezing and thawing. Pour concrete into the holes and insert anchor bolts or post brackets while the concrete is still wet.
-
Frame the Foundation: Once the footings have cured, it's time to frame the foundation. Use pressure-treated lumber to construct the formwork for the concrete slab. Ensure that the formwork is level and square, and use stakes and braces to hold it in place.
-
Pour the Concrete: With the formwork in place, pour the concrete into the prepared area. Use a screed board to level the concrete and remove any excess. Smooth the surface with a trowel, and ensure that the edges are neatly finished. Allow the concrete to cure according to the manufacturer's recommendations.
-
Anchor the Sill Plate: After the concrete has fully cured, anchor the sill plate to the foundation. The sill plate provides a secure base for the lean-to's frame. Use anchor bolts or concrete screws to attach the sill plate to the foundation, ensuring it is level and properly aligned.
-
Waterproofing: To protect the foundation from moisture and water damage, apply a waterproofing membrane or sealant to the exterior of the foundation. This will help prevent water infiltration and prolong the life of the foundation.
-
Inspect for Quality: Once the foundation is complete, inspect it thoroughly to ensure that it meets building codes and quality standards. Check for any cracks, uneven surfaces, or other issues that may need to be addressed before proceeding with the construction of the lean-to.
By following these steps, you'll establish a sturdy and durable foundation for your lean-to, providing a solid base for the rest of the construction process.
Constructing the Frame
Constructing the frame is a critical step in building a lean-to, as it provides the structure and support for the entire project. Here's a detailed guide on how to construct the frame for your lean-to:
-
Cutting the Lumber: Begin by cutting the pressure-treated lumber to the required dimensions for the frame components. Use a circular saw to make precise cuts, ensuring that the pieces are accurately sized and fit together seamlessly.
-
Assembling the Posts: Position the vertical posts in the designated locations according to your lean-to design. Use a level to ensure that the posts are plumb and securely anchored to the foundation. Attach the posts to the foundation using anchor bolts or post brackets.
-
Installing the Beams: Once the posts are in place, install the horizontal beams that will support the roof structure. Secure the beams to the posts using appropriate fasteners, ensuring that they are level and evenly spaced.
-
Adding the Rafters: With the beams in position, add the rafters to create the roof framework. The number and spacing of the rafters will depend on the size and design of your lean-to. Ensure that the rafters are securely attached to the beams and aligned properly.
-
Bracing the Frame: To reinforce the frame and provide additional stability, add diagonal bracing between the posts and beams. This will help prevent lateral movement and ensure that the frame can withstand external forces such as wind or snow loads.
-
Securing the Frame: Double-check all connections and fastenings to ensure that the frame is securely assembled. Use galvanized screws or nails to reinforce joints and connections, creating a robust and durable frame structure.
-
Inspecting for Quality: Once the frame is fully assembled, inspect it thoroughly to ensure that it meets structural and safety standards. Check for any signs of weakness, misalignment, or inadequate fastenings that may need to be addressed before proceeding with the next steps.
By following these steps, you'll successfully construct a sturdy and reliable frame for your lean-to, setting the stage for the next phase of the construction process.
Adding Roofing and Siding
After constructing the frame of your lean-to, the next crucial step is to add roofing and siding to provide protection from the elements and complete the structure. Here's a detailed guide on how to add roofing and siding to your lean-to:
-
Selecting Roofing Materials: Choose the roofing material that best suits your climate and aesthetic preferences. Options include asphalt shingles, metal roofing, or polycarbonate panels. Consider factors such as durability, insulation, and compatibility with the existing roof of your house.
-
Installing Roof Sheathing: Begin by installing a layer of roof sheathing over the rafters. Use plywood or oriented strand board (OSB) to create a solid base for the roofing material. Secure the sheathing to the rafters with appropriate fasteners, ensuring a smooth and even surface.
-
Applying Roofing Material: Depending on your chosen roofing material, follow the manufacturer's instructions for installation. Whether it's laying asphalt shingles, securing metal panels, or installing polycarbonate sheets, ensure proper overlap and sealing to prevent water infiltration and ensure a watertight roof.
-
Adding Siding: Choose the siding material that complements the exterior of your house and provides the desired level of protection. Common siding options include wood, vinyl, or metal. Install the siding vertically or horizontally, following the manufacturer's guidelines for proper attachment and alignment.
-
Weatherproofing: To enhance the longevity of your lean-to, apply weatherproofing measures such as flashing, caulking, and sealants. Seal the joints and edges of the roofing and siding to prevent water penetration and protect against wind-driven rain.
-
Ventilation and Insulation: Consider incorporating ventilation and insulation into your lean-to design to regulate temperature and moisture. Install vents to promote airflow and prevent condensation, and add insulation to improve thermal efficiency if the lean-to will be used as a living space.
-
Finishing Touches: Once the roofing and siding are in place, add finishing touches such as trim, fascia, and soffit to create a polished and cohesive appearance. Ensure that all exterior components are properly aligned and sealed to provide a professional and weather-resistant finish.
By following these steps, you'll successfully add roofing and siding to your lean-to, creating a durable and weatherproof structure that enhances the functionality and aesthetics of your home.
Finishing Touches
Once the roofing and siding are in place, it's time to focus on the finishing touches that will complete the look and functionality of your lean-to. Here are the essential steps to add those final details:
-
Trim Installation: Install trim around the edges of the roofing and siding to create a clean and polished appearance. Use trim pieces that complement the chosen siding material and color, ensuring a seamless transition between different components of the lean-to.
-
Fascia and Soffit: Add fascia boards to cover the exposed rafters and provide a finished look to the roofline. Install soffit panels underneath the eaves to improve ventilation and protect the rafters from moisture and pests.
-
Gutter Installation: If your lean-to is large enough or positioned in a way that requires it, consider installing gutters and downspouts to manage water runoff. Proper drainage will prevent water from pooling around the lean-to and protect the foundation from water damage.
-
Painting or Staining: If you've chosen wood siding or trim, consider painting or staining the surfaces to enhance their durability and visual appeal. Use high-quality exterior paint or stain that is designed to withstand outdoor conditions and provide long-lasting protection.
-
Sealing and Caulking: Inspect all seams, joints, and connections to ensure they are properly sealed and caulked. Use weather-resistant sealants to prevent water infiltration and air leaks, especially around windows, doors, and trim components.
-
Lighting and Electrical: If your lean-to will be used for outdoor gatherings or as a functional living space, consider adding lighting fixtures and electrical outlets. Install weatherproof lighting and ensure that any electrical work is performed by a qualified professional.
-
Decorative Elements: Add personal touches and decorative elements to make the lean-to feel like an extension of your home. Consider incorporating potted plants, outdoor furniture, or decorative accents that reflect your style and enhance the overall ambiance.
By paying attention to these finishing touches, you'll elevate the appearance and functionality of your lean-to, creating a space that seamlessly integrates with your home and enhances your outdoor living experience.
Conclusion
In conclusion, building a lean-to off a house can be a rewarding DIY project that adds valuable space and functionality to your home. By carefully choosing the location, gathering the necessary materials and tools, preparing the site, constructing a solid foundation, and assembling the frame, roofing, and siding, you can create a versatile and durable structure that complements your lifestyle. The finishing touches, such as trim installation, gutter setup, and decorative elements, add the final polish to your lean-to, making it a seamless extension of your home. Whether you're creating a cozy outdoor retreat or expanding your storage options, a well-built lean-to can enhance the overall appeal and utility of your property. With proper planning, attention to detail, and a bit of elbow grease, you can successfully build a lean-to that meets your specific needs and enhances your living space.