
Home>Create & Decorate>DIY & Crafts>How To Build Tiny House On Trailer
DIY & Crafts
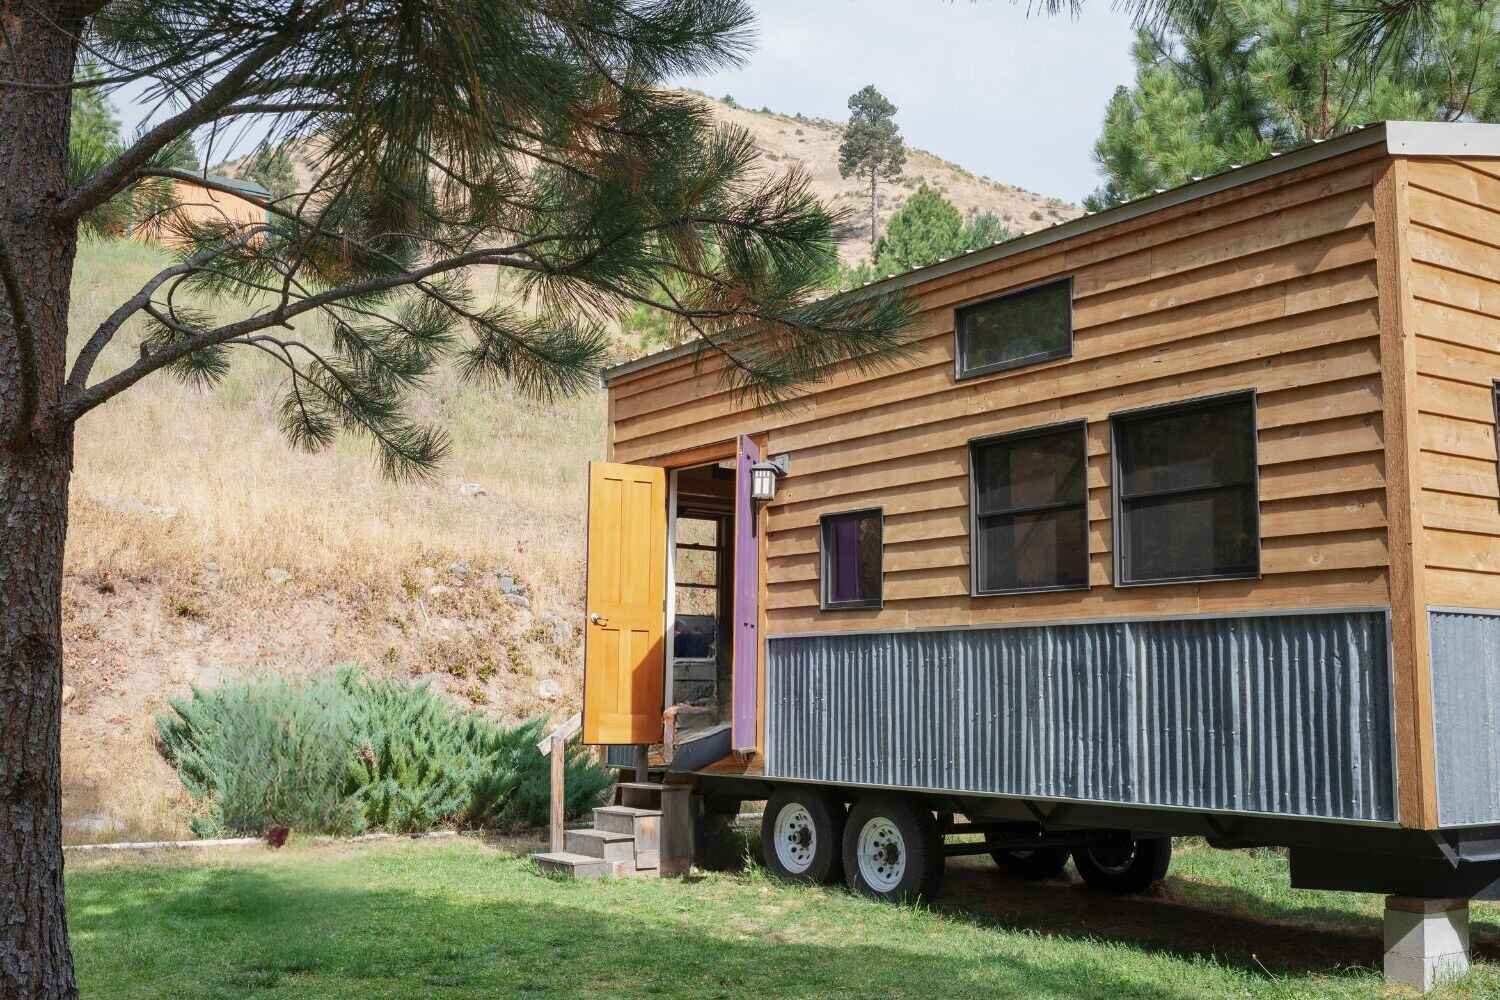
How To Build Tiny House On Trailer
Published: May 21, 2024

Senior Editor in Create & Decorate, Kathryn combines traditional craftsmanship with contemporary trends. Her background in textile design and commitment to sustainable crafts inspire both content and community.
Learn how to build a tiny house on a trailer with our DIY & Crafts guide. Get step-by-step instructions and expert tips for your tiny home project.
(Many of the links in this article redirect to a specific reviewed product. Your purchase of these products through affiliate links helps to generate commission for Twigandthistle.com, at no extra cost. Learn more)
Introduction
So, you've decided to take on the challenge of building a tiny house on a trailer. Congratulations! This can be an exciting and rewarding project, but it also requires careful planning and execution. Whether you're looking to downsize, live off the grid, or simply have a mobile living space, building a tiny house on a trailer can offer flexibility and freedom. In this guide, we'll walk you through the essential steps to help you bring your vision of a tiny house on wheels to life. Let's dive in!
Choosing the Right Trailer
When it comes to building a tiny house on a trailer, selecting the right trailer is crucial. Here are some key factors to consider when choosing the perfect trailer for your tiny house project:
-
Size and Weight Capacity: The size and weight capacity of the trailer will determine the dimensions and overall weight of your tiny house. Make sure to select a trailer that can accommodate the size and weight of your tiny house design.
-
Trailer Type: There are different types of trailers, such as utility trailers, flatbed trailers, and gooseneck trailers. Each type has its own advantages and limitations, so choose one that best suits your needs and budget.
-
Durability: Look for a trailer that is built to last. Consider the materials used, the thickness of the steel, and the overall construction quality to ensure that your tiny house will have a sturdy foundation.
-
Legal Requirements: Before making a purchase, familiarize yourself with the legal requirements for towing a tiny house on a trailer in your area. This includes regulations on trailer size, weight, and towing specifications.
-
Budget: Set a budget for your trailer and stick to it. While it's important to invest in a high-quality trailer, it's also essential to find one that fits within your budget constraints.
By carefully considering these factors, you can choose a trailer that will serve as a solid foundation for your tiny house on wheels.
Designing Your Tiny House
Designing your tiny house is a crucial step in the process of building a tiny house on a trailer. Here are the key aspects to consider when designing your tiny house:
-
Layout and Floor Plan: Determine the layout and floor plan that best suits your needs and lifestyle. Consider the placement of essential areas such as the kitchen, bathroom, living space, and sleeping quarters. Maximize the use of space by incorporating multi-functional furniture and storage solutions.
-
Height and Width: Keep in mind the height and width restrictions for towing your tiny house on a trailer. Ensure that your design complies with transportation regulations to avoid any issues when moving your tiny house.
-
Materials and Insulation: Select suitable materials for the construction of your tiny house. Consider the weight of the materials, their durability, and their insulating properties to ensure energy efficiency and comfort.
-
Aesthetics and Style: Choose a design aesthetic and style that reflects your personal taste and preferences. Whether you prefer a modern, rustic, or minimalist look, the design of your tiny house should align with your vision.
-
Natural Light and Ventilation: Incorporate ample windows and ventilation to create a bright and airy interior. Maximizing natural light not only enhances the sense of space but also reduces the need for artificial lighting.
-
Storage Solutions: Plan for efficient storage solutions to optimize the use of space in your tiny house. Consider built-in cabinets, lofts, and creative storage options to keep your living area organized and clutter-free.
By carefully considering these aspects during the design phase, you can create a functional, comfortable, and visually appealing tiny house that meets your specific requirements and enhances your lifestyle.
Building the Foundation
Building a solid foundation is essential for the structural integrity and longevity of your tiny house on a trailer. Here's a detailed look at the key steps involved in building the foundation for your tiny house:
-
Trailer Preparation: Begin by preparing the trailer to serve as the foundation for your tiny house. This involves securing the trailer to the ground to prevent movement during the construction process. Use leveling jacks and blocks to ensure that the trailer is stable and level.
-
Subfloor Construction: The subfloor serves as the base for the rest of the structure. Use pressure-treated lumber to construct the subfloor frame, ensuring that it is securely anchored to the trailer. Install insulation between the floor joists to provide thermal protection and energy efficiency.
-
Flooring Installation: Once the subfloor is in place, install the flooring material of your choice. Consider durable and easy-to-maintain options such as hardwood, laminate, or vinyl flooring. Properly seal the seams and edges to prevent moisture infiltration.
-
Weatherproofing: Protect the foundation from the elements by applying a weatherproof barrier. This barrier helps to prevent moisture intrusion, which can lead to mold, rot, and structural damage. Ensure that the entire foundation, including the subfloor and flooring, is adequately sealed and protected.
-
Anchoring Systems: Implement anchoring systems to secure the structure to the trailer. This is crucial for ensuring structural stability during transportation and while the tiny house is stationary. Anchor bolts, tie-down straps, and other fastening methods may be used to secure the foundation to the trailer.
-
Plumbing and Electrical Considerations: Plan for plumbing and electrical installations within the foundation. Designate spaces for utility connections and ensure that the necessary provisions are made for future installations. This may include creating access points for plumbing and electrical lines within the subfloor.
By meticulously executing these steps, you can establish a robust and reliable foundation for your tiny house on a trailer. A well-built foundation not only provides structural support but also contributes to the overall safety and functionality of your tiny house.
Framing the Structure
Framing the structure of your tiny house on a trailer is a critical phase that lays the groundwork for the overall stability and durability of the building. Here's a detailed breakdown of the key steps involved in framing the structure:
-
Wall Framing: Begin by framing the walls of your tiny house. Use quality lumber to construct the wall frames, ensuring they are precisely measured and securely assembled. Consider using advanced framing techniques to minimize material waste and maximize energy efficiency.
-
Roof Truss Installation: Install roof trusses to create the framework for the roof structure. Carefully position and secure the trusses to provide adequate support for the roof. Ensure that the trusses are aligned and properly braced to withstand the elements during transportation and while stationary.
-
Floor-to-Ceiling Supports: Implement floor-to-ceiling supports to reinforce the structural integrity of the tiny house. These supports help distribute the weight of the building and enhance its overall stability. Consider using steel brackets or additional framing members to strengthen the connections between the floor, walls, and roof.
-
Window and Door Openings: Frame the openings for windows and doors according to the design specifications. Ensure that the openings are accurately sized and properly framed to accommodate the installation of windows and doors. Incorporate headers and king studs to provide adequate support for these openings.
-
Sheathing Installation: Apply sheathing to the exterior walls and roof to provide lateral bracing and structural rigidity. Use plywood or oriented strand board (OSB) to sheath the walls and roof, securing them with appropriate fasteners. Proper sheathing enhances the overall strength and resilience of the structure.
-
Structural Inspections: Conduct thorough inspections throughout the framing process to verify the structural integrity and compliance with building codes. Ensure that the framing meets safety standards and is capable of withstanding the stresses of transportation and occupancy.
-
Considerations for Plumbing and Electrical: Plan for the installation of plumbing and electrical systems within the framework. Incorporate designated spaces for utility lines, ensuring that the framing allows for the seamless integration of these essential systems.
By meticulously executing these framing steps, you can establish a robust and reliable structure for your tiny house on a trailer. A well-constructed frame not only provides the necessary support but also sets the stage for the next phases of construction, bringing you closer to realizing your dream of a functional and inviting tiny home.
Installing Utilities
Installing utilities in your tiny house on a trailer is a crucial step that ensures your living space is equipped with essential amenities for comfort and functionality. Here's a detailed guide on the installation of utilities:
-
Electrical System: Begin by planning the layout of your electrical system, including the placement of outlets, switches, and lighting fixtures. Install a breaker panel to manage the distribution of electricity within your tiny house. Use appropriate wiring and electrical boxes to connect the various components of the system. Consider energy-efficient lighting options and appliances to minimize power consumption.
-
Plumbing System: Design and install a plumbing system that includes water supply lines, drainage pipes, and fixtures such as sinks, showers, and toilets. Use PEX or CPVC pipes for water distribution and PVC pipes for drainage. Install a water heater to provide hot water for bathing and washing. Consider incorporating water-saving fixtures to conserve water in your tiny house.
-
Heating and Cooling: Depending on your climate and personal preferences, consider installing a heating and cooling system to maintain a comfortable interior temperature. Options include mini-split HVAC units, radiant floor heating, or compact wood stoves. Ensure that the heating and cooling system is appropriately sized for the square footage of your tiny house.
-
Ventilation: Proper ventilation is essential for maintaining air quality and preventing moisture buildup within your tiny house. Install exhaust fans in the kitchen and bathroom to remove odors and excess humidity. Consider incorporating operable windows and skylights to facilitate natural ventilation and enhance indoor air circulation.
-
Propane or Natural Gas: If your tiny house utilizes propane or natural gas for cooking, heating, or powering appliances, ensure that the necessary gas lines and connections are installed safely and in compliance with local codes. Consider consulting a professional for the installation of gas-related components to ensure safety and proper functionality.
-
Utility Connections: If your tiny house will be parked at a location with access to external utilities, such as water and electricity hookups, plan for the installation of external connections. Ensure that the connections are compatible with your tiny house's systems and that they comply with relevant regulations and standards.
By meticulously installing these utilities, you can transform your tiny house on a trailer into a fully functional and self-sufficient living space, equipped with the essential amenities for modern living. Each utility installation contributes to the overall comfort, convenience, and livability of your tiny house, allowing you to enjoy a well-equipped home on wheels.
Interior Finishing
The interior finishing phase of building a tiny house on a trailer is where you bring your vision to life, creating a comfortable and inviting living space. Here's a detailed breakdown of the key steps involved in the interior finishing process:
-
Wall Treatments: Choose wall treatments that reflect your desired aesthetic and contribute to the overall ambiance of your tiny house. Options include painting, wallpapering, or using natural wood paneling. Consider light colors to create a sense of spaciousness and brightness within the limited square footage.
-
Ceiling Finishes: Select a ceiling finish that complements the style of your tiny house. Whether it's traditional drywall, tongue-and-groove wood, or exposed beams, the ceiling finish adds character and visual appeal to the interior. Consider incorporating skylights or a ceiling fan for added functionality and comfort.
-
Flooring Installation: Install the flooring material of your choice, taking into account durability, ease of maintenance, and visual appeal. Options range from hardwood and laminate to vinyl and eco-friendly cork. Properly installed flooring enhances the overall aesthetic and provides a comfortable surface for daily living.
-
Cabinetry and Storage: Integrate custom or pre-fabricated cabinetry to maximize storage and organization within your tiny house. Consider space-saving solutions such as built-in shelving, under-stair storage, and multi-functional furniture to optimize the use of space.
-
Kitchen and Bathroom Fixtures: Install kitchen and bathroom fixtures such as sinks, faucets, and showerheads. Choose compact, high-quality fixtures that are suitable for small spaces. Consider energy-efficient appliances and water-saving fixtures to enhance sustainability.
-
Lighting Design: Plan the lighting design to create a well-lit and inviting interior. Incorporate a combination of ambient, task, and accent lighting to accommodate various activities and create a cozy atmosphere. Consider LED lighting for energy efficiency and longevity.
-
Interior Trim and Molding: Install interior trim and molding to add architectural detail and refinement to your tiny house. Consider crown molding, baseboards, and trim around doors and windows to create a polished and cohesive look.
-
Finishing Touches: Add personal touches and decor elements to make your tiny house feel like home. Whether it's artwork, textiles, or plants, these finishing touches contribute to the overall warmth and personality of your living space.
By meticulously executing these interior finishing steps, you can transform your tiny house on a trailer into a thoughtfully designed and well-appointed home. The interior finishing phase allows you to customize your living space to suit your lifestyle and preferences, creating a cozy retreat within the confines of a compact footprint.
Exterior Finishing
The exterior finishing of your tiny house on a trailer is a crucial aspect that not only enhances the visual appeal but also provides protection against the elements. Here's a detailed breakdown of the key steps involved in the exterior finishing process:
-
Siding Installation: Choose a durable and weather-resistant siding material to clad the exterior of your tiny house. Options include cedar shingles, vinyl siding, fiber cement panels, or metal cladding. Properly installed siding not only adds aesthetic value but also serves as a protective barrier against moisture and environmental exposure.
-
Roofing: Select a reliable roofing material that offers long-term durability and weather resistance. Options range from asphalt shingles and metal roofing to composite or synthetic roofing materials. Ensure that the roofing material is installed with proper flashing and underlayment to prevent water infiltration and ensure a watertight seal.
-
Exterior Trim and Detailing: Install exterior trim and detailing to add architectural interest and refinement to your tiny house. Consider decorative elements such as trim boards, cornices, and window surrounds to create a polished and cohesive exterior appearance.
-
Doors and Windows: Install high-quality, energy-efficient doors and windows that not only enhance the aesthetic appeal but also contribute to the overall energy efficiency and comfort of your tiny house. Properly seal and weatherstrip doors and windows to prevent air and water infiltration.
-
Exterior Paint or Stain: Choose a suitable exterior paint or stain to protect and enhance the appearance of your siding and trim. Select colors and finishes that complement the overall design aesthetic of your tiny house. Ensure that the paint or stain is applied following proper surface preparation and application techniques for long-lasting results.
-
Deck or Porch Addition: Consider adding a deck or porch to extend your living space outdoors. A well-designed outdoor living area can enhance the functionality and visual appeal of your tiny house. Ensure that the deck or porch is constructed with suitable materials and is securely attached to the trailer for stability during transportation.
-
Weatherproofing and Sealing: Apply weatherproofing treatments and sealants to all exterior surfaces to protect against moisture, UV exposure, and temperature fluctuations. Proper weatherproofing helps maintain the integrity of the exterior finishes and prolongs their lifespan.
By meticulously executing these exterior finishing steps, you can create a visually striking, well-protected, and weather-resistant exterior for your tiny house on a trailer. The exterior finishing phase not only enhances the curb appeal but also ensures that your tiny house is equipped to withstand the rigors of travel and the elements, providing a durable and attractive exterior for years to come.
Final Touches and Considerations
As you near the completion of your tiny house on a trailer, it's time to add the final touches and address important considerations to ensure that your project meets your expectations and complies with essential factors. Here are the key aspects to focus on during this phase:
-
Trim and Detailing: Pay attention to the finer details by adding trim and decorative elements to enhance the overall aesthetic of your tiny house. Consider crown molding, baseboards, and trim around doors and windows to create a polished and cohesive look.
-
Interior Decor: Personalize your living space by adding decorative elements such as artwork, textiles, and plants. These final touches contribute to the overall warmth and personality of your tiny house, making it feel like a true home.
-
Safety Measures: Prioritize safety by installing smoke detectors, carbon monoxide alarms, and fire extinguishers. Ensure that your tiny house meets safety standards and regulations to provide a secure living environment.
-
Quality Assurance: Conduct thorough inspections to verify the structural integrity, functionality of utilities, and compliance with building codes. Address any potential issues and make necessary adjustments to ensure that your tiny house is built to high standards.
-
Transportation Considerations: If your tiny house will be frequently moved, consider factors such as weight distribution, securing loose items, and ensuring that all components are travel-ready. Prepare your tiny house for safe and smooth transportation to its intended destinations.
-
Legal and Zoning Compliance: Familiarize yourself with local regulations and zoning requirements for parking and residing in a tiny house on a trailer. Ensure that your project adheres to legal standards and obtain any necessary permits or approvals.
-
Documentation and Records: Keep detailed records of the construction process, including receipts, permits, and important documents. Maintaining organized records can be valuable for future reference and may be required for legal or insurance purposes.
-
Community Integration: If you plan to park your tiny house in a community or on private property, communicate with relevant parties and ensure that you have a clear understanding of any rules or agreements that may apply.
-
Environmental Impact: Consider the environmental impact of your project and explore sustainable practices such as using eco-friendly materials, incorporating renewable energy sources, and minimizing waste generation.
By addressing these final touches and considerations, you can ensure that your tiny house on a trailer is not only aesthetically pleasing and functional but also meets essential safety, legal, and environmental standards. This phase marks the culmination of your efforts, bringing you closer to enjoying the unique lifestyle and freedom that a well-crafted tiny house on wheels can offer.