
Home>Create & Decorate>DIY & Crafts>DIY Hot Dog Cart: How To Build Your Own Mobile Food Stand
DIY & Crafts
DIY Hot Dog Cart: How To Build Your Own Mobile Food Stand
Published: May 22, 2024

Senior Editor in Create & Decorate, Kathryn combines traditional craftsmanship with contemporary trends. Her background in textile design and commitment to sustainable crafts inspire both content and community.
Learn how to build your own DIY hot dog cart and mobile food stand with our step-by-step guide. Perfect for DIY & Crafts enthusiasts looking to start a food business.
(Many of the links in this article redirect to a specific reviewed product. Your purchase of these products through affiliate links helps to generate commission for Twigandthistle.com, at no extra cost. Learn more)
Introduction
So, you've got a passion for hot dogs and a knack for DIY projects, and you're thinking about combining the two by building your very own hot dog cart. Well, you've come to the right place! In this article, we'll guide you through the process of creating your own mobile food stand, from planning and gathering materials to constructing the frame, installing the necessary equipment, and adding those personal touches that will make your hot dog cart stand out from the rest. Whether you're a seasoned DIY enthusiast or a newcomer to the world of home improvement, we've got you covered. Let's dive in and get started on this exciting project!
Planning Your DIY Hot Dog Cart
Before you dive into the nitty-gritty of building your hot dog cart, it's crucial to start with a well-thought-out plan. Here are some key considerations to keep in mind as you embark on this DIY adventure:
-
Regulations and Permits: Research the local regulations and health codes pertaining to mobile food stands in your area. Ensure that you obtain all the necessary permits and licenses to operate your hot dog cart legally.
-
Design and Layout: Sketch out a rough design of your hot dog cart, considering the layout of the food preparation area, storage space, and customer service area. Think about how you want the cart to look and function, keeping both aesthetics and practicality in mind.
-
Budget and Materials: Determine your budget for the project and make a list of all the materials and equipment you'll need. Consider factors such as the type of grill, heating elements, storage compartments, and any additional features you plan to incorporate.
-
Location and Target Audience: Think about where you intend to operate your hot dog cart and the preferences of your target audience. Understanding your potential customers' tastes and preferences can help you tailor your menu and overall cart design to better suit their needs.
-
Safety and Hygiene: Prioritize safety and hygiene in your cart's design. Consider features such as handwashing stations, fire extinguishers, and proper ventilation to ensure a safe and sanitary food preparation environment.
By carefully planning these aspects of your DIY hot dog cart, you'll set a solid foundation for the rest of the project, making the construction process smoother and more efficient.
Gathering Materials and Tools
Now that you have a clear plan in place, it's time to gather the materials and tools you'll need to bring your DIY hot dog cart to life. Here's a comprehensive list to get you started:
Materials:
-
Steel or Aluminum Frame: Look for sturdy, lightweight materials to construct the frame of your hot dog cart. These can include square steel tubing or aluminum extrusions, which provide durability without adding excessive weight to the cart.
-
Plywood or Stainless Steel Sheets: Depending on your design preferences, you'll need materials for the cart's exterior and countertop. Plywood can be a cost-effective option, while stainless steel sheets offer a sleek, easy-to-clean surface for food preparation.
-
Wheels and Axle: Invest in heavy-duty wheels and a durable axle to ensure smooth mobility for your hot dog cart. Consider the terrain where you'll be operating the cart and choose wheels that can handle various surfaces.
-
Grill and Heating Elements: Select a high-quality grill and heating elements suitable for cooking hot dogs and other menu items. Look for options that provide even heat distribution and efficient fuel consumption.
-
Storage Containers and Organizers: Incorporate storage containers and organizers to keep condiments, utensils, and other supplies neatly organized and easily accessible.
-
Signage and Menu Board: Don't forget materials for creating eye-catching signage and a menu board to attract customers and showcase your offerings.
Tools:
-
Welding Equipment: If you're working with steel or aluminum for the frame, welding equipment will be essential for joining the structural components securely.
-
Power Tools: Equip yourself with a range of power tools, including a drill, circular saw, jigsaw, and angle grinder, to cut and shape materials effectively.
-
Measuring and Marking Tools: Accurate measurements are crucial in the construction process, so ensure you have a tape measure, square, and marking tools on hand.
-
Fastening Hardware: Stock up on nuts, bolts, screws, and other fasteners needed to assemble the various components of your hot dog cart.
-
Safety Gear: Prioritize safety by wearing protective gear, including gloves, safety goggles, and a welding helmet if you're using welding equipment.
By gathering these materials and tools, you'll be well-prepared to move on to the next exciting phase of building your DIY hot dog cart.
Building the Frame
Building the frame is a critical step in constructing your DIY hot dog cart, as it provides the structural support and framework for the entire mobile food stand. Here's a step-by-step guide to help you build a sturdy and reliable frame for your hot dog cart:
-
Measure and Cut the Frame Components: Begin by measuring and cutting the steel or aluminum tubing to the required lengths, based on your cart's design specifications. Use a tape measure and a metal-cutting saw to ensure precise cuts for each component.
-
Prepare for Welding: Once the tubing pieces are cut to size, prepare them for welding by cleaning the surfaces to be joined. Remove any dirt, rust, or debris using a wire brush or sandpaper to ensure proper weld penetration and strength.
-
Assemble the Frame Structure: Lay out the cut tubing pieces according to your design plan, and use clamps to hold them in position. Double-check the alignment and squareness of the frame components before proceeding to the welding stage.
-
Weld the Joints: With the frame components securely clamped in place, begin welding the joints using a MIG welder or TIG welder, depending on your welding expertise and the materials being joined. Ensure consistent and strong welds at each connection point to create a rigid frame structure.
-
Reinforce Critical Joints: For added strength and stability, consider reinforcing critical joints with gussets or additional bracing. This step is especially important for supporting heavy equipment and ensuring the longevity of your hot dog cart.
-
Inspect for Quality and Strength: Once the welding is complete, thoroughly inspect the frame for any signs of weak welds or misalignments. Test the frame for stability and structural integrity by applying pressure and verifying that it can support the weight of the intended equipment and supplies.
By following these steps, you'll be well on your way to creating a robust and durable frame for your DIY hot dog cart. The frame serves as the foundation for the rest of the construction process, so it's essential to take the time to ensure its quality and reliability.
Installing the Wheels and Axle
After constructing the frame of your DIY hot dog cart, the next crucial step is to install the wheels and axle to ensure mobility and maneuverability. Follow these steps to securely attach the wheels and axle to your hot dog cart:
-
Position the Axle: Determine the appropriate placement of the axle on the frame, considering factors such as weight distribution and balance. Mark the positions where the axle will be mounted, ensuring that it is level and aligned with the frame.
-
Attach the Axle Brackets: Secure axle brackets to the frame at the marked positions using suitable fasteners, such as bolts and nuts. Ensure that the brackets are firmly attached and capable of supporting the weight of the axle and wheels.
-
Mount the Wheels: With the axle brackets in place, mount the wheels onto the axle, ensuring that they are centered and aligned. Depending on the type of wheels you've chosen, follow the manufacturer's instructions for proper installation to guarantee stability and smooth rotation.
-
Secure the Wheels: Once the wheels are in position, secure them by tightening the axle nuts or locking mechanisms. Test the wheels to ensure they rotate freely without wobbling or excessive play, making any necessary adjustments to achieve optimal alignment.
-
Check for Clearance and Alignment: Verify that the wheels have adequate clearance from the frame and other components, allowing for unrestricted movement. Double-check the alignment of the wheels to prevent any issues with tracking or stability when the cart is in motion.
-
Test Mobility: With the wheels securely installed, test the mobility of the hot dog cart by moving it over various surfaces. Ensure that the wheels roll smoothly and that the cart maintains stability, even when loaded with weight.
By following these steps, you'll successfully install the wheels and axle, transforming your stationary frame into a fully mobile hot dog cart ready to hit the streets and serve up delicious treats to eager customers.
Constructing the Countertop and Food Preparation Area
Constructing the countertop and food preparation area is a pivotal stage in the creation of your DIY hot dog cart. This section will guide you through the essential steps to build a functional and hygienic space for preparing and serving mouthwatering hot dogs.
-
Selecting the Countertop Material: Choose a suitable material for the countertop that is durable, easy to clean, and resistant to food stains and odors. Stainless steel is a popular choice due to its robustness and sanitary properties, while high-pressure laminate offers a cost-effective and customizable option.
-
Measuring and Cutting the Countertop: Accurately measure the dimensions of the countertop area on your hot dog cart frame. Use a marker and a straight edge to mark the cutting lines on the chosen countertop material, ensuring precise dimensions for a seamless fit.
-
Cutting and Shaping the Countertop: Employ a circular saw or jigsaw to cut the countertop material along the marked lines. Take care to maintain a smooth and even cut, especially for materials like stainless steel, to achieve a professional finish.
-
Installing the Countertop: Position the cut countertop material onto the designated area of the hot dog cart frame. Secure it in place using appropriate fasteners, such as screws or bolts, ensuring a snug and stable fit. If using stainless steel, consider using adhesive or sealant to create a seamless and hygienic surface.
-
Creating the Food Preparation Area: Designate a section of the countertop for food preparation, ensuring ample space for tasks such as grilling hot dogs, assembling toppings, and serving customers. Consider incorporating a built-in cutting board or food-safe work surface to enhance functionality.
-
Adding Sink and Faucet (Optional): If your local regulations require it or if you prefer the convenience of on-the-go handwashing, consider integrating a small sink and faucet into the countertop. Ensure proper drainage and a freshwater supply for a hygienic food preparation environment.
-
Installing Food-Safe Containers and Dispensers: Incorporate storage containers and dispensers for condiments, utensils, and other essential supplies within easy reach of the food preparation area. Organize these items to optimize workflow and efficiency during service.
By following these steps, you'll successfully construct a well-designed countertop and food preparation area for your hot dog cart, setting the stage for a seamless and efficient operation. This space will not only facilitate the preparation of delectable hot dogs but also contribute to a professional and inviting presentation for your customers.
Adding Storage and Organization Features
Efficient storage and organization are essential for maintaining a tidy and functional hot dog cart. Here's a detailed guide on adding storage and organization features to keep your supplies, utensils, and condiments neatly arranged and easily accessible.
-
Identify Storage Needs: Assess the types of supplies and equipment you'll need to store on your hot dog cart, including condiments, utensils, napkins, and additional cooking tools. Consider the quantities and sizes of these items to determine the appropriate storage solutions.
-
Incorporate Shelving and Compartments: Install shelves and compartments within the cart's interior to accommodate various items. Utilize adjustable shelving to customize the storage space according to your specific requirements. Consider adding dividers or bins to keep smaller items organized and prevent them from shifting during transit.
-
Utilize Vertical Space: Maximize vertical space by incorporating hanging racks or hooks to store utensils, aprons, and other lightweight items. This approach helps free up valuable countertop and shelf space while keeping frequently used items within easy reach.
-
Implement Secure Closures: Ensure that storage compartments and drawers are equipped with secure closures, such as latches or magnetic locks, to prevent items from spilling or shifting while the cart is in motion. This is particularly important for storing fragile or spill-prone items.
-
Consider Refrigeration Needs: If your menu includes perishable items or condiments that require refrigeration, consider integrating a compact refrigeration unit into your hot dog cart. Ensure that the unit is securely installed and meets the necessary health and safety standards for food storage.
-
Labeling and Inventory Management: Implement a labeling system to clearly identify the contents of each storage area. This facilitates efficient inventory management and helps you quickly locate specific items during busy service periods. Consider using color-coded labels or clear containers for easy visual identification.
-
Optimize Accessibility: Arrange frequently used items in easily accessible locations to streamline your workflow. Keep essential condiments and utensils near the food preparation area, ensuring that they are within arm's reach during service.
-
Customize Storage Solutions: Tailor the storage and organization features to suit your specific menu and operational needs. Consider the layout of your menu items and the frequency of use for different supplies when designing the storage configuration.
By incorporating these storage and organization features into your DIY hot dog cart, you'll create a well-organized and efficient workspace that enhances productivity and ensures a seamless customer service experience.
Installing the Grill and Heating Elements
Installing the grill and heating elements is a pivotal step in bringing your DIY hot dog cart to life, as it equips the mobile food stand with the essential equipment for cooking and serving delicious hot dogs and other menu items. Follow these detailed instructions to ensure the successful installation of the grill and heating elements on your hot dog cart:
-
Selecting the Grill and Heating Elements: Choose a high-quality grill that suits the scale of your operation and aligns with your menu offerings. Consider factors such as cooking capacity, fuel type (propane, natural gas, or electric), and the presence of additional features like side burners or warming racks. Similarly, select heating elements that provide consistent and efficient heat distribution for cooking and keeping food items warm.
-
Determining the Grill Placement: Identify the optimal location for the grill on your hot dog cart, considering factors such as ventilation, accessibility for cooking, and customer interaction. Ensure that the chosen placement allows for safe operation and complies with any relevant safety regulations.
-
Preparing the Mounting Area: Create a stable and heat-resistant mounting area for the grill and heating elements. If using a combustible countertop material, install a non-combustible base or insulation to protect the cart's structure from heat damage.
-
Securing the Grill and Heating Elements: Position the grill and heating elements in the designated area, ensuring that they are level and securely anchored to the cart's frame or countertop. Use appropriate fasteners and mounting hardware to prevent movement or instability during operation.
-
Connecting the Fuel Source: If your grill and heating elements require a fuel source, such as propane or natural gas, carefully connect the supply lines according to the manufacturer's instructions. Verify that all connections are secure and leak-free, and consider incorporating safety features such as shut-off valves and pressure regulators.
-
Testing the Equipment: Before putting the grill and heating elements into regular service, conduct thorough testing to ensure that they function as intended. Verify that the grill ignites properly, reaches the desired cooking temperatures, and maintains consistent heat distribution across the cooking surface.
-
Implementing Safety Measures: Install appropriate safety features, such as fire extinguishers and heat shields, to mitigate potential hazards associated with the use of the grill and heating elements. Educate yourself and any staff members on safe operating procedures and emergency protocols.
-
Optimizing Workflow: Arrange the surrounding area to facilitate a smooth workflow during food preparation and service. Ensure that utensils, condiments, and serving supplies are conveniently located near the grill and heating elements to streamline the cooking and assembly process.
By following these detailed steps, you'll successfully install the grill and heating elements on your DIY hot dog cart, creating a fully functional cooking station that's ready to delight customers with sizzling hot dogs and other delectable treats.
Adding Finishing Touches and Personalization
As you near the completion of your DIY hot dog cart, it's time to add those final touches and inject a touch of personalization to make your mobile food stand truly stand out. Here are some creative and practical ideas to elevate the visual appeal and functionality of your hot dog cart:
-
Branding and Signage: Incorporate eye-catching branding elements, such as a custom logo, vibrant colors, and catchy slogans, to make your hot dog cart instantly recognizable. Design and install a prominent sign or banner that showcases your brand name and menu offerings, drawing in potential customers from a distance.
-
Menu Board and Pricing Display: Create a visually appealing menu board that clearly lists your hot dog variations, toppings, and combo deals. Use chalkboard paint, vinyl lettering, or digital displays to present your menu items attractively. Include clear pricing information to make ordering a breeze for your customers.
-
Decorative Lighting: Enhance the ambiance of your hot dog cart by incorporating decorative lighting elements. Consider string lights, LED strips, or stylish fixtures that not only illuminate your service area but also add a warm and inviting atmosphere, especially during evening events or late-night service.
-
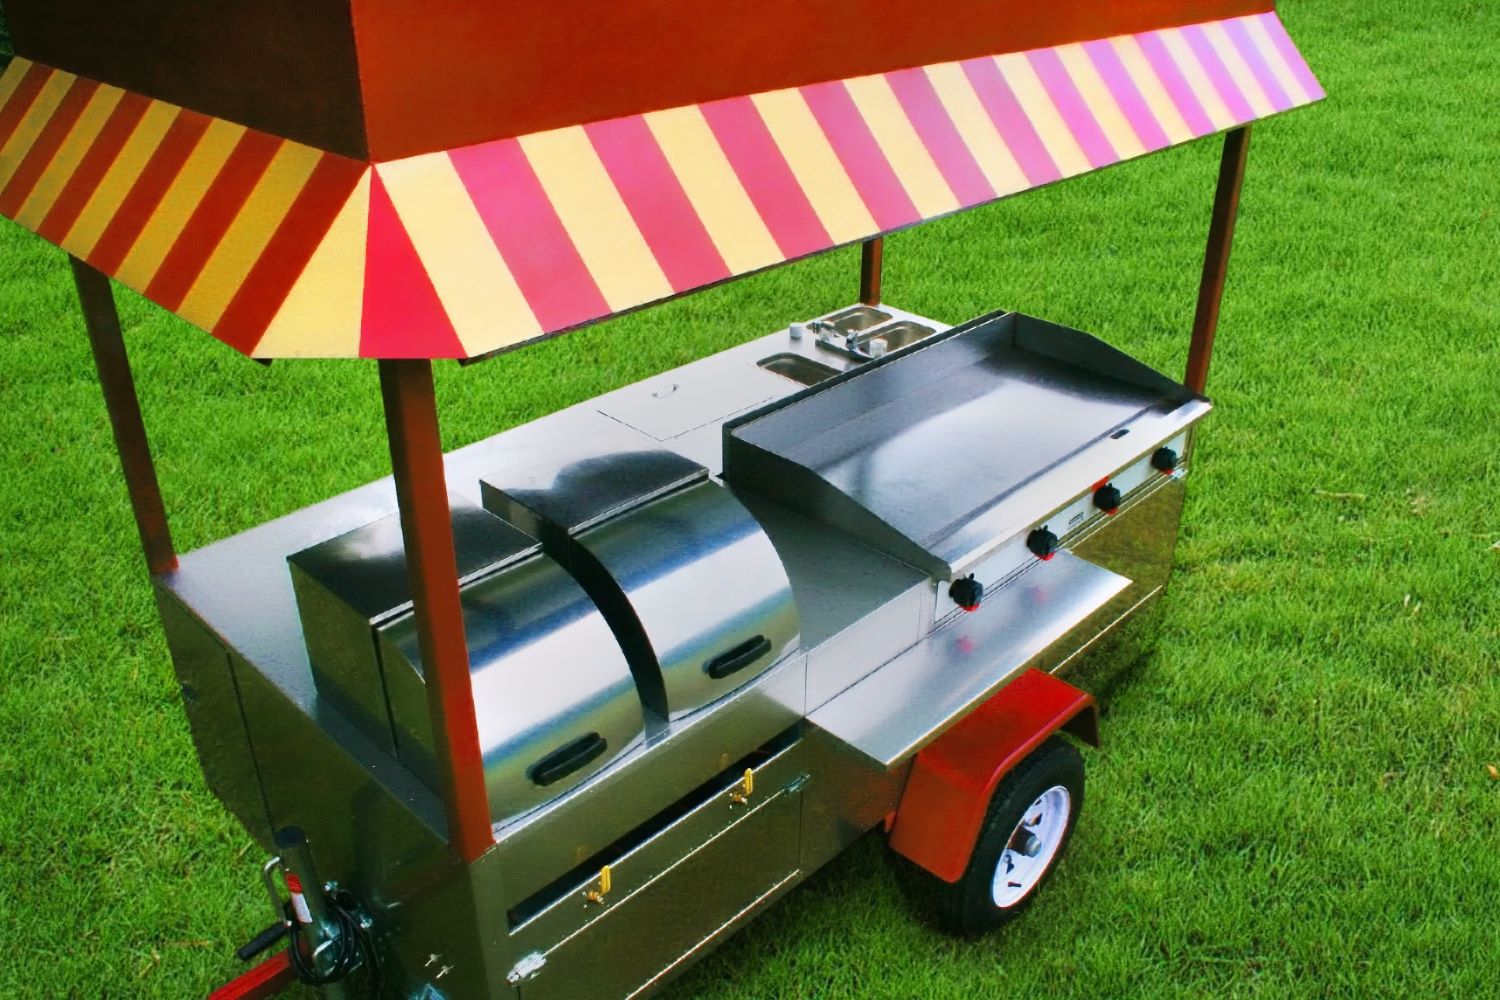
Customized Awning or Canopy: Install a customized awning or canopy that provides shade for both the food preparation area and your customers. Choose a durable and weather-resistant fabric that complements your branding and adds a touch of sophistication to your hot dog cart's exterior.
-
Artistic Flourishes and Graphics: Add artistic flourishes and graphics to the exterior panels of your cart, showcasing playful illustrations, food-themed designs, or engaging visuals that reflect the spirit of your hot dog business. Consider working with a local artist or graphic designer to create unique and attention-grabbing artwork.
-
Customer Seating and Comfort: If space permits, consider integrating a small seating area near your hot dog cart, complete with stools, benches, or standing tables. Providing a comfortable and inviting space for customers to enjoy their hot dogs can enhance their overall dining experience and encourage repeat visits.
-
Functional Accessories: Install practical accessories such as paper towel dispensers, trash receptacles, and condiment stations to ensure a clean and organized service area. These small details contribute to a professional and customer-friendly environment.
-
Branded Uniforms or Apparel: Consider outfitting yourself and any staff members with branded uniforms or apparel that align with your hot dog cart's theme and branding. This not only creates a cohesive and professional look but also reinforces your brand identity.
-
Interactive Elements: Incorporate interactive elements such as a chalkboard where customers can leave messages or a photo booth area for capturing fun moments. These interactive features can create a memorable and engaging experience for your customers.
By adding these finishing touches and personalization elements, you'll infuse your DIY hot dog cart with character, charm, and functionality, setting the stage for a successful and visually captivating mobile food business.
Conclusion
Congratulations on reaching the conclusion of your DIY hot dog cart construction journey! By following the comprehensive steps outlined in this guide, you've embarked on an exciting and rewarding endeavor that has resulted in the creation of a fully functional and visually appealing mobile food stand. From meticulous planning and material gathering to the hands-on construction of the frame, installation of essential equipment, and the addition of personalized touches, you've demonstrated creativity, craftsmanship, and a passion for bringing your hot dog cart vision to life.
As you prepare to unleash your hot dog cart into the bustling world of street food vending, remember to prioritize safety, hygiene, and compliance with local regulations and health codes. Regular maintenance and upkeep of your cart will ensure its longevity and continued success in serving up delectable hot dogs and satisfying hungry customers.
Whether you're setting up at local events, food fairs, or popular street corners, your DIY hot dog cart is a testament to your ingenuity and entrepreneurial spirit. Embrace the opportunities for creativity and innovation as you refine your menu, engage with customers, and carve out a niche for your mobile food business.
As you embark on this exciting new chapter, remember that the journey doesn't end here. Your DIY hot dog cart is a canvas for ongoing improvement, adaptation, and growth. Stay open to feedback, embrace new ideas, and continue to infuse your cart with the passion and dedication that inspired its creation.
Now, armed with a sizzling grill, a well-organized workspace, and a dash of personal flair, it's time to fire up the burners, serve up those mouthwatering hot dogs, and watch as your DIY hot dog cart becomes a beloved fixture in your community. Here's to the success of your hot dog cart venture and the countless smiles it's bound to create with each delicious bite!