
Home>Create & Decorate>DIY & Crafts>How To Build A Birdhouse
DIY & Crafts
How To Build A Birdhouse
Published: February 28, 2024

Senior Editor in Create & Decorate, Kathryn combines traditional craftsmanship with contemporary trends. Her background in textile design and commitment to sustainable crafts inspire both content and community.
Learn how to build a birdhouse with our DIY & Crafts guide. Get step-by-step instructions and create a beautiful home for your feathered friends.
(Many of the links in this article redirect to a specific reviewed product. Your purchase of these products through affiliate links helps to generate commission for Twigandthistle.com, at no extra cost. Learn more)
Introduction
Building a birdhouse is a delightful and rewarding DIY project that not only adds a charming touch to your outdoor space but also provides a cozy sanctuary for our feathered friends. Whether you're an experienced woodworker or a novice enthusiast, constructing a birdhouse is a fulfilling endeavor that allows you to unleash your creativity while contributing to the well-being of local bird populations.
Creating a birdhouse from scratch offers a wonderful opportunity to connect with nature and engage in a hands-on activity that can be enjoyed by individuals of all ages. The process of designing and building a birdhouse involves a blend of craftsmanship, precision, and imagination, making it an ideal project for a weekend or a leisurely afternoon.
By crafting a birdhouse, you are not only providing a safe and inviting shelter for birds to nest and raise their young, but you are also fostering a deeper appreciation for the natural world. The act of observing the avian visitors to your birdhouse can be a source of joy and wonder, offering a glimpse into the captivating lives of these fascinating creatures.
In the following steps, we will guide you through the process of constructing a birdhouse, from gathering the necessary materials to mounting the finished product. Whether you choose to build a simple classic design or opt for a more intricate and decorative style, the satisfaction of creating a welcoming haven for birds will undoubtedly leave you with a sense of accomplishment and pride.
So, roll up your sleeves, gather your tools, and let's embark on this enriching journey of building a birdhouse that will not only beautify your surroundings but also provide a nurturing habitat for our beloved avian neighbors.
Step 1: Gather Materials
Before embarking on the construction of a birdhouse, it's essential to gather all the necessary materials and tools. By ensuring that you have everything at hand, you can streamline the building process and minimize interruptions. Here's a comprehensive list of materials and tools required for this project:
Materials:
- Wood: Select a durable and weather-resistant wood such as cedar, redwood, or pine. Ensure that the wood is untreated to avoid potential harm to the birds.
- Wood Screws: Choose corrosion-resistant screws to assemble the birdhouse securely.
- Wood Glue: Opt for a waterproof wood glue to reinforce the joints and enhance the structural integrity of the birdhouse.
- Drill Bit: A drill bit suitable for creating entrance holes for the birds.
- Hinges and Latch (Optional): If you plan to include a hinged roof for easy cleaning, gather the necessary hinges and a latch for securing the roof.
Tools:
- Saw: A handsaw or a power saw for cutting the wood to the required dimensions.
- Drill: A power drill for creating holes and driving screws into the wood.
- Sandpaper: Various grits of sandpaper for smoothing the edges and surfaces of the wood.
- Measuring Tape: Essential for accurately measuring and marking the wood for cutting.
- Safety Gear: Safety goggles, gloves, and a dust mask to protect yourself during the woodworking process.
By ensuring that you have all the materials and tools listed above, you can proceed with confidence to the next step of cutting the wood for your birdhouse. With careful preparation, you are well-equipped to embark on this fulfilling DIY endeavor and create a welcoming haven for the avian visitors in your area.
Step 2: Cut the Wood
Once you have gathered all the necessary materials and tools, the next step in building a birdhouse is to cut the wood to the required dimensions. This step is crucial as it sets the foundation for the structural integrity and aesthetic appeal of the birdhouse. Here's a detailed guide to cutting the wood for your birdhouse:
1. Select the Wood
Choose high-quality, untreated wood such as cedar, redwood, or pine for your birdhouse. These types of wood are durable and weather-resistant, ensuring the longevity of the birdhouse. Ensure that the wood is free from any chemical treatments that could be harmful to the birds.
2. Measure and Mark
Using a measuring tape and a pencil, carefully measure and mark the wood according to the dimensions of the birdhouse design you have chosen. The measurements will vary depending on the style and size of the birdhouse, so precision is key at this stage.
3. Cutting the Pieces
Using a saw, whether it's a handsaw or a power saw, carefully cut the wood according to the marked dimensions. Take your time to ensure clean and accurate cuts, as this will contribute to the overall professional look of the birdhouse.
4. Sanding the Edges
After cutting the wood, use sandpaper to smooth out any rough edges and surfaces. This step not only enhances the visual appeal of the birdhouse but also prevents any potential splinters, making it safe for both the birds and the builders.
5. Pre-Drill Entrance Holes
If your birdhouse design includes an entrance hole for the birds, use a drill bit to create the hole at this stage. Be mindful of the size of the entrance hole, as it should be suitable for the specific bird species you aim to attract.
By following these steps, you will have successfully cut the wood for your birdhouse, laying the groundwork for the assembly process. With precision and attention to detail, you are one step closer to creating a charming and functional birdhouse that will be a welcoming abode for your avian visitors.
Step 3: Assemble the Birdhouse
With the wood pieces cut to the required dimensions, it's time to assemble the birdhouse. This step brings the individual components together, transforming them into a cohesive structure that will serve as a safe haven for birds. Follow these detailed instructions to effectively assemble the birdhouse:
-
Dry Fit the Pieces: Before applying any adhesive or screws, perform a dry fit of the wood pieces to ensure that they align correctly and form the desired shape of the birdhouse. This step allows you to make any necessary adjustments before proceeding with the final assembly.
-
Apply Wood Glue: Once satisfied with the alignment of the pieces, apply a waterproof wood glue to the joints before securing them with screws. The wood glue reinforces the connections, adding strength and stability to the birdhouse.
-
Secure with Screws: Using corrosion-resistant wood screws, carefully drive them into the pre-drilled pilot holes to secure the wood pieces together. Exercise caution to avoid over-tightening the screws, as this could potentially split the wood.
-
Add Support for Perch and Nesting Platform: If your birdhouse design includes a perch or a nesting platform, this is the stage to attach these features securely. Ensure that they are positioned in a manner that is conducive to the comfort and safety of the birds.
-
Optional: Install Hinges and Latch: If you have opted for a hinged roof for easy cleaning and maintenance, install the hinges and a latch at this point. This addition allows for convenient access to the interior of the birdhouse when needed.
-
Inspect for Stability: Once the assembly is complete, carefully inspect the birdhouse for stability and structural integrity. Any loose connections or potential hazards should be addressed before proceeding to the next step.
By following these steps, you will have successfully assembled the birdhouse, bringing together the individual components to create a sturdy and inviting shelter for birds. The assembly process marks a significant milestone in the construction of the birdhouse, setting the stage for the final touches that will complete this fulfilling DIY project.
Step 4: Add Perch and Roof
With the main structure of the birdhouse assembled, the next crucial step is to add the perch and roof, which are essential elements contributing to the functionality and aesthetic appeal of the birdhouse.
Attaching the Perch
The perch serves as a resting spot for the birds and adds a charming touch to the birdhouse. To attach the perch securely, carefully position it near the entrance of the birdhouse, ensuring that it is stable and provides a convenient spot for the birds to rest or observe their surroundings. Using wood glue and screws, affix the perch in place, taking care to maintain its alignment with the entrance hole.
Installing the Roof
The roof not only provides protection from the elements but also adds character to the birdhouse. Depending on the chosen design, the roof may be flat, sloped, or gabled. Carefully position the roof atop the birdhouse, ensuring that it overhangs to provide adequate shelter. Secure the roof in place using wood screws, taking care to align it symmetrically with the structure. If a hinged roof is incorporated for easy cleaning, ensure that the hinges are securely attached, allowing for smooth opening and closing.
Optional Decorative Touches
For those inclined towards adding decorative elements, this is the stage to personalize the birdhouse further. Whether it's adding intricate wood carvings, decorative trim, or a splash of vibrant paint, these embellishments can infuse the birdhouse with individuality and charm. However, it's important to ensure that any decorations are bird-safe and do not pose any hazards to the avian occupants.
Final Inspection
After adding the perch and roof, conduct a thorough inspection of the birdhouse to ensure that all components are securely attached and that there are no sharp edges or protruding screws that could pose a risk to the birds. The perch and roof should be firmly in place, contributing to the overall stability and visual appeal of the birdhouse.
By completing this step, you have added the essential finishing touches to the birdhouse, elevating it from a simple structure to a welcoming and functional abode for birds. The addition of the perch and roof not only enhances the birdhouse's functionality but also contributes to its aesthetic charm, creating a delightful haven for avian visitors.
Step 5: Paint or Stain
The process of painting or staining the birdhouse is a pivotal stage that not only enhances its visual appeal but also provides essential protection against the elements, ensuring its longevity. Whether you opt for a vibrant splash of color or a natural wood finish, the application of paint or stain adds a personalized touch to the birdhouse, making it an eye-catching feature in your outdoor space.
Choosing the Right Finish
Before proceeding with the application of paint or stain, it's crucial to select a finish that is safe for the birds and conducive to their well-being. If you choose to paint the birdhouse, opt for non-toxic, water-based outdoor paint in vibrant hues. These paints are safe for the birds and offer excellent durability, standing up to the rigors of outdoor exposure. Alternatively, if you prefer to showcase the natural beauty of the wood, a high-quality outdoor wood stain can be applied to enrich the wood's grain while providing protection against moisture and UV rays.
Preparing the Surface
To ensure a smooth and long-lasting finish, prepare the surface of the birdhouse by lightly sanding it to remove any rough spots or imperfections. This step not only creates a clean canvas for the paint or stain but also promotes better adhesion, resulting in a professional-looking finish. After sanding, wipe down the birdhouse with a damp cloth to remove any dust or debris, allowing the surface to dry completely before proceeding with the application of the finish.
Applying the Finish
When applying paint or stain, it's essential to work in a well-ventilated area and protect the surrounding environment from any potential drips or spills. Using a high-quality brush or a paint sprayer, carefully apply an even coat of paint or stain to the birdhouse, ensuring full coverage of all surfaces, including the interior. Take care to follow the manufacturer's instructions regarding drying times and additional coats, if necessary, to achieve the desired depth of color or level of protection.
Adding Personal Touches
For those inclined towards creativity, consider adding decorative elements or intricate designs to the painted or stained birdhouse. Whether it's hand-painted details, stenciled patterns, or whimsical embellishments, these personal touches can infuse the birdhouse with character and charm, making it a standout feature in your outdoor space.
By completing this step, you will have transformed the birdhouse into a visually captivating and weather-resistant structure, ready to welcome its avian occupants while adding a delightful touch to your surroundings. The application of paint or stain not only enhances the aesthetic appeal of the birdhouse but also ensures its durability, allowing it to stand the test of time as a cherished habitat for local bird species.
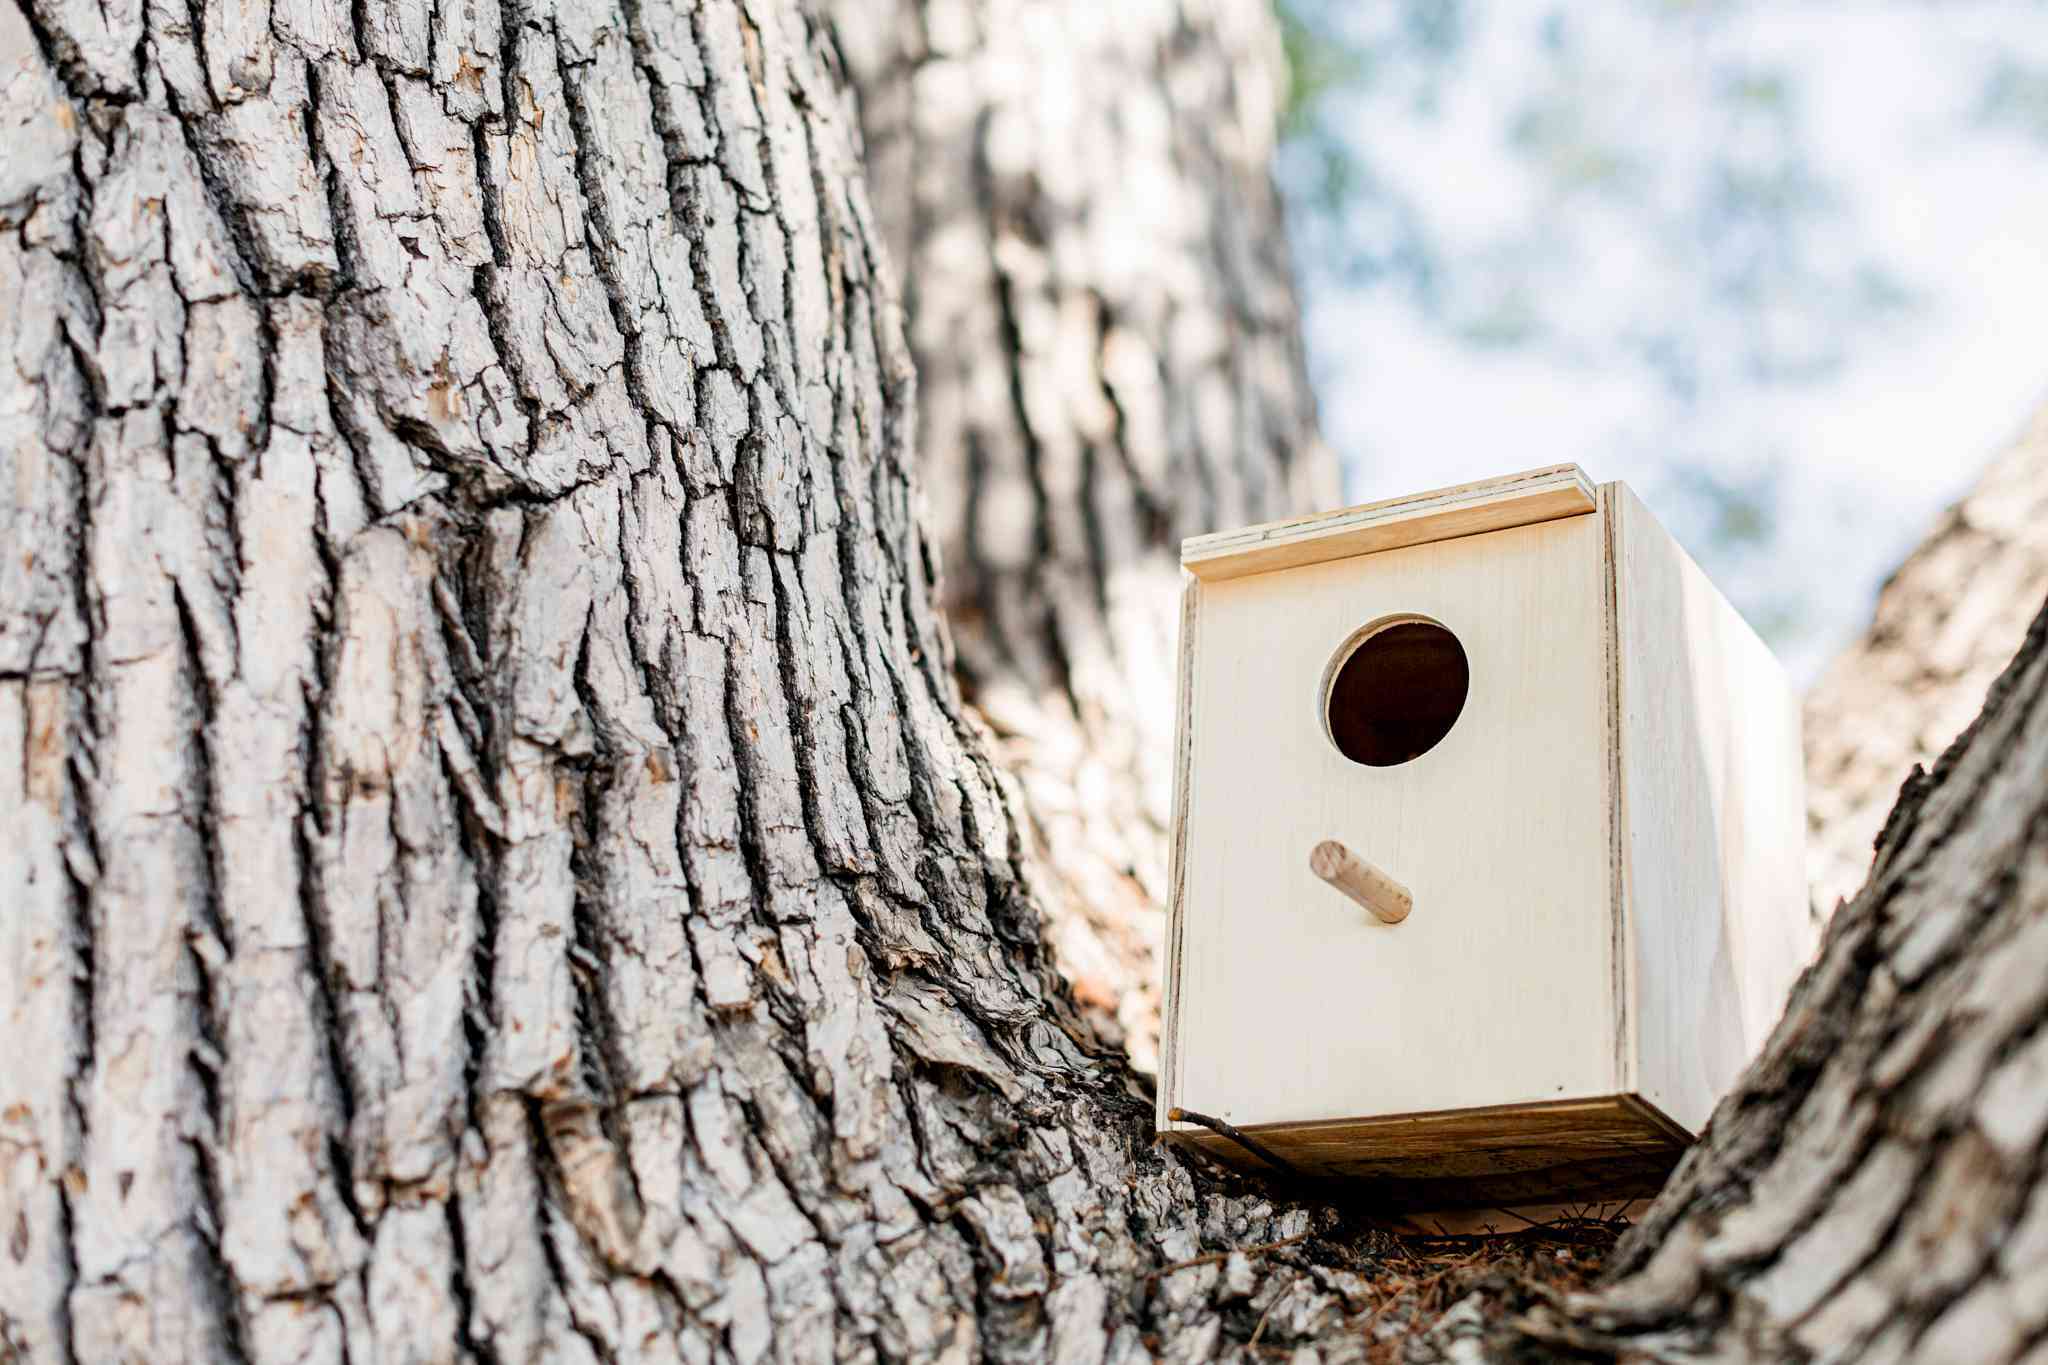
Step 6: Mount the Birdhouse
Mounting the birdhouse is the final step in bringing your DIY project to fruition, as it involves strategically placing the birdhouse in a location that is conducive to attracting and accommodating avian visitors. The positioning of the birdhouse plays a crucial role in its functionality and the well-being of the birds that will call it home. Here's a detailed guide to effectively mounting the birdhouse:
Selecting the Location
Carefully choose a suitable location for mounting the birdhouse, taking into consideration the habitat preferences of the bird species you aim to attract. Ideally, the birdhouse should be placed in a quiet and peaceful area, away from heavy human traffic and potential predators. Additionally, ensuring that the birdhouse is sheltered from direct sunlight and strong winds can provide a more inviting and comfortable environment for the birds.
Mounting Options
There are several mounting options to consider, depending on the design of the birdhouse and the available outdoor space. Common methods of mounting include attaching the birdhouse to a sturdy tree trunk, securing it to a post or pole, or affixing it to a wall or fence. Each mounting option offers distinct advantages, and the choice should align with the specific needs and preferences of the bird species in your area.
Height and Orientation
When mounting the birdhouse, it's essential to consider the appropriate height and orientation for optimal bird occupancy. Different bird species have varying preferences for the height of their nesting sites, so researching the specific requirements of the birds you wish to attract can guide you in positioning the birdhouse at the ideal height. Additionally, ensuring that the entrance hole faces away from prevailing winds and potential disturbances can contribute to the birds' comfort and safety.
Installation Process
Using appropriate mounting hardware such as screws, brackets, or straps, carefully secure the birdhouse in the chosen location, ensuring that it is stable and level. Take care to avoid over-tightening the mounting hardware, as this could potentially damage the birdhouse. Once the birdhouse is securely installed, conduct a final inspection to confirm its stability and suitability for avian occupancy.
By following these guidelines and taking into account the habitat preferences of local bird species, you can effectively mount the birdhouse, creating a welcoming and secure haven for avian visitors. The strategic placement of the birdhouse not only enhances its appeal but also contributes to the conservation of bird populations, fostering a deeper connection with the natural world.
Conclusion
In conclusion, the process of building a birdhouse is a deeply fulfilling and enriching endeavor that transcends the realms of DIY craftsmanship. It represents a harmonious blend of creativity, conservation, and a genuine connection to the natural world. As the final touches are put in place and the birdhouse is securely mounted, a sense of accomplishment and pride accompanies the realization that a welcoming sanctuary has been created for our avian neighbors.
The journey of constructing a birdhouse, from gathering the materials to mounting the finished product, is a testament to the human desire to coexist harmoniously with nature. The careful selection of untreated, weather-resistant wood, the precise cutting and assembly of the components, and the thoughtful addition of a perch and roof all contribute to the creation of a safe and inviting habitat for birds.
The application of paint or stain not only adds a personalized touch to the birdhouse but also ensures its resilience against the elements, safeguarding it for years to come. The strategic mounting of the birdhouse, taking into account the habitat preferences of local bird species, further reinforces the commitment to providing a nurturing environment for our feathered friends.
As the birdhouse stands proudly in its designated location, it serves as a symbol of our dedication to wildlife conservation and our appreciation for the beauty of the natural world. The simple act of observing the avian visitors to the birdhouse can evoke a profound sense of wonder and connection, fostering a deeper understanding of the delicate balance of ecosystems and the importance of preserving biodiversity.
Ultimately, the construction of a birdhouse transcends the realm of a mere DIY project; it embodies a celebration of life, a commitment to environmental stewardship, and a testament to the enduring bond between humans and the creatures that share our world. It is a reminder that even the smallest acts of kindness and creativity can have a meaningful impact, creating a ripple of positivity that resonates far beyond the confines of our immediate surroundings.
In building a birdhouse, we not only provide a safe haven for birds but also nurture a sense of empathy and responsibility towards the natural world. It is a humble yet profound gesture that echoes the sentiment that every living being, no matter how small, deserves a place to call home.