
Home>Create & Decorate>DIY & Crafts>Pallet Firewood Shed: A DIY Guide To Building A Functional And Stylish Storage Solution
DIY & Crafts
Pallet Firewood Shed: A DIY Guide To Building A Functional And Stylish Storage Solution
Published: February 28, 2024

Senior Editor in Create & Decorate, Kathryn combines traditional craftsmanship with contemporary trends. Her background in textile design and commitment to sustainable crafts inspire both content and community.
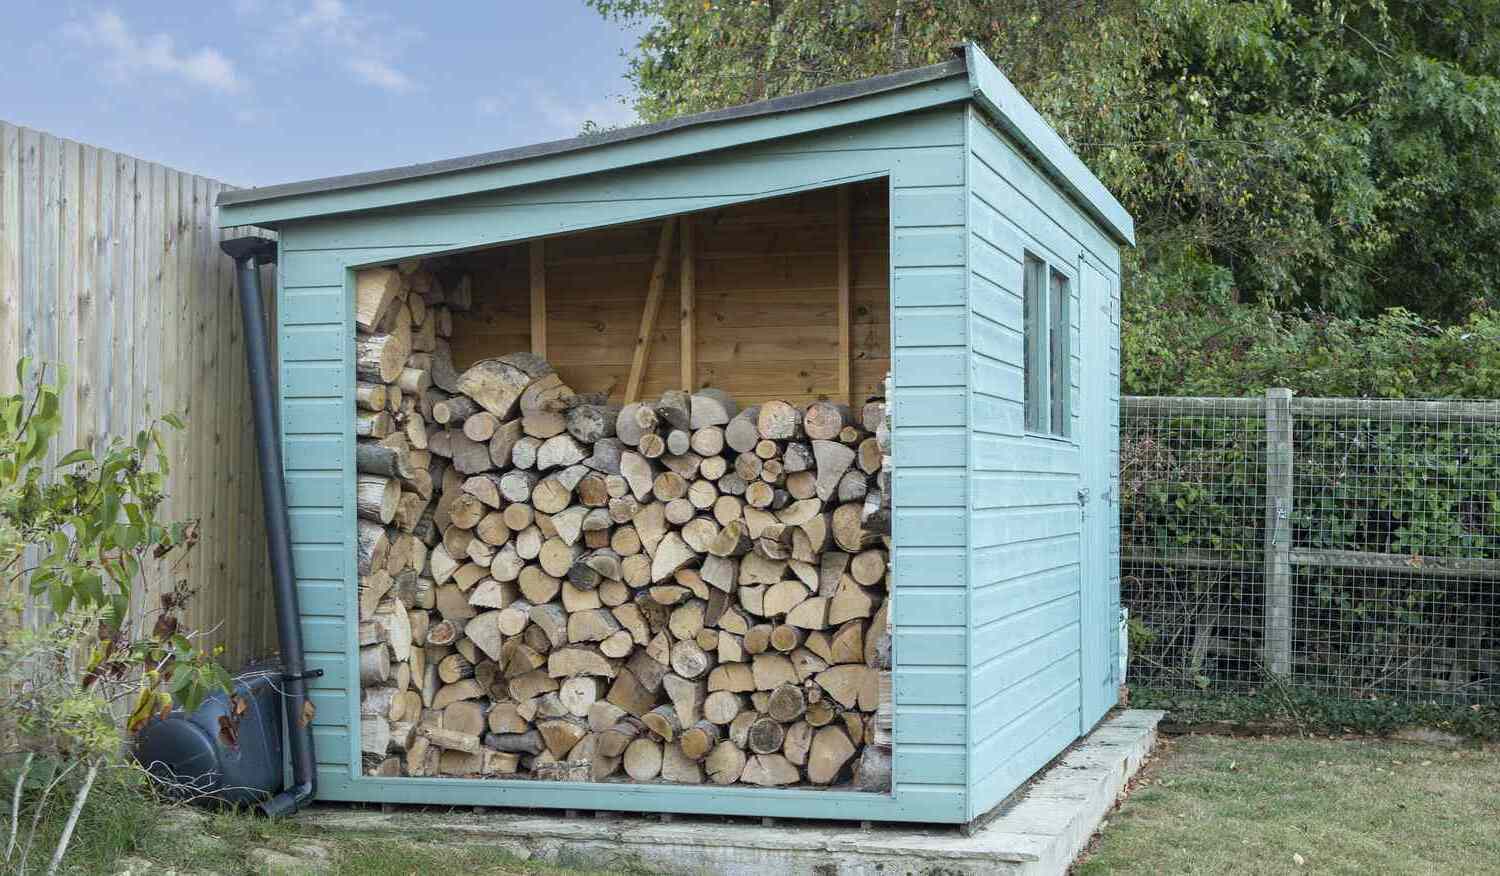
Learn how to build a stylish and functional pallet firewood shed with our DIY guide. Perfect for DIY & Crafts enthusiasts looking for a practical storage solution.
(Many of the links in this article redirect to a specific reviewed product. Your purchase of these products through affiliate links helps to generate commission for Twigandthistle.com, at no extra cost. Learn more)
Introduction
Welcome to the world of DIY woodworking, where creativity meets functionality. In this comprehensive guide, we will delve into the art of building a pallet firewood shed, a practical and stylish storage solution for your outdoor space. Whether you're a seasoned DIY enthusiast or a novice looking to embark on your first woodworking project, this step-by-step guide will equip you with the knowledge and skills needed to create a functional and visually appealing firewood shed using pallets.
A pallet firewood shed serves as a valuable addition to any outdoor area, providing a dedicated space to store firewood while protecting it from the elements. Not only does it keep your firewood dry and well-organized, but it also adds a touch of rustic charm to your backyard or garden. By repurposing pallets, you can embrace sustainable and cost-effective practices while unleashing your creativity through custom designs and finishes.
Throughout this guide, we will explore the essential steps involved in constructing a pallet firewood shed, from meticulous planning and gathering materials to the hands-on process of building the foundation, framing, roofing, and siding. Additionally, we will delve into the finishing touches that elevate the shed's functionality and aesthetic appeal.
Whether you envision a compact shed nestled in a corner of your garden or a larger structure to accommodate ample firewood, this guide will provide you with the knowledge and inspiration to bring your vision to life. So, roll up your sleeves, gather your tools, and let's embark on this rewarding DIY journey to create a pallet firewood shed that seamlessly blends practicality with style.
Planning and Preparation
Before diving into the hands-on aspect of building a pallet firewood shed, meticulous planning and thorough preparation are crucial to ensure a smooth and successful construction process. This phase sets the foundation for the entire project, allowing you to envision the shed's design, assess the available space, and gather the necessary materials and tools.
Assessing the Space
Begin by surveying your outdoor area to determine the ideal location for the firewood shed. Consider factors such as proximity to your home, accessibility, and the overall aesthetic impact on your outdoor space. Take measurements to ascertain the dimensions of the shed, ensuring that it aligns with the available space while allowing ample room for maneuvering around the structure.
Design Considerations
With the location in mind, sketch a rough design of the firewood shed, incorporating elements such as the roof pitch, door placement, and overall dimensions. Consider the quantity of firewood you intend to store and ensure that the shed's design accommodates your storage needs. Additionally, contemplate the visual aspects of the shed, such as the choice of siding and any decorative elements you wish to incorporate.
Obtaining Permits
Depending on your local regulations and the size of the shed, you may need to obtain permits before commencing construction. Research the building codes and permit requirements in your area to ensure compliance with regulations. This step is essential to avoid potential setbacks and ensure that your firewood shed adheres to legal standards.
Material and Tool Checklist
Compile a comprehensive list of materials required for the project, including pallets, framing lumber, roofing materials, siding, fasteners, and any additional components based on your design. Similarly, gather the necessary tools such as a circular saw, hammer, drill, level, measuring tape, and safety equipment. Ensuring that you have all the essential materials and tools on hand will streamline the construction process and minimize interruptions.
Budgeting and Timeline
Establish a realistic budget for the project, factoring in the cost of materials, tools, and any potential unforeseen expenses. Additionally, outline a timeline for the construction, considering factors such as weather conditions and the availability of dedicated time for the project. Setting a budget and timeline will help you manage the project efficiently and avoid unnecessary delays.
By meticulously planning and preparing for the construction of your pallet firewood shed, you lay a solid groundwork for a successful and rewarding DIY endeavor. This phase not only fosters a clear vision for the project but also ensures that you are equipped with the essential resources and knowledge to bring your firewood shed to fruition.
Gathering Materials and Tools
Gathering the necessary materials and tools is a pivotal step in preparing for the construction of a pallet firewood shed. By ensuring that you have all the essential components and equipment at your disposal, you can streamline the building process and minimize interruptions. Here's a comprehensive breakdown of the materials and tools required for this project:
Materials
-
Pallets: As the foundational building blocks of the shed, pallets serve as the primary material for the structure's walls. Ensure that the pallets are in good condition, free from rot and structural damage. The quantity of pallets needed will depend on the size of the shed and your design specifications.
-
Framing Lumber: Select high-quality lumber for constructing the shed's frame, including studs, joists, and rafters. The dimensions of the lumber will vary based on the shed's design and size, so calculate the required lengths and quantities accordingly.
-
Roofing Materials: Depending on your preference and local climate, choose suitable roofing materials such as corrugated metal panels, asphalt shingles, or polycarbonate sheets. Ensure that the roofing materials are durable and provide adequate protection against the elements.
-
Siding: Opt for weather-resistant siding materials to shield the shed from moisture and enhance its visual appeal. Common options include exterior-grade plywood, cedar boards, or composite siding panels. Consider the aesthetic impact and longevity of the chosen siding material.
-
Fasteners: Stock up on an assortment of nails, screws, and bolts to secure the various components of the shed. Choose fasteners designed for outdoor use to withstand exposure to the elements and ensure the structural integrity of the shed.
-
Concrete Blocks or Gravel: For the shed's foundation, acquire concrete blocks or gravel to provide stable support and elevation. The choice between concrete blocks and gravel will depend on the soil composition and drainage requirements of the shed's location.
-
Concrete Mix: If you opt for a concrete foundation, procure the necessary concrete mix to secure the concrete blocks and create a solid base for the shed.
Tools
-
Circular Saw: A versatile and essential tool for cutting lumber, pallets, and siding materials to the required dimensions.
-
Hammer and Nails: Utilized for traditional fastening, the hammer and nails are fundamental tools for securing the shed's components.
-
Drill and Screws: Choose a reliable drill and a variety of screws to facilitate efficient assembly and fastening of the shed's elements.
-
Level: An indispensable tool for ensuring the shed's components are aligned and plumb during construction, promoting structural integrity.
-
Measuring Tape: Accurate measurements are crucial in woodworking projects, making a measuring tape an indispensable tool for precision.
-
Safety Equipment: Prioritize safety by equipping yourself with protective gear, including gloves, safety glasses, and ear protection.
By diligently gathering the required materials and tools, you set the stage for a seamless and productive construction process, laying the groundwork for bringing your pallet firewood shed to life.
Building the Foundation
The foundation serves as the fundamental support system for the pallet firewood shed, ensuring stability and durability. Depending on the shed's size and local soil conditions, you can opt for either a concrete block or gravel foundation. Here's a detailed overview of the steps involved in building a solid foundation for your firewood shed:
1. Site Preparation
Begin by clearing the designated area for the shed, removing any debris, vegetation, or obstacles that may impede the construction process. Use a shovel or a skid steer loader to level the ground, ensuring a flat and even surface for the foundation.
2. Marking the Layout
Using stakes and string, outline the perimeter of the shed's foundation, marking the precise dimensions as per your design plans. Double-check the measurements to guarantee accuracy before proceeding to the next steps.
3. Excavation and Grading
If you opt for a gravel foundation, excavate the marked area to a depth of approximately 4 to 6 inches. Ensure that the excavation is uniform and level, taking into account any necessary slope for proper drainage. For a concrete block foundation, the excavation should accommodate the dimensions of the concrete blocks and allow for a level base.
4. Adding Gravel or Installing Concrete Blocks
For a gravel foundation, spread a layer of compactible gravel within the excavated area, using a hand tamper to achieve a firm and level surface. Compact the gravel to create a stable base for the shed. If you choose a concrete block foundation, carefully lay the blocks in the excavated area, ensuring they are level and aligned according to the shed's layout.
5. Leveling and Alignment
Utilize a carpenter's level to ensure that the gravel or concrete blocks are perfectly level and aligned with the shed's layout. This step is crucial for establishing a stable and balanced foundation, which is essential for the structural integrity of the shed.
6. Securing the Foundation
Once the gravel or concrete blocks are in place and properly leveled, assess the stability and adjust as needed. For a gravel foundation, consider adding a weed barrier fabric to prevent weed growth and maintain the foundation's integrity.
By meticulously executing the foundation-building process, you establish a robust base for the pallet firewood shed, setting the stage for the subsequent phases of construction. A well-constructed foundation is essential for ensuring the longevity and stability of the shed, safeguarding your firewood and enhancing the overall functionality of the structure.
Constructing the Frame
The construction of the frame marks a pivotal phase in the creation of a pallet firewood shed, laying the structural groundwork for the entire edifice. This process involves assembling the framework that will support the shed's walls, roof, and overall stability. Here's a detailed breakdown of the steps involved in constructing the frame:
-
Cutting and Preparing the Lumber: Begin by carefully measuring and cutting the framing lumber to the required dimensions, ensuring precision and accuracy. The lumber will form the vertical studs, horizontal joists, and rafters that comprise the shed's frame. Utilize a circular saw and a reliable measuring tape to achieve consistent and uniform pieces of lumber.
-
Assembling the Wall Frames: With the cut lumber at hand, assemble the wall frames on a flat and level surface, following the dimensions outlined in your design plans. Secure the vertical studs to the horizontal joists using appropriate fasteners, such as nails or screws, ensuring that the corners are square and the frame is structurally sound. This step forms the skeletal structure of the shed's walls, providing the framework for the siding and interior space.
-
Installing the Door and Window Openings: If your design incorporates doors or windows, carefully measure and cut openings within the wall frames to accommodate these features. Reinforce the openings with additional framing members to provide support and stability for the doors and windows.
-
Erecting the Wall Frames: Once the individual wall frames are assembled, erect them in the designated positions on the shed's foundation. Ensure that the frames are plumb and aligned, using a level to verify their vertical orientation. Secure the frames to the foundation and to each other, creating a unified structure that forms the perimeter of the shed.
-
Constructing the Roof Framework: With the wall frames in place, proceed to construct the roof framework, which typically consists of horizontal joists and angled rafters. Carefully position and secure the roof framework atop the wall frames, ensuring that it aligns with the predetermined roof pitch and overhang dimensions.
By meticulously executing the frame construction process, you establish a sturdy and reliable skeleton for the pallet firewood shed, setting the stage for the subsequent phases of assembly. The completed frame forms the backbone of the shed, providing the essential support and structure for the roof, siding, and finishing touches that will transform it into a functional and visually appealing storage solution.
Adding the Roof
The addition of the roof is a critical phase in the construction of a pallet firewood shed, as it provides essential protection for the stored firewood and contributes to the overall structural integrity and weather resistance of the shed. The process of adding the roof involves carefully selecting and installing suitable roofing materials, ensuring proper drainage, and securing the roof to the shed's frame. Here's a detailed overview of the steps involved in adding the roof to the firewood shed:
-
Selecting Roofing Materials: Begin by selecting roofing materials that are well-suited to your local climate and provide effective protection against moisture and the elements. Common options include corrugated metal panels, asphalt shingles, or polycarbonate sheets. Consider factors such as durability, aesthetic appeal, and compatibility with the shed's design.
-
Measuring and Cutting: Once the roofing materials are chosen, measure and cut them to fit the dimensions of the shed's roof. Use a circular saw or appropriate cutting tools to achieve precise and uniform pieces that align with the roof's pitch and overhang.
-
Installing Roof Sheathing: Prior to installing the roofing materials, consider adding a layer of roof sheathing, such as plywood or oriented strand board (OSB), to provide a stable and even surface for the roofing. Secure the sheathing to the roof framework using appropriate fasteners, ensuring a secure and level base for the roofing materials.
-
Laying the Roofing Materials: Carefully position and secure the roofing materials onto the sheathed roof, starting from the bottom and working upwards. Follow the manufacturer's guidelines for installation, ensuring proper overlap and alignment to prevent water infiltration. Secure the roofing materials using nails, screws, or other recommended fasteners, taking care to maintain a consistent and weatherproof installation.
-
Addressing Roof Ventilation: Depending on the shed's design and local climate, consider incorporating roof ventilation to promote air circulation and prevent moisture buildup. Ventilation options may include ridge vents, soffit vents, or gable vents, which contribute to the longevity of the roof and the stored firewood.
-
Ensuring Proper Drainage: Verify that the installed roof facilitates proper drainage, directing water away from the shed to prevent pooling and potential water damage. Consider adding gutters and downspouts to further enhance the shed's drainage capabilities and protect the surrounding area.
By meticulously executing the process of adding the roof, you fortify the pallet firewood shed with essential protection and structural stability, culminating in a functional and resilient storage solution for your firewood. The completed roof not only safeguards the stored firewood but also contributes to the overall aesthetic and longevity of the shed, elevating its functionality and visual appeal.
Installing the Siding
The installation of siding is a pivotal phase in the construction of a pallet firewood shed, as it not only enhances the shed's visual appeal but also provides crucial protection against the elements. The choice of siding material plays a significant role in determining the shed's durability, weather resistance, and overall aesthetic impact. Whether opting for traditional exterior-grade plywood, rustic cedar boards, or modern composite siding panels, the installation process follows a series of meticulous steps to ensure a seamless and weatherproof finish.
Preparing the Siding Materials
Before commencing the installation, carefully measure and cut the siding materials to fit the dimensions of the shed's walls. Utilize a circular saw or appropriate cutting tools to achieve precise and uniform pieces that align with the shed's frame and openings for doors and windows. Additionally, consider treating the siding with a weather-resistant finish or sealant to enhance its longevity and protect it from moisture and UV exposure.
Securing the Siding
Begin the installation process by positioning the first piece of siding at the bottom of the shed's wall, ensuring that it aligns with the foundation and is level. Secure the siding using appropriate fasteners, such as nails or screws, ensuring that they penetrate the underlying wall frame for a secure attachment. Subsequent pieces of siding should overlap the preceding ones, creating a weatherproof barrier that shields the shed's interior and firewood from the elements.
Addressing Corners and Trim
When encountering corners or edges, take care to miter or overlap the siding pieces to ensure a seamless and visually appealing transition. Additionally, consider adding trim elements, such as corner boards and window casings, to provide a polished and finished look while further enhancing the shed's weather resistance. Properly installed trim elements contribute to the shed's overall aesthetic and serve as protective accents that complement the siding.
Incorporating Ventilation and Drainage
During the siding installation, it is essential to consider ventilation and drainage elements to maintain the shed's structural integrity and prevent moisture buildup. Incorporate vented soffits or strategically positioned vents to promote air circulation within the shed, reducing the risk of condensation and mold growth. Additionally, ensure that the siding installation facilitates proper drainage, directing water away from the shed's interior and foundation to prevent water damage and deterioration.
By meticulously executing the process of installing the siding, you not only fortify the pallet firewood shed with essential weather protection but also elevate its visual appeal and longevity. The completed siding serves as a durable and aesthetically pleasing exterior finish, harmonizing with the shed's surroundings while safeguarding the stored firewood and enhancing the overall functionality of the structure.
Finishing Touches
With the structural elements of the pallet firewood shed in place, attention turns to the finishing touches that elevate its functionality, visual appeal, and overall cohesiveness. This phase encompasses a range of essential details and enhancements that contribute to the shed's practicality and aesthetic charm.
1. Weatherproofing and Sealing
Prioritize the application of a weatherproof sealant or exterior paint to the shed's exterior surfaces, including the siding, trim, and door components. This protective layer serves as a barrier against moisture, UV exposure, and wood decay, prolonging the shed's lifespan and maintaining its pristine appearance.
2. Door and Window Installation
If your shed design incorporates doors and windows, proceed with the installation of these components. Ensure that the doors are equipped with sturdy hinges, secure latches, and weather-stripping to prevent drafts and moisture infiltration. Similarly, install windows with durable frames and weather-resistant seals to promote ventilation while safeguarding the shed's interior.
3. Interior Organization and Storage Solutions
Maximize the shed's functionality by implementing interior storage solutions such as shelves, hooks, and racks to organize firewood, tools, and accessories. Customizing the interior layout to accommodate varying storage needs enhances the shed's practicality and streamlines access to firewood and related supplies.
4. Personalized Details and Decor
Infuse the shed with personalized details and decorative elements that reflect your unique style and preferences. Consider adding decorative trim, custom signage, or embellishments that complement the shed's surroundings and contribute to its visual appeal. Embracing creativity in the finishing touches imparts a sense of individuality to the shed.
5. Landscaping and Integration
Integrate the firewood shed seamlessly into its surroundings by incorporating landscaping elements such as pathways, plantings, or exterior lighting. Thoughtfully blending the shed with its environment enhances the overall aesthetic of the outdoor space while creating a cohesive and inviting atmosphere.
6. Maintenance and Upkeep
Establish a maintenance routine to preserve the shed's condition and functionality over time. Regular inspections, cleaning, and minor repairs contribute to the longevity of the structure, ensuring that it continues to serve as a reliable and visually appealing storage solution for your firewood.
By meticulously attending to the finishing touches, you not only enhance the practicality and durability of the pallet firewood shed but also infuse it with personalized character and charm. The culmination of these details transforms the shed into a functional, visually appealing, and seamlessly integrated addition to your outdoor space.
Conclusion
In conclusion, the journey of constructing a pallet firewood shed embodies the fusion of practicality, creativity, and sustainable craftsmanship. From the initial planning and preparation to the meticulous execution of each construction phase, the process of building a functional and stylish storage solution for firewood is a testament to the artistry and ingenuity of DIY woodworking enthusiasts.
As the final hammer strikes and the finishing touches are lovingly applied, the pallet firewood shed stands as more than a mere structure; it embodies the embodiment of resourcefulness and resilience. It represents the transformation of reclaimed pallets and raw materials into a purposeful sanctuary for firewood, sheltering it from the elements while adding a touch of rustic elegance to the outdoor landscape.
The completion of the firewood shed marks not just the end of a construction project, but the beginning of a new chapter in the outdoor space. It becomes a focal point that harmonizes with its surroundings, offering both functionality and visual appeal. The shed's presence is a testament to the dedication and craftsmanship poured into its creation, serving as a tangible symbol of the DIY spirit and the ability to repurpose materials into something of value.
Furthermore, the process of building a pallet firewood shed fosters a deeper connection with the outdoor environment, encouraging a hands-on approach to enhancing the living space. It instills a sense of pride and accomplishment, as each nail driven and board secured represents a step towards self-sufficiency and sustainability.
As the firewood shed takes its place in the outdoor setting, it becomes a canvas for personalization and creativity. Whether adorned with decorative trim, integrated with landscaping elements, or tailored to individual preferences, the shed becomes an extension of the creator's vision and a reflection of their unique style.
Ultimately, the completion of the pallet firewood shed signifies not just the construction of a functional storage space, but the cultivation of a tangible legacy of craftsmanship and creativity. It stands as a testament to the transformative power of DIY endeavors, inspiring a sense of accomplishment and pride in the creation of a practical, stylish, and sustainable outdoor structure.