
Home>Create & Decorate>DIY & Crafts>How To Build A Wood Stove Hearth
DIY & Crafts
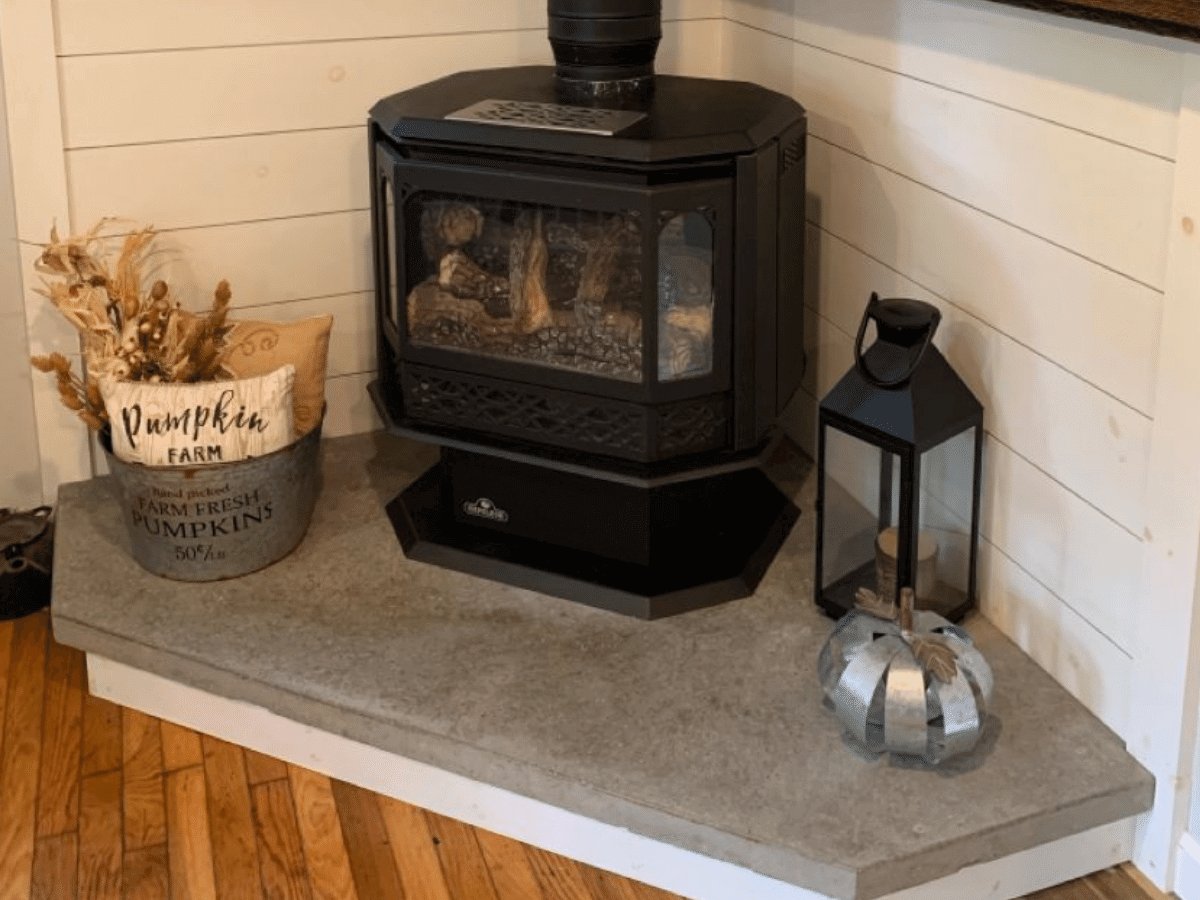
How To Build A Wood Stove Hearth
Published: May 17, 2024

Senior Editor in Create & Decorate, Kathryn combines traditional craftsmanship with contemporary trends. Her background in textile design and commitment to sustainable crafts inspire both content and community.
Learn how to create a DIY wood stove hearth with our step-by-step guide. Get creative with your crafts and build a beautiful and functional addition to your home.
(Many of the links in this article redirect to a specific reviewed product. Your purchase of these products through affiliate links helps to generate commission for Twigandthistle.com, at no extra cost. Learn more)
Introduction
So, you've decided to install a wood stove in your home. Congratulations! A wood stove can be a fantastic addition to any household, providing warmth, ambiance, and even a means of cooking in some cases. However, before you can start enjoying the benefits of your new wood stove, you'll need to build a proper wood stove hearth. This essential component not only enhances the aesthetic appeal of your wood stove but also ensures safety by protecting your floors from the intense heat. In this guide, we'll walk you through the step-by-step process of building a wood stove hearth, from choosing the right location to adding the finishing touches. Let's get started!
Choosing the Right Location
When it comes to building a wood stove hearth, selecting the right location is crucial. Here are some key factors to consider:
-
Proximity to the Wood Stove: The hearth should be positioned directly under the wood stove to ensure that it effectively shields the surrounding floor from heat and embers.
-
Clearance Requirements: Check the manufacturer's guidelines for the required clearance around the wood stove. Ensure that the chosen location allows for the proper clearance to combustible materials.
-
Traffic Flow: Consider the traffic flow in the room. The hearth should be placed in a location that allows for easy access to the wood stove while also ensuring that it doesn't obstruct the natural flow of movement within the space.
-
Aesthetics: The location of the hearth should complement the overall design of the room. It should be visually appealing and harmonize with the surrounding decor.
-
Floor Protection: Choose a location where the hearth can effectively protect the floor from any stray embers or heat generated by the wood stove.
By carefully considering these factors, you can select the optimal location for your wood stove hearth, ensuring both functionality and visual appeal.
Selecting the Materials
Selecting the right materials for your wood stove hearth is essential to ensure its durability, safety, and aesthetic appeal. Here are the key materials you'll need:
-
Fireproof Tiles: Choose fireproof tiles that can withstand high temperatures. Ceramic, porcelain, or natural stone tiles are popular choices for wood stove hearths due to their heat-resistant properties.
-
Plywood or Cement Board: A sturdy base is crucial for the hearth. Use plywood or cement board as the foundation for the tiles. Ensure that the chosen material is non-combustible and can support the weight of the tiles.
-
Adhesive and Grout: Select high-temperature adhesive and grout specifically designed for use with fireproof tiles. These products will ensure a secure bond between the tiles and provide a heat-resistant finish.
-
Edge Trim: Consider using metal edge trim to provide a clean and finished look to the hearth. The edge trim also adds a layer of protection to the exposed edges of the tiles.
-
Decorative Accents (Optional): If desired, you can incorporate decorative accents such as mosaic tiles or border tiles to enhance the visual appeal of the hearth.
-
Protective Sealant: Once the tiles are in place, apply a protective sealant to enhance the durability and longevity of the hearth. The sealant will also make the surface easier to clean and maintain.
By carefully selecting high-quality, fireproof materials, you can ensure that your wood stove hearth not only meets safety standards but also adds a touch of elegance to your living space.
Building the Foundation
Building a solid foundation is crucial for the stability and safety of your wood stove hearth. Here's a detailed guide to constructing the foundation:
-
Prepare the Subfloor: Start by ensuring that the subfloor is clean, level, and free of any debris. If necessary, use a self-leveling compound to create a smooth and even surface for the foundation.
-
Measure and Mark: Using a tape measure and chalk line, carefully measure and mark the dimensions of the hearth on the subfloor. This will serve as a guide for the foundation construction.
-
Cut the Base Material: Cut the plywood or cement board to the dimensions outlined on the subfloor. Ensure that the base material fits snugly within the marked area, providing a sturdy foundation for the tiles.
-
Secure the Base: Place the cut base material within the marked area and secure it to the subfloor using screws or adhesive, depending on the type of material used. This step is essential for preventing any shifting or movement once the tiles are installed.
-
Apply Adhesive: Once the base is secured, apply a layer of high-temperature adhesive evenly across the surface. This will create a strong bond between the base material and the fireproof tiles.
-
Lay the Tiles: Carefully lay the fireproof tiles on top of the adhesive, ensuring a uniform and level arrangement. Use tile spacers to maintain consistent spacing between the tiles for a professional finish.
-
Secure the Tiles: Press the tiles firmly into the adhesive, ensuring that they are level and securely bonded to the base material. Wipe away any excess adhesive that may seep through the tile joints.
-
Add Edge Trim: If desired, install metal edge trim around the perimeter of the hearth to provide a clean and polished look while offering protection to the exposed edges of the tiles.
By following these steps, you can establish a sturdy and level foundation for your wood stove hearth, setting the stage for the construction of the remaining components.
Constructing the Hearth
Now that the foundation is in place, it's time to focus on the construction of the hearth itself. This involves building the structure that surrounds the wood stove and provides a safe and visually appealing platform. Here's a detailed guide to constructing the hearth:
-
Frame the Hearth: Begin by framing the perimeter of the hearth using 2×4 or 2×6 lumber, depending on the desired height. Use a saw to cut the lumber to the appropriate lengths and assemble the frame according to the dimensions of the hearth.
-
Secure the Frame: Once the frame is assembled, secure it to the subfloor using wood screws or anchors, ensuring that it is firmly anchored and level. This frame will serve as the support structure for the hearth.
-
Insulate the Surrounding Area: To provide additional heat protection, consider insulating the space between the frame and the walls or surrounding structures. Use fireproof insulation to minimize heat transfer and enhance the safety of the hearth.
-
Cover with Backer Board: Apply cement backer board to the exterior of the frame, securing it with screws. This backer board will serve as the base for the finishing materials and provide a fire-resistant surface for the hearth.
-
Choose the Finishing Material: Select the finishing material for the exterior of the hearth. This can include stone, brick, tile, or other non-combustible materials. Ensure that the chosen material complements the overall design of the room and meets safety requirements.
-
Apply the Finishing Material: Using mortar or adhesive, apply the chosen finishing material to the backer board, covering the entire exterior of the hearth. Take care to create a uniform and visually appealing finish, paying attention to the placement and alignment of the materials.
-
Add Decorative Accents (Optional): If desired, incorporate decorative accents such as trim pieces, mantels, or custom designs to enhance the aesthetic appeal of the hearth. These accents can add a personal touch and elevate the overall look of the wood stove installation.
-
Seal and Finish: Once the finishing material is in place, apply any necessary sealant or finish to protect the surface and enhance its durability. This step will also make the hearth easier to clean and maintain over time.
By following these steps, you can construct a sturdy and visually appealing hearth that complements your wood stove while ensuring safety and functionality. The completed hearth will serve as a focal point in the room, adding warmth and character to your living space.
Finishing Touches
The finishing touches are the final details that elevate the wood stove hearth from functional to fabulous. Here's how to add those all-important finishing touches to complete the look:
-
Clean and Inspect: Before adding the finishing touches, ensure that the entire hearth is clean and free of any debris. Inspect the hearth for any loose tiles, grout, or finishing materials that may require attention.
-
Apply Grout and Sealant: If the hearth features tiled surfaces, apply grout to fill in the gaps between the tiles. Choose a grout color that complements the tiles and enhances the overall aesthetic. Once the grout has dried, apply a high-quality sealant to protect the grout and tiles from dirt, moisture, and stains.
-
Install a Mantel (Optional): For a traditional and decorative touch, consider installing a mantel above the wood stove. A wooden mantel can provide a charming focal point and offer a convenient display space for decorative items, family photos, or seasonal accents.
-
Accessorize: Add personality to the hearth by incorporating accessories such as a fireplace tool set, decorative firewood holder, or a striking piece of artwork. These accessories not only enhance the visual appeal of the hearth but also contribute to the overall ambiance of the room.
-
Safety Features: Consider adding safety features such as a fire screen or spark guard to prevent embers from escaping the wood stove. These safety additions are essential for protecting both your home and your loved ones.
-
Lighting: Install subtle lighting around the hearth to create a warm and inviting atmosphere. LED strip lights or wall sconces can accentuate the hearth's features and provide a cozy glow during the evening hours.
-
Final Inspection: Once the finishing touches are in place, perform a final inspection of the entire wood stove hearth. Check for any overlooked details, ensure that all components are securely in place, and make any necessary adjustments to achieve the desired look and functionality.
By adding these finishing touches, you can transform your wood stove hearth into a stunning focal point that enhances the overall appeal of your living space. These details not only contribute to the aesthetic charm of the hearth but also ensure that it remains a safe and functional element of your home.
Conclusion
In conclusion, building a wood stove hearth is a rewarding DIY project that not only enhances the safety of your home but also adds a touch of charm and warmth to your living space. By carefully selecting the location, materials, and finishing touches, you can create a hearth that not only meets safety standards but also complements the overall design of the room. Whether you opt for a traditional, rustic, or modern aesthetic, a well-constructed wood stove hearth can become the centerpiece of your home, providing a cozy gathering spot for family and friends. With the step-by-step guidance provided in this article, you are well-equipped to embark on this exciting endeavor and create a wood stove hearth that brings both practicality and beauty to your home.