Home>Create & Decorate>DIY & Crafts>DIY Fireplace Hearth: Step-by-Step Guide To Building A Cozy Addition

DIY & Crafts
DIY Fireplace Hearth: Step-by-Step Guide To Building A Cozy Addition
Published: May 31, 2024

Content Creator specializing in woodworking and interior transformations. Caegan's guides motivate readers to undertake their own projects, while his custom furniture adds a personal touch.
Learn how to build a cozy DIY fireplace hearth with our step-by-step guide. Perfect for DIY & Crafts enthusiasts looking to add warmth and charm to their home.
(Many of the links in this article redirect to a specific reviewed product. Your purchase of these products through affiliate links helps to generate commission for Twigandthistle.com, at no extra cost. Learn more)
Introduction
Are you looking to add a touch of warmth and charm to your living space? Building your own fireplace hearth can be a rewarding and cozy addition to your home. Whether you're a seasoned DIY enthusiast or a beginner looking for a new project, creating a fireplace hearth can be a fulfilling and practical endeavor. In this step-by-step guide, we will walk you through the process of building a fireplace hearth, from planning and gathering materials to adding the finishing touches. So, roll up your sleeves and get ready to transform your space into a snug and inviting retreat with your very own DIY fireplace hearth.
Read more: How To Build A Hearth
Planning Your DIY Fireplace Hearth
Before diving into the construction process, it's crucial to start with a well-thought-out plan for your DIY fireplace hearth. Here are the essential steps to consider:
-
Design Inspiration: Begin by gathering inspiration for your fireplace hearth design. Browse through home improvement magazines, websites, and social media platforms to gather ideas that resonate with your style and preferences.
-
Measurement and Layout: Measure the space where you intend to build the hearth. Consider the dimensions of your fireplace and the surrounding area to ensure that the hearth will fit seamlessly into the room.
-
Regulatory Compliance: Check local building codes and regulations to ensure compliance with safety and construction standards. This step is crucial to avoid any legal or safety issues down the line.
-
Budgeting: Determine your budget for the project, including materials, tools, and any professional assistance you may require. Having a clear budget in mind will help you make informed decisions throughout the construction process.
-
Material Selection: Research and select the materials you will need for the hearth, such as bricks, stones, or tiles. Consider the aesthetic appeal, durability, and heat resistance of the materials to ensure they are suitable for a fireplace hearth.
-
Sketch or Blueprint: Create a rough sketch or blueprint of your fireplace hearth design. This visual representation will serve as a guide during the construction phase and help you communicate your vision if you seek assistance from professionals or knowledgeable acquaintances.
By meticulously planning each aspect of your DIY fireplace hearth, you set the stage for a successful and enjoyable construction journey. With a clear vision and strategy in place, you can proceed to the next steps with confidence and purpose.
Gathering Materials and Tools
When embarking on your DIY fireplace hearth project, gathering the right materials and tools is essential for a smooth and efficient construction process. Here's a comprehensive list to help you prepare for this phase:
Materials
-
Bricks, Stones, or Tiles: Depending on your design preference, acquire the necessary quantity of bricks, stones, or tiles to construct the hearth. Consider the color, texture, and heat resistance of the materials.
-
Mortar: Choose high-quality mortar suitable for bonding the bricks or stones together. Ensure that the mortar is designed for use in fireplace applications to withstand high temperatures.
-
Concrete Mix: If you are building a concrete foundation for the hearth, purchase the appropriate type of concrete mix. Consider factors such as strength, workability, and curing time.
-
Reinforcement Materials: For structural integrity, you may need reinforcement materials such as rebar or wire mesh, especially if you are constructing a concrete base.
-
Firebrick and Fireproof Backer Board: If your design includes a firebox or interior lining, invest in firebrick and fireproof backer board to protect the surrounding materials from heat.
-
Grout and Sealant: Select grout and sealant suitable for the chosen materials to ensure a secure and polished finish.
-
Plywood or MDF: If you plan to build a wooden frame for the hearth, acquire plywood or medium-density fiberboard (MDF) for the structure.
-
Primer and Paint: If you intend to paint or finish the hearth, purchase primer and heat-resistant paint in your preferred color.
Tools
-
Masonry Trowel: A masonry trowel is essential for applying mortar and grout during the construction of the hearth.
-
Level: Ensure precise and even construction by using a level to check the alignment of the materials.
-
Measuring Tape and Square: Accurate measurements and angles are crucial, making a measuring tape and square indispensable tools.
-
Safety Gear: Prioritize safety by wearing protective gear, including gloves, safety goggles, and a dust mask.
-
Circular Saw or Tile Cutter: Depending on the materials used, a circular saw or tile cutter may be necessary for cutting bricks, stones, or tiles to the required dimensions.
-
Drill and Screws: If you are building a wooden frame, a drill and screws will be essential for assembly.
-
Mixing Tools: Have a mixing paddle or hoe for blending mortar, concrete, or grout as per the manufacturer's instructions.
-
Brushes and Sponges: Keep brushes and sponges handy for cleaning and applying sealant or paint.
By ensuring that you have all the required materials and tools at your disposal, you can proceed with confidence, knowing that you are well-equipped to bring your DIY fireplace hearth to life.
Read more: How to Build a Cat Window Box
Preparing the Area for Construction
Before commencing the construction of your DIY fireplace hearth, it's crucial to prepare the designated area to ensure a smooth and organized building process. Here's a detailed guide to preparing the area for construction:
-
Clear the Space: Begin by clearing the area where the hearth will be constructed. Remove any furniture, rugs, or decor items from the vicinity to create a spacious and unobstructed work zone.
-
Protect Surrounding Surfaces: If the construction area adjoins walls, floors, or other surfaces, take measures to protect them from potential damage. Cover adjacent walls and flooring with drop cloths or protective sheets to prevent debris, mortar, or paint from causing unintended harm.
-
Floor Protection: Lay down a sturdy and durable floor protection material, such as thick cardboard or plywood, to safeguard the floor from scratches, spills, and heavy equipment during the construction process.
-
Ventilation: Ensure adequate ventilation in the construction area, especially if you will be working with materials such as mortar, grout, or paint that emit fumes. Open windows and use fans to promote air circulation and maintain a comfortable working environment.
-
Temporary Barrier: If necessary, create a temporary barrier or barricade around the construction area to prevent unauthorized access, particularly if you have young children or pets in the household. Safety should always be a priority during the construction phase.
-
Organize Tools and Materials: Arrange your tools, materials, and equipment in a systematic and accessible manner. Having a well-organized workspace will streamline the construction process and minimize the time spent searching for specific items.
-
Utility Checks: Before initiating any structural work, ensure that there are no hidden utility lines or electrical components within the construction area. Use a stud finder and consult building plans or blueprints, if available, to avoid accidental damage to utilities.
-
Temporary Storage: If the construction process will span multiple days, designate a secure and dry area for the temporary storage of materials, tools, and equipment. This will prevent clutter in the construction zone and reduce the risk of accidents.
By meticulously preparing the construction area, you set the stage for a focused, efficient, and safe building process. Taking the time to organize and safeguard the workspace will contribute to a successful and satisfying DIY fireplace hearth project.
Building the Foundation for the Hearth
Building a sturdy and level foundation is a critical step in constructing a fireplace hearth that is not only visually appealing but also structurally sound. The foundation provides the base on which the hearth structure will rest, ensuring stability and durability. Here's a detailed guide to building the foundation for your DIY fireplace hearth:
-
Assess the Subfloor: Begin by assessing the subfloor where the hearth will be installed. If the subfloor is made of wood, ensure that it is structurally sound and capable of supporting the weight of the hearth. For concrete subfloors, check for any cracks or uneven surfaces that may need to be addressed before proceeding.
-
Mark the Foundation Area: Use a pencil or chalk to mark the outline of the foundation on the subfloor. The dimensions of the foundation should align with the design and size of the hearth, allowing for an adequate and proportional base.
-
Prepare the Subfloor: Clear the marked area of any debris, dust, or protruding nails. It's essential to create a clean and level surface for the foundation construction. If the subfloor requires leveling, use a self-leveling compound to achieve a smooth and even base.
-
Build the Wooden Frame (If Applicable): If your design calls for a wooden frame as part of the foundation, assemble the frame using plywood or medium-density fiberboard (MDF). Ensure that the frame is securely anchored to the subfloor, providing a stable structure for the hearth.
-
Pouring Concrete: For a concrete foundation, mix the concrete according to the manufacturer's instructions. Carefully pour the concrete into the marked foundation area, ensuring that it fills the space evenly. Use a trowel to level the surface and eliminate air pockets.
-
Reinforcement: If the foundation is constructed using concrete, consider reinforcing it with rebar or wire mesh for added strength. This step is particularly important for larger or heavier hearth designs that require additional support.
-
Allow for Curing: After pouring the concrete, allow sufficient time for the foundation to cure and harden. Follow the recommended curing time provided by the concrete manufacturer to ensure that the foundation achieves its maximum strength.
-
Check for Levelness: Once the foundation has cured, use a level to ensure that it is perfectly level and aligned with the surrounding floor. Adjust as needed to achieve a uniform and balanced foundation.
By meticulously following these steps, you can establish a solid and reliable foundation for your fireplace hearth, setting the stage for the subsequent construction phases with confidence and precision.
Constructing the Hearth Structure
With the foundation in place, the next crucial phase of building your DIY fireplace hearth involves constructing the actual structure that will define the hearth's appearance and functionality. Here's a detailed guide to help you navigate through this pivotal stage of the construction process:
1. Laying the Base Layer
- Begin by laying the base layer of bricks, stones, or tiles, depending on your chosen material. Apply a generous amount of mortar to the foundation, using a trowel to create an even and consistent layer.
- Carefully position each brick, stone, or tile, pressing it firmly into the mortar to ensure a secure bond. Use a level to verify that the base layer is perfectly horizontal and aligned with the surrounding floor.
2. Building the Sides and Back
- As you progress upward from the base layer, construct the sides and back of the hearth structure using the same method of applying mortar and positioning the chosen materials.
- Pay close attention to the alignment and spacing of the bricks, stones, or tiles to maintain a uniform and visually appealing structure. Use spacers if necessary to achieve consistent gaps between the materials.
3. Creating Support for Firebox (If Applicable)
- If your design includes a firebox or interior space for a fireplace insert, ensure that the structure provides adequate support for this component. Use fireproof backer board to line the interior of the firebox area, providing a heat-resistant surface.
4. Incorporating Design Elements
- Integrate design elements such as decorative patterns, contrasting colors, or textured surfaces to enhance the visual appeal of the hearth structure. Be creative in arranging the materials to achieve a unique and personalized look.
5. Applying Grout and Sealant
- Once the structure is fully assembled, fill the gaps between the bricks, stones, or tiles with grout, using a grout float to press the grout firmly into the spaces. Wipe away excess grout with a damp sponge, leaving behind clean and polished joints.
- After the grout has cured, apply a suitable sealant to the entire hearth structure, protecting it from moisture and enhancing its durability. Choose a sealant that is compatible with the materials used in the construction.
Read more: How to Build a Pergola with Roof
6. Final Inspection and Touch-Ups
- Conduct a thorough inspection of the completed hearth structure, checking for any loose materials, uneven surfaces, or imperfections. Make any necessary adjustments or touch-ups to ensure a flawless finish.
- Step back and admire your handiwork, appreciating the transformation of the space with the addition of the beautifully constructed fireplace hearth.
By following these detailed steps, you can successfully construct the hearth structure, infusing your living space with warmth, character, and a touch of timeless elegance.
Adding Finishing Touches
After completing the construction of the hearth structure, it's time to add the finishing touches that will elevate the visual appeal and functionality of your DIY fireplace hearth. Here's a comprehensive guide to the final steps of the construction process:
1. Hearth Extension
If your design includes a hearth extension, ensure that it seamlessly integrates with the main hearth structure. The extension provides additional space in front of the fireplace, serving as a decorative and practical feature. Use the same materials and construction techniques as the main hearth to maintain consistency and cohesiveness.
2. Mantel Installation
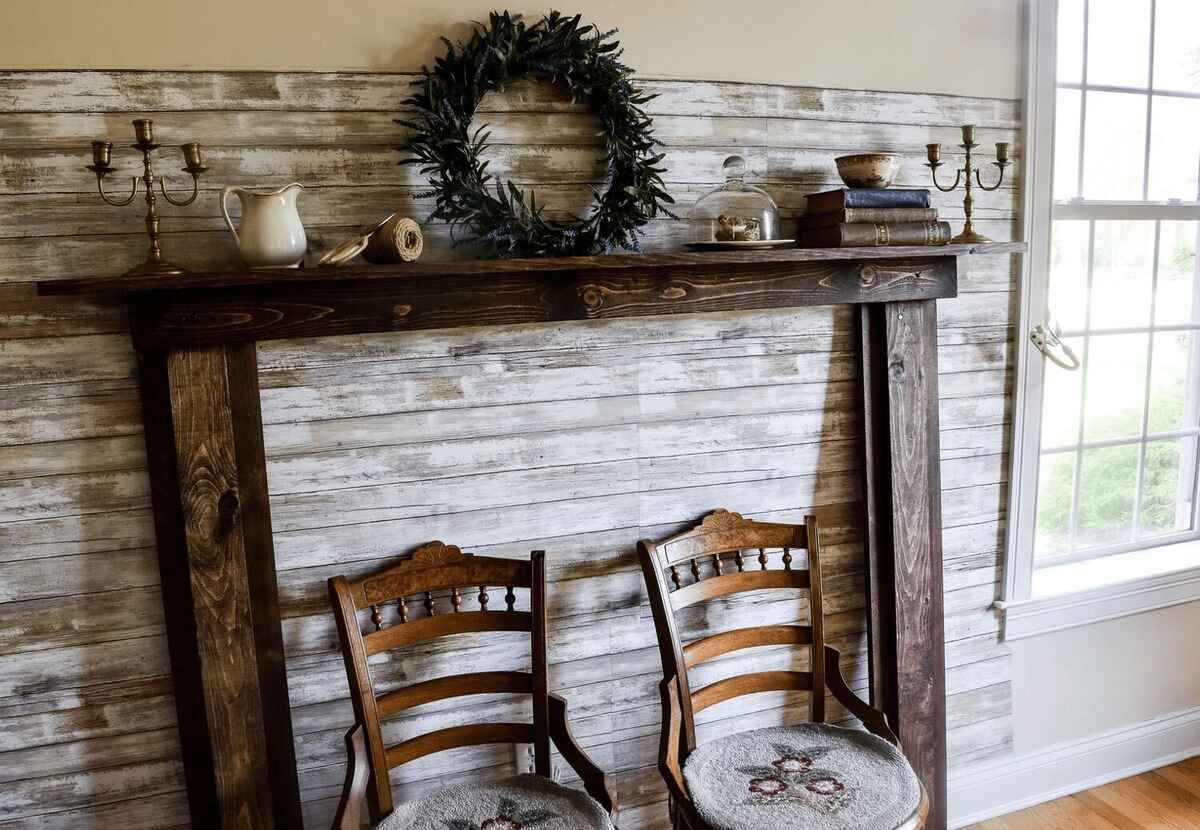
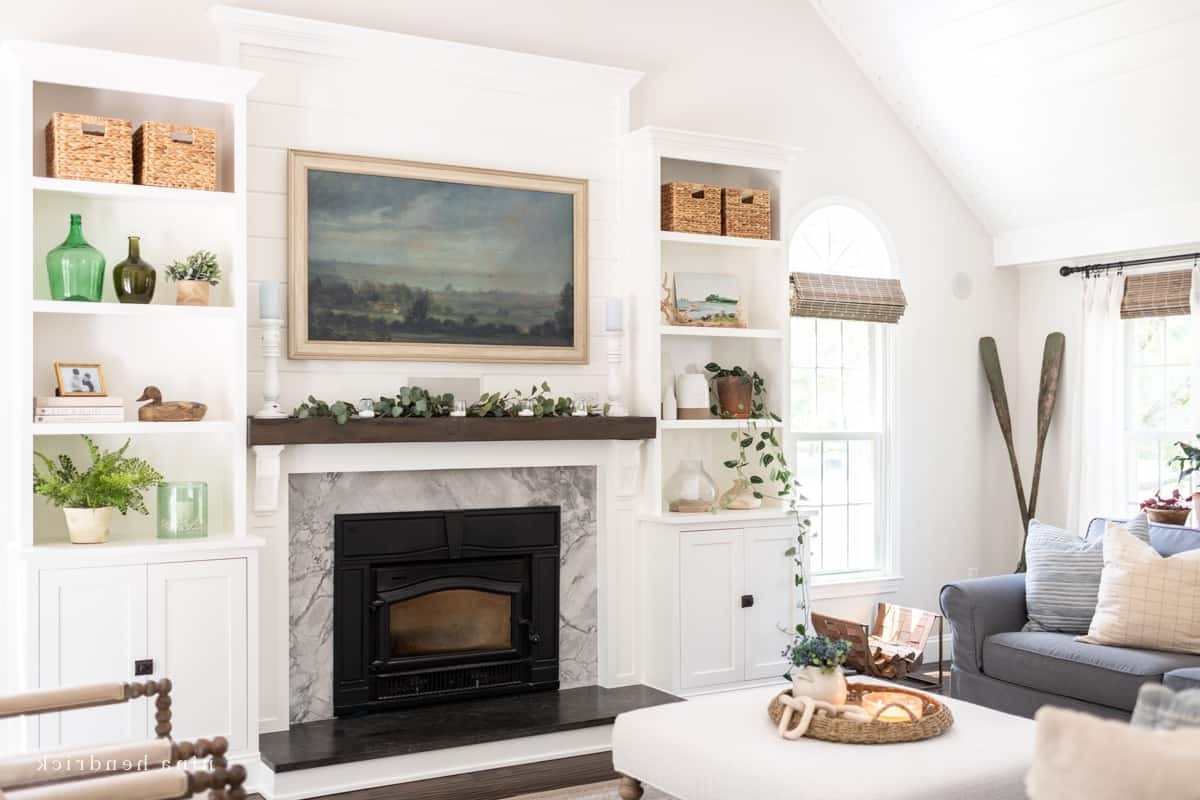
Consider installing a mantel above the fireplace hearth to create a focal point and display area. Choose a mantel design that complements the overall aesthetic of the room. Whether it's a sleek and modern shelf or a traditional wooden mantel, the addition of a mantel can enhance the charm and functionality of the fireplace.
Read more: How To Build A Wood Stove Hearth
3. Decorative Accents
Personalize the hearth area with decorative accents such as candles, vases, or artwork. These elements add character and warmth to the space, creating a cozy and inviting ambiance. Be mindful of the scale and arrangement of the decorative pieces to achieve a harmonious and visually appealing composition.
4. Fireproofing Measures
Prioritize safety by implementing fireproofing measures around the hearth. If the hearth structure includes combustible materials such as wood or fabric, ensure that they are positioned at a safe distance from the fireplace opening. Additionally, consider installing a spark guard or screen to contain embers and prevent accidental fires.
5. Hearth Seating
Integrate seating options near the fireplace hearth to create a comfortable and intimate gathering space. Whether it's a cozy armchair, a cushioned bench, or built-in seating, the addition of seating encourages relaxation and socialization around the warmth of the fire.
6. Lighting Enhancement
Illuminate the hearth area with strategic lighting to accentuate its features and create a captivating ambiance. Consider installing wall sconces, recessed lighting, or a statement chandelier to highlight the hearth and its surroundings. Adjustable lighting allows for versatility, enabling you to set the desired mood for different occasions.
Read more: How To Build A Fireplace
7. Seasonal Decor
Embrace the changing seasons by incorporating seasonal decor elements around the fireplace hearth. From festive holiday decorations to seasonal foliage and accents, infusing the hearth area with seasonal charm adds a touch of whimsy and joy to your living space throughout the year.
8. Routine Maintenance
Establish a routine maintenance schedule to keep the fireplace hearth in optimal condition. Regularly clean the hearth, inspect the mortar and grout for any signs of wear, and address any maintenance needs promptly. By caring for the hearth, you ensure its longevity and continued enjoyment.
By attending to these finishing touches, you can transform your DIY fireplace hearth into a captivating focal point that enriches the ambiance and functionality of your living space. Each detail contributes to the overall allure and comfort of the hearth, creating a space where cherished memories are made and cherished.
Conclusion
In conclusion, the journey of building a DIY fireplace hearth is a fulfilling and transformative experience that adds warmth, character, and charm to your home. From the initial planning and material gathering to the meticulous construction of the hearth structure and the thoughtful addition of finishing touches, every step contributes to the creation of a cozy and inviting space. As you bask in the glow of the crackling fire and relish the comfort of your newly constructed hearth, you can take pride in the craftsmanship and dedication that went into bringing this timeless addition to life. Whether it's a quiet evening by the fire or a joyous gathering with loved ones, the DIY fireplace hearth stands as a testament to your creativity, craftsmanship, and the enduring allure of a well-crafted home.

