
Home>Create & Decorate>DIY & Crafts>How To Build A She Shed On A Budget
DIY & Crafts
How To Build A She Shed On A Budget
Published: February 28, 2024

Senior Editor in Create & Decorate, Kathryn combines traditional craftsmanship with contemporary trends. Her background in textile design and commitment to sustainable crafts inspire both content and community.
Discover budget-friendly DIY tips and tricks for building your own she shed. Get creative with DIY & Crafts to create your perfect retreat.
(Many of the links in this article redirect to a specific reviewed product. Your purchase of these products through affiliate links helps to generate commission for Twigandthistle.com, at no extra cost. Learn more)
Introduction
Welcome to the world of she sheds, where creativity and craftsmanship come together to create a cozy retreat just for you. Whether you're a seasoned DIY enthusiast or a novice looking to embark on a new project, building a she shed can be a fulfilling and rewarding endeavor. This guide will walk you through the step-by-step process of constructing your own she shed on a budget, allowing you to unleash your creativity and design a space that reflects your unique style and personality.
A she shed is more than just a backyard structure; it's a sanctuary where you can escape the hustle and bustle of daily life and indulge in activities that bring you joy. Whether you envision a tranquil reading nook, a crafting haven, or a peaceful garden retreat, your she shed can be tailored to suit your specific needs and interests. With careful planning and resourcefulness, you can transform a humble outdoor space into a charming and functional retreat that complements your lifestyle.
Throughout this guide, you'll discover valuable tips and techniques for selecting the ideal location, designing a functional and aesthetically pleasing she shed, and acquiring the necessary materials and tools without breaking the bank. From laying the foundation to adding the finishing touches, each step of the construction process will be demystified, empowering you to bring your she shed vision to life.
Whether you're seeking a tranquil space to unwind, a creative hub to pursue your hobbies, or simply a private sanctuary to call your own, the journey of building a she shed is an opportunity to unleash your imagination and create a space that resonates with your individuality. So, roll up your sleeves, gather your creative spirit, and let's embark on this exciting journey of building a she shed that reflects your unique style and provides a haven of relaxation and inspiration.
Step 1: Choosing the Right Location
Selecting the perfect location for your she shed is a crucial first step in the construction process. The ideal spot should offer a balance of tranquility, accessibility, and functionality. Consider the following factors when choosing the right location for your she shed:
-
Scenic Views: Look for a location that provides picturesque views of your garden, landscape, or any natural surroundings. A serene and visually appealing setting can enhance the ambiance of your she shed, creating a peaceful retreat where you can unwind and find inspiration.
-
Privacy: Ensure that the chosen location offers a sense of seclusion and privacy. Whether nestled among trees or positioned in a secluded corner of your yard, a private setting will allow you to escape from distractions and fully immerse yourself in the tranquility of your she shed.
-
Accessibility: While privacy is important, it's also essential to consider the accessibility of the location. Ensure that your she shed is easily accessible from your home, allowing you to seamlessly transition between indoor and outdoor spaces. Additionally, consider factors such as proximity to utilities and ease of transporting materials to the construction site.
-
Natural Light: Opt for a location that receives ample natural light throughout the day. Sunlight not only creates a bright and inviting atmosphere but also reduces the need for artificial lighting during daylight hours, contributing to energy efficiency.
-
Functional Considerations: Evaluate the practicality of the location in relation to your intended use of the she shed. For instance, if you plan to use it as a crafting or hobby space, consider a location with sufficient space for outdoor activities or gardening.
-
Regulations and Permits: Check local zoning regulations and obtain any necessary permits before finalizing the location. Compliance with local building codes and regulations is essential to ensure a smooth and hassle-free construction process.
By carefully considering these factors, you can select a location that aligns with your vision for the she shed and sets the stage for a harmonious blend of functionality and aesthetics. Once you've chosen the perfect spot, you can move on to the next exciting phase of designing your she shed to suit your unique style and preferences.
Step 2: Designing Your She Shed
Designing your she shed is an exhilarating phase that allows you to unleash your creativity and personalize the space according to your unique style and preferences. Whether you envision a cozy reading nook, a vibrant crafting haven, or a tranquil garden retreat, the design phase sets the stage for bringing your she shed vision to life.
Personalized Layout and Functionality
Begin by envisioning how you intend to use the she shed. Consider the layout and functionality that align with your specific needs and interests. If you plan to use the space for crafting or hobbies, allocate areas for work surfaces, storage, and display. For a reading nook, focus on creating a comfortable and inviting seating area with ample natural light. Tailoring the layout to your intended activities ensures that the she shed becomes a functional and inspiring space.
Aesthetic Elements and Decor
Infuse your personal style into the design by selecting aesthetic elements and decor that resonate with your taste. Whether it's a rustic, bohemian, modern, or eclectic theme, the decor sets the ambiance of the she shed. Consider incorporating elements such as cozy rugs, decorative lighting, vibrant cushions, and wall art to add character and charm to the space. Embrace your creativity and experiment with colors, textures, and patterns to create a visually captivating environment.
Practical Considerations
Incorporate practical elements into the design to enhance the comfort and functionality of the she shed. Ensure adequate insulation and ventilation to regulate temperature and air quality. Additionally, consider the installation of electrical outlets and lighting fixtures to accommodate various activities. By addressing practical considerations during the design phase, you can create a space that is not only aesthetically pleasing but also comfortable and conducive to your chosen activities.
Sustainable and Upcycled Materials
Embrace sustainability by incorporating eco-friendly and upcycled materials into the design. From reclaimed wood for flooring and furniture to repurposed windows and doors, sustainable materials add a unique touch to the she shed while minimizing environmental impact. Not only does this approach contribute to a more eco-conscious construction, but it also infuses the space with character and individuality.
Reflecting Your Personality
Above all, let the design of the she shed reflect your personality and passions. Whether it's through cherished mementos, handmade decor, or personalized touches, infusing the space with elements that hold sentimental value creates a truly personal retreat. By incorporating elements that resonate with your identity and interests, the she shed becomes a reflection of your individuality and a place where you can feel truly at home.
As you immerse yourself in the design phase, let your imagination run wild and explore possibilities that align with your vision for the she shed. With a thoughtful and personalized design, your she shed will evolve into a captivating and functional retreat that embodies your unique style and provides a haven of relaxation and inspiration.
Step 3: Gathering Materials and Tools
Gathering the necessary materials and tools is a pivotal step in the construction of your she shed. By carefully selecting high-quality materials and ensuring that you have the essential tools at your disposal, you can streamline the building process and achieve a professional and durable result. Here's a comprehensive guide to help you navigate the process of gathering materials and tools for your she shed project.
Materials
-
Lumber: The backbone of your she shed, lumber will be used for framing, flooring, and various structural elements. Opt for pressure-treated or weather-resistant lumber to ensure longevity and durability.
-
Exterior Siding: Choose from a variety of siding options such as wood, vinyl, or composite materials. Consider the aesthetic appeal, maintenance requirements, and weather resistance when selecting the siding for your she shed.
-
Roofing Materials: Select roofing materials that offer both aesthetic appeal and weather protection. Options include asphalt shingles, metal roofing, or cedar shakes, each with its unique characteristics and visual impact.
-
Insulation: Ensure year-round comfort by investing in high-quality insulation materials. From fiberglass batts to spray foam insulation, adequate insulation is essential for regulating temperature and energy efficiency.
-
Doors and Windows: Opt for energy-efficient doors and windows that complement the design of your she shed while providing ample natural light and ventilation.
-
Hardware and Fasteners: Stock up on nails, screws, bolts, and other fasteners required for assembling the structural components and securing the she shed's elements.
-
Interior Finishes: Plan for interior finishes such as drywall, paint, trim, and flooring materials to create a polished and inviting interior space.
-
Electrical and Lighting: If you plan to incorporate electrical components, ensure that you have the necessary wiring, outlets, switches, and lighting fixtures to accommodate your electrical needs.
Tools
-
Basic Hand Tools: A comprehensive set of hand tools including hammers, screwdrivers, wrenches, and pliers will be indispensable throughout the construction process.
-
Power Tools: Invest in power tools such as a circular saw, drill/driver, jigsaw, and a nail gun to expedite the cutting, drilling, and fastening tasks.
-
Level and Measuring Tools: Accurate measurements and level surfaces are crucial for a structurally sound she shed. Equip yourself with a level, tape measure, and carpenter's square for precision.
-
Safety Gear: Prioritize safety by wearing protective gear including gloves, safety glasses, and a dust mask to safeguard yourself during construction.
-
Ladder or Scaffolding: Depending on the height of your she shed, a sturdy ladder or scaffolding will facilitate safe access during construction and installation of roofing and siding.
By meticulously procuring the required materials and tools, you can set the stage for a smooth and efficient construction process, bringing you one step closer to realizing your dream she shed. With the foundation laid and the materials at hand, the next phase of building the foundation will mark a significant stride towards the completion of your personalized retreat.
Step 4: Building the Foundation
The foundation serves as the anchor of your she shed, providing stability and support for the entire structure. Building a solid foundation is essential for ensuring the longevity and structural integrity of your retreat. Here's a detailed overview of the steps involved in constructing the foundation for your she shed.
Site Preparation
Begin by clearing and leveling the ground where the she shed will be situated. Remove any debris, rocks, or vegetation to create a smooth and even surface for the foundation. Use a shovel, rake, and a compacting tool to ensure that the ground is well-prepared for the construction of the foundation.
Foundation Type
Select the appropriate foundation type based on your she shed design and local building codes. Common options include concrete slab, concrete piers, or skids. Each type offers distinct advantages in terms of cost, durability, and ease of construction. Consider factors such as soil type, drainage, and the intended use of the she shed when choosing the foundation type.
Concrete Slab Construction
If you opt for a concrete slab foundation, the next step involves creating a formwork to contain the concrete. Measure and mark the dimensions of the slab, then construct the formwork using wooden boards. Ensure that the formwork is level and securely in place to prevent the concrete from spilling or shifting during pouring.
Pouring and Leveling
Once the formwork is in position, it's time to pour the concrete into the designated area. Use a concrete mixer or wheelbarrow to transport the concrete and fill the formwork evenly. After pouring, use a screed board to level the concrete and eliminate any excess. Allow the concrete to cure and harden according to the manufacturer's recommendations.
Skid or Pier Installation
For skid or pier foundations, position the support elements at strategic locations to evenly distribute the weight of the she shed. Use a level to ensure that the skids or piers are aligned and plumb. Secure them in place using anchor bolts or concrete for added stability.
Inspection and Compliance
Once the foundation is constructed, it's crucial to have it inspected to ensure compliance with local building regulations. An inspector can verify that the foundation meets safety and structural requirements, providing you with peace of mind as you progress to the next phase of building your she shed.
By meticulously executing the foundation construction process, you establish a solid groundwork for the rest of the she shed's construction. With the foundation in place, you are ready to embark on the exciting phase of constructing the frame and walls, bringing your vision of a personalized retreat one step closer to reality.
Step 5: Constructing the Frame and Walls
With the foundation set, the construction of the frame and walls marks a significant stride towards bringing your she shed to life. This phase involves assembling the structural framework and enclosing the space to create a defined interior. Here's a detailed overview of the steps involved in constructing the frame and walls for your she shed.
Frame Assembly
Begin by assembling the frame of the she shed using the lumber and framing materials. Follow the architectural plans and precise measurements to construct the frame, ensuring that it is square and level. Utilize power tools such as a circular saw and nail gun to expedite the cutting and fastening process. The frame serves as the skeleton of the she shed, providing structural support for the walls, roof, and interior elements.
Wall Construction
Once the frame is in place, it's time to construct the walls of the she shed. Depending on your design and material preferences, you can opt for traditional stud walls or alternative construction methods such as timber framing or prefabricated wall panels. Install insulation between the wall studs to enhance energy efficiency and regulate temperature within the she shed. Consider incorporating windows and doors into the wall design to introduce natural light and ventilation.
Exterior Sheathing
After the walls are framed and insulated, apply exterior sheathing to provide rigidity and weather resistance. Oriented Strand Board (OSB) or plywood are commonly used for sheathing, offering a sturdy base for siding installation. Secure the sheathing to the frame using appropriate fasteners, ensuring that it is flush and properly aligned. Proper sheathing is essential for protecting the she shed from the elements and ensuring structural integrity.
Siding Installation
With the sheathing in place, it's time to install the exterior siding to enclose the walls of the she shed. Choose siding materials that complement the design and aesthetic of your she shed, whether it's traditional wood siding, low-maintenance vinyl, or eco-friendly composite options. Follow manufacturer guidelines and architectural plans to properly install the siding, creating a visually appealing and durable exterior finish.
By meticulously constructing the frame and walls of your she shed, you lay the groundwork for the subsequent phases of roofing, insulation, and interior finishes. This pivotal phase brings your vision of a personalized retreat one step closer to reality, setting the stage for the transformation of a humble structure into a charming and functional sanctuary.
Step 6: Roofing and Insulation
The roofing and insulation phase of building your she shed is a critical step that ensures the structural integrity, weather resistance, and year-round comfort of the space. This phase involves the installation of the roof, as well as the implementation of insulation to regulate temperature and enhance energy efficiency within the she shed.
Roofing Installation
Begin by selecting roofing materials that align with your design preferences, climate considerations, and durability requirements. Common roofing options include asphalt shingles, metal roofing, cedar shakes, or eco-friendly alternatives such as recycled rubber or composite materials. Each material offers distinct advantages in terms of aesthetics, longevity, and weather resistance.
Once the roofing material is chosen, proceed with the installation process, following manufacturer guidelines and best practices. Start by applying an underlayment to provide an additional layer of protection against moisture and ensure a watertight seal. Next, install the roofing material according to the specific requirements of the chosen material, whether it involves nailing down shingles, securing metal panels, or interlocking cedar shakes. Pay meticulous attention to proper flashing around roof penetrations such as vents and chimneys to prevent water infiltration.
Proper roof installation is essential for safeguarding the she shed against the elements and ensuring long-term durability. A well-constructed roof not only enhances the aesthetic appeal of the she shed but also provides essential protection against rain, snow, and harsh weather conditions.
Insulation Implementation
Following the roofing installation, shift your focus to implementing insulation within the she shed. Adequate insulation is crucial for maintaining a comfortable interior environment, regulating temperature, and reducing energy consumption. Evaluate insulation options such as fiberglass batts, spray foam insulation, or eco-friendly alternatives to determine the most suitable choice for your she shed.
Install insulation within the walls, ceiling, and any exposed areas to create a thermal barrier that minimizes heat transfer and enhances energy efficiency. Proper insulation not only ensures a cozy and comfortable interior space but also contributes to cost savings by reducing heating and cooling demands.
By meticulously executing the roofing and insulation phase, you fortify the she shed against external elements while creating a comfortable and energy-efficient interior environment. With the roof in place and insulation implemented, the next phase of adding finishing touches will bring your she shed one step closer to becoming a personalized retreat that reflects your unique style and provides a haven of relaxation and inspiration.
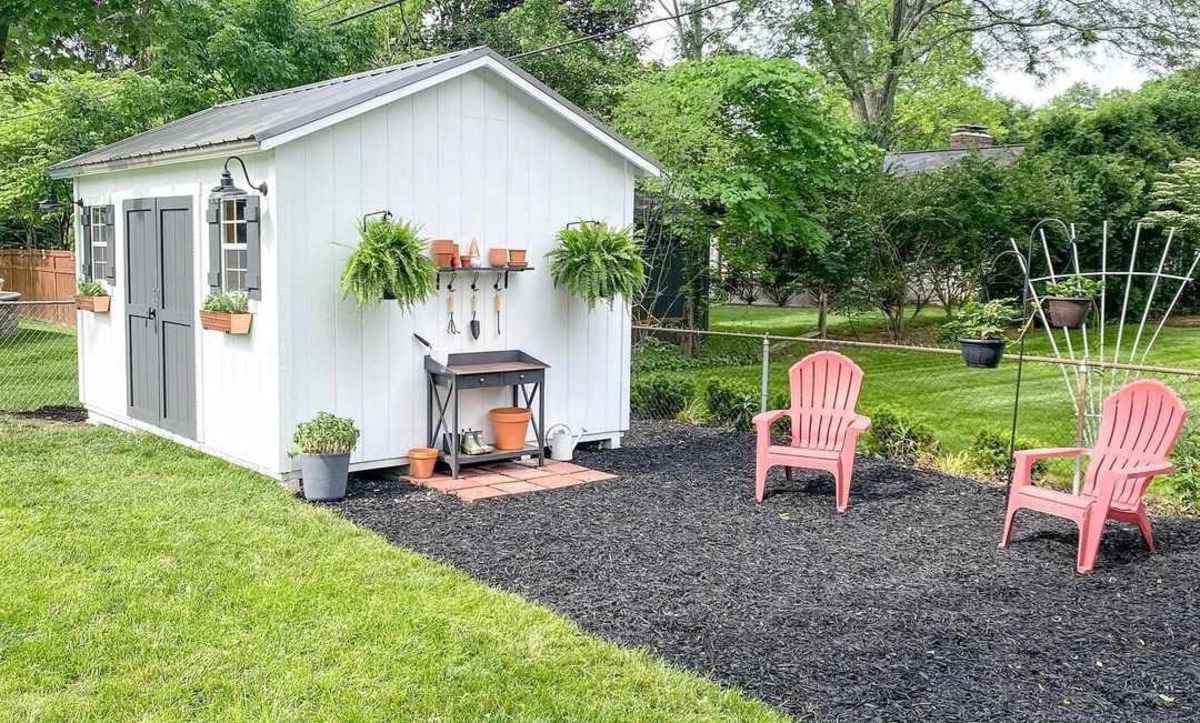
Step 7: Adding Finishing Touches
The phase of adding finishing touches to your she shed is where the vision of a personalized retreat comes to fruition. This pivotal step involves infusing the space with aesthetic elements, functional amenities, and personal touches that elevate the she shed from a structure to a captivating and inviting sanctuary.
Interior Finishes
Begin by focusing on the interior finishes that will define the ambiance and comfort of the she shed. Install drywall to create a polished and seamless interior surface, providing a blank canvas for personalization. Choose a color palette that resonates with your style and preferences, whether it's soothing neutrals, vibrant hues, or a combination of complementary tones. The right paint colors can transform the she shed into a tranquil oasis or a vibrant creative space, setting the tone for the overall ambiance.
Flooring and Lighting
Select flooring materials that align with the intended use of the she shed, whether it's hardwood for a classic look, laminate for easy maintenance, or eco-friendly options such as bamboo or cork. The flooring sets the foundation for the interior design, contributing to the overall aesthetic and functionality of the space. Additionally, incorporate lighting fixtures that enhance the ambiance and functionality of the she shed. From pendant lights to wall sconces and task lighting, a well-illuminated space creates a welcoming and versatile environment for various activities.
Furnishings and Decor
Infuse the she shed with furnishings and decor that reflect your personality and cater to your specific activities. Whether it's cozy seating for relaxation, functional storage solutions for hobbies, or versatile furniture that adapts to different uses, the right furnishings can maximize the comfort and utility of the space. Embrace decorative elements such as rugs, curtains, artwork, and plants to add character and charm to the interior, creating a visually captivating and inviting atmosphere.
Personalized Touches
Finally, personalize the she shed with cherished mementos, handmade decor, and meaningful accents that imbue the space with a sense of identity and warmth. Display sentimental items, artwork, or collections that hold personal significance, infusing the she shed with a unique and intimate touch. Consider incorporating DIY projects, custom signage, or personalized artwork to further enhance the individuality of the space, creating a retreat that truly feels like your own.
By meticulously adding finishing touches to the she shed, you transform a structure into a personalized retreat that embodies your style, passions, and aspirations. With the interior adorned with thoughtful details and functional amenities, the she shed becomes a haven of relaxation and inspiration, inviting you to immerse yourself in a space that reflects your unique identity and provides a sanctuary for rejuvenation and creativity.
Conclusion
In conclusion, the journey of building a she shed on a budget is a testament to the power of creativity, resourcefulness, and personalized craftsmanship. From the initial selection of the perfect location to the meticulous execution of each construction phase, the process of creating a she shed is a fulfilling endeavor that culminates in the realization of a personalized retreat.
Throughout this guide, we've delved into the intricacies of designing, constructing, and infusing a she shed with individuality and functionality. The careful selection of the ideal location sets the stage for a tranquil and accessible sanctuary, while the personalized design phase allows for the infusion of unique style and practical considerations. The gathering of materials and tools, coupled with the construction of the foundation, frame, walls, roofing, insulation, and finishing touches, forms a comprehensive journey that transforms a vision into a tangible space of comfort and inspiration.
As the she shed takes shape, it becomes more than just a structure; it evolves into a reflection of personal style, passions, and aspirations. The careful selection of materials, the precision of construction, and the infusion of personalized touches culminate in a space that beckons for relaxation, creativity, and rejuvenation. Whether it's a tranquil reading nook, a vibrant crafting haven, or a serene garden retreat, the she shed becomes a haven that resonates with individuality and offers a respite from the demands of daily life.
The process of building a she shed on a budget is not merely about constructing a physical space; it's about crafting an environment that nurtures the soul and fosters a sense of belonging. It's a testament to the transformative power of DIY craftsmanship and the ability to create a space that is uniquely tailored to individual needs and preferences.
As you embark on your own journey of building a she shed, may this guide serve as a source of inspiration and guidance, empowering you to unleash your creativity and embark on a fulfilling and rewarding endeavor. Whether you're a seasoned DIY enthusiast or a novice embarking on your first project, the journey of building a she shed is an opportunity to create a space that reflects your unique identity and provides a haven of relaxation and inspiration.