
Home>Create & Decorate>DIY & Crafts>How To Build A Snowman
DIY & Crafts
How To Build A Snowman
Published: February 23, 2024

Senior Editor in Create & Decorate, Kathryn combines traditional craftsmanship with contemporary trends. Her background in textile design and commitment to sustainable crafts inspire both content and community.
Learn how to build a snowman with our DIY & Crafts guide. Get creative and enjoy the winter season with this fun activity. Start building your snowman today!
(Many of the links in this article redirect to a specific reviewed product. Your purchase of these products through affiliate links helps to generate commission for Twigandthistle.com, at no extra cost. Learn more)
Introduction
Building a snowman is a beloved winter tradition that brings joy and creativity to people of all ages. The process of crafting a snowman from scratch is not only a fun outdoor activity but also a wonderful way to embrace the winter season and spend quality time with family and friends. Whether you're a seasoned snowman builder or a novice looking to embark on this classic winter endeavor, this comprehensive guide will walk you through the step-by-step process of creating your very own frosty friend.
As the first snowflakes begin to blanket the ground, the excitement of building a snowman starts to stir. The prospect of transforming a simple pile of snow into a whimsical figure with a personality of its own is truly enchanting. The anticipation builds as you envision the snowman coming to life, standing proudly in your yard or garden, spreading cheer to all who lay eyes on it.
With the right techniques and a touch of creativity, you can fashion a snowman that reflects your unique style and imagination. From selecting the ideal location for your snowman to adding the final embellishments, each step in the process contributes to the character and charm of your creation. Whether you opt for a traditional snowman with a top hat and carrot nose or decide to give your snowman a quirky and unconventional appearance, the possibilities are as endless as the freshly fallen snow.
So, grab your mittens, dust off your imagination, and get ready to embark on a delightful journey of building a snowman. With a few simple materials and a sprinkle of winter magic, you'll soon be on your way to creating a timeless winter masterpiece that will bring smiles and warmth to your heart. Let's dive into the enchanting world of snowman building and make cherished memories that will last a lifetime.
Step 1: Gather the necessary materials
Before embarking on the delightful journey of building a snowman, it's essential to gather the necessary materials to ensure a smooth and enjoyable process. Here's a list of items you'll need:
1. Freshly Fallen Snow
The key ingredient for crafting a snowman is, of course, snow! Look for an area with freshly fallen snow that is moist and packable. The ideal snow for building a snowman is slightly wet and sticky, as it holds together well when compacted. If the snow is too dry, it may not adhere properly, making it challenging to form sturdy snowballs.
2. Winter Attire
Dress appropriately for the outdoor adventure of snowman building. Bundle up in warm winter clothing, including a cozy jacket, waterproof gloves, a knit hat, and insulated boots. Staying warm and dry will ensure that you can fully immerse yourself in the creative process without feeling chilly or uncomfortable.
3. Carrot and Coal (or other materials for facial features)
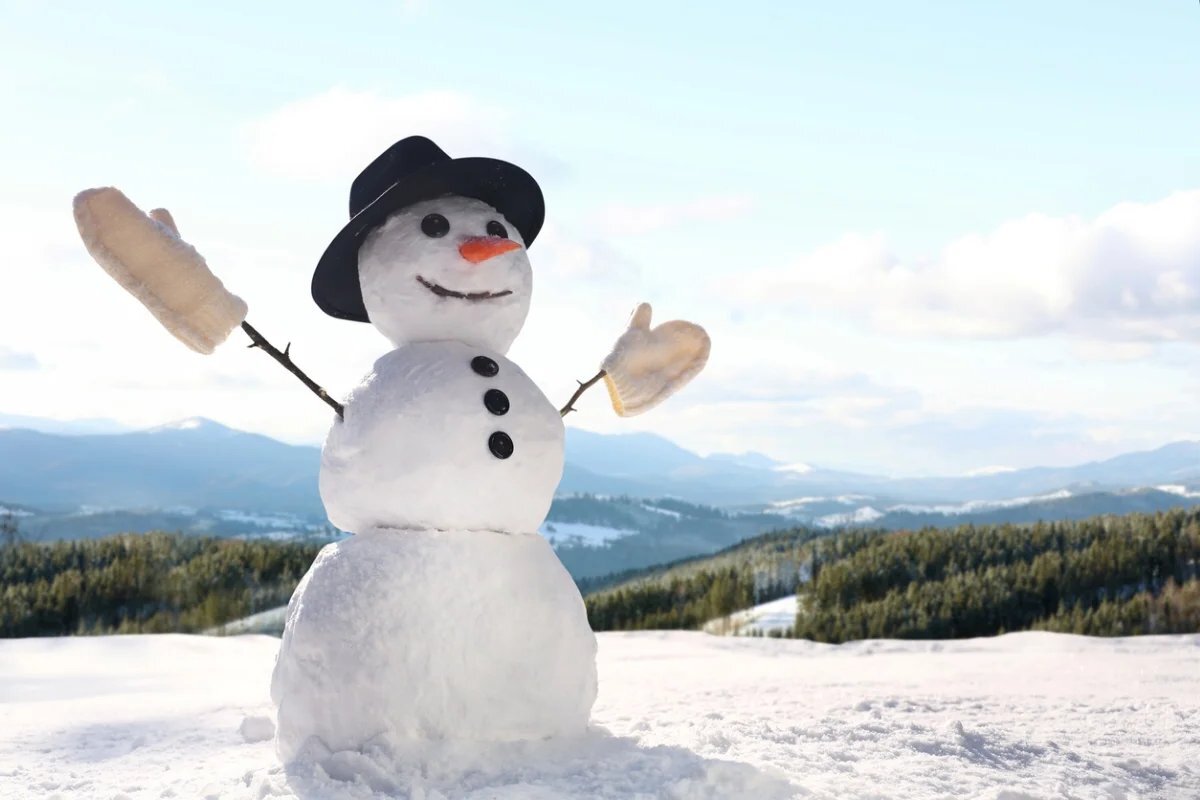
To bring your snowman to life, gather a few classic items for its facial features. A carrot makes an excellent choice for the snowman's nose, adding a touch of whimsy to its appearance. Additionally, consider using pieces of coal or other materials, such as buttons or rocks, for the eyes and mouth. Get creative and let your imagination guide you in selecting the perfect materials to give your snowman a unique and expressive face.
4. Accessories (optional)
Enhance your snowman's personality by incorporating accessories such as a scarf, a hat, or even a pair of sunglasses. These accessories not only add character to your snowman but also provide an opportunity to infuse your creation with a personal touch. Whether you opt for a colorful scarf or a dashing top hat, accessories can elevate your snowman from a simple figure to a charming and individualized work of art.
5. Tools for Sculpting (optional)
While your hands are the primary tools for shaping the snowman, you may also consider using a shovel, a small rake, or even a bucket to assist in gathering and packing the snow. These tools can be especially helpful when working with larger quantities of snow or when creating a particularly sizable snowman.
By gathering these materials, you'll be well-prepared to embark on the enchanting process of building a snowman. With the right snow and a touch of creativity, you're ready to bring your snowman to life, infusing it with personality and charm. Now that you have all the necessary materials at your fingertips, it's time to roll up your sleeves and dive into the next step of crafting your winter masterpiece.
Step 2: Roll the snowballs
With the necessary materials at hand and a vision of your snowman taking shape, it's time to dive into the pivotal step of rolling the snowballs. This step forms the foundation of your snowman and sets the stage for its iconic silhouette. Here's a detailed guide to rolling the perfect snowballs:
1. Select the Right Snow
Begin by identifying an open area with ample space to roll the snowballs. Look for a patch of snow that is slightly moist and compact, as this type of snow adheres well and facilitates the rolling process. The snow should be pliable enough to pack into a cohesive mass without crumbling.
2. Start Small
To create the base of your snowman, start by forming a small snowball. Scoop up a handful of snow and gently compress it between your hands, rotating and shaping it into a compact sphere. The size of this initial snowball will determine the overall scale of your snowman, so consider the desired height and proportions as you roll the base.
3. Roll with Precision
Once the small snowball is formed, place it on the ground and begin rolling it back and forth. As you roll, apply gentle pressure to compact the snow and encourage it to adhere to itself. Gradually increase the pressure as the snowball gains size, ensuring that it maintains a spherical shape and does not become lopsided.
4. Build Momentum
As the snowball grows, continue rolling it across the snow-covered surface, allowing it to accumulate more snow and increase in size. The goal is to create a sturdy and sizable base for your snowman, so invest time and effort into rolling the snowball with precision and consistency.
5. Repeat the Process
Once the base snowball reaches the desired size, repeat the rolling process to create additional snowballs for the snowman's midsection and head. As you roll each snowball, aim for a gradual decrease in size to achieve the classic tiered structure of a snowman.
6. Assess and Adjust
Periodically assess the size and shape of each snowball, making adjustments as needed to ensure that they are uniform and well-proportioned. Pay attention to the texture and density of the snow, as these factors contribute to the stability and longevity of your snowman.
By meticulously rolling the snowballs with care and precision, you'll lay the groundwork for a well-built and enduring snowman. With the base, midsection, and head snowballs expertly crafted, you're now ready to proceed to the next step of stacking the snowballs and bringing your snowman to life.
Step 3: Stack the snowballs
With the meticulously rolled snowballs at your disposal, it's time to embark on the pivotal step of stacking them to form the iconic figure of a snowman. This step is where your snowman begins to take shape, and each snowball plays a crucial role in defining the snowman's stature and character. Here's a detailed guide to stacking the snowballs and bringing your snowman to life:
- Establish a Sturdy Foundation
Before stacking the snowballs, identify a flat and open area where the snowman will stand proudly. Ensure that the ground is level and provides ample space for the snowman's base. This foundation will support the weight of the snowballs and contribute to the stability of your snowman.
- Lift and Position the Base Snowball
Carefully lift the base snowball, taking measures to maintain its shape and integrity. Place it in the chosen spot, gently pressing it into the snow to create a solid anchor. The base snowball forms the groundwork for the entire snowman, so position it thoughtfully to achieve the desired height and stability.
- Stack the Midsection Snowball
Once the base snowball is securely in place, lift the midsection snowball and position it on top of the base. Apply gentle pressure to ensure that the snowballs adhere to each other, forming a stable connection. Take a step back to assess the alignment and symmetry of the snowballs, making adjustments as needed to achieve a well-balanced and proportionate midsection.
- Crown the Snowman with the Head Snowball
With the base and midsection in place, carefully lift the head snowball and position it atop the midsection. Exercise caution to maintain the round shape of the head and align it with the midsection to create a seamless transition. As you nestle the head snowball into position, take a moment to step back and admire the emerging silhouette of your snowman.
- Secure the Snowballs
Once all the snowballs are stacked, take a few moments to ensure that they are firmly connected and balanced. Gently press each snowball to promote cohesion and stability, minimizing the risk of toppling. A well-secured stack ensures that your snowman withstands the elements and remains upright for all to admire.
By methodically stacking the snowballs with precision and care, you've successfully laid the groundwork for a charming and enduring snowman. The carefully aligned base, midsection, and head snowballs form the quintessential structure of a snowman, setting the stage for the final step of adding the finishing touches and infusing your creation with personality and charm.
Step 4: Add the finishing touches
With the snowman's structure solidly in place, it's time to infuse your creation with personality and charm by adding the finishing touches. This step is where your snowman truly comes to life, reflecting your creativity and individual style. Here's a detailed guide to adding the final embellishments and transforming your snowman into a captivating winter masterpiece:
-
Facial Features:
Carefully insert a carrot into the snowman's face to create a whimsical and endearing nose. Next, select materials such as coal, pebbles, or buttons to craft the snowman's eyes and mouth. Position each facial feature thoughtfully, allowing the snowman's expression to convey warmth and character. -
Accessories:
Elevate your snowman's appearance by adorning it with accessories that reflect its unique persona. Wrap a colorful scarf around the snowman's neck, adding a pop of color and a touch of coziness. Consider placing a stylish hat atop the snowman's head, whether it's a classic top hat, a festive beanie, or a quirky headpiece that showcases your creativity. -
Arms and Hands:
Enhance the snowman's charm by incorporating arms and hands crafted from tree branches or twigs. Position the arms on either side of the snowman's midsection, allowing them to extend outward in a welcoming gesture. The addition of arms lends a sense of movement and liveliness to your snowman, inviting admiration from all who encounter it. -
Personalized Details:
Infuse your snowman with personalized details that reflect your interests and imagination. Whether it's adding a miniature prop, such as a tiny book or a snowball "pet," or incorporating unique elements that hold sentimental value, these personalized touches make your snowman truly one-of-a-kind. -
Final Assessment:
Step back and assess your snowman from all angles, ensuring that each embellishment contributes to its overall charm and appeal. Make any necessary adjustments to achieve a harmonious and captivating appearance, allowing your snowman to exude warmth and delight.
By adding these finishing touches, you've transformed a simple stack of snowballs into a captivating and endearing snowman. Each carefully placed detail contributes to the snowman's unique character, making it a delightful centerpiece of winter wonder. With the finishing touches complete, your snowman stands as a testament to creativity, imagination, and the joy of embracing the winter season.
Step 5: Enjoy your snowman!
With the final embellishments in place, it's time to bask in the joy and wonder of your newly crafted snowman. As you stand back and admire your creation, take a moment to appreciate the artistry and creativity that went into bringing this winter icon to life. Your snowman stands as a testament to the simple pleasures of the season, evoking a sense of nostalgia and whimsy that transcends generations.
The presence of your snowman transforms the outdoor landscape, infusing it with a touch of enchantment and lighthearted charm. Its cheerful demeanor and welcoming posture beckon passersby to pause and revel in the magic of the winter wonderland. Whether it's a neighborhood stroll, a visit from friends and family, or a quiet moment of reflection, your snowman serves as a heartwarming focal point that spreads joy and merriment to all who encounter it.
As the days pass and the seasons shift, your snowman becomes a cherished symbol of winter's fleeting beauty. Its enduring presence, albeit temporary, captures the essence of the season and serves as a reminder to embrace the fleeting moments of joy and togetherness. Each glance at your snowman evokes fond memories of its creation, the laughter shared during its assembly, and the sense of accomplishment that comes with bringing a vision to life.
Beyond its visual appeal, your snowman fosters a sense of community and camaraderie, inviting others to partake in the simple pleasures of winter. Children and adults alike are drawn to its whimsical allure, finding delight in its endearing features and the warmth it exudes. Your snowman becomes a catalyst for shared experiences, sparking conversations, laughter, and a sense of unity among those who gather around it.
As the season draws to a close and the temperatures rise, your snowman will gradually yield to the inevitable passage of time. Yet, its legacy will endure in the hearts and memories of those who reveled in its presence. The joy it brought, the memories it created, and the sense of wonder it inspired will linger, leaving an indelible mark on the winter season.
So, take a moment to revel in the enchantment of your snowman, to savor the joy it brings, and to embrace the fleeting beauty of the winter season. As you bid farewell to your snowman, know that its impact transcends its physical form, leaving behind a legacy of warmth, creativity, and cherished moments that will be fondly remembered for years to come.