Home>Create & Decorate>DIY & Crafts>DIY Firewood Rack: How To Build A Sturdy Storage Solution For Your Firewood

DIY & Crafts
DIY Firewood Rack: How To Build A Sturdy Storage Solution For Your Firewood
Published: February 27, 2024

Senior Editor in Create & Decorate, Kathryn combines traditional craftsmanship with contemporary trends. Her background in textile design and commitment to sustainable crafts inspire both content and community.
Learn how to build a sturdy DIY firewood rack for convenient storage of your firewood with our step-by-step guide. Perfect for DIY & Crafts enthusiasts!
(Many of the links in this article redirect to a specific reviewed product. Your purchase of these products through affiliate links helps to generate commission for Twigandthistle.com, at no extra cost. Learn more)
Introduction
Are you ready to take your firewood storage to the next level? Building your own DIY firewood rack is a rewarding and practical project that can enhance the organization and aesthetics of your outdoor space. Whether you're a seasoned DIY enthusiast or a beginner looking for a fulfilling project, constructing a sturdy firewood rack is a great way to flex your carpentry skills and create a functional storage solution.
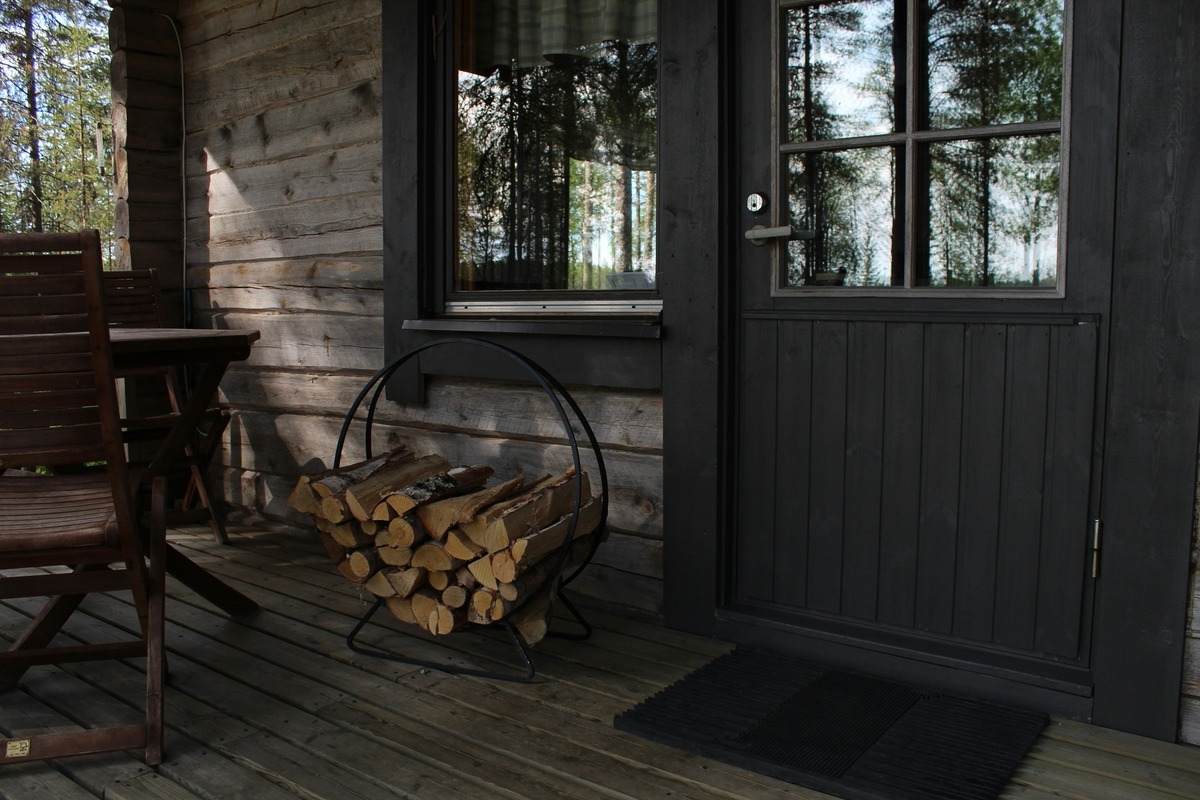
A well-built firewood rack not only keeps your firewood neatly stacked and off the ground but also allows for proper airflow, which is essential for seasoning and maintaining the quality of the wood. Additionally, a thoughtfully designed firewood rack can add a touch of rustic charm to your backyard or patio, serving as both a practical storage unit and a decorative element.
By embarking on this DIY project, you'll have the opportunity to customize the dimensions and style of the firewood rack to suit your specific needs and preferences. Whether you have limited space and need a compact rack or you're aiming to build a larger storage unit to accommodate a substantial wood supply, this project can be tailored to fit your requirements.
In this comprehensive guide, we'll walk you through the step-by-step process of building a durable and visually appealing firewood rack. From gathering the necessary materials to cutting and assembling the wood, each stage of the construction will be detailed to ensure that you have all the information and guidance needed to successfully complete the project.
So, roll up your sleeves, gather your tools, and get ready to embark on a fulfilling DIY journey as we delve into the art of constructing a practical and robust firewood rack. Whether you're preparing for the chilly months ahead or simply seeking to elevate the organization of your outdoor space, this DIY endeavor is sure to bring a sense of accomplishment and functionality to your home.
Read more: How to Build a DIY Roof Rack
Materials Needed
Before diving into the construction process, it's essential to gather all the necessary materials and tools to ensure a smooth and efficient building experience. Here's a comprehensive list of the items you'll need for this DIY firewood rack project:
-
Pressure-treated lumber: Opt for durable and weather-resistant lumber, such as pressure-treated 2×4 or 4×4 boards, to withstand outdoor conditions and provide long-lasting support for your firewood.
-
Screws or nails: Depending on your preference and the tools available, gather an ample supply of screws or nails to secure the various components of the firewood rack.
-
Measuring tape: A reliable measuring tape is indispensable for accurately determining the dimensions of the wood pieces and ensuring precise cuts during the construction process.
-
Saw: Whether you use a circular saw, miter saw, or handsaw, having a quality cutting tool is essential for accurately shaping the lumber according to the required measurements.
-
Drill: A power drill equipped with the appropriate drill bits will be essential for creating pilot holes and securing the wood pieces together with screws.
-
Level: To ensure the stability and balance of the firewood rack, a level will be indispensable for checking the alignment of the components during assembly.
-
Wood stain or sealant (optional): If you desire a finished look and added protection for the wood, consider acquiring a suitable wood stain or sealant to enhance the appearance and durability of the firewood rack.
-
Paintbrush or applicator: If you opt to apply a wood stain or sealant, a paintbrush or applicator will be necessary for evenly coating the wood surfaces.
-
Work gloves and safety goggles: Prioritize safety by wearing work gloves and safety goggles to protect your hands and eyes during the cutting and assembly processes.
-
Workbench or sawhorses: A stable work surface, such as a workbench or sawhorses, will provide a secure area for cutting and assembling the wood components.
By ensuring that you have all the required materials and tools at your disposal, you'll be well-prepared to embark on the construction of your DIY firewood rack with confidence and efficiency. With these essentials in hand, you can proceed to the next steps of measuring, cutting, and assembling the components to bring your firewood storage solution to life.
Step 1: Measure and Cut the Wood
The initial phase of constructing a sturdy and functional firewood rack involves precise measurements and accurate cuts to ensure that the wood components fit together seamlessly. Before diving into the cutting process, it's crucial to have a clear understanding of the desired dimensions for the firewood rack, taking into account the available space and the quantity of firewood it will accommodate.
Begin by measuring the pressure-treated lumber according to the predetermined specifications. Utilize a reliable measuring tape to mark the appropriate lengths on the wood, ensuring uniformity and accuracy in the measurements. Whether you're aiming for a compact firewood rack to fit a specific area or a larger storage unit to accommodate ample firewood, precision in measurement is key to achieving a well-proportioned and structurally sound rack.
Once the measurements are marked, proceed to the cutting phase using a saw that is suitable for the task at hand. Whether you opt for a circular saw, miter saw, or handsaw, it's essential to execute the cuts with precision to achieve clean and accurate edges on the wood pieces. Take your time to ensure that the cuts align with the marked measurements, as this will directly impact the overall stability and visual appeal of the firewood rack.
As you progress through the cutting process, pay close attention to the angles and dimensions required for the various components of the firewood rack, including the base, uprights, and cross supports. Each piece plays a crucial role in the structural integrity and functionality of the rack, making precise cutting an essential aspect of the construction process.
By meticulously measuring and cutting the pressure-treated lumber to the specified dimensions, you'll lay a solid foundation for the subsequent stages of assembling the firewood rack. With careful attention to detail and a focus on accuracy, you'll set the stage for a successful and visually appealing DIY project that will elevate the organization and functionality of your outdoor space.
Step 2: Assemble the Base
With the pressure-treated lumber cut to the specified dimensions, it's time to move on to the pivotal stage of assembling the base of the firewood rack. The base serves as the foundation of the rack, providing stability and support for the stacked firewood while ensuring that it remains elevated and protected from ground moisture. By following the step-by-step instructions for assembling the base, you'll lay the groundwork for a robust and reliable firewood storage solution.
-
Position the Base Components: Begin by arranging the cut lumber pieces for the base according to the predetermined design. Typically, the base consists of two longer pieces for the sides and several shorter pieces for the cross supports. Ensure that the pieces are aligned and positioned in a manner that allows for secure attachment and even weight distribution.
-
Create Pilot Holes: To facilitate the assembly process and prevent the wood from splitting, use a drill equipped with an appropriate drill bit to create pilot holes at the points where the pieces will be joined. This preparatory step is essential for ensuring that the screws or nails can be inserted smoothly and securely during the assembly.
-
Secure the Cross Supports: With the pilot holes in place, proceed to attach the cross supports to the longer side pieces of the base. Utilize screws or nails to firmly secure the cross supports in position, ensuring that they are evenly spaced and aligned to provide adequate support for the stacked firewood.
-
Check for Stability: Once the cross supports are attached, carefully assess the stability and levelness of the base. Utilize a level to ensure that the base is flat and well-balanced, as this will contribute to the overall stability and functionality of the firewood rack.
-
Reinforce the Joints (Optional): For added durability, consider reinforcing the joints of the base components with additional screws or nails. This optional step can further enhance the structural integrity of the base, especially if the firewood rack is intended to accommodate a substantial amount of firewood.
By methodically assembling the base of the firewood rack, you'll establish a solid and reliable foundation for the subsequent stages of the construction process. The completion of this step sets the stage for the vertical elements of the rack, laying the groundwork for the assembly of the uprights and cross supports that will ultimately hold the stacked firewood in place. With the base securely assembled, you're one step closer to bringing your DIY firewood rack to fruition.
Step 3: Build the Uprights
As you progress through the construction of your DIY firewood rack, the assembly of the uprights marks a pivotal stage in creating a sturdy and visually appealing storage solution for your firewood. The uprights play a crucial role in supporting the cross supports and providing the vertical framework for the stacked firewood, contributing to the overall stability and functionality of the rack.
To commence the construction of the uprights, begin by arranging the designated pieces of pressure-treated lumber according to the predetermined measurements and design. Typically, the uprights consist of vertical components that will stand at the ends of the base, serving as the primary supports for the cross supports and the stacked firewood. Ensure that the pieces are positioned in a manner that allows for secure attachment and even weight distribution, setting the stage for the subsequent assembly steps.
Once the pieces are positioned, proceed to create pilot holes at the points where the uprights will be attached to the base and cross supports. This preparatory step is essential for facilitating the assembly process and ensuring that the screws or nails can be inserted smoothly and securely, contributing to the overall structural integrity of the firewood rack.
With the pilot holes in place, carefully align and attach the uprights to the base, ensuring that they are securely positioned and perpendicular to the ground. Utilize screws or nails to firmly secure the uprights in place, paying close attention to the alignment and stability of the vertical components. The secure attachment of the uprights to the base forms the foundational framework for the subsequent addition of the cross supports, setting the stage for the completion of the vertical structure of the firewood rack.
As you progress through the assembly of the uprights, prioritize precision and attention to detail to ensure that the vertical components are securely positioned and aligned. The successful completion of this stage lays the groundwork for the addition of the cross supports, bringing you one step closer to the realization of a robust and visually appealing firewood rack that will enhance the organization and functionality of your outdoor space.
Read more: DIY Van Roof Rack Guide
Step 4: Attach the Uprights to the Base
With the uprights securely in place, the next crucial step in the construction of your DIY firewood rack is the attachment of the uprights to the base. This pivotal stage serves to solidify the vertical framework of the rack, ensuring that the components are securely connected and aligned to provide the necessary support for the stacked firewood.
To begin this phase, carefully position the assembled uprights at the designated points on the base, ensuring that they are aligned with precision and perpendicular to the ground. By meticulously aligning the uprights, you set the stage for a stable and structurally sound framework that will support the weight of the firewood while maintaining overall stability.
Once the uprights are positioned, proceed to create pilot holes at the points where the uprights will be attached to the base. This preparatory step is essential for facilitating the assembly process and ensuring that the screws or nails can be inserted smoothly and securely, contributing to the overall structural integrity of the firewood rack.
With the pilot holes in place, carefully secure the uprights to the base using screws or nails, ensuring that the attachment is firm and secure. Pay close attention to the alignment and stability of the connection, as this will directly impact the overall strength and functionality of the firewood rack.
As you progress through the attachment process, periodically assess the stability and alignment of the uprights to guarantee that they are securely fastened to the base. Utilize a level to confirm that the uprights are positioned vertically and that the base remains flat and well-balanced, contributing to the overall stability and functionality of the firewood rack.
By methodically attaching the uprights to the base, you establish a solid and reliable vertical framework that forms the backbone of the firewood rack. This crucial step sets the stage for the addition of the cross supports, bringing you one step closer to the realization of a robust and visually appealing firewood rack that will enhance the organization and functionality of your outdoor space.
Step 5: Add the Cross Supports
With the base and uprights securely assembled, the next pivotal stage in the construction of your DIY firewood rack involves the addition of the cross supports. These horizontal components play a crucial role in providing stability and structure to the rack, ensuring that the stacked firewood remains securely in place while allowing for proper airflow and seasoning.
To commence this phase, carefully position the designated pieces of pressure-treated lumber for the cross supports according to the predetermined measurements and design. Typically, the cross supports are placed horizontally between the uprights, serving as essential elements that prevent the stacked firewood from shifting or collapsing while contributing to the overall strength and integrity of the rack.
Once the pieces are positioned, proceed to create pilot holes at the points where the cross supports will be attached to the uprights. This preparatory step is essential for facilitating the assembly process and ensuring that the screws or nails can be inserted smoothly and securely, contributing to the overall structural stability of the firewood rack.
With the pilot holes in place, carefully align and attach the cross supports to the uprights, ensuring that they are securely positioned and evenly spaced to provide adequate support for the stacked firewood. Utilize screws or nails to firmly secure the cross supports in place, paying close attention to the alignment and stability of the horizontal components.
As you progress through the attachment of the cross supports, prioritize precision and attention to detail to ensure that the horizontal components are securely positioned and aligned. The successful completion of this stage lays the groundwork for the final phase of finishing and staining, bringing you one step closer to the realization of a robust and visually appealing firewood rack that will enhance the organization and functionality of your outdoor space.
By methodically adding the cross supports to the uprights, you establish a solid and reliable framework that provides essential support for the stacked firewood. This crucial step sets the stage for the completion of the construction process, bringing you closer to the realization of a practical and visually appealing firewood rack that will serve as a valuable addition to your outdoor space.
Step 6: Finish and Stain (Optional)
As you near the completion of your DIY firewood rack, the optional step of finishing and staining presents an opportunity to enhance the visual appeal and durability of the wood. While this step is not essential for the functionality of the rack, it can significantly elevate its aesthetic charm and provide added protection against outdoor elements.
Before proceeding with the finishing and staining process, it's essential to prepare the wood surfaces by ensuring that they are clean and free of any debris or sawdust. Utilize a brush or cloth to remove any lingering particles, creating a smooth and pristine surface for the application of the finish.
When selecting a finish for your firewood rack, consider options such as wood sealant, outdoor varnish, or exterior-grade paint, all of which are designed to withstand the rigors of outdoor exposure. These finishes not only enhance the natural beauty of the wood but also provide crucial protection against moisture, UV rays, and other environmental factors that can compromise the integrity of the rack over time.
If you opt for a wood stain, carefully choose a shade that complements the aesthetic of your outdoor space while allowing the natural grain and texture of the wood to shine through. Prior to application, thoroughly stir the stain to ensure an even distribution of color pigments, and test it on a small, inconspicuous area of the wood to gauge the desired finish.
When applying the finish or stain, use a paintbrush or applicator to ensure even coverage across all surfaces of the firewood rack. Pay special attention to the end grains and joints, as these areas are particularly susceptible to moisture penetration and may benefit from an extra coat of protection.
After the application of the finish or stain, allow the wood to thoroughly dry according to the manufacturer's recommendations before proceeding with the stacking of firewood. This drying period is crucial for allowing the finish to cure and bond with the wood, ensuring long-lasting protection and a professional, polished appearance.
By taking the optional step of finishing and staining your firewood rack, you not only enhance its visual appeal but also fortify its resilience against the elements, contributing to its longevity and functionality in your outdoor space. Whether you choose a natural wood finish to accentuate the rustic charm of the rack or opt for a bold color to make a statement, this final touch adds a personalized and enduring flourish to your DIY creation.
Conclusion
In conclusion, the journey of constructing a DIY firewood rack has been a fulfilling and rewarding endeavor, culminating in the creation of a practical and visually appealing storage solution for your firewood. From the initial stages of measuring and cutting the pressure-treated lumber to the final touches of finishing and staining, each step has contributed to the realization of a robust and functional rack that enhances the organization and aesthetics of your outdoor space.
By embarking on this DIY project, you have not only honed your carpentry skills but also tailored a firewood rack to suit your specific needs and preferences. Whether you opted for a compact design to fit a limited space or constructed a larger storage unit to accommodate a substantial wood supply, the customization and personalization of the rack reflect your creativity and practicality.
The completion of the firewood rack marks the beginning of a new chapter in your outdoor space, where the neatly stacked firewood stands as a testament to your craftsmanship and dedication. The sturdy framework, comprised of carefully assembled base, uprights, and cross supports, ensures that your firewood remains elevated, organized, and protected from ground moisture, contributing to its longevity and quality.
Furthermore, the optional step of finishing and staining has added a touch of refinement and durability to the rack, elevating its visual appeal and fortifying its resilience against outdoor elements. Whether you chose a natural wood finish to accentuate the rustic charm of the rack or opted for a bold color to make a statement, the finishing touch reflects your attention to detail and commitment to creating a lasting and impactful addition to your outdoor space.
As you stand back and admire the completed firewood rack, take pride in the fact that you have not only built a practical storage solution but also infused your outdoor space with a touch of craftsmanship and functionality. Whether you're preparing for the chilly months ahead or simply seeking to elevate the organization of your outdoor space, the DIY firewood rack stands as a testament to your ingenuity and resourcefulness.
In the end, the construction of a DIY firewood rack transcends the mere assembly of wood and screws; it represents a journey of creativity, practicality, and personalization that has left a lasting imprint on your outdoor space. As you anticipate the warmth and comfort of crackling fires, take a moment to appreciate the craftsmanship and dedication that have gone into creating a sturdy and visually appealing home for your firewood.


