
Home>Create & Decorate>DIY & Crafts>DIY Dog House Plans: Build A Cozy Home For Your Furry Friend
DIY & Crafts
DIY Dog House Plans: Build A Cozy Home For Your Furry Friend
Published: February 27, 2024

Senior Editor in Create & Decorate, Kathryn combines traditional craftsmanship with contemporary trends. Her background in textile design and commitment to sustainable crafts inspire both content and community.
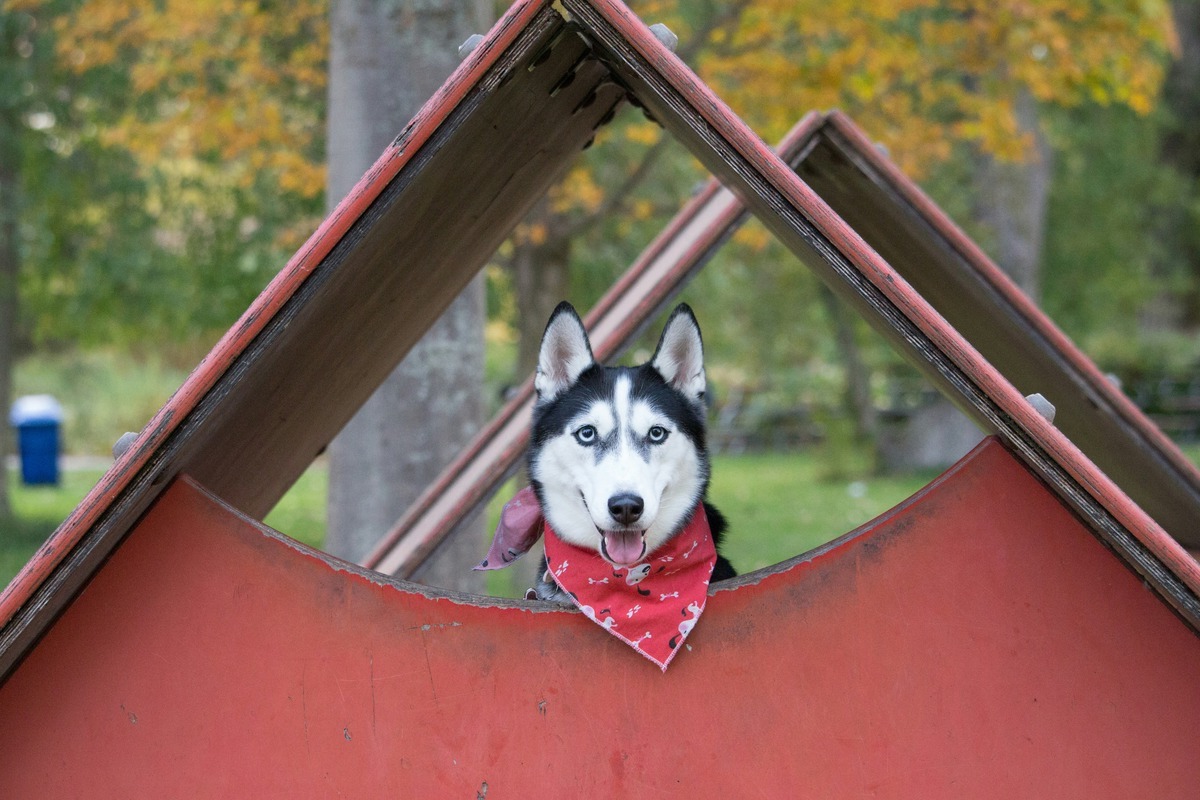
Discover easy-to-follow DIY dog house plans to create a cozy and comfortable home for your furry friend. Get creative with these DIY & Crafts projects!
(Many of the links in this article redirect to a specific reviewed product. Your purchase of these products through affiliate links helps to generate commission for Twigandthistle.com, at no extra cost. Learn more)
Introduction
Building a cozy and comfortable dog house for your furry friend can be a rewarding and enjoyable DIY project. Not only does it provide your canine companion with a dedicated space to relax and unwind, but it also allows you to unleash your creativity and craftsmanship. Whether you're a seasoned DIY enthusiast or a novice looking to embark on your first pet-related project, constructing a dog house can be a fulfilling endeavor that strengthens the bond between you and your four-legged friend.
A well-designed dog house serves as a retreat for your pet, offering protection from the elements and a sense of security. It's a place where your dog can seek refuge from inclement weather, bask in the warmth of the sun, or simply curl up for a peaceful nap. By customizing the dog house to suit your pet's needs and preferences, you can create a space that complements your outdoor environment while providing a safe and comfortable haven for your beloved companion.
In this comprehensive guide, we'll walk you through the process of building a dog house from start to finish. From selecting the ideal location for the dog house to choosing the right materials and tools, we'll cover every aspect of the construction process. You'll also find step-by-step instructions, helpful tips for maintenance, and advice on adding finishing touches to ensure that your DIY dog house is not only functional but also aesthetically pleasing.
Whether you're looking to showcase your carpentry skills, bond with your pet through a shared project, or simply provide your dog with a cozy retreat, this guide will equip you with the knowledge and inspiration needed to embark on this fulfilling DIY endeavor. So, roll up your sleeves, gather your materials, and get ready to embark on a rewarding journey of creating a snug and inviting home for your furry friend.
Choosing the Right Location
Selecting the perfect location for your dog house is crucial to ensure your furry friend's comfort and well-being. Consider the following factors when choosing the right spot for your DIY dog house:
-
Shade and Sunlight: Look for an area in your yard that offers a balance of shade and sunlight throughout the day. This will provide your dog with options to stay cool during hot weather and bask in the warmth of the sun when it's chilly.
-
Protection from Elements: Ensure that the chosen location shields the dog house from strong winds, heavy rain, and snow. Placing the dog house against a sturdy structure, such as a wall or fence, can offer additional protection from the elements.
-
Elevation and Drainage: Opt for a slightly elevated spot to prevent water accumulation during rainy periods. Good drainage is essential to keep the interior of the dog house dry and comfortable for your pet.
-
Accessibility: Choose a location that is easily accessible for your dog, allowing them to enter and exit the dog house without obstacles. Additionally, consider proximity to your home for convenient monitoring and interaction with your pet.
-
Visibility and Security: While it's important for the dog house to be visible from your vantage point, it's equally crucial to ensure that it provides a sense of security and privacy for your dog. Striking a balance between visibility and seclusion will help your pet feel safe and relaxed in their new abode.
-
Terrain and Landscaping: Take into account the terrain and landscaping of your yard. Avoid placing the dog house in low-lying areas prone to flooding and consider the overall aesthetics of the location to seamlessly integrate the dog house into your outdoor space.
By carefully assessing these factors, you can identify the optimal location for your DIY dog house, creating a comfortable and inviting space for your furry friend to enjoy. Once you've chosen the perfect spot, you can proceed to the next steps of gathering materials and preparing for the construction process.
Selecting the Materials
When it comes to building a durable and comfortable dog house, selecting the right materials is paramount. The materials you choose will not only determine the structural integrity of the dog house but also play a significant role in providing insulation, protection from the elements, and overall comfort for your furry friend. Here's a detailed look at the essential materials you'll need for constructing a sturdy and cozy dog house:
1. Lumber:
Choose high-quality, weather-resistant lumber for the frame and walls of the dog house. Pressure-treated wood or cedar are excellent options, as they offer natural resistance to decay and insects. Opt for lumber with smooth surfaces to prevent splinters and ensure the safety of your pet.
2. Insulation:
To regulate the temperature inside the dog house, consider adding insulation between the walls. Foam board insulation or fiberglass batts can help maintain a comfortable environment for your dog, especially during extreme weather conditions. Proper insulation is crucial for keeping the interior warm in winter and cool in summer.
3. Roofing Materials:
Select durable and waterproof roofing materials to protect the dog house from rain, snow, and sunlight. Asphalt shingles, metal roofing, or corrugated plastic panels are popular choices for their weather-resistant properties. Ensure that the roofing materials are securely installed to prevent leaks and provide reliable shelter for your pet.
4. Flooring:
Opt for flooring materials that are easy to clean and provide insulation from the ground. Pressure-treated plywood or composite decking boards are suitable options for the dog house floor. Additionally, consider raising the floor slightly above ground level to prevent moisture buildup and enhance ventilation.
5. Fasteners and Sealants:
Use corrosion-resistant screws and nails to assemble the dog house frame and secure the materials. Additionally, choose a high-quality, pet-safe sealant to weatherproof the joints and seams, preventing drafts and moisture infiltration. Silicone-based sealants are effective in creating a tight seal against the elements.
6. Paints and Finishes:
If you plan to paint or finish the exterior of the dog house, select non-toxic, pet-safe paints and finishes. Water-based exterior paints and stains are ideal for adding color and protection to the dog house while ensuring the safety of your dog.
By carefully selecting these materials, you can ensure that your DIY dog house is built to withstand the elements and provide a cozy and secure retreat for your furry companion. Prioritize quality and durability when sourcing materials, as they are essential for creating a long-lasting and comfortable home for your beloved pet.
Tools Needed
Embarking on the construction of a DIY dog house requires the use of essential tools to ensure precision, efficiency, and safety throughout the building process. From measuring and cutting materials to assembling the components, having the right tools at your disposal is crucial for a successful and rewarding construction experience. Here's a comprehensive list of the tools you'll need to bring your vision of a cozy dog house to life:
-
Measuring Tools: Accurate measurements are fundamental to the construction process. Equip yourself with a tape measure, combination square, and carpenter's level to ensure precise dimensions and angles for the frame, walls, and roofing components.
-
Cutting Tools: A circular saw or a handsaw will be indispensable for cutting lumber, insulation, and roofing materials to the required sizes and shapes. Additionally, a sharp utility knife is essential for trimming insulation and making precise cuts.
-
Fastening Tools: Invest in a quality cordless drill with screwdriver bits and drill bits to secure the components together. Additionally, a hammer and a set of nails will be necessary for traditional fastening methods.
-
Assembly Tools: A sturdy workbench or sawhorses will provide a stable surface for assembling and working on the dog house components. Clamps are also valuable for holding pieces together during assembly and ensuring accurate alignment.
-
Safety Gear: Prioritize safety by wearing protective gear, including safety goggles, work gloves, and a dust mask. These items will safeguard you from potential hazards such as wood dust, splinters, and debris during the construction process.
-
Marking and Layout Tools: A carpenter's pencil, marking gauge, and chalk line are essential for marking cut lines, layout points, and reference marks on the materials, ensuring precision and consistency in the assembly of the dog house.
-
Sealing and Finishing Tools: A caulking gun is indispensable for applying sealant to joints and seams, providing weatherproofing and insulation. Additionally, brushes and rollers will be needed for applying paint or finishes to the exterior surfaces of the dog house.
-
Cleaning and Maintenance Tools: Once the dog house is constructed, keep it well-maintained with a broom, brush, and pet-safe cleaning solution for periodic cleaning and upkeep.
By assembling these essential tools, you'll be well-equipped to tackle the construction of a comfortable and secure dog house for your beloved pet. With the right tools at your disposal, you can approach the building process with confidence, precision, and a commitment to creating a welcoming retreat that your furry friend will cherish for years to come.
Step-by-Step Instructions
Building a dog house for your furry friend involves a series of carefully orchestrated steps to ensure a sturdy, comfortable, and aesthetically pleasing final product. Follow these detailed step-by-step instructions to embark on the construction process with confidence and precision:
-
Prepare the Work Area: Clear and level the chosen location for the dog house, ensuring a stable and debris-free surface for construction. Lay out the materials, tools, and safety gear in the designated work area to facilitate a smooth building process.
-
Construct the Base: Begin by assembling the base of the dog house using pressure-treated lumber. Cut the pieces to the required dimensions and securely fasten them together using corrosion-resistant screws. Ensure that the base is elevated slightly above ground level to prevent moisture buildup and enhance ventilation.
-
Frame the Walls: Cut the lumber to frame the walls of the dog house, incorporating openings for the entrance and windows if desired. Use a combination square and carpenter's level to ensure precise angles and dimensions, and securely fasten the frame together using appropriate fasteners.
-
Install Insulation: If insulation is desired, carefully fit foam board insulation or fiberglass batts within the wall frames to provide thermal regulation and comfort for your pet. Trim the insulation to fit snugly within the walls, ensuring complete coverage and effective insulation.
-
Add the Roof Structure: Construct the roof frame using sturdy lumber, ensuring proper slope for water runoff and overhang for added protection. Once the frame is assembled, securely attach the roofing materials, such as asphalt shingles or metal panels, to create a weatherproof and durable roof.
-
Install the Flooring: Place and secure the flooring material, such as pressure-treated plywood or composite decking boards, onto the base of the dog house. Ensure a snug fit and secure fastening to create a stable and comfortable floor for your pet.
-
Assemble the Walls and Roof: Position the framed walls and roof structure onto the base, ensuring proper alignment and secure attachment. Use clamps to hold the components in place during assembly, and fasten them together using screws and nails for a sturdy and cohesive structure.
-
Apply Finishes and Sealants: If desired, apply pet-safe exterior paints or stains to the surfaces of the dog house for added protection and visual appeal. Additionally, use a high-quality sealant to weatherproof the joints and seams, preventing drafts and moisture infiltration.
-
Add Final Touches: Personalize the dog house by adding a nameplate, decorative trim, or other embellishments to enhance its visual appeal. Ensure that all finishing touches are securely attached and pet-friendly.
By following these step-by-step instructions, you can construct a cozy and inviting dog house that provides your furry friend with a secure and comfortable retreat. With attention to detail and precision in each phase of the construction process, you'll create a durable and aesthetically pleasing home that your pet will cherish for years to come.
Adding Finishing Touches
Once the structural components of the dog house are in place, it's time to add the finishing touches that will elevate its functionality and visual appeal. Paying attention to the finer details during this phase will not only enhance the overall aesthetics of the dog house but also contribute to its durability and comfort for your furry friend.
1. Weatherproofing and Sealing
Before proceeding with decorative elements, ensure that all joints, seams, and exposed surfaces are adequately sealed with a high-quality, pet-safe sealant. This step is crucial for weatherproofing the dog house, preventing drafts, and safeguarding the interior from moisture infiltration. Pay special attention to areas where different materials meet, such as the junctions between walls, roof, and flooring.
2. Personalized Nameplate
Adding a personalized nameplate to the exterior of the dog house not only imparts a touch of charm but also designates the space as your pet's own. Whether it's a custom-engraved plaque or a hand-painted sign, incorporating your pet's name onto the dog house creates a sense of ownership and belonging for your furry companion.
3. Decorative Trim and Paint
Consider adding decorative trim to the exterior edges of the dog house to accentuate its visual appeal. This can be achieved with simple molding or trim pieces that complement the overall design. Additionally, if you've opted to paint the exterior, choose pet-safe, non-toxic exterior paints in colors that harmonize with your outdoor space. A fresh coat of paint not only adds vibrancy but also provides an extra layer of protection against the elements.
4. Cozy Bedding and Interior Furnishings
To complete the interior of the dog house, place a comfortable and washable bedding material that provides insulation and cushioning for your pet. Consider using a cozy pet bed or layering blankets to create a snug resting area. Additionally, incorporating a few pet-safe toys or chew treats can make the interior inviting and engaging for your furry friend.
5. Landscaping and Integration
Integrate the dog house seamlessly into your outdoor environment by strategically placing potted plants or shrubs around its perimeter. This not only enhances the aesthetics but also provides natural shading and a sense of enclosure for your pet. Ensure that the landscaping elements do not obstruct the entrance or compromise the accessibility of the dog house.
By meticulously attending to these finishing touches, you'll transform the dog house into a personalized and inviting space that reflects your care and consideration for your beloved pet. These details not only contribute to the visual appeal of the dog house but also enhance its functionality, creating a welcoming and secure retreat for your furry companion.
Tips for Maintenance
Maintaining your DIY dog house is essential to ensure its longevity, structural integrity, and continued comfort for your furry friend. By incorporating regular maintenance practices into your routine, you can preserve the quality of the dog house and provide a safe and inviting space for your pet. Here are valuable tips for maintaining your dog house:
-
Regular Cleaning: Schedule periodic cleaning sessions to remove dirt, debris, and any accumulated pet hair from both the interior and exterior of the dog house. Use a pet-safe cleaning solution and a brush to scrub the surfaces, ensuring a hygienic and pleasant environment for your pet.
-
Inspect for Wear and Damage: Conduct routine inspections to check for signs of wear, damage, or deterioration. Look for loose fasteners, cracked seals, or any structural issues that may compromise the integrity of the dog house. Addressing these issues promptly can prevent further damage and maintain the safety of the structure.
-
Weatherproofing Maintenance: Monitor the condition of the sealant and weatherproofing materials applied to the dog house. Reapply sealant as needed to reinforce the protection against drafts, moisture, and temperature fluctuations. Additionally, inspect the roofing materials for any signs of damage and repair or replace as necessary.
-
Seasonal Considerations: Adapt the maintenance routine to seasonal changes. In colder months, ensure that the interior remains well-insulated and draft-free, while in warmer months, focus on ventilation and shading to keep the interior cool and comfortable for your pet.
-
Pest Control: Implement measures to deter pests and insects from inhabiting the dog house. Regularly check for signs of infestation and take preventive actions such as applying pet-safe pest deterrents and keeping the surroundings clear of food debris.
-
Ground Maintenance: Keep the area around the dog house clear of overgrown vegetation, debris, and standing water. This helps prevent moisture buildup, minimizes pest attraction, and maintains a clean and accessible environment for your pet.
-
Repairs and Upkeep: Promptly address any necessary repairs, such as replacing worn-out bedding, repairing damaged roofing, or reinforcing structural components. Regular upkeep ensures that the dog house remains a secure and inviting space for your pet.
By incorporating these maintenance tips into your routine, you can uphold the quality and functionality of the dog house, providing your furry friend with a safe, comfortable, and well-maintained retreat. Regular care and attention to the dog house will not only extend its lifespan but also demonstrate your commitment to your pet's well-being and comfort.
Conclusion
In conclusion, embarking on the journey of building a DIY dog house is not only a fulfilling endeavor but also a meaningful expression of care and dedication to your furry companion. By following the comprehensive guide provided in this article, you have gained valuable insights into the essential aspects of constructing a cozy and secure home for your pet.
From choosing the ideal location and selecting the right materials to mastering the step-by-step construction process, you have acquired the knowledge and confidence to embark on this rewarding DIY project. The careful consideration of factors such as shade and sunlight, protection from the elements, and accessibility has equipped you to create a comfortable and inviting space that meets your pet's needs.
The selection of high-quality lumber, insulation, roofing materials, and finishes ensures that your DIY dog house is built to withstand the elements while providing a snug and secure retreat for your furry friend. Additionally, the acquisition of essential tools and the meticulous attention to finishing touches have empowered you to create a durable and aesthetically pleasing home that reflects your care and consideration for your pet.
As you venture into the maintenance phase, the tips provided will guide you in preserving the longevity and functionality of the dog house, ensuring that it remains a safe and inviting space for your pet to enjoy for years to come. By incorporating regular cleaning, inspections, weatherproofing maintenance, and seasonal considerations, you can uphold the quality and comfort of the dog house, demonstrating your commitment to your pet's well-being.
Ultimately, the construction of a DIY dog house is not just about creating a physical shelter; it's about fostering a sense of security, comfort, and belonging for your beloved pet. The bond between you and your furry friend is strengthened through the shared experience of building a space that provides protection, warmth, and a place to call their own.
As you witness your pet enjoying their new abode, whether seeking refuge from the elements, basking in the sun, or simply finding solace in their cozy retreat, you'll experience the true fulfillment of this DIY endeavor. The joy and contentment reflected in your pet's demeanor will serve as a testament to the love and care that went into creating a home that truly embodies the essence of a loyal companion.
So, as you admire the craftsmanship and dedication that went into building the DIY dog house, take pride in knowing that you've provided your furry friend with a sanctuary that not only meets their practical needs but also resonates with the warmth of your affection and the bond you share.