Home>Create & Decorate>DIY & Crafts>DIY Shed Workbench: How To Build A Functional And Space-Saving Workstation


DIY & Crafts
DIY Shed Workbench: How To Build A Functional And Space-Saving Workstation
Published: February 27, 2024

Content Creator specializing in woodworking and interior transformations. Caegan's guides motivate readers to undertake their own projects, while his custom furniture adds a personal touch.
Learn how to create a practical and efficient DIY shed workbench for your crafting projects. Maximize space and functionality with our step-by-step guide. Ideal for DIY & Crafts enthusiasts.
(Many of the links in this article redirect to a specific reviewed product. Your purchase of these products through affiliate links helps to generate commission for Twigandthistle.com, at no extra cost. Learn more)
Introduction
Are you a DIY enthusiast looking to create a dedicated workspace for your shed? Building a functional and space-saving workbench can significantly enhance your efficiency and enjoyment of various projects. Whether you're into woodworking, crafting, or tinkering with tools, having a well-designed workbench can make a world of difference. In this comprehensive guide, we'll walk you through the process of constructing a DIY shed workbench that meets your specific needs and maximizes the available space.
A well-designed workbench serves as the cornerstone of any DIY workspace, providing a sturdy and organized area for a wide range of tasks. From assembling furniture to repairing household items, a purpose-built workbench can make your projects more manageable and enjoyable. By customizing the dimensions, features, and storage options, you can tailor the workbench to accommodate your tools, materials, and working style.
Whether you're a seasoned DIYer or just starting to explore the world of hands-on projects, building a workbench for your shed is a rewarding endeavor. Not only does it offer a practical solution for your crafting and repair needs, but it also provides an opportunity to unleash your creativity and problem-solving skills. With careful planning, the right tools, and a bit of elbow grease, you can transform your shed into a productive and organized space where you can bring your ideas to life.
In the following sections, we'll delve into the step-by-step process of planning, gathering materials, and constructing a sturdy workbench for your shed. We'll explore the essential considerations for building the frame, adding a durable work surface, installing storage solutions, and adding finishing touches to ensure that your DIY shed workbench is both functional and visually appealing. So, roll up your sleeves, gather your tools, and let's embark on this exciting journey of creating a practical and efficient workspace within your shed.
Read more: DIY Garage Shelves with Workbench Guide
Planning and Preparation
Before diving into the construction of your DIY shed workbench, thorough planning and preparation are essential for a successful outcome. This phase sets the foundation for the entire project, ensuring that you have a clear vision of the workbench's design, dimensions, and functionality.
Assess Your Needs
Begin by assessing your specific needs and the intended use of the workbench. Consider the types of projects you typically undertake in your shed, the tools and materials you frequently use, and the space available for the workbench. Understanding these factors will help you determine the ideal size, layout, and features for your workbench.
Measure the Space
Take precise measurements of the area in your shed where the workbench will be located. Consider factors such as the height of the workbench, ensuring it aligns with your ergonomic requirements for comfortable working. Additionally, account for any obstructions or limitations within the space that may impact the design and placement of the workbench.
Design Considerations
Explore various workbench designs and configurations to identify the features that best suit your needs. Consider factors such as the inclusion of shelves, drawers, pegboards, and tool racks to optimize organization and accessibility. Additionally, think about the materials and finishes that align with your aesthetic preferences and the overall style of your shed.
Read more: How to Build a DIY Garage Workbench
Budget and Materials
Establish a budget for the project and create a list of required materials and tools. Research the types of wood, hardware, and finishes that align with your budget and project requirements. Consider the durability and strength of the materials, ensuring they can withstand the demands of your projects and provide long-term functionality.
Safety Precautions
Prioritize safety by familiarizing yourself with the proper use of tools and equipment required for the construction. Ensure that your workspace is well-ventilated and adequately lit. Additionally, consider any safety gear, such as goggles, gloves, and dust masks, that may be necessary during the construction process.
Obtain Necessary Permits
Depending on your location and the scale of the project, you may need to obtain permits or adhere to specific building codes. Research local regulations and obtain any necessary permits before commencing the construction of your workbench.
By investing time in thorough planning and preparation, you can lay the groundwork for a well-executed DIY shed workbench project. This phase sets the stage for a smooth construction process and ensures that the end result aligns with your specific needs and preferences.
Gathering Materials and Tools
Gathering the necessary materials and tools is a crucial step in the construction of your DIY shed workbench. By ensuring that you have all the required items on hand, you can streamline the building process and minimize interruptions. Here's a comprehensive guide to help you gather the essential materials and tools for your project.
Read more: How To Build A Workbench
Materials
-
Lumber: Select high-quality lumber that aligns with the dimensions of your workbench design. Common choices include pine, oak, or maple, known for their durability and strength. Consider the thickness and width of the lumber based on the intended load-bearing capacity of the workbench.
-
Hardware: Purchase a variety of hardware such as screws, bolts, washers, and nuts to assemble the workbench frame securely. Additionally, consider purchasing brackets and fasteners for attaching the work surface and installing storage components.
-
Work Surface: Depending on your preference, choose a suitable work surface material such as plywood, MDF (medium-density fiberboard), or a hardwood panel. Ensure that the work surface material is sturdy and capable of withstanding the tasks you plan to undertake on the workbench.
-
Finishes: Select appropriate finishes such as wood stain, varnish, or paint to protect the workbench from moisture, scratches, and general wear and tear. Choose finishes that complement the overall aesthetic of your shed and provide long-lasting protection for the workbench.
-
Storage Solutions: If your workbench design includes storage components such as shelves, drawers, or pegboards, gather the necessary materials for constructing and installing these elements. This may include additional lumber, hardware, and organizational accessories.
Tools
-
Measuring and Marking Tools: Ensure you have a tape measure, combination square, and marking gauge to accurately measure and mark the lumber for cutting and assembly.
-
Cutting Tools: Essential cutting tools include a circular saw, jigsaw, or table saw for accurately cutting the lumber to the required dimensions. Additionally, a handsaw or miter saw may be necessary for precision cuts.
-
Fastening Tools: Gather a cordless drill/driver with a variety of drill bits and screwdriver attachments for assembling the workbench frame and attaching hardware.
-
Clamps and Level: Utilize clamps to secure the lumber during assembly and ensure precise alignment. A level is essential for confirming that the workbench frame and work surface are perfectly horizontal.
-
Safety Gear: Prioritize safety by obtaining protective gear such as safety goggles, ear protection, and a dust mask to safeguard yourself during the construction process.
By carefully sourcing the required materials and ensuring that you have the necessary tools at your disposal, you can set the stage for a smooth and efficient construction process. This proactive approach minimizes delays and allows you to focus on the craftsmanship and assembly of your DIY shed workbench.
Building the Frame
The construction of the frame forms the structural backbone of your DIY shed workbench, providing stability and support for the entire assembly. Building a sturdy and well-constructed frame is essential for ensuring the durability and functionality of the workbench. Here's a detailed guide on how to build the frame for your workbench:
Step 1: Cut the Lumber
Begin by accurately measuring and cutting the lumber according to the dimensions specified in your workbench design. Use a tape measure, combination square, and marking gauge to ensure precision in your cuts. Common lumber choices for the frame include 2×4 or 4×4 dimensional lumber, selected for their strength and load-bearing capacity.
Read more: DIY Garage Shed Plans Guide
Step 2: Assemble the Legs
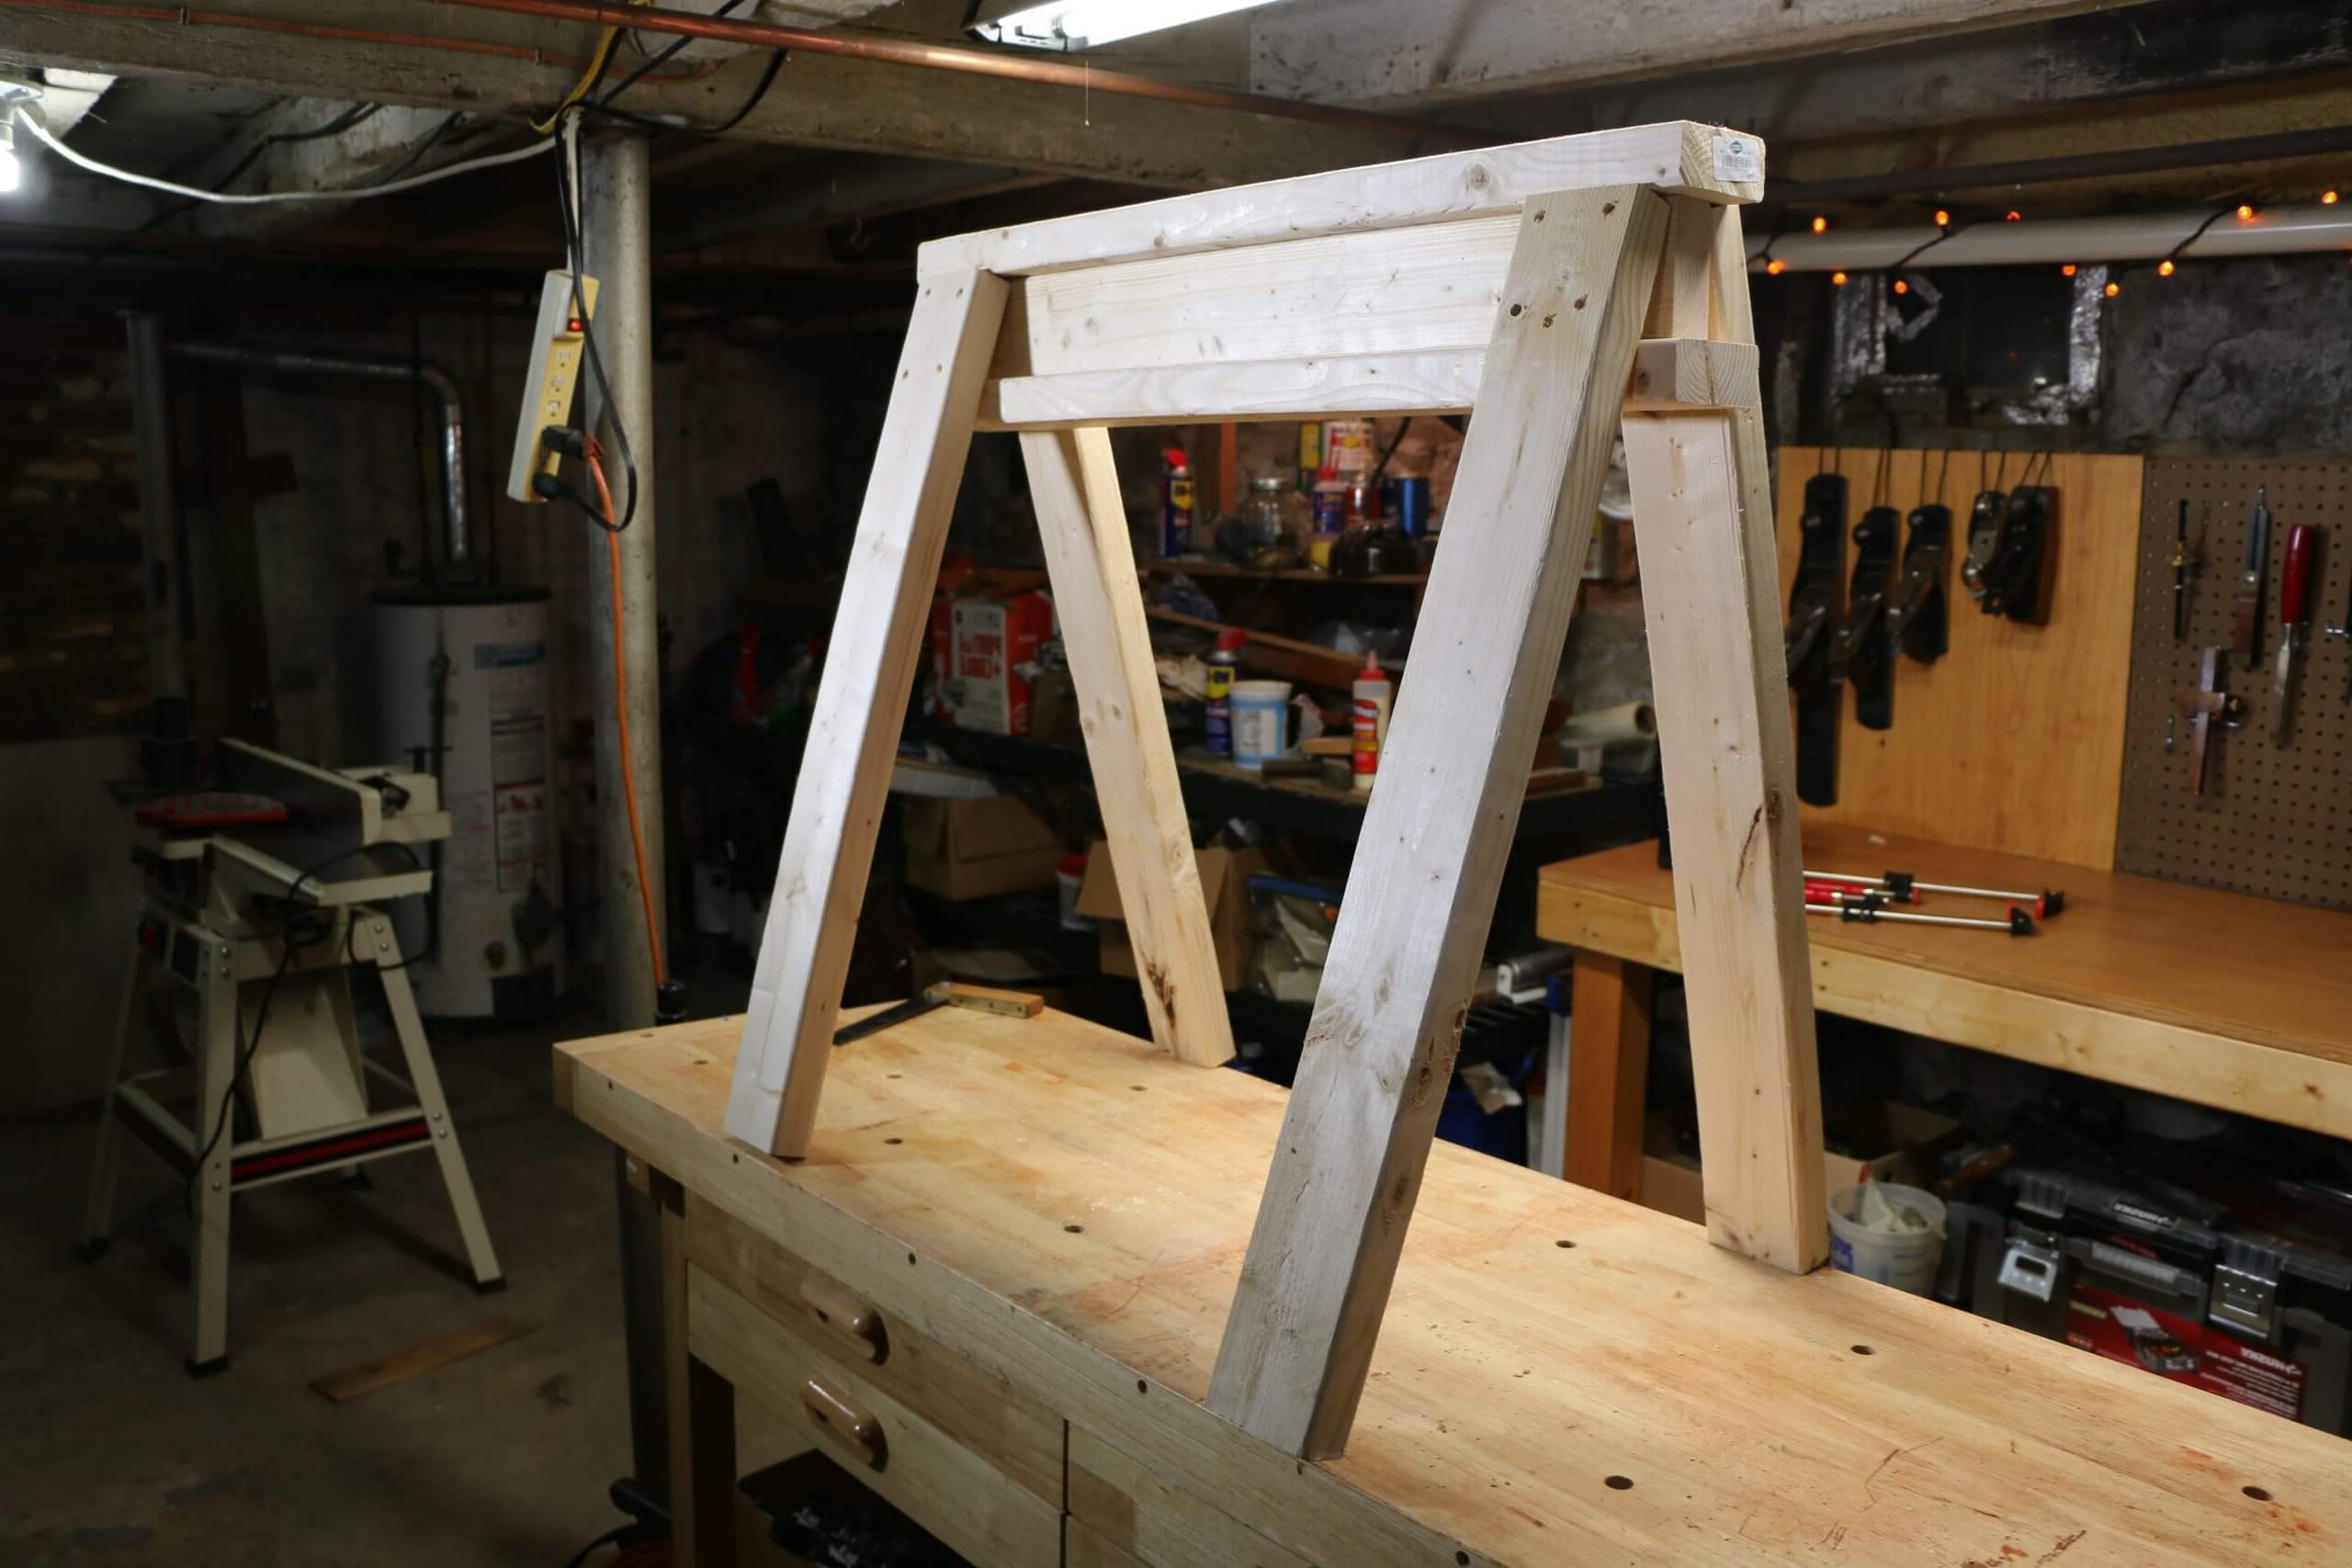
Once the lumber is cut to size, assemble the legs of the workbench frame by joining the vertical and horizontal components. Utilize a cordless drill/driver with appropriate drill bits and screws to securely fasten the pieces together. Ensure that the legs are perfectly square and level to guarantee the stability of the workbench.
Step 3: Construct the Frame Structure
With the legs in place, proceed to construct the frame structure by connecting the front, rear, and side sections. Use additional lumber pieces to create a rigid and stable framework, taking care to align the components accurately. Employ clamps to hold the pieces in position before fastening them together with screws or bolts.
Step 4: Reinforce the Joints
To enhance the strength and stability of the frame, consider reinforcing the joints with metal brackets or corner braces. These additional hardware components provide extra support and prevent the frame from wobbling or shifting during use. Ensure that the brackets are securely attached using appropriate fasteners.
Step 5: Check for Level and Square
Once the frame is fully assembled, verify that it is perfectly level and square. Use a carpenter's level to confirm that the workbench frame is not tilted or uneven. Additionally, check the corners of the frame to ensure that they form perfect right angles, which is crucial for the overall stability and functionality of the workbench.
By meticulously following these steps, you can construct a robust and reliable frame for your DIY shed workbench. The careful assembly of the frame sets the stage for the subsequent stages of adding the work surface, installing storage solutions, and adding finishing touches to complete your functional and space-saving workbench.
Read more: How To Build A Shed
Adding the Work Surface
After successfully constructing the sturdy frame for your DIY shed workbench, the next critical step is adding the work surface. The work surface serves as the primary area for carrying out various tasks, providing a flat and durable platform for woodworking, crafting, repairs, and other hands-on activities. Here's a detailed guide on how to add the work surface to your workbench:
Step 1: Selecting the Work Surface Material
Begin by selecting a suitable material for the work surface based on your specific requirements and preferences. Common options include plywood, medium-density fiberboard (MDF), or hardwood panels. Consider the intended use of the workbench and choose a material that offers the necessary strength, durability, and resistance to wear and tear. Additionally, factor in the aesthetic appeal and compatibility with the overall design of your shed workspace.
Step 2: Cutting and Sizing the Work Surface
Using precise measurements, carefully cut the selected work surface material to fit the dimensions of the workbench frame. Ensure that the edges are straight and smooth, allowing for a seamless fit onto the frame. Utilize a circular saw, jigsaw, or table saw to achieve accurate cuts, and verify that the work surface aligns perfectly with the frame to create a level and stable platform.
Step 3: Attaching the Work Surface
Position the cut work surface material onto the assembled frame, ensuring that it is centered and aligned with the edges of the frame. Secure the work surface to the frame by driving screws or bolts through the underside of the frame into the work surface material. Space the fasteners evenly to provide uniform support and prevent any warping or movement of the work surface during use.
Step 4: Finishing the Work Surface
Once the work surface is securely attached, consider applying a protective finish to enhance its durability and appearance. Depending on your preference, you can opt for wood stain, varnish, or paint to seal the work surface and protect it from moisture, scratches, and general wear. This finishing touch not only adds a professional look to the workbench but also extends the lifespan of the work surface.
By following these steps, you can effectively add a robust and functional work surface to your DIY shed workbench. The carefully selected and precisely installed work surface provides a reliable platform for a wide range of projects, ensuring that your workbench is ready to support your creative endeavors and practical tasks within the shed.
Installing Storage Solutions
Installing storage solutions is a pivotal aspect of optimizing the functionality and organization of your DIY shed workbench. Efficient storage not only enhances productivity but also contributes to a clutter-free workspace, allowing you to focus on your projects without unnecessary distractions. Here's a comprehensive guide on how to install storage solutions that cater to your specific needs and maximize the available space.
Assessing Storage Needs
Before proceeding with the installation of storage components, assess the types of tools, materials, and accessories that require organized storage within your shed workspace. Consider the frequency of use for different items and prioritize easy accessibility for frequently utilized tools. This assessment will guide the selection and placement of storage solutions to ensure a well-organized and efficient work environment.
Selecting Storage Components
Based on your storage needs and available space, choose a combination of storage components such as shelves, drawers, pegboards, and tool racks. Opt for adjustable shelving units to accommodate items of varying sizes and shapes. Drawers provide a convenient solution for storing smaller tools and accessories, while pegboards and tool racks offer a versatile and visible storage option for frequently used hand tools.
Read more: How To Build An Office Shed
Mounting Shelves and Drawers
Begin by installing the selected shelving units and drawers onto the framework of your workbench. Utilize sturdy brackets and fasteners to securely mount the shelves, ensuring they are level and capable of supporting the intended load. For drawers, consider using smooth-sliding drawer slides to facilitate easy access and smooth operation. Verify that the shelves and drawers are positioned at ergonomic heights for convenient reach during your projects.
Incorporating Pegboards and Tool Racks
Integrate pegboards and tool racks onto the walls of your shed workspace, adjacent to the workbench, to provide efficient storage for hand tools and frequently used equipment. Utilize a variety of hooks, holders, and hangers to organize tools based on their specific functions, keeping them within arm's reach for quick retrieval. Arrange the tools in a logical and intuitive manner to streamline your workflow and maintain a tidy workspace.
Customizing Storage Accessories
Consider customizing storage accessories such as bins, containers, and dividers to further enhance the organization of your shed workspace. Utilize transparent bins for storing smaller parts and hardware, allowing for easy identification of contents. Additionally, implement dividers within drawers to categorize and separate tools, ensuring a systematic and clutter-free storage solution.
By diligently following these steps, you can effectively install storage solutions that optimize the functionality and organization of your DIY shed workbench. The thoughtful integration of storage components contributes to a well-equipped and efficient workspace, allowing you to focus on your projects with ease and convenience.
Finishing Touches
With the construction of the frame, addition of the work surface, and installation of storage solutions complete, the final phase of perfecting your DIY shed workbench involves adding the finishing touches. These details not only contribute to the overall aesthetics of the workbench but also play a crucial role in ensuring its durability, functionality, and user experience.
Read more: How To Build A Portable Shed
Sanding and Smoothing
Before applying any finishes, it's essential to thoroughly sand the surfaces of the workbench to achieve a smooth and uniform texture. Utilize varying grits of sandpaper to remove any rough spots, imperfections, or sharp edges. Pay special attention to the edges and corners of the workbench, ensuring that they are rounded and free from splinters to prevent any accidental injuries during use.
Applying Protective Finishes
To safeguard the workbench against moisture, stains, and general wear, consider applying protective finishes such as wood stain, varnish, or paint. Wood stain enhances the natural beauty of the lumber while providing a protective layer that penetrates the wood fibers. Varnish offers a durable and glossy finish, adding a layer of protection against scratches and spills. Alternatively, paint allows for customization and color coordination with the overall aesthetic of your shed workspace.
Adding Edge Banding
If your workbench features exposed edges, consider adding edge banding to provide a clean and professional look. Edge banding not only conceals the raw edges of the workbench but also protects them from chipping and damage. It creates a seamless and polished appearance, elevating the overall visual appeal of the workbench.
Labeling and Organization
Incorporate labeling and organization systems to further enhance the functionality of your workbench. Utilize adhesive labels or markers to clearly identify the designated storage areas for specific tools, materials, and accessories. This simple yet effective addition promotes a systematic approach to maintaining a tidy and organized workspace.
Read more: How To Build Shed Foundation
Personalization and Customization
Consider personalizing your workbench with unique touches that reflect your individual style and preferences. Whether it's adding decorative hardware, customizing drawer pulls, or incorporating a dedicated space for personal mementos, infusing the workbench with personal touches creates a sense of ownership and pride in your workspace.
By meticulously attending to these finishing touches, you can elevate the overall appeal and functionality of your DIY shed workbench. These details not only contribute to the visual aesthetics but also enhance the user experience, ensuring that your workbench is a well-crafted and personalized space where you can bring your creative endeavors to life.
Conclusion
In conclusion, the journey of building a DIY shed workbench is not just about constructing a functional workspace; it's a testament to the creativity, craftsmanship, and dedication of the DIY enthusiast. By embarking on this endeavor, you've not only created a practical and efficient workbench but also transformed your shed into a hub of productivity and inspiration.
Throughout the planning and preparation phase, you meticulously assessed your needs, measured the space, and carefully considered the design and budgetary aspects. This thoughtful approach laid the groundwork for a well-executed project, ensuring that the workbench aligns with your specific requirements and seamlessly integrates into your shed workspace.
The process of gathering materials and tools was a testament to your commitment to quality and precision. By selecting high-quality lumber, hardware, and finishes, you've set the stage for a durable and visually appealing workbench. The careful sourcing of tools and safety gear further exemplifies your dedication to a safe and efficient construction process.
Building the sturdy frame and adding the durable work surface were pivotal stages that showcased your craftsmanship and attention to detail. The meticulous assembly of the frame and the precise installation of the work surface resulted in a robust and reliable workbench that forms the foundation for a wide range of projects and activities.
The installation of storage solutions and the incorporation of finishing touches demonstrated your commitment to organization, functionality, and personalization. By optimizing storage and adding thoughtful details, you've created a workspace that not only facilitates productivity but also reflects your individual style and preferences.
As you stand back and admire the completed DIY shed workbench, take pride in the fact that you've not only built a functional workstation but also cultivated a space where your creativity can flourish. Whether it's woodworking, crafting, or tinkering with tools, your workbench stands ready to support your endeavors and inspire new projects.
In the end, the construction of a DIY shed workbench is a testament to your passion for hands-on projects and your ability to transform raw materials into a purposeful and personalized creation. As you embark on future projects within your shed, may your workbench serve as a constant source of inspiration and a tangible symbol of your ingenuity and dedication to the art of DIY craftsmanship.

