
Home>Create & Decorate>DIY & Crafts>DIY Pergola Installation: Step-by-Step Guide For Creating Your Outdoor Oasis
DIY & Crafts
DIY Pergola Installation: Step-by-Step Guide For Creating Your Outdoor Oasis
Published: May 14, 2024

Senior Editor in Create & Decorate, Kathryn combines traditional craftsmanship with contemporary trends. Her background in textile design and commitment to sustainable crafts inspire both content and community.
Create your dream outdoor oasis with our step-by-step DIY pergola installation guide. Perfect for DIY & Crafts enthusiasts looking to enhance their outdoor space.
(Many of the links in this article redirect to a specific reviewed product. Your purchase of these products through affiliate links helps to generate commission for Twigandthistle.com, at no extra cost. Learn more)
Introduction
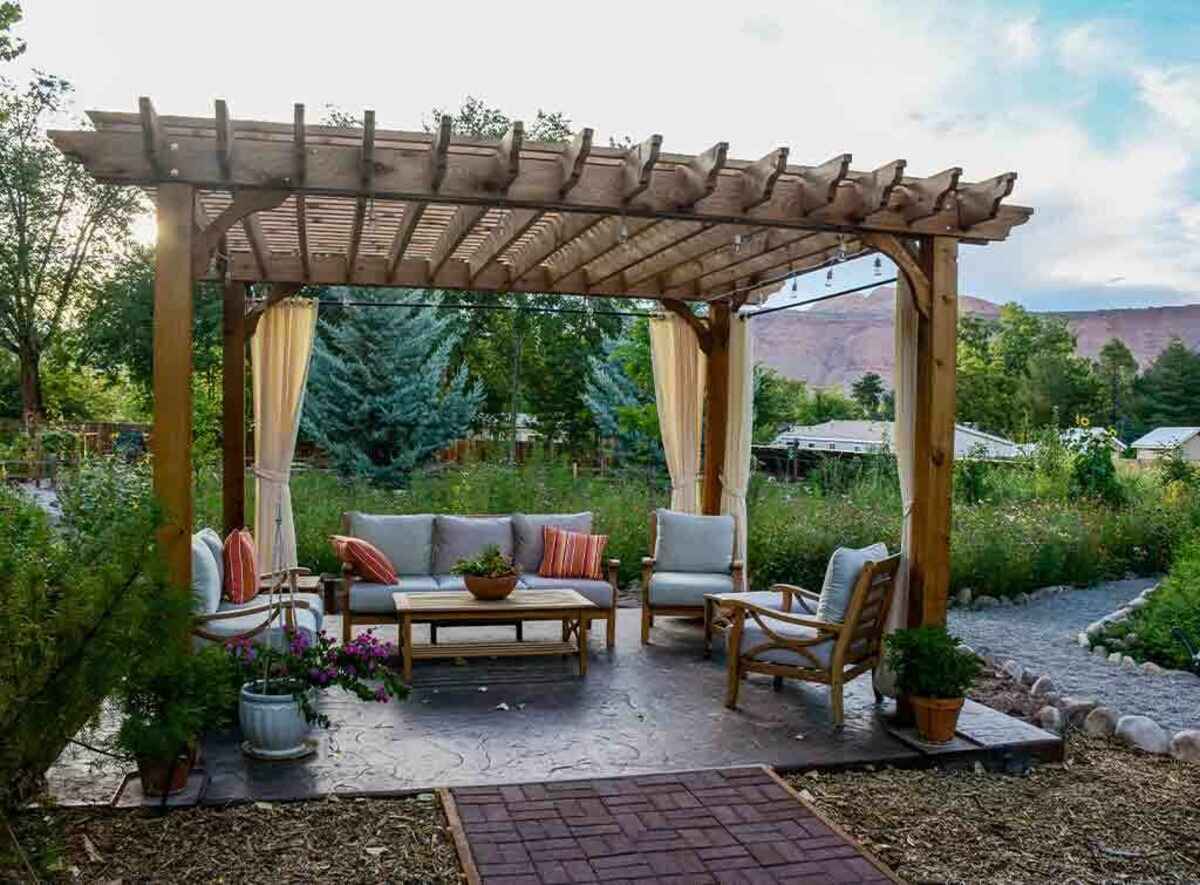
Are you dreaming of creating a cozy outdoor space where you can relax and entertain? A DIY pergola installation might be just the project for you. Building a pergola can add beauty, shade, and a touch of elegance to your backyard. Whether you're envisioning a spot for al fresco dining, a peaceful retreat for reading, or a place to hang string lights for evening ambiance, a pergola can transform your outdoor area into a welcoming oasis. In this step-by-step guide, we'll walk you through the process of building your own pergola, so you can bring your outdoor living space to life.
Planning Your Pergola Project
Before diving into the construction phase, it's crucial to start with a well-thought-out plan. Here's how to get started:
-
Determine the Purpose: First, consider how you intend to use your pergola. Will it be a dining area, a lounging space, or a combination of both? Understanding the primary function will guide the design and size of your pergola.
-
Select the Location: Choose the ideal spot for your pergola. Take into account factors such as sunlight, shade, and proximity to your home. You'll want to create a space that is both functional and visually appealing.
-
Check Local Regulations: Before proceeding, check with your local building department or homeowner's association to ensure compliance with any regulations or permits required for the construction of a pergola.
-
Design the Structure: Sketch out the design of your pergola, considering the dimensions, style, and materials you plan to use. This will serve as a blueprint for the construction phase.
By taking the time to plan your pergola project thoroughly, you'll set the stage for a successful and satisfying DIY experience.
Gathering Materials and Tools
Once you have a clear plan in place, it's time to gather the necessary materials and tools for your pergola project. Here's what you'll need:
Materials
- Lumber: Select high-quality, weather-resistant lumber for the main structure, such as cedar, redwood, or pressure-treated pine.
- Concrete: Purchase concrete mix for securing the pergola posts in the ground.
- Hardware: Gather galvanized or stainless steel screws, bolts, and brackets to ensure the structural integrity of your pergola.
- Decorative Elements: Consider adding decorative elements such as lattice panels, post caps, or trim pieces to enhance the visual appeal of your pergola.
Tools
- Measuring Tools: A tape measure, level, and speed square will be essential for accurate measurements and alignment.
- Cutting Tools: A circular saw or miter saw will be necessary for cutting lumber to the desired lengths.
- Drilling Tools: A power drill with drill bits and screwdriver attachments will be used for assembling the pergola components.
- Digging Tools: Shovels and a post hole digger will be required for excavating holes for the pergola posts.
- Safety Gear: Don't forget to prioritize safety with protective eyewear, gloves, and hearing protection.
By ensuring you have all the required materials and tools on hand, you'll be well-prepared to move on to the next phase of your pergola installation project.
Preparing the Site
Before you begin the physical construction of your pergola, it's essential to prepare the site where it will be located. This involves several key steps to ensure a solid foundation and proper alignment for your pergola structure.
-
Clear the Area: Start by clearing the ground where the pergola will be situated. Remove any debris, rocks, or vegetation to create a clean and level surface. This will provide a stable base for the construction process.
-
Mark the Layout: Use stakes and string to outline the footprint of your pergola. This will help you visualize the size and placement of the structure within your outdoor space. Double-check the dimensions and make any necessary adjustments before proceeding.
-
Excavate the Post Holes: Using the dimensions from your layout, dig holes for the pergola posts. The depth of the holes will depend on the frost line in your region and the recommended depth for supporting the structure. Be sure to follow local building codes and guidelines for proper hole depth.
-
Add Gravel and Compact: Once the post holes are dug, add a layer of gravel to the bottom of each hole. This will aid in drainage and prevent the posts from sitting directly in waterlogged soil. Use a tamper to compact the gravel for a stable base.
-
Set the Posts: With the holes prepared, it's time to set the pergola posts in place. Use a level to ensure each post is perfectly plumb and aligned with the layout markings. Temporary bracing can help hold the posts in position while the concrete sets.
By taking the time to thoroughly prepare the site for your pergola, you'll establish a solid foundation for the rest of the construction process. This attention to detail will contribute to the overall stability and longevity of your outdoor oasis.
Setting the Posts
Setting the pergola posts is a critical step in the construction process, as they will serve as the primary support for the entire structure. Here's a detailed guide on how to set the posts for your DIY pergola installation:
-
Positioning the Posts: Carefully place each post in its designated hole, ensuring that they are evenly spaced according to your pergola design. Use a tape measure to confirm that the distances between the posts are consistent, maintaining the structural integrity of the pergola.
-
Checking for Plumb: Before adding concrete, it's essential to ensure that each post is perfectly plumb, meaning it is vertically straight. Use a level to check all four sides of each post, adjusting as necessary to achieve precise alignment. This step is crucial for the stability and aesthetics of the finished pergola.
-
Bracing the Posts: To hold the posts in position while the concrete sets, temporary bracing is recommended. This can be achieved by attaching diagonal braces from the top of each post to stakes driven into the ground. The braces will prevent the posts from shifting during the setting process.
-
Adding Concrete: Once the posts are accurately positioned and braced, it's time to add concrete to the holes. Pour the concrete mix into each hole around the base of the posts, taking care to eliminate air pockets and ensure thorough coverage. Follow the manufacturer's instructions for mixing and setting times.
-
Checking Alignment: As the concrete sets, periodically check the alignment and plumb of the posts to make any necessary adjustments before the concrete hardens. This attention to detail will contribute to the overall stability and appearance of the pergola.
By following these steps, you'll establish a solid and secure foundation for your pergola, setting the stage for the next phases of the construction process.
Attaching the Beams and Rafters
With the posts securely set in place, the next phase of your pergola installation involves attaching the beams and rafters to form the framework of the structure. This step requires precision and attention to detail to ensure a sturdy and visually appealing result.
-
Prepare the Beams: Before attaching the beams, it's essential to prepare them for installation. This may involve cutting the beams to the desired length and adding any decorative details or end cuts to enhance the aesthetic appeal of the pergola.
-
Lift and Position the Beams: Enlist the help of a few assistants to lift the beams into position on top of the set posts. Carefully place the beams across the tops of the posts, ensuring that they are evenly aligned and level. Temporary clamps or braces can help hold the beams in place during this process.
-
Secure the Beams to the Posts: Once the beams are positioned correctly, it's time to secure them to the posts. Depending on your design, this may involve using heavy-duty screws or specialized hardware to attach the beams firmly to the sides of the posts. Be sure to double-check the alignment and level of the beams before fully securing them in place.
-
Install the Rafters: With the beams in position, the next step is to install the rafters that will run perpendicular to the beams, creating the traditional "grid" pattern of a pergola. Space the rafters evenly across the length of the beams, ensuring that they are parallel to each other and perpendicular to the beams.
-
Secure the Rafters: Once the rafters are positioned correctly, secure them to the beams using appropriate fasteners. Depending on your design, this may involve toenailing the rafters into the beams or using metal brackets for added stability. Take care to maintain consistent spacing between the rafters for a polished look.
-
Add Decorative Touches: As the framework of the pergola takes shape, consider adding decorative touches such as notched ends on the rafters or decorative trim pieces to enhance the visual appeal of the structure. These details can add a touch of elegance and personalization to your DIY pergola.
By following these steps, you'll successfully attach the beams and rafters, bringing your pergola one step closer to completion. This phase sets the stage for the final touches that will transform your outdoor space into a welcoming oasis.
Installing the Crosspieces
Installing the crosspieces is a crucial step in the construction of your pergola, as they not only contribute to the structural integrity of the framework but also add visual interest to the overall design. Here's a detailed guide on how to install the crosspieces for your DIY pergola installation:
-
Measure and Cut the Crosspieces: Begin by measuring and cutting the crosspieces to the desired length, taking into account the spacing and overhang you want for your pergola. Use a saw to make precise cuts, ensuring that the ends are square and the lengths are consistent for a professional finish.
-
Position the Crosspieces: With the crosspieces prepared, position them across the rafters, perpendicular to the beams. Depending on your design, you may choose to space the crosspieces evenly or create a custom pattern for a unique look. Use a level to ensure that the crosspieces are perfectly horizontal and aligned with the rafters.
-
Secure the Crosspieces: Once the crosspieces are in position, secure them to the rafters using appropriate fasteners. Depending on your preference, this may involve using screws, nails, or specialized hardware. Take care to space the fasteners evenly along the length of each crosspiece for a professional and secure attachment.
-
Consider Decorative Details: As you install the crosspieces, consider adding decorative details such as notched ends, decorative cuts, or additional trim pieces to enhance the visual appeal of your pergola. These custom touches can add a touch of elegance and personalization to your outdoor oasis.
-
Double-Check Alignment: Throughout the installation process, double-check the alignment and level of the crosspieces to ensure a uniform and polished appearance. Making any necessary adjustments as you progress will contribute to the overall visual appeal and structural integrity of your pergola.
By following these steps, you'll successfully install the crosspieces, bringing your pergola one step closer to completion. This phase adds the finishing touches that will transform your outdoor space into a welcoming and stylish oasis.
Adding the Finishing Touches
As you approach the final stages of your DIY pergola installation, it's time to add the finishing touches that will elevate the visual appeal and functionality of your outdoor oasis. Here's a detailed guide on how to complete your pergola with style and finesse:
-
Apply a Protective Finish: To enhance the longevity of your pergola and protect it from the elements, consider applying a protective finish to the wood. Options such as clear sealants, stains, or outdoor-rated paint can not only safeguard the wood but also add a touch of color and character to your pergola.
-
Incorporate Greenery: Introducing climbing plants or vines to your pergola can create a lush and inviting atmosphere. Consider planting climbing roses, wisteria, or jasmine at the base of the pergola and training them to weave through the structure. This natural adornment will infuse your outdoor space with fragrance and visual charm.
-
Add Shade Elements: If you desire additional shade or privacy, consider incorporating shade elements such as outdoor curtains, retractable canopies, or louvered panels into your pergola design. These additions can provide versatility and comfort, allowing you to adapt your outdoor space to varying weather conditions and preferences.
-
Install Lighting: To extend the functionality of your pergola into the evening hours, consider installing outdoor lighting. String lights, lanterns, or sconces can create a warm and inviting ambiance, making your pergola the perfect spot for evening gatherings or quiet relaxation under the stars.
-
Accessorize with Furniture and Decor: Complete the transformation of your outdoor oasis by adding comfortable seating, outdoor rugs, and decorative accents to your pergola space. Choose weather-resistant furniture and accessories that complement the style of your pergola, creating a cohesive and inviting environment for relaxation and entertainment.
-
Personalize with Custom Details: Consider adding custom details such as carved post caps, decorative brackets, or personalized signage to infuse your pergola with unique character and charm. These custom touches can reflect your individual style and create a one-of-a-kind outdoor retreat.
By incorporating these finishing touches, you'll bring your DIY pergola installation to its full potential, creating a captivating and functional outdoor space that reflects your personal style and enhances your enjoyment of your home.
Conclusion
In conclusion, building your own pergola can be a rewarding and transformative DIY project that adds both beauty and functionality to your outdoor space. By following the step-by-step guide provided, you can create a customized oasis where you can relax, entertain, and enjoy the natural beauty of your surroundings. From careful planning and preparation to the installation of the framework and the addition of finishing touches, each phase of the process contributes to the creation of a welcoming and stylish outdoor retreat. With the right materials, tools, and attention to detail, you can bring your vision of a pergola to life, enhancing your home and lifestyle in the process. So, roll up your sleeves, gather your supplies, and get ready to build the pergola of your dreams.