Home>Create & Decorate>DIY & Crafts>Deck Pergola: A DIY Guide To Building Your Own Outdoor Oasis

DIY & Crafts
Deck Pergola: A DIY Guide To Building Your Own Outdoor Oasis
Published: February 23, 2024

Content Creator specializing in woodworking and interior transformations. Caegan's guides motivate readers to undertake their own projects, while his custom furniture adds a personal touch.
Create your own outdoor oasis with our DIY guide to building a deck pergola. Transform your space with our step-by-step instructions and expert tips. Perfect for DIY & Crafts enthusiasts.
(Many of the links in this article redirect to a specific reviewed product. Your purchase of these products through affiliate links helps to generate commission for Twigandthistle.com, at no extra cost. Learn more)
Introduction
Welcome to the ultimate guide on building your very own deck pergola! If you're dreaming of creating a cozy outdoor oasis where you can relax, entertain, and soak up the beauty of nature, then you're in the right place. A deck pergola is a versatile and stylish addition to any outdoor space, providing shade, architectural interest, and a perfect spot for climbing plants to thrive.
In this comprehensive DIY guide, we'll walk you through the step-by-step process of planning, gathering materials, and constructing your deck pergola. Whether you're a seasoned DIY enthusiast or a beginner looking to take on a new project, this guide will equip you with the knowledge and confidence to bring your vision to life.
By the end of this journey, you'll have a stunning deck pergola that not only enhances the aesthetic appeal of your outdoor area but also adds value to your home. So, roll up your sleeves, unleash your creativity, and get ready to embark on an exciting adventure of crafting your own outdoor sanctuary.
Let's dive into the planning phase and explore the key considerations for designing a deck pergola that perfectly complements your space and lifestyle.
Planning Your Deck Pergola
Before diving into the construction phase, meticulous planning is essential to ensure that your deck pergola aligns with your vision and meets your practical needs. Here's a detailed breakdown of the planning process:
-
Assess Your Space: Begin by evaluating the available space on your deck where the pergola will be installed. Consider the dimensions, existing furniture, and traffic flow to determine the ideal size and placement of the pergola.
-
Define Your Purpose: What do you envision using the pergola for? Whether it's creating a cozy lounging area, hosting outdoor gatherings, or cultivating a garden oasis, clarifying the primary purpose will guide the design and layout decisions.
-
Style and Aesthetics: Explore different pergola styles, such as traditional, modern, or rustic, and envision how each would complement your deck and overall outdoor ambiance. Consider architectural elements, such as the shape of the pergola, decorative details, and how it integrates with the existing design of your home.
-
Material Selection: Research various materials for building the pergola, such as wood, vinyl, or metal, and weigh the pros and cons of each in terms of durability, maintenance, and aesthetic appeal. The material choice should harmonize with your deck's existing materials and the overall style of your outdoor space.
-
Sun and Shade Considerations: Assess the sun exposure on your deck throughout the day to determine the optimal positioning of the pergola for shade. This will ensure that you can enjoy the outdoor space comfortably, whether it's for morning coffee or afternoon relaxation.
-
Regulatory Compliance: Check local building codes and regulations to ensure compliance with any necessary permits or restrictions for adding a structure to your deck. It's crucial to adhere to these guidelines to avoid potential issues in the future.
-
Budget and Timeline: Establish a realistic budget for the project, factoring in material costs, tools, and any professional assistance if needed. Additionally, outline a timeline for the planning, construction, and completion of your deck pergola to manage expectations and stay organized throughout the process.
By meticulously planning these key aspects, you'll lay a solid foundation for the successful execution of your deck pergola project. With a clear vision and thoughtful considerations, you're ready to move on to the next phase of gathering materials and tools to bring your dream pergola to life.
Gathering Materials and Tools
With the planning phase complete, it's time to gather the essential materials and tools that will bring your deck pergola to fruition. Here's a comprehensive list to ensure you have everything you need for a smooth and efficient construction process.
Materials:
-
Lumber: Select high-quality, weather-resistant lumber for the structural components of the pergola. Pressure-treated wood, cedar, or redwood are popular choices known for their durability and ability to withstand outdoor conditions.
-
Fasteners: Stock up on galvanized or stainless steel screws, nails, and bolts to securely assemble the components of the pergola. These corrosion-resistant fasteners are essential for long-lasting stability.
-
Concrete Mix: If your pergola design includes posts that require anchoring, concrete mix will be necessary for setting the posts securely in the ground.
-
Post Anchors: Depending on the design and layout of your deck, you may need post anchors to attach the pergola posts to the deck surface. Choose anchors suitable for your specific deck material and structure.
-
Decorative Hardware: Enhance the visual appeal of your pergola with decorative hardware such as ornamental brackets, caps, and finials. These details add a touch of elegance and charm to the structure.
-
Wood Stain or Sealant: Protect the lumber from moisture, UV rays, and general wear by investing in a high-quality wood stain or sealant. Choose a product that complements the natural beauty of the wood while providing long-term protection.
-
Climbing Plants: If you envision lush greenery adorning your pergola, consider purchasing climbing plants such as jasmine, wisteria, or climbing roses. These plants will eventually intertwine with the pergola, adding a vibrant and organic element to the structure.
Tools:
-
Circular Saw: A versatile and essential tool for cutting lumber to the desired dimensions. Ensure the saw blade is suitable for cutting wood and make precise, clean cuts.
-
Drill/Driver: A power drill with screwdriver bits is indispensable for fastening screws and drilling pilot holes. Opt for a cordless drill for convenience and maneuverability.
-
Level: Achieve accurate and straight construction by using a reliable level to ensure the horizontal and vertical alignment of the pergola components.
-
Measuring Tape: Accurate measurements are crucial for a well-built pergola. A durable measuring tape will be your trusted companion throughout the construction process.
-
Post Hole Digger: If your pergola design involves setting posts in the ground, a post hole digger will expedite the digging process and ensure proper depth for secure anchoring.
-
Ladder: Depending on the height of your pergola, a sturdy ladder will facilitate safe access to elevated areas during assembly.
-
Paintbrush or Sprayer: For applying wood stain or sealant, have a high-quality paintbrush or sprayer on hand to achieve an even and protective finish on the lumber.
By gathering these materials and tools, you'll be well-equipped to embark on the construction phase of your deck pergola project. With careful preparation and attention to detail, you're on your way to creating a captivating outdoor oasis that reflects your personal style and enhances your outdoor living experience.
Building the Pergola Frame
With the materials and tools at the ready, it's time to dive into the exciting phase of constructing the pergola frame. This foundational step sets the stage for the overall structure and visual appeal of your deck pergola. Follow these detailed steps to build a sturdy and visually appealing pergola frame that will serve as the backbone of your outdoor oasis.
Step 1: Preparing the Lumber
Begin by carefully measuring and cutting the lumber according to your design specifications. Use a reliable circular saw to make precise cuts, ensuring that the components are uniform in size and ready for assembly. Take your time with this step to achieve accuracy, as the quality of the cuts will significantly impact the overall appearance and stability of the pergola frame.
Step 2: Assembling the Posts and Beams
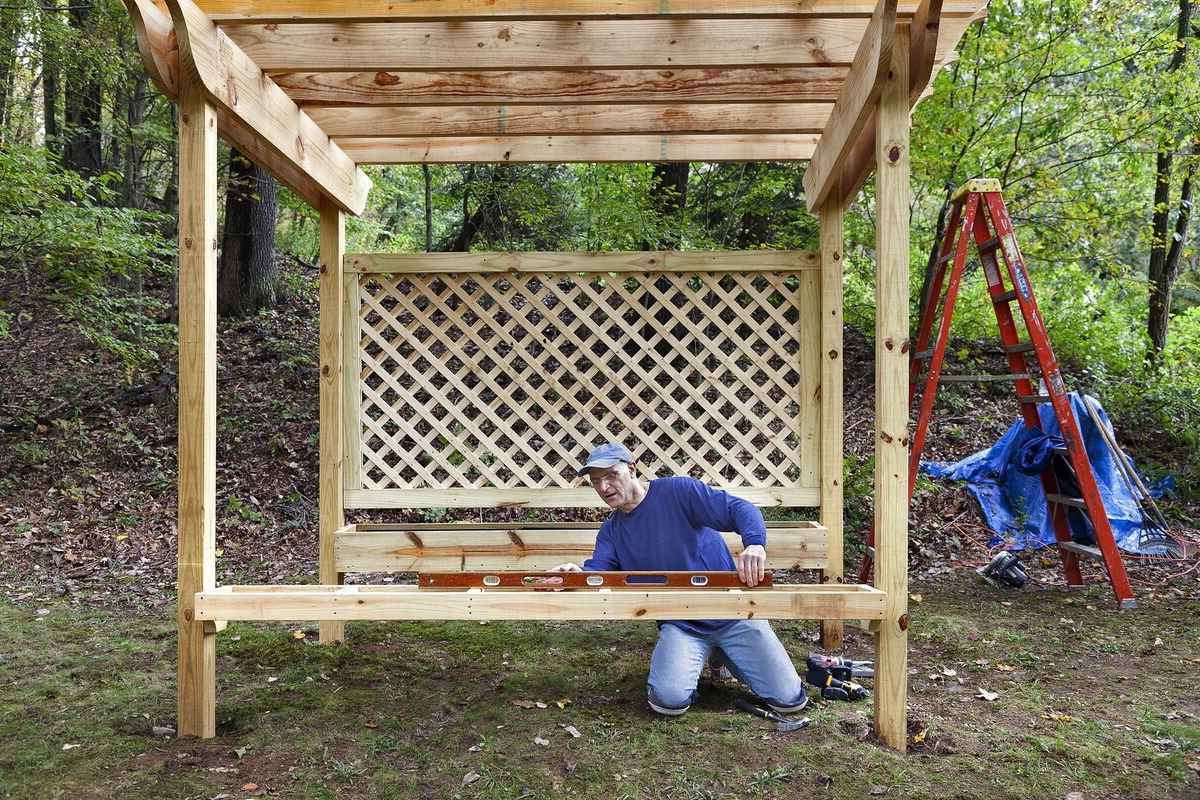
Lay out the pre-cut lumber in the designated area of your deck, positioning the posts according to your planned layout. Use a level to ensure that the posts are perfectly vertical and securely anchored to the deck surface, either through post anchors or by setting them in concrete footings. Once the posts are in place, attach the horizontal beams to create the basic framework of the pergola. Secure the connections with galvanized or stainless steel fasteners for added durability.
Step 3: Adding the Rafters and Purlins
With the main frame in position, it's time to add the rafters and purlins to complete the structure. The rafters will run perpendicular to the beams, providing essential support and creating the classic grid pattern characteristic of pergolas. Carefully space the rafters to achieve a balanced and visually appealing layout. Once the rafters are in place, install the purlins across the rafters, adding structural integrity and a decorative touch to the frame.
Step 4: Finishing Touches
As the pergola frame takes shape, take a moment to assess the overall alignment and stability of the structure. Use a level to ensure that the frame is perfectly horizontal and that all connections are secure. Additionally, consider adding decorative hardware and embellishments to enhance the aesthetic appeal of the frame. Ornamental brackets, caps, and finials can elevate the visual impact of the pergola, infusing it with charm and personality.
By meticulously following these steps, you'll successfully build a robust and visually striking pergola frame that forms the centerpiece of your outdoor sanctuary. With the frame in place, you're now ready to move on to the next phase of installing the pergola on your deck, bringing you one step closer to enjoying your own tranquil and stylish outdoor retreat.
Installing the Pergola on Your Deck
With the pergola frame expertly constructed, the next crucial step is to securely install it on your deck, ensuring stability and structural integrity. This phase requires precision and attention to detail to seamlessly integrate the pergola with your existing outdoor space. Follow these detailed steps to successfully install the pergola on your deck and bring your vision to life.
Step 1: Positioning the Pergola
Carefully determine the ideal placement of the pergola on your deck, considering factors such as sun exposure, traffic flow, and visual harmony with the surrounding environment. Enlist the help of a friend or family member to assist with positioning the pergola in the designated area, ensuring that it aligns with your initial planning and complements the overall layout of the deck.
Step 2: Securing the Pergola Posts
Once the pergola is in position, focus on securing the posts to the deck surface. Depending on your deck's construction and material, you may utilize post anchors designed for attachment to the deck or opt for alternative methods such as lag screws or bolts. Ensure that the posts are perfectly vertical and securely fastened to the deck, providing a solid foundation for the pergola structure.
Step 3: Checking for Level and Stability
Use a reliable level to verify that the installed pergola is perfectly horizontal and free from any tilting or imbalance. This step is crucial for ensuring the overall stability and visual appeal of the structure. Make any necessary adjustments to achieve a level and secure installation, guaranteeing that the pergola stands as a steadfast and elegant addition to your outdoor space.
Step 4: Reinforcing Connections
Inspect all connections between the pergola and the deck, ensuring that each attachment point is robust and capable of withstanding outdoor elements. Double-check the fasteners and hardware used to secure the pergola to the deck, reinforcing any connections that may require additional support. This meticulous approach will contribute to the long-term durability and safety of the installed pergola.
Step 5: Final Assessment
Take a step back to admire the newly installed pergola and conduct a comprehensive assessment of the entire structure. Confirm that the pergola seamlessly integrates with the deck, creating a harmonious and inviting outdoor environment. Pay attention to the details, ensuring that the installation reflects your original vision and enhances the overall aesthetic appeal of your outdoor oasis.
By meticulously following these steps, you'll successfully install the pergola on your deck, transforming your outdoor space into a captivating and functional retreat. With the pergola securely in place, you're now ready to add the finishing touches that will elevate its charm and create a welcoming haven for relaxation, entertainment, and enjoyment.
Adding Finishing Touches
With the pergola securely installed on your deck, it's time to infuse it with character and charm by adding the finishing touches that will elevate its visual appeal and functionality. These details will not only enhance the aesthetics of the pergola but also contribute to creating a welcoming and inviting outdoor sanctuary. Here's a detailed guide on how to add the perfect finishing touches to your newly installed deck pergola.
Read more: How To Add A Pergola To An Existing Deck
Step 1: Choosing Decorative Elements
Consider incorporating decorative elements that reflect your personal style and complement the overall design of your outdoor space. Ornamental brackets, caps, and finials can add a touch of elegance to the pergola, creating visual interest and a sense of refinement. Additionally, consider integrating lighting fixtures, such as string lights or solar-powered lanterns, to illuminate the pergola and extend its functionality into the evening hours.
Step 2: Selecting Climbing Plants
If you envision a lush and verdant ambiance for your pergola, select climbing plants that will thrive in the outdoor environment. Consider options such as jasmine, wisteria, or climbing roses, which will eventually intertwine with the pergola structure, adding a vibrant and organic element to the space. The presence of climbing plants will infuse the pergola with natural beauty and create a tranquil atmosphere.
Step 3: Incorporating Cozy Furnishings
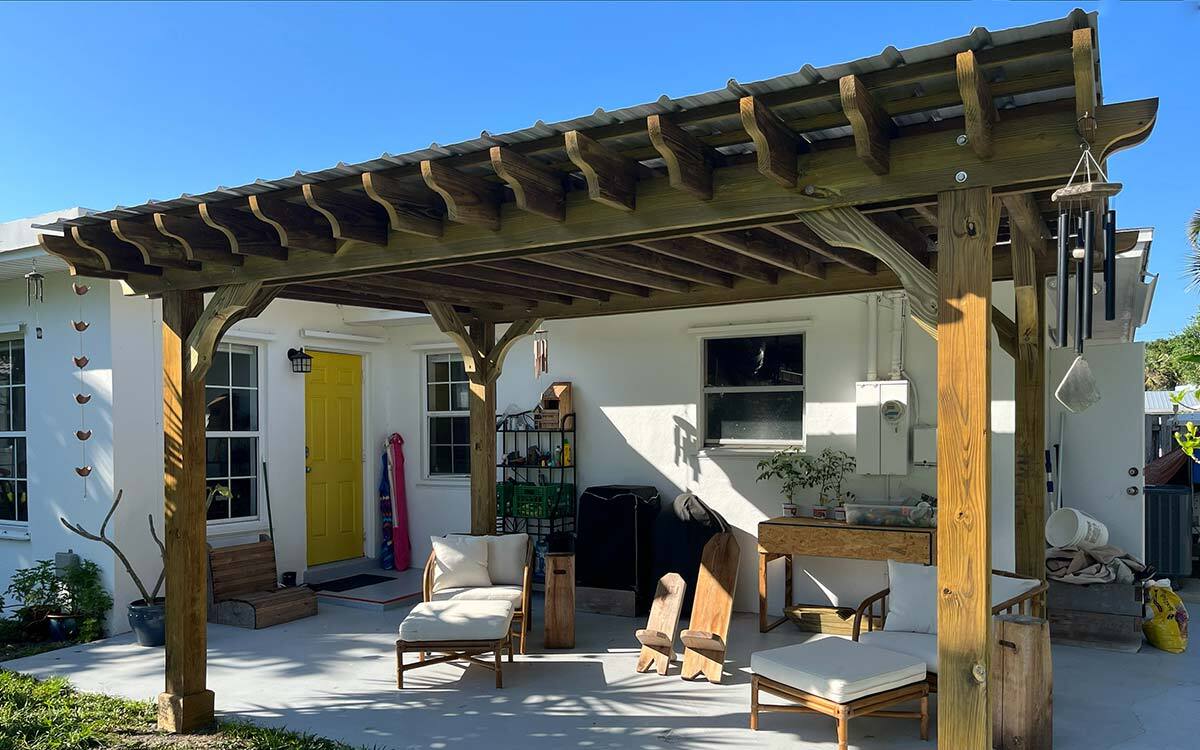
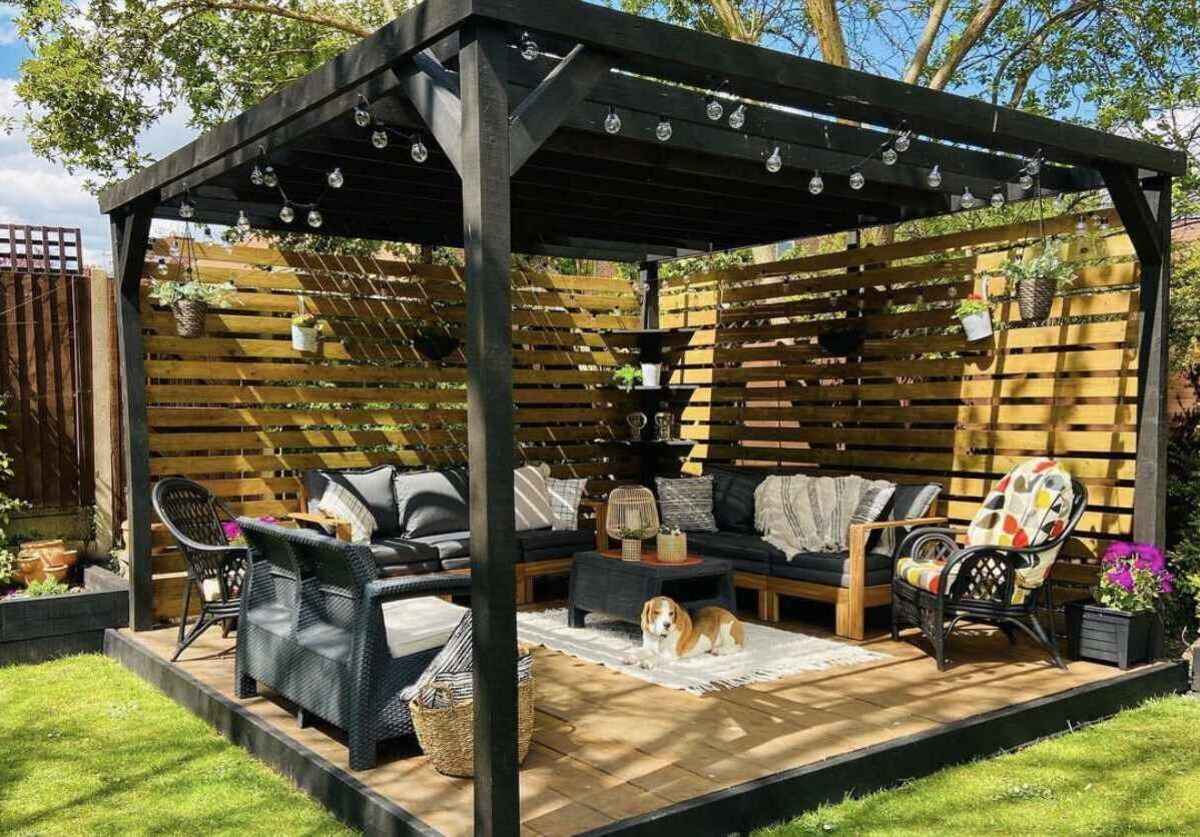
To transform the pergola into a cozy and inviting retreat, introduce comfortable furnishings such as outdoor sofas, chairs, and accent pillows. Select weather-resistant materials that can withstand outdoor conditions while providing a comfortable and stylish seating area. Adding a weatherproof rug and a small outdoor table can further enhance the functionality of the pergola, creating a space where you can relax and entertain with ease.
Step 4: Applying a Protective Finish
Prioritize the long-term durability and visual appeal of the pergola by applying a protective finish to the wood. Choose a high-quality wood stain or sealant that complements the natural beauty of the lumber while providing essential protection against moisture, UV rays, and general wear. A well-maintained finish will preserve the integrity of the wood and ensure that your pergola remains a stunning focal point of your outdoor space for years to come.
Read more: DIY Outdoor Shower: Building Your Own Oasis
Step 5: Personalizing with Décor
Infuse the pergola with your personal touch by incorporating decorative elements that resonate with your style and preferences. Consider hanging potted plants, decorative lanterns, or artwork that reflects your personality and adds a unique flair to the space. By personalizing the pergola with carefully curated décor, you'll create a welcoming and intimate atmosphere that feels like an extension of your indoor living space.
By meticulously adding these finishing touches, you'll transform your deck pergola into a captivating outdoor oasis that invites relaxation, social gatherings, and moments of tranquility. Each detail contributes to the overall ambiance and functionality of the pergola, creating a space where you can unwind, entertain, and savor the beauty of outdoor living. With the finishing touches in place, your deck pergola is ready to serve as a stylish and inviting retreat that enriches your outdoor lifestyle.
Conclusion
Congratulations on successfully completing the construction of your deck pergola! By embarking on this DIY journey, you've not only added a stunning architectural feature to your outdoor space but also created a versatile and inviting sanctuary where you can unwind, entertain, and connect with nature. As you reflect on the fulfilling process of planning, gathering materials, constructing the pergola frame, installing it on your deck, and adding the finishing touches, it's evident that your dedication and creativity have resulted in a remarkable transformation of your outdoor environment.
Your deck pergola stands as a testament to your vision and craftsmanship, serving as a focal point that enhances the aesthetic appeal and functionality of your outdoor living area. The careful consideration of design elements, material selection, and decorative details has culminated in a structure that seamlessly integrates with your deck while elevating the overall ambiance of your outdoor oasis.
As you bask in the satisfaction of completing this project, take a moment to envision the countless memorable experiences that await within the embrace of your pergola. Whether it's enjoying leisurely mornings with a cup of coffee, hosting intimate gatherings with friends and family, or simply finding solace in the tranquility of your outdoor retreat, your deck pergola is poised to enrich your lifestyle and create lasting memories.
Furthermore, the skills and knowledge gained throughout this DIY endeavor have empowered you to take on future projects with confidence and enthusiasm. The sense of accomplishment derived from bringing your vision to life, coupled with the practical experience gained from working with materials and tools, positions you to embrace new opportunities for enhancing your living space through hands-on creativity.
As you continue to savor the fruits of your labor, remember that your deck pergola is not merely a structure but a reflection of your passion for crafting a harmonious and inviting outdoor environment. It stands as a testament to your dedication to creating a space that embodies your unique style and fosters moments of joy and relaxation.
With your deck pergola now standing proudly as a symbol of your creativity and commitment to enhancing your home, may it serve as a constant source of inspiration and delight, enriching your daily life and providing a welcoming haven for years to come. Cheers to the successful completion of your deck pergola project and the countless cherished moments that lie ahead within its embrace.

