
Home>Create & Decorate>DIY & Crafts>DIY Decking: How To Build Your Own Outdoor Oasis
DIY & Crafts
DIY Decking: How To Build Your Own Outdoor Oasis
Published: February 28, 2024

Senior Editor in Create & Decorate, Kathryn combines traditional craftsmanship with contemporary trends. Her background in textile design and commitment to sustainable crafts inspire both content and community.
Learn how to create your own outdoor oasis with our DIY decking guide. Get expert tips and ideas for crafting the perfect space. Ideal for DIY & Crafts enthusiasts.
(Many of the links in this article redirect to a specific reviewed product. Your purchase of these products through affiliate links helps to generate commission for Twigandthistle.com, at no extra cost. Learn more)
Introduction
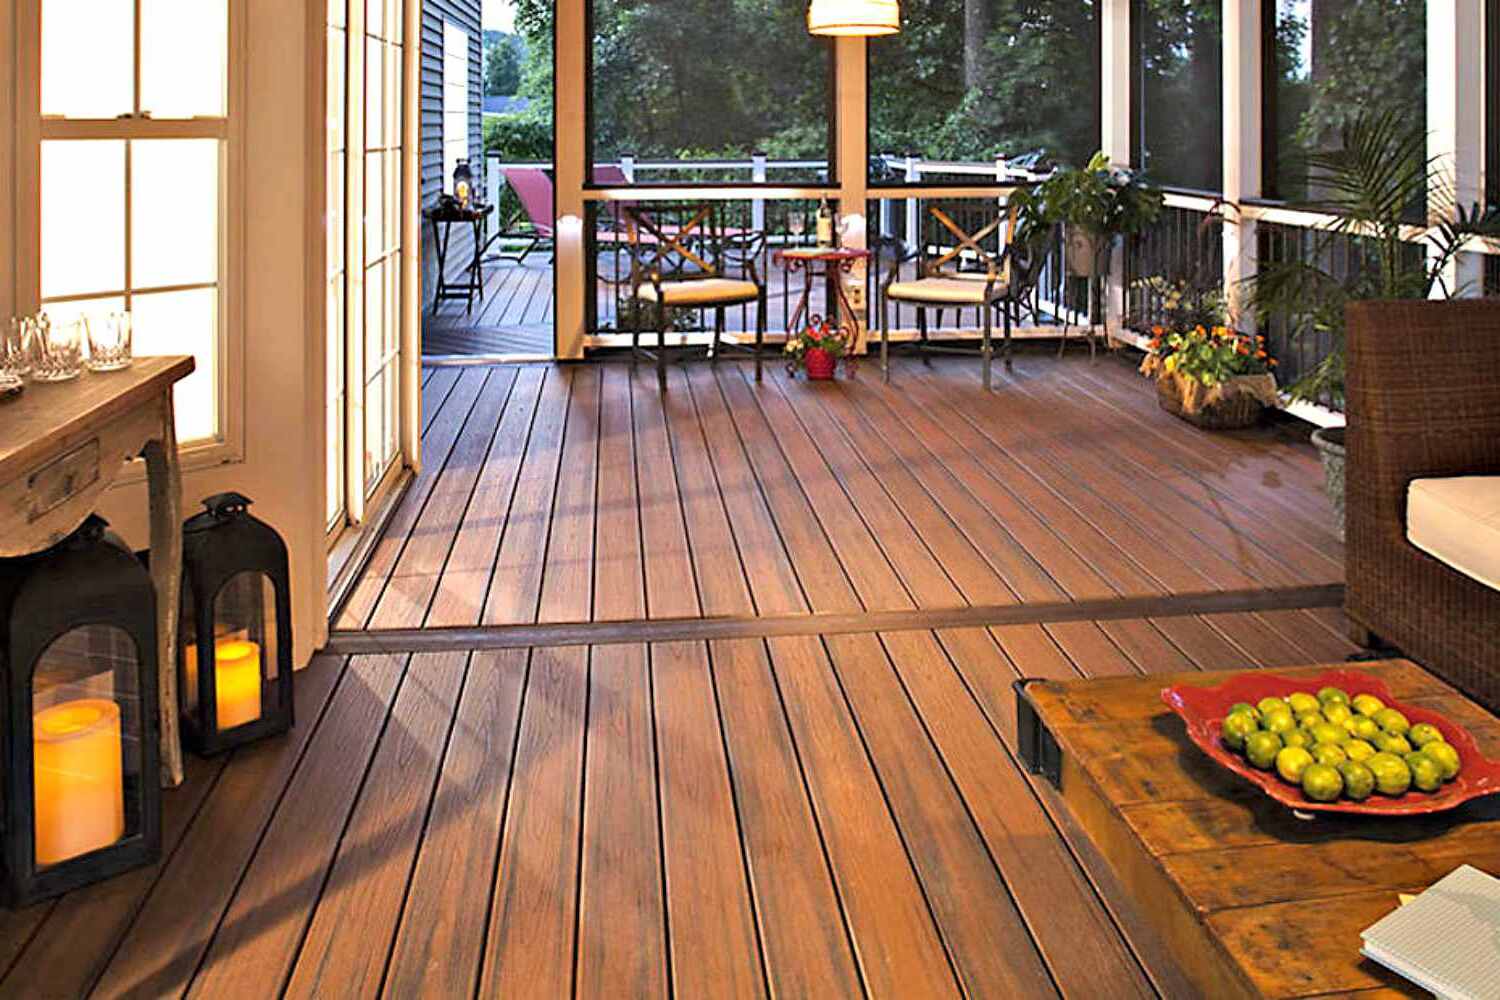
Welcome to the world of DIY decking, where creativity meets craftsmanship to transform your outdoor space into a captivating oasis. Building your own deck is not just a practical endeavor; it's a fulfilling journey that allows you to personalize your outdoor living area to suit your unique style and needs.
Imagine stepping outside into your backyard and being greeted by a beautifully crafted deck that serves as an extension of your home. Whether you envision a cozy spot for morning coffee, a vibrant space for entertaining guests, or a tranquil retreat for relaxation, a DIY deck can bring your vision to life.
Embarking on a DIY decking project offers a sense of accomplishment and pride as you witness your ideas materialize into a functional and aesthetically pleasing outdoor haven. From the initial planning stages to the final touches, every step of the process presents an opportunity for creativity and self-expression.
As you delve into the world of DIY decking, you'll discover the joy of working with your hands and the satisfaction of creating a space that reflects your personality and lifestyle. Whether you're a seasoned DIY enthusiast or a newcomer to the world of home improvement, building your own deck can be an enriching experience that allows you to unleash your imagination and hone your skills.
Throughout this guide, we'll explore the essential aspects of DIY decking, from planning and material selection to construction and maintenance. By the end of this journey, you'll be equipped with the knowledge and inspiration to embark on your own DIY decking project, ready to transform your outdoor space into a captivating oasis that reflects your individuality and enhances your lifestyle. So, roll up your sleeves and get ready to embark on an exciting adventure in creating your very own outdoor sanctuary.
Planning Your DIY Deck
Planning is the cornerstone of any successful DIY decking project. It sets the stage for the entire endeavor, guiding you through crucial decisions and ensuring that your vision aligns with practical considerations. Before diving into the construction phase, take the time to meticulously plan every aspect of your deck, from its size and layout to its intended purpose and aesthetic appeal.
Visualizing Your Ideal Deck
Begin by envisioning the perfect outdoor space that you desire. Consider how you intend to use the deck – will it be a space for hosting gatherings, a peaceful retreat for relaxation, or a versatile area for various activities? Visualizing the primary function of your deck will help determine its size, layout, and features.
Assessing Your Outdoor Space
Survey your backyard or outdoor area to assess the available space for the deck. Take note of any existing landscaping, trees, or structures that may influence the deck's placement and design. Consider factors such as sunlight exposure, privacy, and natural elements that can enhance or impact the usability of your deck.
Setting a Budget
Establishing a realistic budget is essential for guiding your material and design choices. Factor in costs for materials, tools, permits, and any professional assistance you may require. By setting a clear budget from the outset, you can make informed decisions and avoid overspending as the project progresses.
Researching Local Regulations
Before finalizing your deck plans, research local building codes and regulations. Familiarize yourself with permit requirements, setback regulations, and any restrictions on deck height or design. Compliance with these regulations is crucial to ensure the safety and legality of your DIY deck.
Designing the Layout
With a clear understanding of your space, budget, and local regulations, begin sketching out the layout and design of your deck. Consider elements such as entry points, seating areas, railing styles, and any additional features you envision. Take inspiration from various sources, such as home improvement magazines, online resources, and neighboring decks, to refine your design ideas.
Seeking Inspiration
Gather inspiration from a variety of sources, including DIY websites, home improvement shows, and outdoor living magazines. Explore different deck styles, materials, and finishing options to refine your vision and gather ideas that resonate with your personal taste and lifestyle.
Seeking Professional Advice
If you're unsure about any aspect of the planning process, consider consulting with a professional contractor or designer. Their expertise can provide valuable insights and guidance, ensuring that your DIY deck plans are well-informed and aligned with best practices.
By investing time and effort into the planning phase, you'll lay a solid foundation for the successful execution of your DIY decking project. Thoughtful planning not only streamlines the construction process but also ensures that your deck fulfills your practical needs and aesthetic preferences, resulting in a space that seamlessly integrates with your outdoor lifestyle.
Choosing the Right Materials
Selecting the appropriate materials for your DIY deck is a pivotal decision that significantly influences its durability, appearance, and maintenance requirements. By carefully considering the following factors, you can make informed choices that align with your vision and budget, ensuring a successful and enduring outdoor oasis.
Decking Materials
1. Wood:
- Pressure-Treated Lumber: A cost-effective and widely available option, pressure-treated lumber offers durability and resistance to rot and insects. It can be stained or painted to complement your outdoor aesthetic.
- Cedar or Redwood: Known for their natural beauty and resistance to decay, cedar and redwood decking provide a luxurious appearance and long-term durability. While they may require more maintenance, their visual appeal is unmatched.
2. Composite Decking:
- Low-Maintenance Option: Composed of a blend of wood fibers and recycled plastic, composite decking offers a low-maintenance alternative with excellent resistance to fading, staining, and rot. It's available in a variety of colors and textures, mimicking the look of natural wood without the upkeep.
3. PVC or Vinyl Decking:
- Waterproof and Low-Maintenance: PVC or vinyl decking is impervious to moisture, making it an ideal choice for areas prone to heavy rainfall or humidity. It requires minimal maintenance and is resistant to mold, mildew, and staining.
Structural Components
1. Joists and Beams:
- Pressure-Treated or Cedar: Use pressure-treated lumber or cedar for the structural framework of your deck. These materials offer strength and resistance to decay, ensuring the longevity of your deck's support system.
2. Fasteners:
- Corrosion-Resistant Screws or Nails: Opt for stainless steel or coated fasteners to prevent rust and corrosion, especially in outdoor environments where exposure to moisture is inevitable.
Railings and Balusters
1. Wood or Metal Railings:
- Customizable and Sturdy: Choose between wood or metal railings based on your design preferences and desired level of customization. Both options offer durability and aesthetic versatility.
Finishing Touches
1. Stain or Sealant:
- Protection and Enhancement: Select a high-quality stain or sealant to protect your deck from the elements and enhance its natural beauty. Consider the level of UV protection and color options when choosing a finish.
2. Lighting and Accessories:
- Ambiance and Functionality: Explore lighting options, decorative post caps, and other accessories to add ambiance and functionality to your deck, creating an inviting outdoor space for day and night use.
By carefully evaluating the characteristics and benefits of various materials, you can make informed decisions that align with your budget, maintenance preferences, and aesthetic goals. The right materials will not only enhance the visual appeal of your DIY deck but also contribute to its long-term resilience and enjoyment.
Tools and Equipment Needed
When embarking on a DIY decking project, having the right tools and equipment at your disposal is essential for ensuring a smooth and efficient construction process. From precise measurements to sturdy fastenings, the following tools and equipment are indispensable for bringing your deck vision to life.
Measuring and Layout Tools
- Tape Measure: A reliable tape measure is crucial for accurately determining the dimensions of your deck layout, ensuring precise cuts and placements.
- Chalk Line: Used for creating straight guidelines and marking layout points, a chalk line helps maintain alignment during the construction process.
- Level: Ensuring the evenness and alignment of structural components, a level is indispensable for achieving a sturdy and visually appealing deck.
Cutting and Shaping Tools
- Circular Saw: Ideal for cutting decking boards, joists, and beams, a circular saw provides the versatility and power needed for various cutting tasks.
- Miter Saw: Essential for creating precise angled cuts, a miter saw facilitates the accurate shaping of decking boards and structural elements.
- Jigsaw: Utilized for intricate cuts and curved shapes, a jigsaw is invaluable for customizing deck boards and addressing unique design requirements.
Fastening Tools
- Power Drill: Equipped with appropriate drill bits and drivers, a power drill is essential for creating pilot holes, driving screws, and securing fasteners throughout the deck construction process.
- Impact Driver: Providing additional torque and driving power, an impact driver expedites the fastening of screws and ensures secure connections in dense materials.
Digging and Excavation Tools
- Post Hole Digger: Essential for digging precise and uniform holes for deck footings, a post hole digger streamlines the excavation process, ensuring stable and level support for the deck structure.
- Shovel: Utilized for clearing and leveling the ground, a sturdy shovel is indispensable for preparing the site and ensuring a solid foundation for the deck.
Safety Gear
- Safety Glasses: Protecting your eyes from debris and potential hazards, safety glasses are essential for maintaining clear vision and safety during construction.
- Work Gloves: Providing hand protection and a secure grip, work gloves are crucial for handling materials, tools, and fasteners throughout the construction process.
Miscellaneous Tools
- Hammer: Utilized for various tasks, including securing joist hangers, adjusting framing components, and minor adjustments during construction.
- Pry Bar: Essential for removing stubborn fasteners, adjusting deck boards, and addressing minor adjustments during the installation process.
By ensuring that you have the necessary tools and equipment on hand, you can streamline the construction process, maintain precision and safety, and bring your DIY decking project to fruition with confidence and efficiency.
Building the Deck Frame
The construction of the deck frame forms the structural backbone of your DIY deck, providing stability, support, and a level surface for the decking boards. This phase of the project requires meticulous attention to detail and precision to ensure the integrity and longevity of your outdoor oasis.
Setting the Foundation
Begin by marking the layout of the deck using stakes and string, following the dimensions outlined in your initial plans. Clear the area of any vegetation, rocks, or debris, and use a shovel to level the ground, ensuring a uniform and stable foundation for the deck.
Installing the Footings
Dig post holes for the footings according to local building codes and the size of your deck. The depth of the holes will depend on the frost line in your region and the recommended depth for stable support. Place concrete footings in the holes and insert post anchors or embedded post brackets to secure the support posts.
Securing the Support Posts
Position pressure-treated lumber or cedar posts in the post anchors, ensuring they are plumb and securely anchored. Use a level to verify the vertical alignment of the posts, adjusting them as needed to achieve uniform height and stability.
Attaching the Beams and Joists
Install beams perpendicular to the support posts, securing them with appropriate fasteners and ensuring they are level and properly aligned. Subsequently, attach joists parallel to the beams, spacing them according to the dimensions specified in your deck plans. Use joist hangers to secure the joists to the beams, ensuring a strong and stable connection.
Adding Cross Bracing
To enhance the structural integrity of the deck frame, consider adding cross bracing between the support posts. This diagonal bracing provides additional stability and prevents lateral movement, particularly in larger deck structures.
Verifying Levelness and Alignment
Throughout the construction of the deck frame, consistently verify the levelness and alignment of the structural components using a level and string lines. Ensuring that the frame is square, level, and properly aligned is essential for the successful installation of the decking boards and the overall stability of the deck.
By meticulously executing the construction of the deck frame, you establish a solid and reliable foundation for the subsequent phases of your DIY decking project. The careful attention to detail and precision in this stage sets the stage for a visually appealing, durable, and functional outdoor oasis that reflects your creativity and craftsmanship.
Installing the Decking Boards
With the deck frame meticulously constructed, it's time to transition to the transformative phase of installing the decking boards. This pivotal stage not only defines the visual appeal of your deck but also contributes to its structural integrity and long-term performance. Whether you've opted for traditional wood, composite, or PVC decking, the installation process demands precision, attention to detail, and a keen eye for aesthetics.
Preparing for Installation
Before commencing the installation, carefully inspect the decking boards for any defects, warping, or damage. Sort the boards based on their condition and ensure that you have an adequate supply to cover the entire deck surface. Additionally, acclimate the decking boards to the outdoor environment for a period recommended by the manufacturer, allowing them to adjust to the ambient moisture levels and minimize potential expansion or contraction after installation.
Layout and Alignment
Begin the installation by determining the orientation and layout of the decking boards. Consider factors such as the direction of the wood grain, visual appeal, and optimal utilization of board lengths to minimize waste. Establish a consistent overhang and spacing between the boards, ensuring uniformity and visual harmony. Utilize spacers to maintain precise gaps between the boards, promoting adequate drainage and airflow while accommodating natural expansion and contraction.
Fastening and Securing
Select appropriate fastening methods based on the type of decking material and your design preferences. For traditional wood decking, stainless steel or coated screws are recommended to minimize corrosion and ensure secure attachment. When working with composite or PVC decking, concealed fastening systems offer a sleek and seamless appearance, eliminating visible screws and enhancing the overall aesthetic.
Cutting and Customization
As you progress with the installation, you may encounter the need for custom cuts and adjustments to accommodate the deck's shape, features, and obstructions. Utilize a circular saw, jigsaw, or miter saw to create precise cuts, angles, and notches as required. Exercise caution and precision when cutting the decking boards to ensure seamless integration and a professional finish.
Finishing Touches
Upon completing the installation of the decking boards, evaluate the overall appearance and alignment of the deck surface. Make any necessary adjustments to ensure uniformity and visual appeal. Consider the application of a high-quality stain or sealant to protect the decking boards from moisture, UV exposure, and wear, enhancing their longevity and natural beauty.
Embracing the Transformation
As the final decking boards are secured into place, step back and admire the remarkable transformation taking place in your outdoor space. The installation of the decking boards not only marks a significant milestone in your DIY decking project but also sets the stage for the addition of personalized touches and the realization of your vision for an inviting and functional outdoor oasis.
By approaching the installation of the decking boards with precision, care, and an eye for detail, you contribute to the creation of a captivating and enduring outdoor living space that reflects your craftsmanship and enhances your lifestyle.
Adding Finishing Touches
With the decking boards securely in place, it's time to elevate the visual appeal and functionality of your DIY deck through the addition of finishing touches. This phase of the project allows you to infuse your personal style and preferences into the outdoor oasis, creating a space that reflects your creativity and enhances your outdoor living experience.
Railing and Balusters
Consider the installation of railing and balusters to enhance safety and aesthetics. Whether opting for traditional wood railings or sleek metal designs, ensure that the chosen materials complement the overall style of your deck. Customizing the railing height and design can add character and visual interest to the space while providing essential safety features for elevated decks.
Post Caps and Lighting
Incorporate post caps to add a decorative element to the support posts while providing protection from the elements. Additionally, explore lighting options to illuminate the deck during evening gatherings or create a captivating ambiance. From solar-powered post lights to integrated LED strips, the right lighting can transform your deck into a welcoming retreat after sunset.
Seating and Storage
Integrate built-in seating or storage solutions to optimize the functionality of your deck. Bench seating along the perimeter not only offers additional seating options but also contributes to the seamless integration of the deck with its surroundings. Similarly, incorporating storage benches or under-deck storage units provides practical solutions for stowing away outdoor essentials while maximizing space efficiency.
Decorative Accents
Personalize your deck with decorative accents such as potted plants, outdoor rugs, and weather-resistant artwork. These elements infuse character and charm into the outdoor space, creating a welcoming and inviting atmosphere. Consider the use of vibrant cushions, throw pillows, and outdoor textiles to add comfort and style to seating areas, enhancing the overall appeal of the deck.
Privacy Features
If privacy is a consideration, explore the incorporation of lattice panels, pergolas, or outdoor curtains to create secluded areas within your deck. These features not only provide privacy but also contribute to the visual interest and versatility of the outdoor space, allowing for intimate gatherings and moments of relaxation.
Maintenance Considerations
Prioritize the application of a high-quality sealant or stain to protect the decking boards and structural elements from the elements. Regular maintenance, including cleaning and resealing, will prolong the lifespan of your deck and preserve its aesthetic appeal over time. Additionally, establish a maintenance routine for the railing, lighting fixtures, and decorative elements to ensure their longevity and functionality.
By thoughtfully integrating these finishing touches, you can transform your DIY deck into a captivating outdoor oasis that reflects your individuality and enhances your outdoor lifestyle. Each element contributes to the overall ambiance and functionality of the space, creating an inviting retreat that beckons you to unwind, entertain, and savor the beauty of your personalized outdoor sanctuary.
Maintaining Your DIY Deck
Maintaining your DIY deck is essential for preserving its beauty, structural integrity, and longevity. By implementing a proactive maintenance routine, you can safeguard your outdoor oasis against the effects of weather, wear, and aging, ensuring that it remains a captivating and functional space for years to come.
Regular Cleaning
Regular cleaning is a fundamental aspect of deck maintenance. Use a gentle cleanser and a soft-bristle brush to remove dirt, debris, and stains from the surface of the decking boards. Pay attention to areas prone to moisture accumulation, such as around planters and furniture, to prevent mold and mildew growth. Additionally, consider using a pressure washer on a low setting to deep clean the deck periodically, taking care to maintain a safe distance to avoid damaging the wood or composite material.
Inspection and Repairs
Perform routine inspections of your deck to identify any signs of wear, damage, or structural issues. Check for loose or protruding fasteners, cracked or warped boards, and any areas of decay or rot. Addressing these issues promptly can prevent further damage and prolong the lifespan of your deck. Replace damaged or deteriorating components, and tighten or replace fasteners as needed to maintain the stability and safety of the structure.
Stain or Sealant Maintenance
If your deck features natural wood decking, regular application of a high-quality stain or sealant is crucial for protecting the wood from UV exposure, moisture, and general wear. Monitor the condition of the finish and reapply stain or sealant as recommended by the manufacturer or when signs of wear become apparent. This proactive approach will enhance the durability and visual appeal of the decking boards, preserving their natural beauty and resilience.
Railing and Lighting Care
The railing and lighting features of your deck also require attention to ensure their functionality and aesthetic appeal. Inspect the railing for loose or damaged components, and tighten fasteners or replace parts as necessary. Clean lighting fixtures regularly and replace bulbs or batteries to maintain optimal illumination during evening hours. By caring for these elements, you contribute to the overall safety and ambiance of your deck.
Seasonal Considerations
Adapt your maintenance routine to account for seasonal changes and weather patterns. In colder climates, clear snow and ice from the deck surface to prevent moisture damage and minimize the risk of slips and falls. In warmer months, trim back foliage and vegetation that may encroach on the deck, promoting airflow and reducing the risk of mold growth. Additionally, consider applying a fresh coat of sealant or stain before the onset of harsh weather to fortify the deck against the elements.
By embracing a proactive and comprehensive approach to deck maintenance, you can uphold the beauty and functionality of your DIY deck, ensuring that it remains a cherished outdoor retreat for relaxation, entertainment, and enjoyment. Regular care and attention will not only preserve the visual appeal of your deck but also contribute to its resilience and longevity, allowing you to savor the fruits of your DIY efforts for years to come.