
Home>Create & Decorate>DIY & Crafts>How To Build A Bathroom Vanity
DIY & Crafts
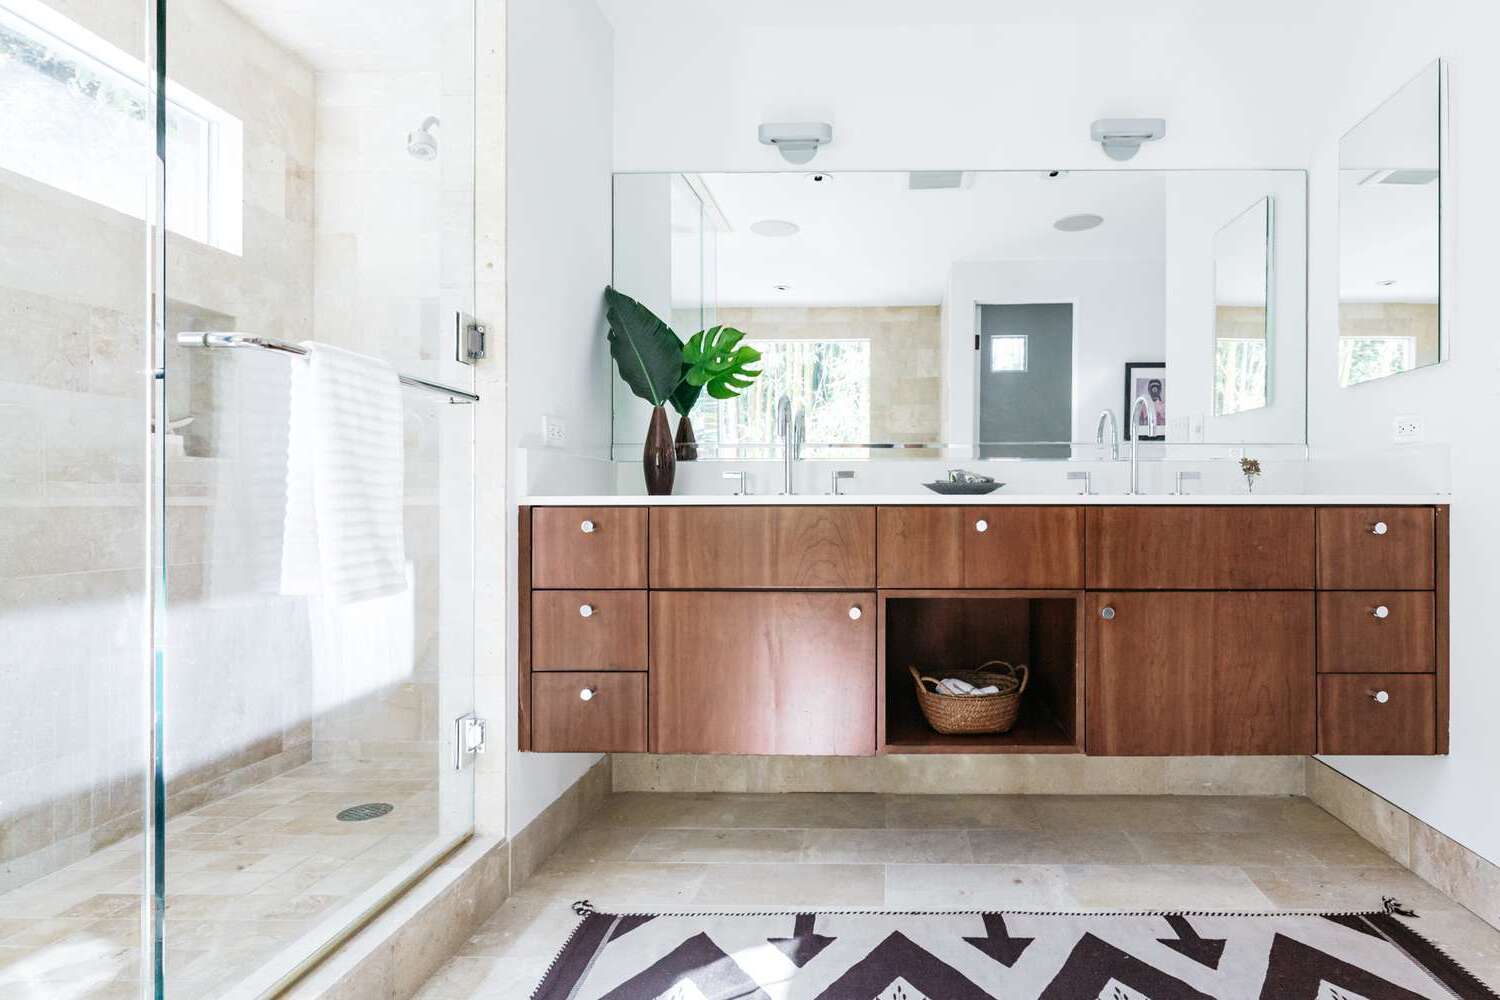
How To Build A Bathroom Vanity
Published: February 28, 2024

Content Creator specializing in woodworking and interior transformations. Caegan's guides motivate readers to undertake their own projects, while his custom furniture adds a personal touch.
Learn how to build a beautiful bathroom vanity with our DIY & Crafts guide. Create a custom vanity that fits your style and space perfectly. Start your project today!
(Many of the links in this article redirect to a specific reviewed product. Your purchase of these products through affiliate links helps to generate commission for Twigandthistle.com, at no extra cost. Learn more)
Introduction
Building a bathroom vanity from scratch can be a rewarding and cost-effective project that adds a personal touch to your home. Whether you're a seasoned DIY enthusiast or a novice looking to embark on a new challenge, constructing a custom bathroom vanity allows you to tailor the design to your specific needs and preferences.
Crafting your own bathroom vanity provides the opportunity to unleash your creativity and showcase your woodworking skills. From choosing the type of wood and finish to customizing the dimensions and storage options, every aspect of the vanity can be tailored to complement your bathroom's style and layout.
Not only does building a bathroom vanity offer a sense of accomplishment, but it also allows you to create a unique piece of furniture that perfectly fits your space. By taking on this project, you can achieve a high level of customization, ensuring that the vanity meets your storage requirements and aesthetic vision.
In addition to the creative freedom it offers, constructing a bathroom vanity can also be a cost-effective alternative to purchasing a pre-made unit. By sourcing the materials and investing your time and effort, you can potentially save money while achieving a high-quality, custom piece for your bathroom.
Throughout this comprehensive guide, we will walk you through the step-by-step process of building a bathroom vanity, from gathering the necessary materials and tools to adding the finishing touches. By following these instructions and tapping into your creativity, you can create a stunning and functional bathroom vanity that reflects your personal style and craftsmanship. Let's dive into the exciting journey of crafting your own custom bathroom vanity!
Step 1: Gather Materials and Tools
Before embarking on the construction of a bathroom vanity, it's essential to gather all the necessary materials and tools to ensure a smooth and efficient building process. Here's a detailed list of the items you'll need:
Materials:
- Wood: Select high-quality wood for the vanity frame and panels. Popular choices include oak, maple, or birch, known for their durability and attractive grain patterns.
- Plywood: Choose plywood for the back panel and shelves. Opt for a sturdy and smooth-surfaced plywood to provide structural support and a clean finish.
- Drawer Slides: Invest in high-quality drawer slides to ensure smooth and reliable drawer operation.
- Wood Glue: A strong wood glue is essential for securely joining the vanity components.
- Screws and Nails: Stock up on screws and nails of various sizes to assemble the vanity frame and attach hardware.
- Finishing Materials: Consider the type of finish you want for your vanity, such as paint, stain, or varnish, and gather the necessary supplies accordingly.
Tools:
- Measuring Tape: Accurate measurements are crucial for ensuring the vanity fits perfectly in your bathroom space.
- Circular Saw or Table Saw: A saw will be needed to cut the wood to the desired dimensions.
- Drill and Bits: A drill is essential for creating holes for screws and installing hardware.
- Screwdriver: Both manual and electric screwdrivers will be handy for assembling the vanity components.
- Clamps: Clamps are useful for holding wood pieces together during assembly and gluing.
- Sander: A sander will help smooth the wood surfaces for a professional finish.
- Paintbrushes or Sprayer: Depending on your chosen finish, gather the appropriate tools for applying paint, stain, or varnish.
By ensuring you have all the required materials and tools at the outset, you'll be well-prepared to commence the construction of your custom bathroom vanity. With these essentials in hand, you can proceed to the next step of measuring and planning the layout of your vanity, setting the stage for a successful and fulfilling DIY project.
Step 2: Measure and Plan
Accurate measurements and meticulous planning are crucial steps in the process of building a custom bathroom vanity. Before cutting any wood or assembling components, it's essential to carefully measure the available space in your bathroom and consider the specific requirements for the vanity's design and functionality.
Measuring the Space
Begin by measuring the area where the vanity will be installed. Take precise measurements of the width, height, and depth available for the vanity, considering any obstructions such as plumbing fixtures and electrical outlets. It's important to account for clearances around these fixtures to ensure that the vanity fits seamlessly into the space without any hindrances.
Design Considerations
Once the space has been measured, consider the design elements that will influence the vanity's appearance and functionality. Determine the desired height of the vanity, keeping in mind ergonomic considerations and the comfort of users. Additionally, think about the style and aesthetic features you want to incorporate, such as the number of drawers, open shelving, or decorative details.
Sketching the Layout
With the measurements and design considerations in mind, sketch a layout of the vanity, including the dimensions of the frame, the placement of shelves and drawers, and any additional features. This visual representation will serve as a guide during the construction process, helping you stay organized and ensuring that the components fit together harmoniously.
Planning for Storage
Consider the storage needs in your bathroom and plan the internal layout of the vanity accordingly. Determine the optimal configuration of shelves and drawers to accommodate toiletries, towels, and other essentials. By customizing the storage layout to suit your specific needs, you can maximize the functionality of the vanity while keeping your bathroom organized and clutter-free.
Material Optimization
As you plan the dimensions and layout of the vanity, consider how to optimize the use of materials to minimize waste and maximize efficiency. Plan the cuts for the wood and plywood to make the most of the available materials, reducing unnecessary scraps and ensuring a sustainable approach to the construction process.
By meticulously measuring the space, considering design elements, sketching a layout, planning for storage, and optimizing materials, you can lay a solid foundation for the successful construction of a custom bathroom vanity. This thoughtful and strategic approach sets the stage for the next steps of cutting and assembling the vanity frame, bringing you closer to the realization of your personalized and functional bathroom fixture.
Step 3: Cut and Assemble Frame
With the measurements and layout plan in hand, it's time to bring the bathroom vanity to life by cutting the wood and assembling the frame. This step forms the structural core of the vanity, laying the groundwork for the incorporation of shelves, drawers, and other features.
Cutting the Wood
Using a circular saw or table saw, carefully cut the wood according to the dimensions outlined in your layout plan. Take precise measurements and exercise caution to ensure accurate cuts that align with the intended design. It's essential to double-check the measurements before cutting to avoid errors that could compromise the overall fit and finish of the vanity.
Assembling the Frame
Once the wood pieces are cut to size, begin assembling the frame of the vanity. Apply wood glue to the joints and use screws to secure the pieces together, creating a sturdy and stable frame. Utilize clamps to hold the components in place during assembly, ensuring that the frame aligns perfectly and the joints are tightly bonded.
Reinforcing the Structure
To reinforce the frame and enhance its durability, consider adding corner braces or L-brackets at key junctions. These reinforcements provide additional support, minimizing the risk of warping or weakening over time. By reinforcing the structure, you can ensure that the vanity maintains its integrity and stability, even with regular use.
Fine-Tuning and Sanding
After the frame is assembled, take the time to fine-tune any rough edges and imperfections. Use a sander to smooth the surfaces, creating a uniform and professional finish. Pay attention to detail, as this step contributes to the overall aesthetic appeal of the vanity, preparing it for the next stages of the construction process.
By meticulously cutting the wood, assembling the frame, reinforcing the structure, and fine-tuning the surfaces, you can establish a solid foundation for the construction of a custom bathroom vanity. This step sets the stage for the integration of shelves, drawers, and other components, bringing you closer to the realization of a personalized and functional fixture for your bathroom.
Step 4: Attach Back Panel and Shelves
With the frame of the bathroom vanity securely assembled, the next crucial step is to attach the back panel and install the shelves. These components not only contribute to the structural integrity of the vanity but also play a pivotal role in defining its functionality and storage capacity.
Attaching the Back Panel
Begin by positioning the plywood back panel against the rear of the vanity frame. Ensure that it aligns perfectly with the edges of the frame, providing a seamless and uniform appearance. Secure the back panel in place by using wood screws, driving them through the plywood and into the frame at regular intervals. This process helps to stabilize the structure and create a solid backing for the vanity.
Installing the Shelves
Once the back panel is securely attached, proceed to install the shelves within the vanity. Depending on the design and layout outlined in the initial plan, position the shelves at the desired heights within the frame. Use a level to ensure that the shelves are perfectly horizontal, providing a stable and balanced surface for storage. Secure the shelves in place by using shelf brackets or by directly attaching them to the frame with screws, depending on the chosen design and construction method.
Optimizing Storage Space
As you install the shelves, consider the optimal configuration for maximizing storage space within the vanity. Customize the shelf heights to accommodate items of varying sizes, such as toiletries, towels, and other bathroom essentials. By strategically positioning the shelves, you can create a functional and organized storage solution that meets your specific needs while enhancing the overall utility of the vanity.
Enhancing Stability and Durability
In addition to providing storage space, the installation of the back panel and shelves contributes to the overall stability and durability of the vanity. These components work in tandem to reinforce the structure, minimizing the risk of warping or shifting over time. By securely attaching the back panel and shelves, you can ensure that the vanity remains robust and reliable, capable of withstanding the demands of daily use in the bathroom.
By meticulously attaching the back panel and installing the shelves, you further solidify the foundation of the custom bathroom vanity, bringing it one step closer to completion. This pivotal stage sets the stage for the next phase of building and installing the drawers, adding a functional and aesthetic dimension to the personalized fixture.
Step 5: Build and Install Drawers
Building and installing drawers is a crucial phase in the construction of a custom bathroom vanity, as it adds a functional and organizational dimension to the fixture. By incorporating well-crafted drawers, you can optimize storage space and enhance the usability of the vanity, providing a designated area for storing various bathroom essentials.
Constructing the Drawers
Begin by selecting high-quality wood for the drawer fronts, sides, and backs, ensuring durability and a visually appealing finish. Cut the wood to the appropriate dimensions, taking into account the desired size and number of drawers. Precision is key during this stage, as accurately cut pieces will contribute to the seamless assembly and operation of the drawers.
Assemble the drawer components using wood glue and screws, ensuring that the joints are secure and the structure is robust. Pay attention to the alignment and symmetry of the drawers, as well-fitted and evenly spaced drawers contribute to the overall aesthetic appeal of the vanity. Additionally, consider incorporating drawer slides for smooth and effortless operation, enhancing the user experience and longevity of the vanity.
Installing the Drawers
Once the drawers are meticulously constructed, proceed to install them within the vanity frame. Carefully position the drawers within their designated spaces, ensuring a snug fit and smooth operation. Utilize drawer slides to facilitate seamless opening and closing, providing easy access to the contents stored within the drawers.
Verify that the drawers are level and properly aligned, making any necessary adjustments to ensure uniformity and functionality. Secure the drawers in place by attaching them to the frame using screws, ensuring that they are firmly anchored and capable of withstanding regular use.
Optimizing Storage and Accessibility
Customize the internal layout of the drawers to accommodate a variety of bathroom items, such as toiletries, cosmetics, and grooming essentials. Consider incorporating dividers or compartments within the drawers to enhance organization and accessibility, allowing for efficient storage and retrieval of items.
By meticulously building and installing drawers, you elevate the functionality and practicality of the custom bathroom vanity, creating a tailored storage solution that aligns with your specific needs and preferences. This pivotal step brings the vanity closer to its completion, setting the stage for the final touches that will transform it into a stunning and fully functional fixture for your bathroom.
Step 6: Add Finishing Touches
With the structural components in place, it's time to infuse the custom bathroom vanity with the finishing touches that will elevate its aesthetic appeal and functionality. This phase involves adding details and treatments that enhance the overall appearance and ensure that the vanity seamlessly integrates into your bathroom space.
Applying the Finish
Begin by applying the chosen finish to the vanity, whether it's a coat of paint, a rich stain, or a protective varnish. The finish not only adds visual allure but also serves to protect the wood from moisture and wear, extending the longevity of the vanity. Ensure that the application is even and thorough, allowing the natural beauty of the wood grain to shine through while achieving the desired color and sheen.
Installing Hardware
Select and install the hardware elements that will complement the style of the vanity, such as drawer pulls, knobs, or handles. Choose hardware that not only enhances the visual appeal but also provides ergonomic functionality, allowing for effortless opening and closing of drawers and doors. The hardware serves as a decorative accent, adding a personalized touch to the vanity while ensuring ease of use.
Adding Decorative Elements
Consider incorporating decorative elements such as molding, trim, or embellishments that accentuate the vanity's design. These details can impart a sense of sophistication and refinement, elevating the overall aesthetic impact of the vanity. Whether it's intricate carvings, beveled edges, or decorative inlays, these embellishments contribute to the vanity's visual appeal and showcase your attention to detail.
Sealing and Protecting
Once the finish and hardware are in place, consider sealing the vanity to provide added protection against moisture and daily wear. A clear sealant or topcoat can safeguard the surface, making it easier to clean and maintain while preserving the beauty of the finish. This step ensures that your custom bathroom vanity remains resilient and retains its allure over time.
Final Inspection
Conduct a thorough inspection of the vanity, paying attention to the details and ensuring that all components are securely in place. Verify that the drawers operate smoothly, the finish is flawless, and the hardware is firmly attached. This meticulous review ensures that the vanity meets your expectations and is ready to take its place as a functional and captivating centerpiece in your bathroom.
By adding these finishing touches, you bring the custom bathroom vanity to its full potential, transforming it into a striking and functional fixture that reflects your craftsmanship and attention to detail. With the completion of this step, your personalized creation is ready to enhance the ambiance and utility of your bathroom, showcasing your dedication to creating a truly unique and functional piece of furniture.
Conclusion
In conclusion, the journey of building a custom bathroom vanity is a testament to the fusion of creativity, craftsmanship, and practicality. From the initial stages of gathering materials and meticulously measuring the space to the final touches that imbue the vanity with character and functionality, this DIY project embodies the spirit of personalized home improvement.
The process of constructing a bathroom vanity from scratch offers a myriad of benefits, transcending the mere creation of a functional fixture. It provides an avenue for self-expression, allowing individuals to tailor every aspect of the vanity to their unique preferences and requirements. Whether it's the choice of wood, the layout of shelves and drawers, or the selection of finishes and hardware, each decision contributes to the realization of a truly bespoke piece of furniture.
Beyond the realm of aesthetics, the construction of a custom bathroom vanity fosters a sense of accomplishment and empowerment. It empowers individuals to take an active role in shaping their living spaces, instilling a deep sense of pride in the creation of a tangible and utilitarian item. The satisfaction derived from using a vanity that was meticulously crafted with one's own hands is unparalleled, serving as a daily reminder of the ingenuity and dedication invested in its construction.
Moreover, the DIY approach to building a bathroom vanity offers a cost-effective alternative to purchasing pre-made units, allowing individuals to maximize their resources while obtaining a high-quality and personalized fixture. By investing time and effort into the construction process, individuals can create a vanity that not only meets their specific needs but also reflects their individual style and design sensibilities.
As the custom bathroom vanity takes its place in the home, it stands as a testament to the fusion of practicality and artistry, embodying the unique vision and skill of its creator. It serves as a functional and aesthetically pleasing addition to the bathroom, enhancing the overall ambiance and utility of the space while showcasing the craftsmanship and attention to detail that went into its construction.
In essence, the journey of building a custom bathroom vanity transcends the mere act of construction; it represents a personal and creative endeavor that culminates in the realization of a functional and visually captivating fixture. It exemplifies the transformative power of DIY craftsmanship, offering a tangible manifestation of individuality and ingenuity within the home.