
Home>Create & Decorate>DIY & Crafts>DIY Concrete Piers For Shed: Step-by-Step Guide
DIY & Crafts
DIY Concrete Piers For Shed: Step-by-Step Guide
Published: February 28, 2024

Senior Editor in Create & Decorate, Kathryn combines traditional craftsmanship with contemporary trends. Her background in textile design and commitment to sustainable crafts inspire both content and community.
Learn how to build DIY concrete piers for your shed with our step-by-step guide. Perfect for your DIY & Crafts project.
(Many of the links in this article redirect to a specific reviewed product. Your purchase of these products through affiliate links helps to generate commission for Twigandthistle.com, at no extra cost. Learn more)
Introduction
Building a shed in your backyard can be a rewarding DIY project that adds both functionality and aesthetic appeal to your outdoor space. However, to ensure the stability and longevity of your shed, it's crucial to lay a solid foundation. One popular and cost-effective method for creating a sturdy foundation is by using concrete piers. In this comprehensive guide, we will walk you through the step-by-step process of constructing DIY concrete piers for your shed. Whether you're a seasoned DIY enthusiast or a novice looking to take on a new challenge, this guide will equip you with the knowledge and confidence to tackle this project with ease.
The beauty of constructing concrete piers for your shed lies in its versatility and durability. By elevating your shed off the ground, you can protect it from moisture, pests, and potential water damage. Additionally, concrete piers offer excellent stability, ensuring that your shed remains level and secure for years to come. With the right materials, tools, and a clear understanding of the process, you can create a solid foundation that will support your shed through various weather conditions and heavy loads.
Throughout this guide, we will provide detailed instructions, helpful tips, and insights to streamline the construction process. From choosing the ideal location for your piers to pouring and setting the concrete, each step is designed to empower you to achieve professional-grade results without the need for expensive contractors or specialized equipment. By the end of this guide, you will have the knowledge and skills to embark on this DIY endeavor and create a robust foundation for your shed that stands the test of time. So, roll up your sleeves, gather your materials, and let's dive into the exciting world of building DIY concrete piers for your shed!
Materials and Tools Needed
Before embarking on the construction of DIY concrete piers for your shed, it's essential to gather all the necessary materials and tools to ensure a smooth and efficient building process. Here's a comprehensive list of items you'll need to have on hand:
Materials:
-
Concrete: Purchase high-quality concrete mix from your local hardware store. Opt for a mix specifically designed for construction projects, ensuring durability and strength.
-
Gravel: Acquire coarse gravel to serve as a base for the piers. The gravel will aid in drainage and provide stability to the foundation.
-
Rebar: Invest in steel rebar to reinforce the concrete piers, enhancing their load-bearing capacity and structural integrity.
-
Form Tubes: Obtain cardboard form tubes of the appropriate diameter to mold the concrete piers. These tubes will define the shape and size of the piers, facilitating a uniform and professional finish.
-
Anchor Bolts: Secure anchor bolts to attach the shed's floor framing to the concrete piers, preventing shifting or movement over time.
-
Water: Ensure access to water for mixing the concrete. A reliable water source is crucial for achieving the ideal consistency of the concrete mixture.
Tools:
-
Shovel: A sturdy shovel will be indispensable for excavating the holes for the piers and moving the gravel and concrete mix.
-
Level: A reliable level is essential for ensuring the piers are perfectly aligned and plumb during the construction process.
-
Tape Measure: Accurate measurements are critical for achieving uniform pier heights and diameters. A tape measure will be indispensable for precision.
-
Mixing Tools: Depending on the scale of your project, consider using a mixing trough, hoe, or concrete mixer to blend the concrete thoroughly.
-
Saw: If adjustments to the form tubes are necessary, a saw will be required to cut them to the desired lengths.
-
Safety Gear: Prioritize safety by equipping yourself with gloves, safety goggles, and a dust mask to protect against potential hazards during the construction process.
-
Wheelbarrow: A wheelbarrow will facilitate the transportation of materials, such as gravel and concrete, around the construction site.
By ensuring that you have all the required materials and tools at your disposal, you can approach the construction of DIY concrete piers for your shed with confidence and efficiency. With these essentials in hand, you'll be well-prepared to move on to the next steps of this exciting project.
Choosing the Right Location
Selecting the optimal location for your DIY concrete piers is a critical initial step that significantly influences the stability and functionality of your shed. Several key factors should be taken into consideration to ensure that the chosen site is well-suited for supporting the weight of the shed and enduring various environmental conditions.
Factors to Consider:
-
Ground Stability: Assess the ground stability of the potential locations. Look for areas with firm, compact soil that can provide a solid base for the piers. Avoid spots with soft or uneven ground, as they can lead to structural issues over time.
-
Drainage: Consider the natural drainage patterns of the site. It's essential to avoid low-lying areas prone to water accumulation, as excess moisture can compromise the integrity of the piers and the shed itself. Opt for a location with good natural drainage to prevent water-related damage.
-
Accessibility: Evaluate the accessibility of the chosen location. Ensure that it allows convenient entry and exit to and from the shed. Additionally, consider the ease of transporting materials and tools to the site during the construction phase.
-
Orientation: Take into account the orientation of the shed in relation to the sun and prevailing winds. Position the shed in a way that maximizes natural light and ventilation while minimizing exposure to harsh weather elements.
-
Building Codes and Regulations: Familiarize yourself with local building codes and regulations. Ensure that the selected location complies with any zoning restrictions or setback requirements imposed by local authorities.
-
Future Land Use: Anticipate future land use and potential expansions. Choose a location that allows for future modifications or additions to the shed without compromising the stability of the existing piers.
Site Preparation:
Once a suitable location has been identified, clear the area of any debris, vegetation, or obstacles that may impede the construction process. Use a shovel or appropriate equipment to level the ground and remove any obstructions, ensuring a clean and even surface for laying the piers.
By carefully considering these factors and adequately preparing the chosen site, you can lay the groundwork for a robust and enduring foundation for your shed. The right location sets the stage for a successful construction process and ensures the long-term structural integrity of your DIY concrete piers.
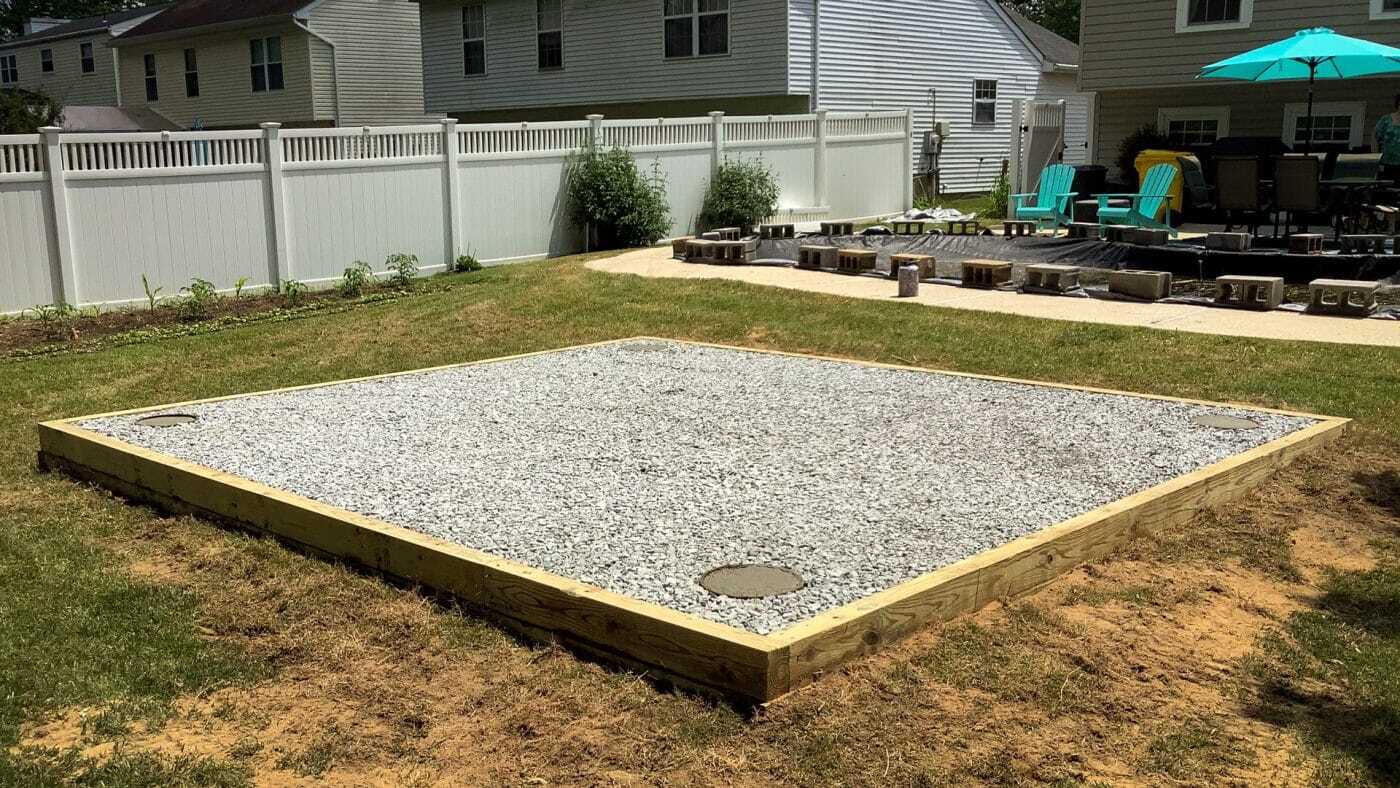
Digging the Holes
The process of digging the holes for your DIY concrete piers is a crucial phase that sets the foundation for the structural integrity and stability of your shed. Properly excavated holes ensure that the piers are securely anchored to the ground, providing a solid base for the shed to rest upon. Here's a detailed breakdown of the steps involved in digging the holes for your concrete piers:
Marking the Hole Locations
Using stakes and string, mark the precise locations where the concrete piers will be situated. Ensure that the markings align with the dimensions and layout of your shed's floor plan. Accurate placement is essential for maintaining uniform spacing between the piers and accommodating the shed's weight distribution.
Determining Hole Depth
Refer to your local building codes or consult with a structural engineer to determine the appropriate depth for the holes based on the soil composition and frost line in your region. Typically, the holes should extend below the frost line to prevent frost heave, which can compromise the stability of the piers and the shed.
Excavating the Holes
Armed with a sturdy shovel, begin excavating the marked locations to the prescribed depth. Exercise caution to ensure that the holes are straight and uniform in diameter, allowing for consistent pier placement. Remove any loose soil and debris from the holes to create a clean and stable foundation for the piers.
Checking Hole Alignment and Depth
Use a tape measure and level to verify the alignment and depth of each hole. Accurate measurements are essential for ensuring that the piers will be set at the correct height and remain level once the concrete is poured. Make any necessary adjustments to the hole depth to achieve uniformity across all pier locations.
Inspecting the Bottom of the Holes
Inspect the bottoms of the excavated holes to ensure they are free of debris and adequately compacted. A firm and level base is essential for providing solid support to the concrete piers. Address any irregularities or soft spots by compacting the soil or adding a layer of gravel for stability.
By meticulously following these steps and paying close attention to detail during the hole-digging process, you can lay the groundwork for a robust foundation that will uphold the structural integrity of your shed. The precision and care invested in this phase will contribute to the overall stability and longevity of your DIY concrete piers.
Creating the Concrete Mixture
Creating the concrete mixture is a pivotal step in the construction of DIY concrete piers for your shed. The quality and consistency of the concrete will directly impact the strength and durability of the piers, making it essential to approach this process with precision and care. Here's a comprehensive guide to creating the ideal concrete mixture for your project:
Gather the Necessary Materials
Before commencing the mixing process, gather all the essential materials required for creating the concrete mixture. You will need high-quality concrete mix, coarse gravel, and water. Ensure that the concrete mix is specifically formulated for structural applications, as it offers the necessary strength and durability to support the weight of the shed.
Determine the Water-to-Concrete Ratio
The water-to-concrete ratio plays a critical role in achieving the ideal consistency and strength of the concrete. Refer to the instructions provided by the concrete mix manufacturer to determine the recommended water-to-concrete ratio. Adhering to these guidelines will ensure that the concrete achieves the desired strength and workability.
Mixing the Concrete
Using a wheelbarrow or mixing trough, combine the concrete mix and coarse gravel in the prescribed ratio. Gradually add water while continuously mixing the materials to achieve a uniform consistency. It's crucial to avoid adding excessive water, as this can compromise the strength of the concrete. Aim for a workable yet firm mixture that holds its shape without being overly dry or soupy.
Ensuring Uniformity
Thoroughly mix the concrete to ensure that the gravel is evenly distributed and fully coated with the concrete mix. Pay close attention to the color and texture of the mixture, aiming for a homogeneous blend that indicates consistent distribution of the materials. Take care to eliminate any pockets of dry concrete or excess water within the mixture.
Consistency Check
To verify the consistency of the concrete, perform a slump test. Fill a cone-shaped container with the freshly mixed concrete, compact it, and then carefully remove the cone. Measure the distance the concrete slumps from its original height. The result will indicate the workability and cohesiveness of the concrete, allowing you to make adjustments if necessary.
Rebar Integration
If reinforcement with steel rebar is part of your construction plan, ensure that the rebar is integrated into the concrete mixture at this stage. Thoroughly coat the rebar with the concrete mixture, ensuring that it is evenly surrounded to enhance the structural integrity and load-bearing capacity of the piers.
By meticulously following these steps and paying attention to the details of the concrete mixing process, you can create a high-quality concrete mixture that forms the foundation for sturdy and resilient DIY concrete piers. The precision and care invested in this phase will contribute to the overall stability and longevity of your shed's foundation.
Pouring the Concrete
With the concrete mixture prepared to the ideal consistency, it's time to proceed with the crucial step of pouring the concrete into the form tubes to create the DIY piers for your shed. This phase demands precision and attention to detail to ensure that the piers are structurally sound and capable of withstanding the weight and demands of the shed. Here's a detailed breakdown of the process of pouring the concrete:
-
Filling the Form Tubes: Begin by positioning the form tubes in the excavated holes, ensuring that they are set at the correct depth and alignment. With the aid of a helper or using appropriate bracing, secure the form tubes in a vertical position to prevent shifting or misalignment during the pouring process.
-
Pouring the Concrete: Carefully transfer the prepared concrete mixture into the form tubes, starting from the bottom and working your way up. Use a shovel or suitable tools to guide the concrete into the tubes, ensuring a consistent and even fill. Avoid abrupt pouring that may cause segregation of the concrete components, which can compromise the strength and integrity of the piers.
-
Consolidating the Concrete: As the form tubes are being filled, use a rod or vibrating tool to consolidate the concrete and eliminate air pockets or voids within the mixture. This step is crucial for achieving a dense and uniform distribution of the concrete, enhancing the strength and load-bearing capacity of the piers.
-
Leveling and Smoothing: Once the form tubes are filled to the desired height, use a trowel or screed board to level and smooth the surface of the poured concrete. Pay attention to achieving a uniform and flat finish, ensuring that the piers will provide a stable base for the shed's structure.
-
Setting Anchor Bolts: If anchor bolts are required to secure the shed's floor framing to the piers, embed them into the freshly poured concrete at the designated locations. Ensure that the anchor bolts are positioned accurately and securely within the concrete to facilitate seamless attachment of the shed.
-
Monitoring and Adjusting: Throughout the pouring process, monitor the form tubes for any signs of shifting or settling. Make necessary adjustments to maintain the vertical alignment and uniformity of the piers as the concrete sets.
By meticulously following these steps and exercising care and precision during the pouring process, you can create robust and reliable concrete piers that form the cornerstone of a stable and durable foundation for your shed. The successful completion of this phase sets the stage for the subsequent steps of setting and attaching the shed to the piers, bringing you closer to the realization of your DIY shed construction project.
Setting the Piers
Setting the concrete piers is a pivotal phase that transitions the foundation construction process from groundwork to the actual support structure for your shed. This step requires meticulous attention to detail to ensure that the piers are precisely positioned and aligned, laying the groundwork for a stable and level base for the shed. Here's a comprehensive guide to the process of setting the piers:
Placing the Piers
Carefully lower the shed's floor framing onto the freshly poured concrete piers, ensuring that each pier aligns with the designated support points on the framing. Enlist the assistance of others to facilitate the precise placement of the framing onto the piers, guaranteeing a snug and secure fit.
Verifying Alignment and Level
Use a reliable level to verify the alignment and levelness of the shed's floor framing on the piers. Adjust the positioning of the framing as needed to achieve uniform contact with all piers, ensuring that the weight of the shed will be evenly distributed across the support points.
Securing the Framing to the Piers
Once the framing is aligned and level, secure it to the concrete piers using anchor bolts or appropriate fastening hardware. Ensure that the attachment points are robust and firmly anchored to the piers, preventing any shifting or movement of the shed over time.
Checking Stability
Conduct a thorough assessment of the stability and integrity of the shed's positioning on the piers. Apply gentle pressure to different areas of the shed to test for any signs of wobbling or instability. Address any issues by adjusting the attachment points and reinforcing the connections between the framing and the piers.
Finalizing the Setting Process
Once the shed's floor framing is securely attached to the piers and verified to be stable and level, the setting process is complete. Take a moment to admire the progress made in establishing a solid foundation for your shed, knowing that each meticulously set pier contributes to the overall strength and durability of the structure.
By meticulously following these steps and ensuring the precise setting of the piers, you can lay the groundwork for a stable and secure foundation that will support your shed for years to come. The successful completion of this phase brings you one step closer to the realization of your DIY shed construction project, setting the stage for the subsequent steps of allowing the concrete to cure and finalizing the attachment of the shed to the piers.
Allowing the Concrete to Cure
After the concrete has been poured and the piers have been meticulously set to support the shed's foundation, the crucial phase of allowing the concrete to cure begins. Curing is a process that involves maintaining the ideal conditions for the concrete to achieve its maximum strength and durability. This phase is essential for ensuring the long-term stability and resilience of the DIY concrete piers. Here's a detailed breakdown of the steps involved in allowing the concrete to cure:
Initial Protection
Immediately after the concrete has been poured and the piers have been set, it's imperative to shield the freshly poured concrete from external factors that could compromise the curing process. Cover the piers with plastic sheeting or damp burlap to retain moisture and prevent rapid evaporation. This initial protection is critical for preventing cracks and ensuring that the concrete cures uniformly.
Moisture Retention
Maintaining adequate moisture levels is a key factor in promoting proper curing of the concrete. Regularly mist the concrete piers with water or utilize a curing compound to seal in moisture and prevent the surface from drying out too quickly. This moisture retention process supports the development of strong and resilient concrete, enhancing the overall integrity of the piers.
Temperature Control
Monitor the ambient temperature and take measures to shield the concrete piers from extreme heat or cold during the curing period. Avoid exposing the piers to direct sunlight or harsh weather conditions that could impede the curing process. Implement shading or insulation techniques as needed to regulate the temperature and create a conducive environment for curing.
Time Considerations
Allow sufficient time for the concrete to cure before subjecting the piers to the weight and demands of the shed. While the initial setting of the concrete may occur within the first 24 to 48 hours, the curing process continues over an extended period. Follow the guidelines provided by the concrete mix manufacturer regarding the recommended curing duration to ensure optimal strength and durability.
Quality Assurance
Regularly inspect the concrete piers during the curing period to identify any signs of cracking, uneven curing, or other irregularities. Address any issues promptly to maintain the integrity of the piers. By conducting thorough quality assurance checks, you can ensure that the curing process progresses smoothly, laying the foundation for a robust and enduring support system for the shed.
By meticulously following these steps and allowing the concrete to cure under controlled conditions, you can maximize the strength and durability of the DIY concrete piers. The successful completion of the curing process sets the stage for the final phase of attaching the shed to the piers, bringing you closer to the realization of your DIY shed construction project.
Attaching the Shed to the Piers
Attaching the shed to the meticulously constructed concrete piers marks the culmination of the foundation-building process, bringing your DIY shed construction project one step closer to fruition. This phase demands precision and attention to detail to ensure that the shed is securely and seamlessly affixed to the piers, establishing a stable and durable structure. Here's a comprehensive guide to the process of attaching the shed to the piers:
Positioning the Shed
Carefully maneuver the shed into position, ensuring that it aligns precisely with the concrete piers. Enlist the assistance of others to facilitate the accurate placement of the shed, guaranteeing that it rests securely on the piers without any undue stress on the foundation.
Securing the Shed
Utilize anchor bolts or appropriate fastening hardware to secure the shed's floor framing to the concrete piers. Ensure that the attachment points are robust and firmly anchored, preventing any shifting or movement of the shed over time. The secure attachment of the shed to the piers is essential for maintaining the structural integrity of the entire assembly.
Verifying Stability
Conduct a thorough assessment of the stability and alignment of the shed on the piers. Apply gentle pressure to different areas of the shed to test for any signs of instability. Verify that the shed is evenly supported by all the piers, ensuring that the weight distribution is uniform and balanced.
Final Adjustments
Make any necessary adjustments to the attachment points and connections to guarantee the stability and levelness of the shed. Verify that the shed is level and plumb, making minor modifications as needed to achieve an optimal and secure fit on the piers.
Completion and Celebration
With the shed securely attached to the concrete piers, take a moment to appreciate the successful completion of the foundation-building process. The secure attachment of the shed to the piers signifies the realization of a stable and durable foundation, setting the stage for the subsequent phases of completing the shed's construction.
By meticulously following these steps and ensuring the precise attachment of the shed to the piers, you can establish a robust and reliable foundation that will support your shed for years to come. The successful completion of this phase brings you one step closer to the realization of your DIY shed construction project, setting the stage for the subsequent steps of completing the shed's construction and enjoying the fruits of your labor.
Conclusion
In conclusion, the construction of DIY concrete piers for your shed represents a significant achievement in creating a stable and durable foundation that will support your shed for years to come. By following the step-by-step guide outlined in this comprehensive resource, you have gained the knowledge and confidence to undertake this rewarding DIY project with precision and skill.
The process began with careful consideration of the location for the piers, taking into account factors such as ground stability, drainage, accessibility, and future land use. By selecting the optimal site and meticulously preparing the ground, you have laid the groundwork for a robust foundation that can withstand various environmental conditions.
The meticulous excavation of the holes and the precise pouring of the concrete mixture were essential steps in creating sturdy and resilient piers. By adhering to best practices and paying attention to detail during the pouring and setting processes, you have established a solid base for the shed, ensuring stability and longevity.
Allowing the concrete to cure under controlled conditions was a critical phase that maximized the strength and durability of the piers. By maintaining moisture levels, regulating temperature, and conducting quality assurance checks, you have ensured that the piers are primed to support the weight and demands of the shed effectively.
The final phase of attaching the shed to the piers marked the culmination of the foundation-building process. By securing the shed with precision and verifying its stability, you have established a reliable and secure structure that forms the cornerstone of your DIY shed construction project.
As you stand back and admire the completed foundation, you can take pride in the knowledge that you have created a robust and enduring support system for your shed. The successful construction of DIY concrete piers not only adds functionality and value to your outdoor space but also represents a testament to your craftsmanship and dedication to the art of DIY construction.
With the foundation in place, you are now well-equipped to proceed with the subsequent phases of completing the shed's construction, bringing you closer to the realization of your vision for a functional and aesthetically pleasing outdoor structure. Whether you are using the shed for storage, as a workshop, or for recreational purposes, the solid foundation you have built will serve as the bedrock for years of utility and enjoyment.
In embracing the journey of constructing DIY concrete piers for your shed, you have not only expanded your DIY skills but also created a lasting and tangible testament to your ingenuity and determination. As you move forward with the next stages of your project, may the foundation you have built stand as a testament to the power of DIY craftsmanship and the fulfillment that comes from creating something enduring with your own hands.