Home>Create & Decorate>DIY & Crafts>DIY Pool Table: Step-by-Step Guide To Building Your Own

DIY & Crafts
DIY Pool Table: Step-by-Step Guide To Building Your Own
Published: June 2, 2024

Content Creator specializing in woodworking and interior transformations. Caegan's guides motivate readers to undertake their own projects, while his custom furniture adds a personal touch.
Discover how to build your own pool table with our step-by-step DIY guide. Get creative with DIY & Crafts and create your dream pool table today!
(Many of the links in this article redirect to a specific reviewed product. Your purchase of these products through affiliate links helps to generate commission for Twigandthistle.com, at no extra cost. Learn more)
Introduction
So, you've got a passion for billiards and a knack for DIY projects, and you're thinking about building your own pool table. Well, you've come to the right place! In this step-by-step guide, we'll walk you through the process of creating your very own custom pool table. Whether you're a seasoned DIY enthusiast or a newcomer to the world of home improvement, this project is sure to challenge and reward you in equal measure. Let's dive in and get started on this exciting journey to build your own pool table!
Materials and Tools Needed
Before you embark on this DIY adventure, it's crucial to gather all the necessary materials and tools. Here's a comprehensive list to get you started:
Materials:
- Wood: Select high-quality hardwood for the frame and legs, and medium-density fiberboard (MDF) for the playing surface.
- Slate: You'll need a piece of slate for the playing surface, ensuring a smooth and level area for optimal gameplay.
- Felt: Choose a durable and smooth billiard cloth for the playing surface.
- Pockets and Rails: Acquire pre-made pockets and rails or materials to construct them from scratch.
- Screws, Nails, and Wood Glue: These will be essential for assembling the frame and attaching the playing surface.
- Finishing Materials: Sandpaper, wood stain, and varnish to give your pool table a polished look.
Tools:
- Measuring Tape and Level: Precise measurements and a level surface are crucial for constructing a functional pool table.
- Saw: A table saw or circular saw for cutting the wood to the required dimensions.
- Drill and Bits: Essential for creating holes and assembling the frame.
- Staple Gun: To secure the felt to the playing surface.
- Screwdriver and Hammer: For assembling the frame and attaching various components.
- Clamps: These will come in handy for securing the wood during assembly.
By ensuring you have all the necessary materials and tools at the outset, you'll be well-prepared to tackle each step of the DIY pool table construction process.
Planning and Designing Your Pool Table
Before diving into the construction phase, it's essential to devote ample time to planning and designing your pool table. This initial step will set the foundation for a successful DIY project and ensure that your finished product meets your expectations. Here's how to approach the planning and design phase:
-
Research and Inspiration: Begin by researching different pool table designs and styles to gather inspiration. Consider the size, shape, and overall aesthetic that you envision for your custom pool table. Look for inspiration in professional pool tables as well as DIY projects to gather ideas for your own creation.
-
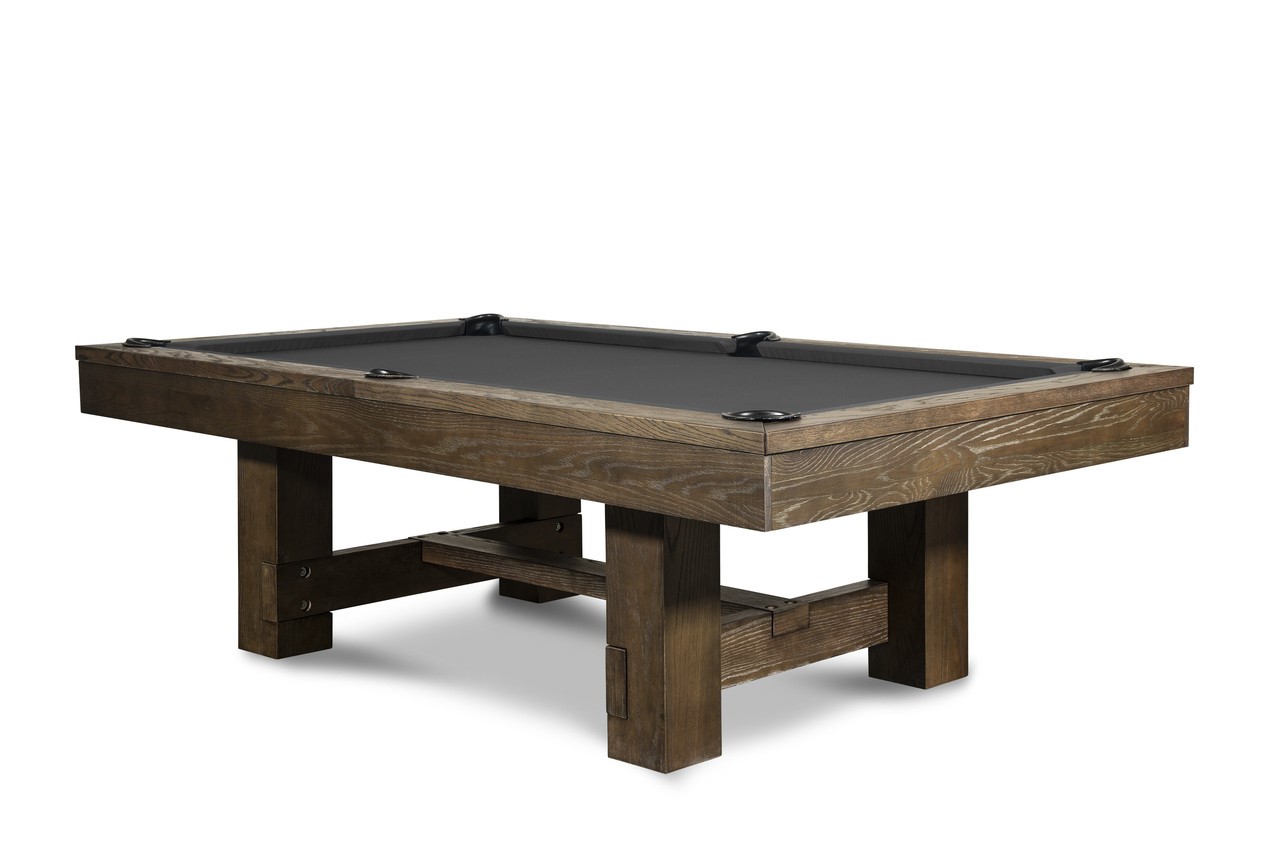
Measurements and Dimensions: Determine the ideal size for your pool table based on the available space in your home or game room. Standard pool tables are typically 7, 8, or 9 feet in length, so consider the dimensions that will best suit your space and playing preferences.
-
Sketching and Prototyping: Create rough sketches and prototypes of your pool table design. This can be done on paper or using design software to visualize the layout, frame structure, and overall appearance of the table. Pay close attention to the proportions and ensure that the design aligns with your vision.
-
Material Selection: Choose the type of wood for the frame and legs, considering both aesthetics and durability. Additionally, select the appropriate slate and felt for the playing surface, keeping in mind the quality and performance you aim to achieve.
-
Customization Options: Explore opportunities for customization, such as inlaid designs, unique pocket styles, or personalized finishes. This is your chance to add a personal touch to your pool table, making it a one-of-a-kind piece that reflects your style and creativity.
By investing time and effort into the planning and design phase, you'll lay the groundwork for a well-executed DIY pool table project. This thoughtful approach will help you avoid potential pitfalls and ensure that the construction process progresses smoothly, ultimately leading to a stunning and functional pool table that you can proudly call your own.
Building the Frame
Building the frame is a critical step in constructing your DIY pool table, as it provides the structural support and stability for the entire table. Here's a detailed guide to help you navigate the process of building the frame:
-
Cutting the Wood: Begin by cutting the hardwood to the required dimensions for the frame and legs. Use a table saw or circular saw to ensure precise cuts, and double-check the measurements to guarantee accuracy.
-
Assembling the Frame Structure: Once the wood pieces are cut, assemble the frame structure according to your design. Use wood glue and screws to securely join the pieces together, creating a sturdy and stable frame that will support the playing surface and withstand the rigors of gameplay.
-
Reinforcement and Bracing: To enhance the strength of the frame, consider adding reinforcement and bracing at key points. This can involve adding additional support beams or diagonal bracing to prevent warping or shifting over time.
-
Leveling the Frame: It's crucial to ensure that the frame is perfectly level to provide a flat and consistent playing surface. Use a level to check the horizontal and vertical alignment of the frame, making any necessary adjustments to achieve a level foundation for the next steps.
-
Preparation for Slate Installation: If your design includes a slate playing surface, the frame must be prepared to accommodate the slate. This may involve adding support beams and ensuring that the frame's dimensions align with the slate's specifications.
By following these steps and paying close attention to detail, you'll be well on your way to constructing a robust and reliable frame for your DIY pool table. The frame serves as the backbone of the entire structure, so investing time and effort into this phase will contribute to the overall quality and longevity of your custom-built pool table.
Installing the Playing Surface
The installation of the playing surface is a pivotal stage in the construction of your DIY pool table, as it directly impacts the gameplay experience and overall quality of the table. Here's a comprehensive guide to help you navigate the process of installing the playing surface:
-
Preparing the Frame: Before installing the playing surface, ensure that the frame is clean, level, and free of any debris or protrusions. This will provide a smooth and stable foundation for the playing surface.
-
Placing the Slate: If your design incorporates a slate playing surface, carefully position the slate slab onto the prepared frame. The slate should fit snugly and securely within the frame, with no gaps or uneven edges. Take precise measurements to ensure that the slate is aligned with the frame's dimensions.
-
Securing the Slate: Once the slate is in position, use shims and leveling tools to achieve a perfectly level surface. This step is crucial for ensuring consistent ball roll and gameplay. Secure the slate to the frame using screws or adhesive, taking care to avoid over-tightening, which could lead to cracking.
-
Applying the Felt: Lay the billiard cloth (felt) over the slate, ensuring that it is smooth and free of wrinkles. Start from the center and work outward, gently stretching the felt to remove any creases. Use a staple gun to secure the felt to the underside of the slate, maintaining even tension throughout the process.
-
Trimming and Finishing: Trim any excess felt along the edges of the slate, leaving a clean and uniform overhang. Carefully tuck and secure the felt into the slate's pockets, ensuring a neat and professional appearance. Smooth out any remaining wrinkles or imperfections to achieve a flawless playing surface.
-
Quality Check: Once the felt is secured, conduct a thorough quality check to ensure that the playing surface is level, smooth, and free of imperfections. Run your hands over the surface to detect any irregularities, and make any necessary adjustments to achieve an optimal playing condition.
By following these detailed steps and exercising precision and care, you'll successfully install a high-quality playing surface for your DIY pool table. The playing surface is a central component of the table, and meticulous attention to detail during this phase will contribute to the overall performance and aesthetic appeal of your custom-built pool table.
Adding Pockets and Rails
The addition of pockets and rails is a crucial step in completing the construction of your DIY pool table, as it enhances the functionality and authenticity of the playing experience. Here's a detailed guide to help you navigate the process of adding pockets and rails to your custom-built pool table:
-
Selecting Pockets and Rails: Begin by selecting the type of pockets and rails that best complement your pool table design. You can choose from a variety of styles, including leather drop pockets, shield pockets, or modern net pockets. Consider the aesthetic appeal and functionality of each option before making your selection.
-
Positioning the Pockets: Determine the precise placement of the pockets on the pool table's frame. Use measurements and guidelines to ensure that the pockets are evenly spaced and aligned with the designated pocket locations on the playing surface. Mark the positions of the pockets to guide the installation process.
-
Installing the Pockets: Once the positions are marked, proceed to install the pockets onto the frame. Secure the pockets in place using screws or bolts, ensuring that they are firmly attached and capable of withstanding the impact of pocketed balls during gameplay. Double-check the alignment and stability of each pocket to guarantee uniformity.
-
Attaching the Rails: With the pockets in place, it's time to attach the rails to the edges of the playing surface. Carefully position the rails along the perimeter of the playing surface, ensuring a precise fit and alignment with the pocket openings. Use screws or bolts to secure the rails to the frame, maintaining consistent spacing and a secure connection.
-
Ensuring Consistency: As you install the rails, pay close attention to the consistency of the cushion height and firmness. The rails should provide a consistent and reliable bounce for the billiard balls, contributing to the overall quality of gameplay. Make any necessary adjustments to achieve uniform cushion performance across all rail sections.
-
Quality Assurance: Once the pockets and rails are installed, conduct a thorough quality check to ensure that they are securely attached and aligned with the playing surface. Test the pockets by gently applying pressure to verify their stability, and run a few test shots to assess the performance of the rails. Make any final adjustments to optimize the functionality and appearance of the pockets and rails.
By following these detailed steps and exercising precision and care, you'll successfully add high-quality pockets and rails to your DIY pool table. These components play a pivotal role in defining the authentic billiards experience and contribute to the overall appeal and functionality of your custom-built pool table.
Finishing Touches and Customization
After completing the structural and functional elements of your DIY pool table, it's time to add the finishing touches and incorporate personalized customization to elevate the overall aesthetic and appeal of the table. Here's a detailed guide to help you navigate the process of adding those final flourishes to your custom-built pool table:
-
Surface Refinement: Begin by meticulously inspecting the entire playing surface, ensuring that the felt is smooth, free of imperfections, and securely fastened. Use a lint roller to remove any stray fibers or particles that may detract from the playing experience. Additionally, carefully brush the felt to achieve a uniform nap and enhance the visual appeal of the playing surface.
-
Stain and Varnish Application: If you've opted for a natural wood finish, consider applying a high-quality wood stain to enhance the richness and depth of the wood grain. Once the stain has dried, apply multiple coats of varnish to protect the wood and achieve a lustrous, durable finish. This step not only adds a touch of elegance to the pool table but also safeguards the wood from wear and tear.
-
Custom Inlays and Embellishments: Embrace the opportunity to infuse your personal style into the pool table by incorporating custom inlays or embellishments. Whether it's intricate wood carvings, inlaid designs, or personalized engravings, these details can transform your pool table into a unique and visually striking centerpiece in your home or game room.
-
Personalized Accessories: Consider adding personalized accessories such as cue racks, scorekeeping devices, or custom ball sets to complement the aesthetics of your pool table. These accessories not only enhance the functionality of the table but also contribute to the overall theme and ambiance of the game space.
-
Lighting and Ambiance: The right lighting can significantly enhance the visual impact of your pool table. Explore options for overhead lighting, LED accents, or custom light fixtures to create an inviting and immersive playing environment. Thoughtfully chosen lighting can elevate the overall atmosphere and draw attention to the craftsmanship of your DIY pool table.
-
Final Quality Check: Once all the finishing touches and customizations are in place, conduct a comprehensive quality check to ensure that every detail aligns with your vision. Run your hands over the surface, inspect the custom embellishments, and assess the overall presentation of the pool table. Make any final adjustments to achieve a cohesive and polished final product.
By investing time and attention into the finishing touches and customization of your DIY pool table, you'll create a stunning and personalized centerpiece that reflects your craftsmanship and creativity. These final details not only enhance the visual appeal of the pool table but also contribute to a truly unique and rewarding DIY project.
Conclusion
Congratulations on completing the construction of your very own DIY pool table! By following this step-by-step guide, you've embarked on a challenging yet immensely rewarding journey that has culminated in the creation of a custom-built pool table tailored to your preferences and style. From meticulously planning and designing the table to adding the finishing touches and personalization, you've demonstrated skill, creativity, and dedication throughout the entire process.
As you admire the finished pool table in your home or game room, take pride in the craftsmanship and attention to detail that have gone into its construction. Whether you're enjoying casual games with friends or honing your billiards skills, your DIY pool table stands as a testament to your ingenuity and passion for home improvement projects.
As you continue to enjoy the fruits of your labor, remember that your DIY pool table is not just a functional piece of furniture but a reflection of your creativity and craftsmanship. Embrace the opportunity to showcase your handiwork and share the story of its construction with friends and family, inspiring others to embark on their own DIY endeavors.
With your newfound expertise in DIY pool table construction, you may even consider taking on more ambitious projects or sharing your knowledge with fellow DIY enthusiasts. Your journey to build a custom pool table has equipped you with valuable skills and experiences that can be applied to future home improvement ventures.
So, as you gather around your newly constructed pool table for friendly games and memorable moments, take a moment to appreciate the dedication and effort that have gone into bringing this project to fruition. Your DIY pool table is not just a piece of furniture; it's a testament to your creativity, perseverance, and the satisfaction of turning a vision into a tangible reality.

